제품 끝view
This manual provides instructions for the replacement tail cap designed for Streamlight Stinger series flashlights. This component is essential for maintaining the functionality and integrity of your flashlight.
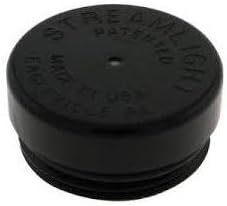
이미지 1: 상단 view of the Streamlight PolyStinger replacement tail cap, showing the textured surface and brand markings.
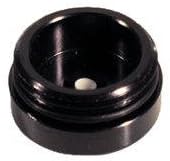
이미지 2: 내부 view of the Streamlight PolyStinger replacement tail cap, showing the threaded interior and contact point.
설정 및 설치
The replacement tail cap is designed for easy installation. Ensure your flashlight is turned off and disconnected from any power source before proceeding.
- 준비: Ensure the flashlight body and the new tail cap are clean and free of debris.
- Removal of Old Tail Cap: Unscrew the existing tail cap from the rear of your Streamlight Stinger series flashlight by turning it counter-clockwise.
- 점검: Inspect the threads on the flashlight body for any damage or dirt. Clean if necessary.
- Installation of New Tail Cap: Align the new replacement tail cap with the threads on the flashlight body. Carefully screw it on by turning clockwise.
- 조임: Hand-tighten the tail cap until it is snug. Do not overtighten, as this may damage the threads or the internal components.
작동 지침
Once the tail cap is securely installed, the flashlight should operate as normal. The tail cap typically houses the power switch or provides a secure end for the battery compartment.
- 전원 켜기/끄기: Refer to your specific Streamlight Stinger flashlight model's manual for detailed instructions on operating the power switch, which may be integrated into the tail cap or located elsewhere on the flashlight body.
- 배터리 액세스: The tail cap provides access to the battery compartment. Unscrew the tail cap to insert or replace batteries as per your flashlight's specifications.
유지
Proper maintenance ensures the longevity and optimal performance of your tail cap and flashlight.
- 청소: Periodically clean the threads of the tail cap and the flashlight body with a clean, dry cloth to prevent dirt and debris buildup.
- 매끄럽게 하기: If your flashlight's original tail cap had an O-ring for water resistance, ensure the new tail cap also has one. Lightly lubricate the O-ring with silicone grease to maintain its seal and prevent wear.
- 점검: Regularly inspect the tail cap for any signs of wear, cracks, or damage. Replace if necessary to maintain water resistance and functionality.
문제 해결
If you encounter issues after replacing the tail cap, consider the following common solutions:
- 손전등이 켜지지 않음:
- 테일캡이 완전히 조여졌는지 확인하십시오. 테일캡이 헐거우면 전기 접촉이 불량해질 수 있습니다.
- Check the batteries. Ensure they are correctly inserted and have sufficient charge.
- Inspect the contact points inside the tail cap and on the flashlight body for dirt or corrosion. Clean if necessary.
- 간헐적 작동:
- Re-tighten the tail cap.
- Check for any debris or foreign objects obstructing the electrical contacts.
- 물 침투:
- Ensure the O-ring (if present) is properly seated and not damaged.
- 테일캡이 완전히 조여졌는지 확인하십시오.
명세서
| 특징 | 세부 사항 |
|---|---|
| 상표 | 스트림라이트 |
| 모델 번호 | 760057 |
| 재료 | 플라스틱 |
| 색상 | 검은색 |
| 호환성 | Streamlight Stinger series flashlights |
| 특징 | 튼튼한 |
보증 및 지원
Specific warranty information for this replacement tail cap is not provided in this manual. For details regarding warranty coverage, technical support, or service, please refer to the official Streamlight website or contact Streamlight customer service directly.
일반적으로 제조업체의 공식 연락처 정보와 보증 정책을 찾을 수 있습니다. web대지: www.스트림라이트.com


