소개
This manual provides essential instructions for the proper setup, operation, and maintenance of your Vivitar VX137-BLK 12.1MP Digital Touch Screen Camera. Please read this manual thoroughly before using your camera to ensure optimal performance and longevity.
제품 끝view
The Vivitar VX137-BLK is a compact 12.1-megapixel digital camera featuring a 2.4-inch touchscreen display. It includes a 4x digital zoom and an anti-shake feature to assist in capturing clear images. This camera is designed for ease of use and portability.

그림 1: 전면 view of the Vivitar VX137-BLK Digital Camera.
카메라 부품
- 렌즈: 이미지를 캡처합니다.
- 플래시: 조명이 어두운 환경에서 조명을 제공합니다.
- 전원 버튼: 카메라를 켜거나 끕니다.
- 셔터 버튼: 사진을 찍습니다.
- 2.4인치 터치스크린 디스플레이: 을 위한 viewing images, navigating menus, and controlling camera functions.
- 홈 버튼: 메인 메뉴 또는 홈 화면으로 돌아갑니다.
- 배터리 칸: AAA 배터리 3개가 들어갑니다.
- 메모리 카드 슬롯: For inserting an SD or compatible memory card.
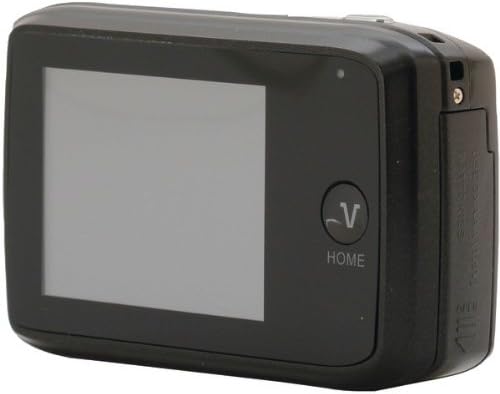
그림 2: 뒤로 view of the Vivitar VX137-BLK Digital Camera, showing the touchscreen and Home button.
설정
1. 배터리 설치
- 카메라 측면이나 하단에 있는 배터리함 덮개를 찾으세요.
- 잠금장치를 밀어서 수납공간을 여세요.
- 배터리함 내부에 표시된 극성(+/-)을 확인하여 AAA 배터리 3개를 삽입하십시오.
- Close the battery compartment door securely until it latches.
참고: 배터리는 포함되어 있지 않으므로 별도로 구매해야 합니다.
2. 메모리 카드 설치
- 일반적으로 배터리 칸 근처에 있는 메모리 카드 슬롯을 찾으세요.
- 메모리 카드 슬롯 커버를 엽니다.
- Insert a compatible SD or memory card into the slot with the metal contacts facing the correct direction, usually downwards or towards the front of the camera. Push gently until it clicks into place.
- 메모리 카드 슬롯 커버를 닫습니다.
Note: A memory card is not included and is highly recommended for storing photos and videos.
카메라 작동
1. 전원 켜기/끄기
- 전원을 켜려면: 누르고 계세요 전원 버튼 화면이 켜질 때까지.
- 전원을 끄려면: 길게 누르세요. 전원 버튼 화면이 꺼질 때까지 계속합니다.
2. 사진 찍기
- Turn on the camera. The camera will typically start in photo capture mode.
- Frame your shot using the 2.4-inch touchscreen display.
- To zoom in or out, use the digital zoom controls on the touchscreen.
- 를 누르세요 셔터 버튼 halfway to focus, then press it fully to capture the image.
- The anti-shake feature will automatically engage to help reduce blur.
3. 비디오 녹화
- From the main screen, tap the video icon on the touchscreen to switch to video recording mode.
- 를 누르세요 셔터 버튼 to start recording. A timer or indicator will appear on the screen.
- 를 누르세요 셔터 버튼 다시 한번 녹음을 중지합니다.
4. 재생 모드
- From the main screen, tap the playback icon (usually an arrow in a rectangle) to enter playback mode.
- Swipe left or right on the touchscreen to browse through your captured photos and videos.
- Tap on a photo or video to view 전체 화면으로 보세요.
- To exit playback mode, tap the 홈 버튼 or the appropriate icon on the screen.
5. Touch Screen Usage
The 2.4-inch touchscreen allows for intuitive navigation. Tap icons to select functions, swipe to scroll through images, and use pinch-to-zoom gestures if supported for review잉 사진.
유지
카메라 청소
- 카메라 본체 : Use a soft, dry cloth to wipe the camera body. Do not use liquid cleaners or solvents.
- 렌즈: Gently clean the lens with a lens cleaning cloth or a soft brush designed for camera lenses. Avoid touching the lens surface with your fingers.
- 터치 스크린: Use a microfiber cloth specifically designed for screens to gently wipe the display.
저장
- When not in use for extended periods, remove the AAA batteries to prevent leakage.
- Store the camera in a cool, dry place, away from direct sunlight, extreme temperatures, and high humidity.
- 카메라 케이스를 사용하여 먼지와 긁힘으로부터 보호하세요.
문제 해결
| 문제 | 가능한 원인 | 해결책 |
|---|---|---|
| 카메라의 전원이 켜지지 않습니다. | 배터리가 방전되었거나 잘못 삽입되었습니다. | 올바른 극성을 확인하여 새 AAA 배터리로 교체하세요. |
| 사진을 찍을 수 없습니다. | 메모리 카드가 가득 찼거나 삽입되지 않았습니다. | Insert a memory card or delete existing files to free up space. Ensure the card is properly inserted. |
| 이미지가 흐릿합니다. | Insufficient light, camera shake, or dirty lens. | Ensure adequate lighting. Hold the camera steady. Clean the lens. The anti-shake feature is automatic, but extreme movement can still cause blur. |
| 터치스크린이 반응하지 않습니다. | 일시적인 소프트웨어 오류 또는 화면 오염. | Turn the camera off and on again. Gently clean the screen with a microfiber cloth. |
| 카메라가 정지됩니다. | 소프트웨어 오류입니다. | Remove and reinsert the batteries to reset the camera. |
명세서
| 특징 | 세부 사항 |
|---|---|
| 모델 번호 | VX137-BLK |
| 이미지 센서 | 12.1메가픽셀 |
| 표시하다 | 2.4-inch Touch Screen LCD |
| 디지털 줌 | 4x |
| 이미지 안정화 | Optical (Anti-Shake) |
| 전원 | AAA 배터리 3개(포함되지 않음) |
| 지원됨 File 체재 | 제이피 |
| 포토 센서 기술 | CMOS |
| 종횡비 | 4시 3분 |
| 품목 무게 | 4.8 온스 |
| 제품 치수 | 7.09 x 8.94 x 1.69 인치 |
보증 정보
This product is sold AS-IS. Please refer to the original purchase documentation for any specific warranty details provided at the time of sale. For further inquiries regarding product functionality, please consult the support section.
지원하다
For technical assistance or further questions not covered in this manual, please visit the Vivitar official website or contact their customer support. Keep your purchase receipt and product model number (VX137-BLK) available when seeking support.


