1. 서론
This manual provides detailed instructions for the installation, operation, and maintenance of the Eaton Accell AIM06-A-K Smart Dimmer. This device is designed for smooth, full-range digital dimming of incandescent, magnetic low-voltage, and fluorescent lighting. Please read these instructions carefully before installation and use.
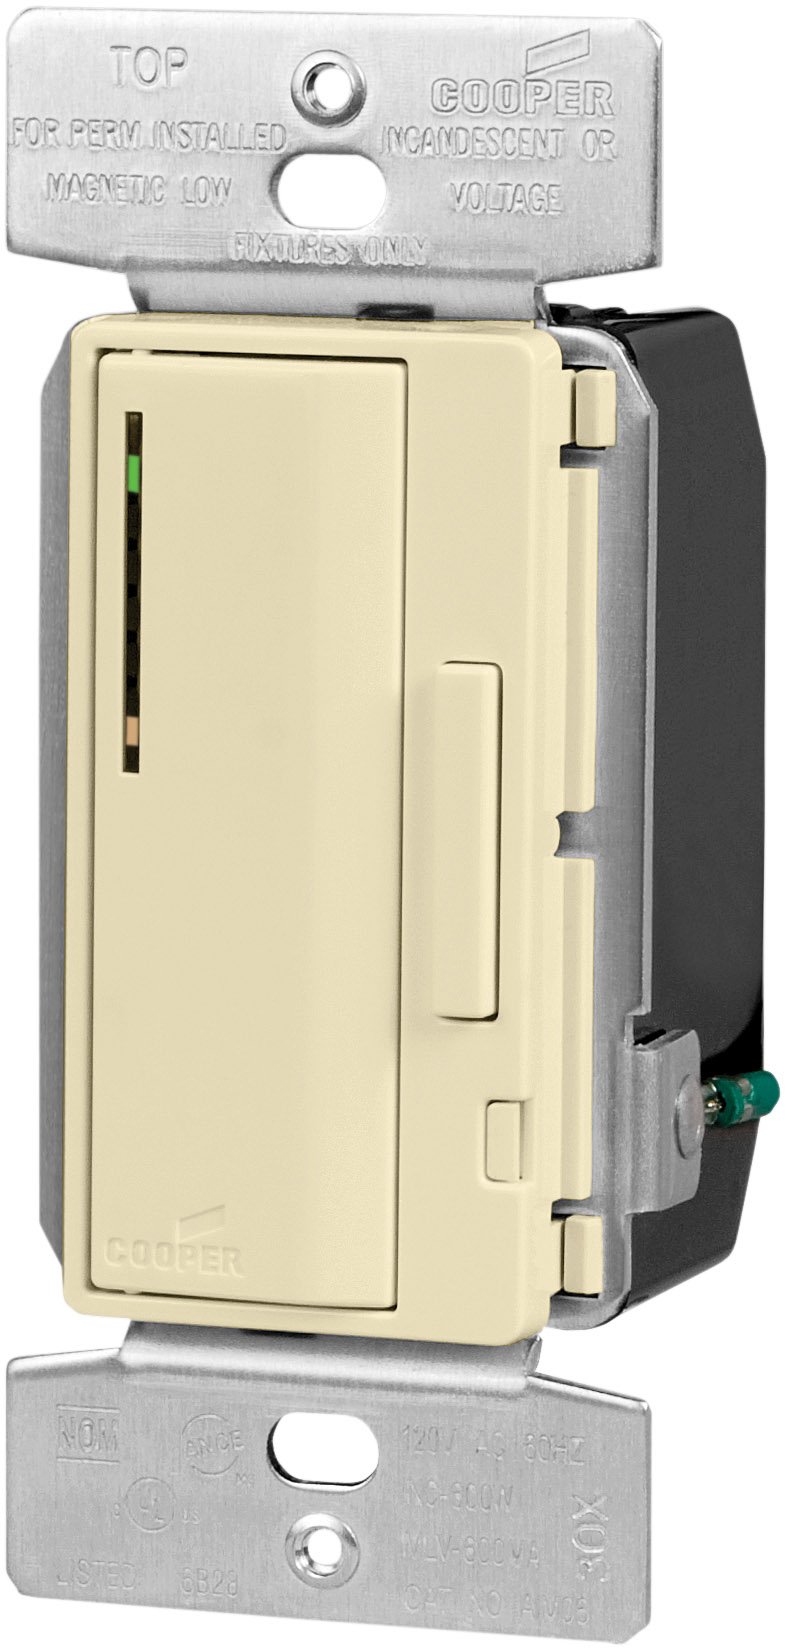
Image 1.1: Eaton Accell AIM06-A-K Smart Dimmer in Almond. This image shows the front view of the dimmer switch, highlighting its push pad and dim/bright bar.
2. 안전 정보
경고: 화재, 감전 또는 사망을 방지하려면 회로 차단기나 퓨즈 박스에서 전원을 끄고 배선을 하기 전에 전원이 꺼져 있는지 테스트하세요.
- 설치는 모든 지역 및 국가 전기 규정에 따라 자격을 갖춘 전기 기술자가 수행해야 합니다.
- Do not use with loads exceeding 600 Watts for incandescent/halogen or magnetic low-voltag전자 조명.
- 모든 전선 연결이 안전한지 확인하십시오.
- 이 장치는 실내에서만 사용하세요.
- 기기를 직접 수리하거나 개조하지 마십시오. 자격을 갖춘 전문가에게 서비스를 의뢰하십시오.
3. 패키지 내용
설치를 시작하기 전에 모든 구성 요소가 있는지 확인하세요.
- Eaton Accell AIM06-A-K Smart Dimmer (Almond)
- Wire Nuts (typically included for connections)
- 사용 설명서(본 문서)
4. 주요 특징
- Single-pole and multi-location smart dimmer functionality.
- Smooth, full-range digital dimming for incandescent, magnetic low-voltage, and fluorescent lighting.
- Electro-mechanical push pad for ON/OFF operation with a separate dim/bright bar.
- Preset feature allows return to the previous light setting.
- LED light level display for presetting illumination levels.
- Amber LED at the bottom indicates ON/OFF load status.
- Seven-step green LED display indicates selected light level and reduces brightness when off (night light feature).
- Digital circuitry provides soft-on/fade-off, extending lamp 삶.
- Neutral wire is not required for installation.
- Compatible with any decorator designer-style wallplates.
5. 설치
- 전원 끄기: 회로 차단기 또는 퓨즈 박스에서 해당 스위치 위치의 전원을 끄십시오. 전압계를 사용하여 전원이 꺼졌는지 확인하십시오.tag전자 테스터.
- 이전 스위치 제거: Carefully remove the existing wallplate and switch from the wall box. Disconnect the wires from the old switch.
- 전선 식별:
- 라인 와이어: The wire bringing power from the circuit breaker.
- 부하 와이어: The wire going to the light fixture.
- 접지선: 절연되지 않은 구리선 또는 녹색 절연 전선.
- Traveler Wires (for multi-location): If replacing a 3-way or 4-way switch, identify the traveler wires.
- 조광기를 연결하세요: Connect the wires to the dimmer according to the wiring diagram provided with the product.
- Connect the Line wire to the dimmer's Line terminal.
- Connect the Load wire to the dimmer's Load terminal.
- Connect the Ground wire to the dimmer's Ground terminal.
- For multi-location installations, connect traveler wires as per the specific diagram for your setup.
메모: The AIM06-A-K dimmer does not require a neutral wire for installation.
- 디머 장착: 전선을 벽면 박스 안으로 조심스럽게 접어 넣고, 제공된 나사를 사용하여 조광기를 벽면 박스에 고정하십시오.
- 월플레이트 설치: Attach a decorator-style wallplate (sold separately) over the dimmer.
- 복원력 : 회로 차단기를 다시 켜세요.
- 테스트 작업: Test the dimmer's ON/OFF function and dimming capabilities.
6. 운영
- 켜기/끄기: Press the large electro-mechanical push pad to turn the lights ON or OFF.
- 밝기 조절(어둡게/밝게): Use the separate dim/bright bar located next to the push pad. Press the top of the bar to brighten lights, and the bottom to dim lights.
- Preset Feature: When turning the lights ON, the dimmer will return to the last set brightness level.
- LED Light Level Display: The seven-step green LED display indicates the current light level. When the lights are off, these LEDs reduce brightness, acting as a night light.
- Load Status Indicator: An amber LED at the bottom of the LED display indicates the ON/OFF status of the load.
7. 유지관리
- 청소: 조광기를 청소하려면 부드러운 천으로 닦으십시오.amp 천. 연마성 세척제나 용매를 사용하지 마십시오.
- 사용자가 수리할 수 없는 부품: The dimmer contains no user-serviceable parts. Do not attempt to open or repair the unit.
8. 문제 해결
| 문제 | 가능한 원인 | 해결책 |
|---|---|---|
| 불이 켜지지 않습니다. |
|
|
| 조명이 어두워지지 않습니다. |
|
|
| Dimmer is hot to the touch. |
|
|
9. 사양
- 모델: AIM06-A-K
- 상표: 이튼
- 유형: Smart Dimmer, Incandescent/Halogen, Magnetic Low-Voltage
- 왓tage: 600와트(최대)
- 권tage: 120볼트 AC, 60Hz
- 작동 모드: Push Button with Dim/Bright Bar
- 색상: 아몬드
- 치수(길이 x 너비 x 높이): Approximately 2.27 x 2.27 x 2.27 inches (actual faceplate size may vary)
- 인증: cULus Listed to UL1472, NOM certified
- 연결 프로토콜: 엑스-10
- 중성선: Not required for installation
10. 보증 및 지원
For warranty information and technical support, please refer to the official Eaton website or contact Eaton customer service directly. Specific warranty terms may vary by region and purchase date.


