1. 소개 및 이상view
The Avision AV 320D2+ is a high-performance A3 document scanner designed for efficient and reliable document digitization. Featuring a 600 dpi optical resolution and USB connectivity, it is capable of handling a wide range of document sizes up to A3, making it suitable for various professional environments. This manual provides essential information for setting up, operating, maintaining, and troubleshooting your scanner.
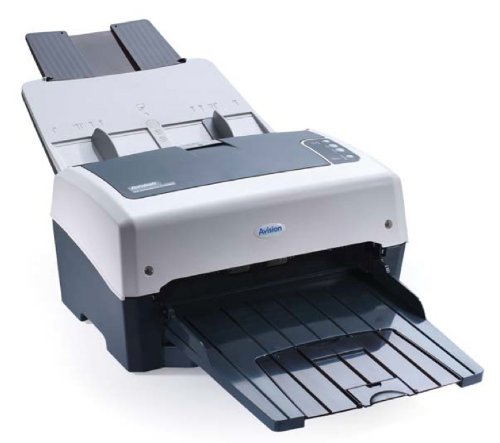
Figure 1: Avision AV 320D2+ A3 Document Scanner. This image displays the Avision AV 320D2+ A3 Document Scanner from a front-right perspective. The scanner is light grey and dark grey, featuring an automatic document feeder (ADF) at the top with paper guides visible, and an extended output tray at the front. The Avision logo is visible on the front panel.
2. 설정
2.1 풀기
- 스캐너와 모든 부속품을 포장에서 조심스럽게 꺼내십시오.
- 포장 목록에 기재된 모든 구성품이 있는지 확인하십시오.
- Remove all protective tapes and packing materials from the scanner, including any inside the document feeder and output tray.
2.2 스캐너 연결
- 스캐너를 컴퓨터 근처의 안정적이고 평평한 표면에 놓으십시오.
- 전원 어댑터를 스캐너의 전원 입력 단자에 연결한 다음 전기 콘센트에 꽂으십시오.
- Connect one end of the supplied USB cable to the USB port on the scanner and the other end to an available USB port on your computer.
- Power on the scanner using the power button, typically located on the side or rear panel.
2.3 소프트웨어 설치
Before using the scanner, you must install the necessary drivers and scanning software. Refer to the included software CD or visit the official Avision website for the latest drivers and utilities.
- Insert the software installation CD into your computer's CD/DVD drive, or download the software package from the Avision support web대지.
- Follow the on-screen instructions to install the scanner drivers and bundled scanning applications. It is recommended to install all provided software for full functionality.
- 설치가 완료된 후 메시지가 나타나면 컴퓨터를 다시 시작하십시오.
3. 스캐너 작동
3.1 문서 로딩
- 자동 문서 공급기(ADF): Open the ADF input tray. Adjust the paper guides to fit the width of your documents. Place the documents face-down with the top edge first into the ADF. The standard sheet capacity is 50 sheets.
- Ensure documents are free of staples, paper clips, or any foreign objects that could damage the scanner.
- For mixed-size documents, ensure they are aligned properly to prevent skewing.
3.2 기본 스캐닝 절차
- Load your documents into the ADF as described above.
- Open your preferred scanning application (e.g., Avision Button Manager, TWAIN/ISIS compatible software).
- Select the Avision AV 320D2+ as your scanner.
- Choose your desired scanning settings (e.g., color mode, resolution, destination folder).
- Initiate the scan from the software interface. The scanner will automatically feed and scan the documents.
- Review 스캔한 이미지를 원하는 위치에 저장하세요.
3.3 스캔 설정
The scanner supports various settings to optimize scan quality and file 크기:
- 해결: Adjustable up to 600 dpi. Higher resolution provides better image quality but results in larger file 크기.
- 색상 모드: Options typically include Color, Grayscale, and Black & White (Binary).
- 양면 스캔: The AV 320D2+ supports duplex (two-sided) scanning, allowing you to capture both sides of a document in a single pass.
- 출력 형식: Common output formats include PDF, JPEG, TIFF, and searchable PDF.
4. 유지관리
4.1 스캐너 청소
Regular cleaning ensures optimal performance and extends the life of your scanner.
- 외부: 부드러운 d로 외부 표면을 닦으십시오.amp보푸라기가 없는 천으로 닦아주세요. 연마성 세제나 용제는 사용하지 마세요.
- 유리 표면: 부드러운 천을 사용하세요ampened with a non-abrasive glass cleaner to clean the scanner's glass surfaces (if applicable).
- 롤러: Periodically clean the feed rollers with a lint-free cloth lightly damp종이 먼지와 잔여물을 제거하기 위해 이소프로필 알코올로 세척했습니다.
- 청소하기 전에 항상 스캐너의 전원을 끄고 전원 플러그를 뽑으십시오.
5. 문제 해결
This section addresses common issues you might encounter with your Avision AV 320D2+ scanner.
| 문제 | 가능한 원인 | 해결책 |
|---|---|---|
| 컴퓨터에서 스캐너가 감지되지 않았습니다. | USB 케이블이 헐거워졌거나, 전원이 꺼졌거나, 드라이버 문제일 수 있습니다. | USB 연결을 확인하고, 스캐너 전원이 켜져 있는지 확인하고, 드라이버를 다시 설치하십시오. |
| 종이 걸림 | Misaligned documents, worn rollers, foreign objects | Remove jammed paper carefully, align documents properly, clean rollers. |
| Poor scan quality (streaks, blurry images) | Dirty glass, incorrect settings, worn rollers | Clean scanner glass and rollers, adjust resolution/color settings. |
| Documents not feeding | Incorrectly loaded, worn feed rollers | Ensure documents are loaded correctly, clean or replace feed rollers if worn. |
6. 사양
Key technical specifications for the Avision AV 320D2+ scanner:
- 제품 유형: 문서 스캐너
- 논문 형식: A3
- 해결: 600dpi (광학식)
- 연결성: USB
- 색상: 블랙/화이트
- 무게: 약 26.46kg(12파운드)
- 전력 소비량: 38.4 와트
- 표준 용지 적재 용량(ADF): 50장
- 광학 센서 기술: CMOS
- 모델 이름: AV320D2+
- 품목 모델 번호: FT-0807H
7. 보증 및 지원
7.1 제조업체 보증
The Avision AV 320D2+ scanner typically comes with a 2년 제조사 보증. This warranty covers defects in materials and workmanship under normal use. Please retain your proof of purchase for warranty claims. For specific terms and conditions, refer to the warranty card included with your product or visit the official Avision web대지.
7.2 기술 지원
For technical assistance, driver updates, or further troubleshooting not covered in this manual, please contact Avision customer support. Support contact information can usually be found on the Avision official website or in the documentation provided with your scanner.
Note: Availability of spare parts and software updates may vary. Please check the manufacturer's official channels for the most current information.


