소개
This manual provides comprehensive instructions for the setup, operation, and maintenance of your ASUS ROG Strix 27” 5K HDR Gaming Monitor (Model: XG27JCG). Please read this manual thoroughly before using the monitor to ensure proper functionality and to maximize your user experience.
The ROG Strix XG27JCG is a 27-inch 5K (5120 x 2880) Fast IPS display designed for high-performance gaming and detailed visual tasks. It features a 180Hz (overclocked) refresh rate, 0.3ms GTG response time, and a Dual Mode function allowing switching between 5K 180Hz and QHD 330Hz. Advanced features include G-SYNC Compatible technology, VESA DisplayHDR 600, and ROG Gaming A.I. Technology.
동영상: 위에view of the ASUS ROG Strix XG27JCG 27-inch 5K monitor, highlighting its key features and design.
상자 안에 무엇이 들어있나요?
설치를 진행하기 전에 모든 구성품이 포장에 들어 있는지 확인하세요.
- ASUS ROG Strix XG27JCG Monitor
- 디스플레이포트 케이블
- 빠른 시작 가이드
- ROG 파우치
- ROG 스티커
- ROG tripod stand
- 보증 카드
- 전원 코드
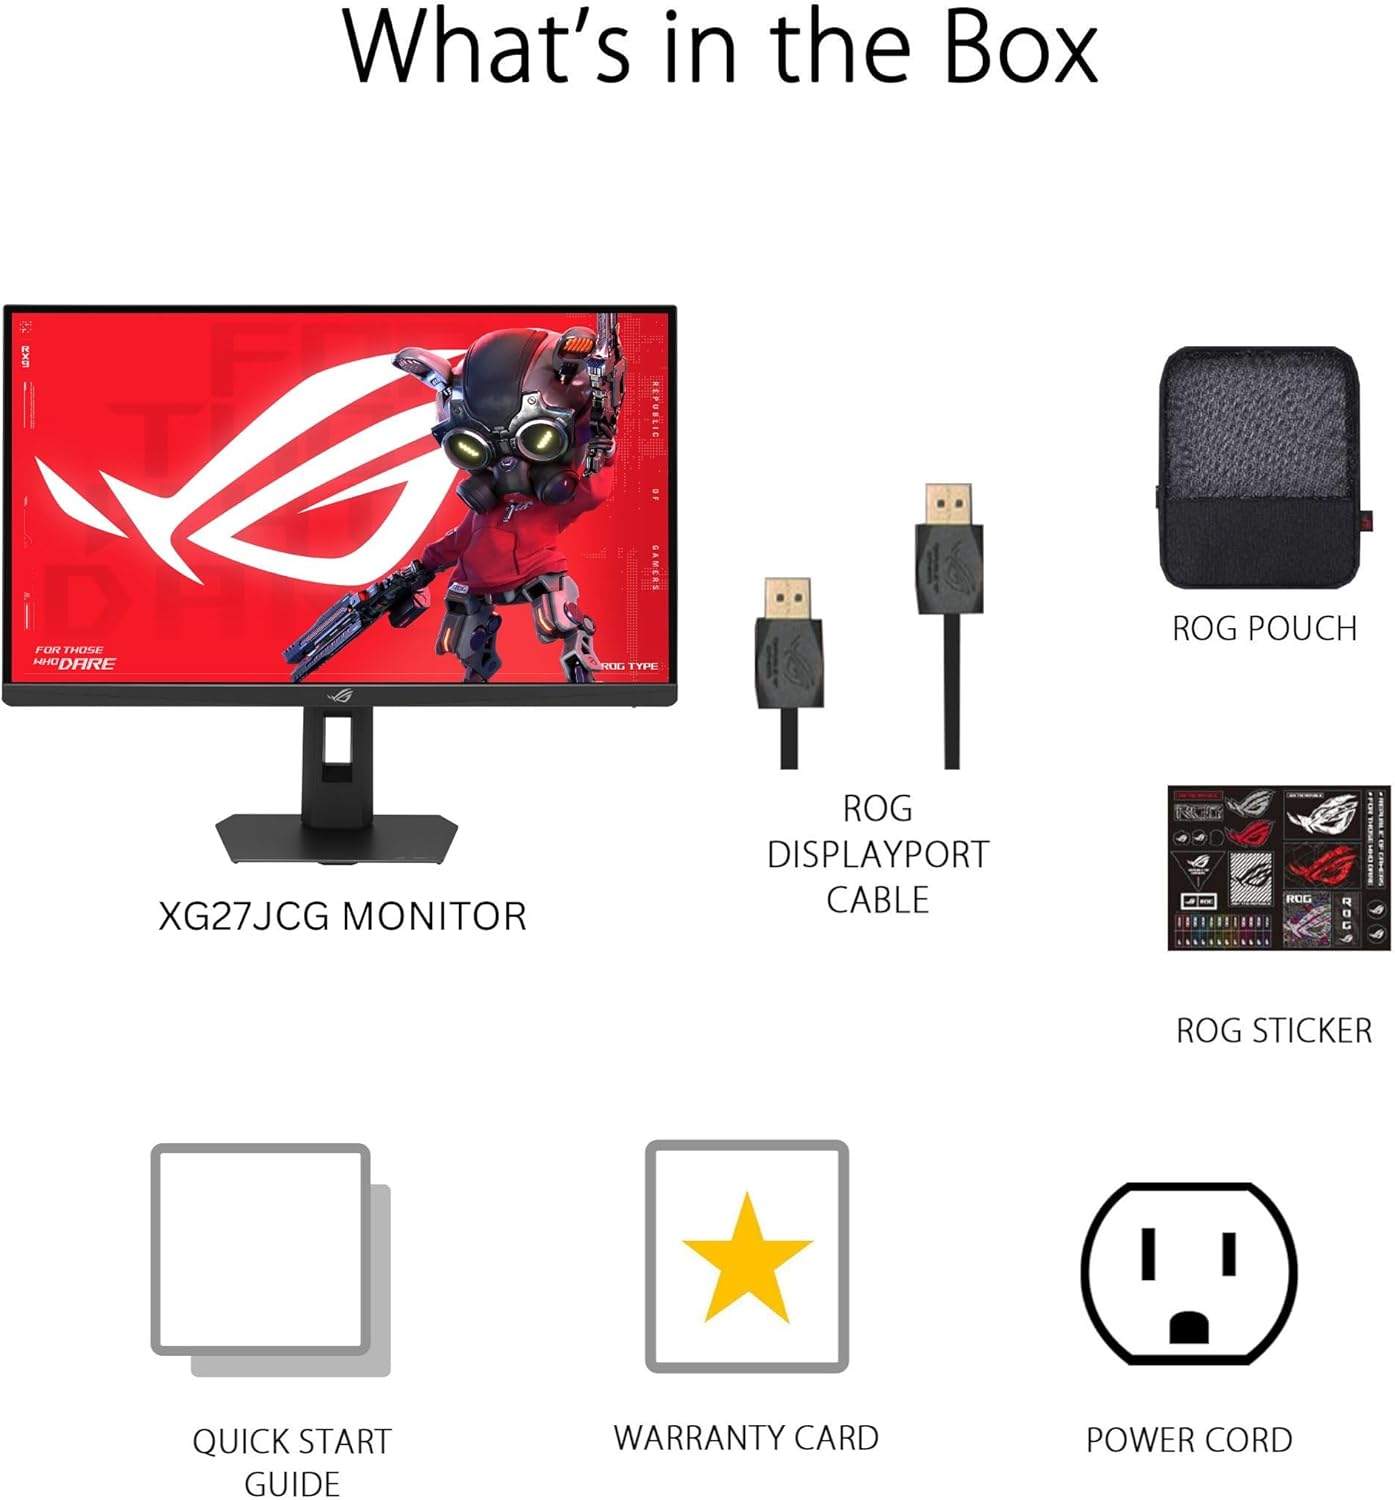
영상: Contents of the monitor packaging, showing the monitor, DisplayPort cable, ROG pouch, ROG sticker, Quick Start Guide, Warranty Card, and Power Cord.
설치 지침
1. 스탠드 조립
Carefully remove the monitor from its packaging. Attach the stand base to the stand neck, securing it with the provided screw. Then, attach the assembled stand to the back of the monitor until it clicks into place. Ensure all connections are firm.
2. 컴퓨터에 연결하기
The monitor supports DisplayPort 1.4 (DSC), HDMI 2.1, and USB-C connectivity. Choose the appropriate cable for your system.
- 디스플레이포트: DisplayPort 케이블의 한쪽 끝을 모니터의 DisplayPort 입력 단자에 연결하고 다른 쪽 끝을 컴퓨터의 DisplayPort 출력 단자에 연결하십시오.
- HDMI : Connect one end of an HDMI 2.1 cable to the monitor's HDMI input and the other end to your computer's HDMI output.
- USB-C : Connect a USB-C cable to the monitor's USB-C port and to a compatible USB-C port on your computer. This connection also supports 15W power delivery.

영상: 뒤쪽 view of the monitor's connectivity ports, including HDMI 2.1, DisplayPort 1.4, USB Type-C, and a Headphone Jack.
3. 전원 연결
전원 코드를 모니터의 전원 입력 단자에 연결한 다음, 다른 한쪽 끝을 전원 콘센트에 꽂으십시오.
4. 초기 전원 켜기
Press the power button located on the monitor to turn it on. The monitor will automatically detect the input source. If no image appears, ensure all cables are securely connected and the computer is powered on.
작동 지침
온스크린 디스플레이(OSD) 메뉴
Use the joystick and buttons on the back of the monitor to navigate the OSD menu. The OSD allows you to adjust various settings such as brightness, contrast, color, input source, and gaming features.
Display Modes and Refresh Rate
The monitor features a Dual Mode function, allowing you to switch between two primary display configurations:
- 5K (5120 x 2880) at 180Hz (OC): Provides ultra-sharp, immersive visuals suitable for cinematic content and detailed work.
- QHD (2560 x 1440) at 330Hz: Offers extremely high frame rates and responsive gaming action, ideal for competitive esports.
Switching between modes can be done via the OSD menu or a dedicated hotkey, if configured.

영상: Visual representation of the monitor's Dual Mode, allowing users to switch between 5K 180Hz and QHD 330Hz for different gaming experiences.
ROG Gaming A.I. Technology
This monitor includes AI-powered features designed to enhance your gaming experience:
- 다이내믹 섀도우 부스트: Automatically brightens dark areas of the game world without overexposing bright areas, improving visibility of hidden enemies or details.
- 동적 십자선: Provides an on-screen crosshair that can adapt to the game environment, ensuring it remains visible against various backgrounds.
- AI 비주얼: Optimizes visual settings based on the game content for improved clarity and detail.

영상: Examples of Dynamic Crosshair and Dynamic Shadow Boost in action, showing how these features enhance visibility in games.
디스플레이위젯 센터
The DisplayWidget Center software provides seamless control over monitor settings directly from your Windows or macOS operating system. This utility allows for easy adjustment of GameVisual modes, MultiScreen configurations, and system settings without using the OSD buttons.

영상: Screenshot of the DisplayWidget Center software, demonstrating its user interface for adjusting monitor settings.
인체공학 및 조정
The monitor stand offers multiple adjustment options to optimize your view편안함:
- 경사: +20° ~ -5°
- 받침: +40° ~ -40°
- 피벗: +90° to -90° (for portrait mode)
- 높이 조정: 0~110mm
Adjust the monitor to an ergonomic position that reduces strain on your neck and eyes. Ensure the top of the screen is at or slightly below eye level.

영상: Diagram illustrating the monitor's ergonomic adjustments, including tilt, swivel, pivot, and height.
유지
모니터 청소
- 청소하기 전에는 항상 모니터의 전원을 끄고 전원 코드를 뽑으세요.
- 부드럽고 털이 없는 천을 살짝 사용하세요.amp물이나 부드럽고 연마성이 없는 화면 세척제로 닦으세요.
- 세척제를 화면에 직접 뿌리지 마세요. 천에 먼저 묻혀 사용하세요.
- Avoid using alcohol-based cleaners, ammonia, or abrasive materials, as these can damage the screen surface.
일반 관리
- 모니터를 직사광선, 과도한 열, 습기로부터 멀리 두십시오.
- 과열을 방지하려면 모니터 주변에 적절한 환기가 이루어지도록 하세요.
- 모니터나 케이블 위에 무거운 물건을 올려놓지 마세요.
문제 해결
| 문제 | 가능한 해결책 |
|---|---|
| 화면에 이미지가 없습니다. |
|
| 이미지가 흐릿하거나 왜곡됩니다. |
|
| Screen flickers or shows artifacts |
|
| No sound from headphones (if connected to monitor) |
|
명세서
| 특징 | 세부 사항 |
|---|---|
| 상표 | 아수스 |
| 모델 번호 | XG27JCG |
| 화면 크기 | 27 인치 |
| 해결 | 5120 x 2880(5K UHD) |
| 패널 유형 | 빠른 IPS |
| 새로 고침 빈도 | 180 Hz (OC) / QHD 330Hz (Dual Mode) |
| 응답 시간 | 0.3ms(GTG) |
| 종횡비 | 16시 9분 |
| 대비율 | 600시 1분 |
| View잉 각도 | 178도 (수평/수직) |
| HDR 지원 | VESA 디스플레이HDR 600 |
| 색상 영역 | 97% DCI-P3 |
| 적응형 동기화 | AMD FreeSync Premium Pro, G-SYNC Compatible |
| 연결성 | 1x DisplayPort 1.4 (DSC), 2x HDMI 2.1, 1x USB-C (with 15W PD), Headphone Jack |
| 전력 소비 | 40 와트 |
| 품목 치수(D x W x H) | 8.59인치 깊이 x 24.2인치 너비 x 20.1인치 높이 |
| 품목 무게 | 6.9 파운드 |
| 인체공학적 조정 | Tilt (+20° ~ -5°), Swivel (+40° ~ -40°), Pivot (+90° ~ -90°), Height (0~110mm) |
보증 및 지원
This ASUS ROG Strix XG27JCG monitor comes with a 3년 보증. For warranty claims, technical support, or service inquiries, please contact ASUS customer support. Refer to the included Warranty Card for detailed terms and conditions.
You can find additional support resources, drivers, and FAQs on the official ASUS support web대지: www.asus.com/support/