
1. 서론
This manual provides essential information for the installation, configuration, operation, and maintenance of your Zyyini X99H Motherboard Kit. Please read these instructions carefully before proceeding with installation to ensure proper setup and optimal performance. Retain this manual for future reference.
2. 제품 오버view
The Zyyini X99H Motherboard is designed for high-performance computing, offering robust compatibility and expansion options. It supports a range of CPUs and memory configurations, making it suitable for various computing needs.
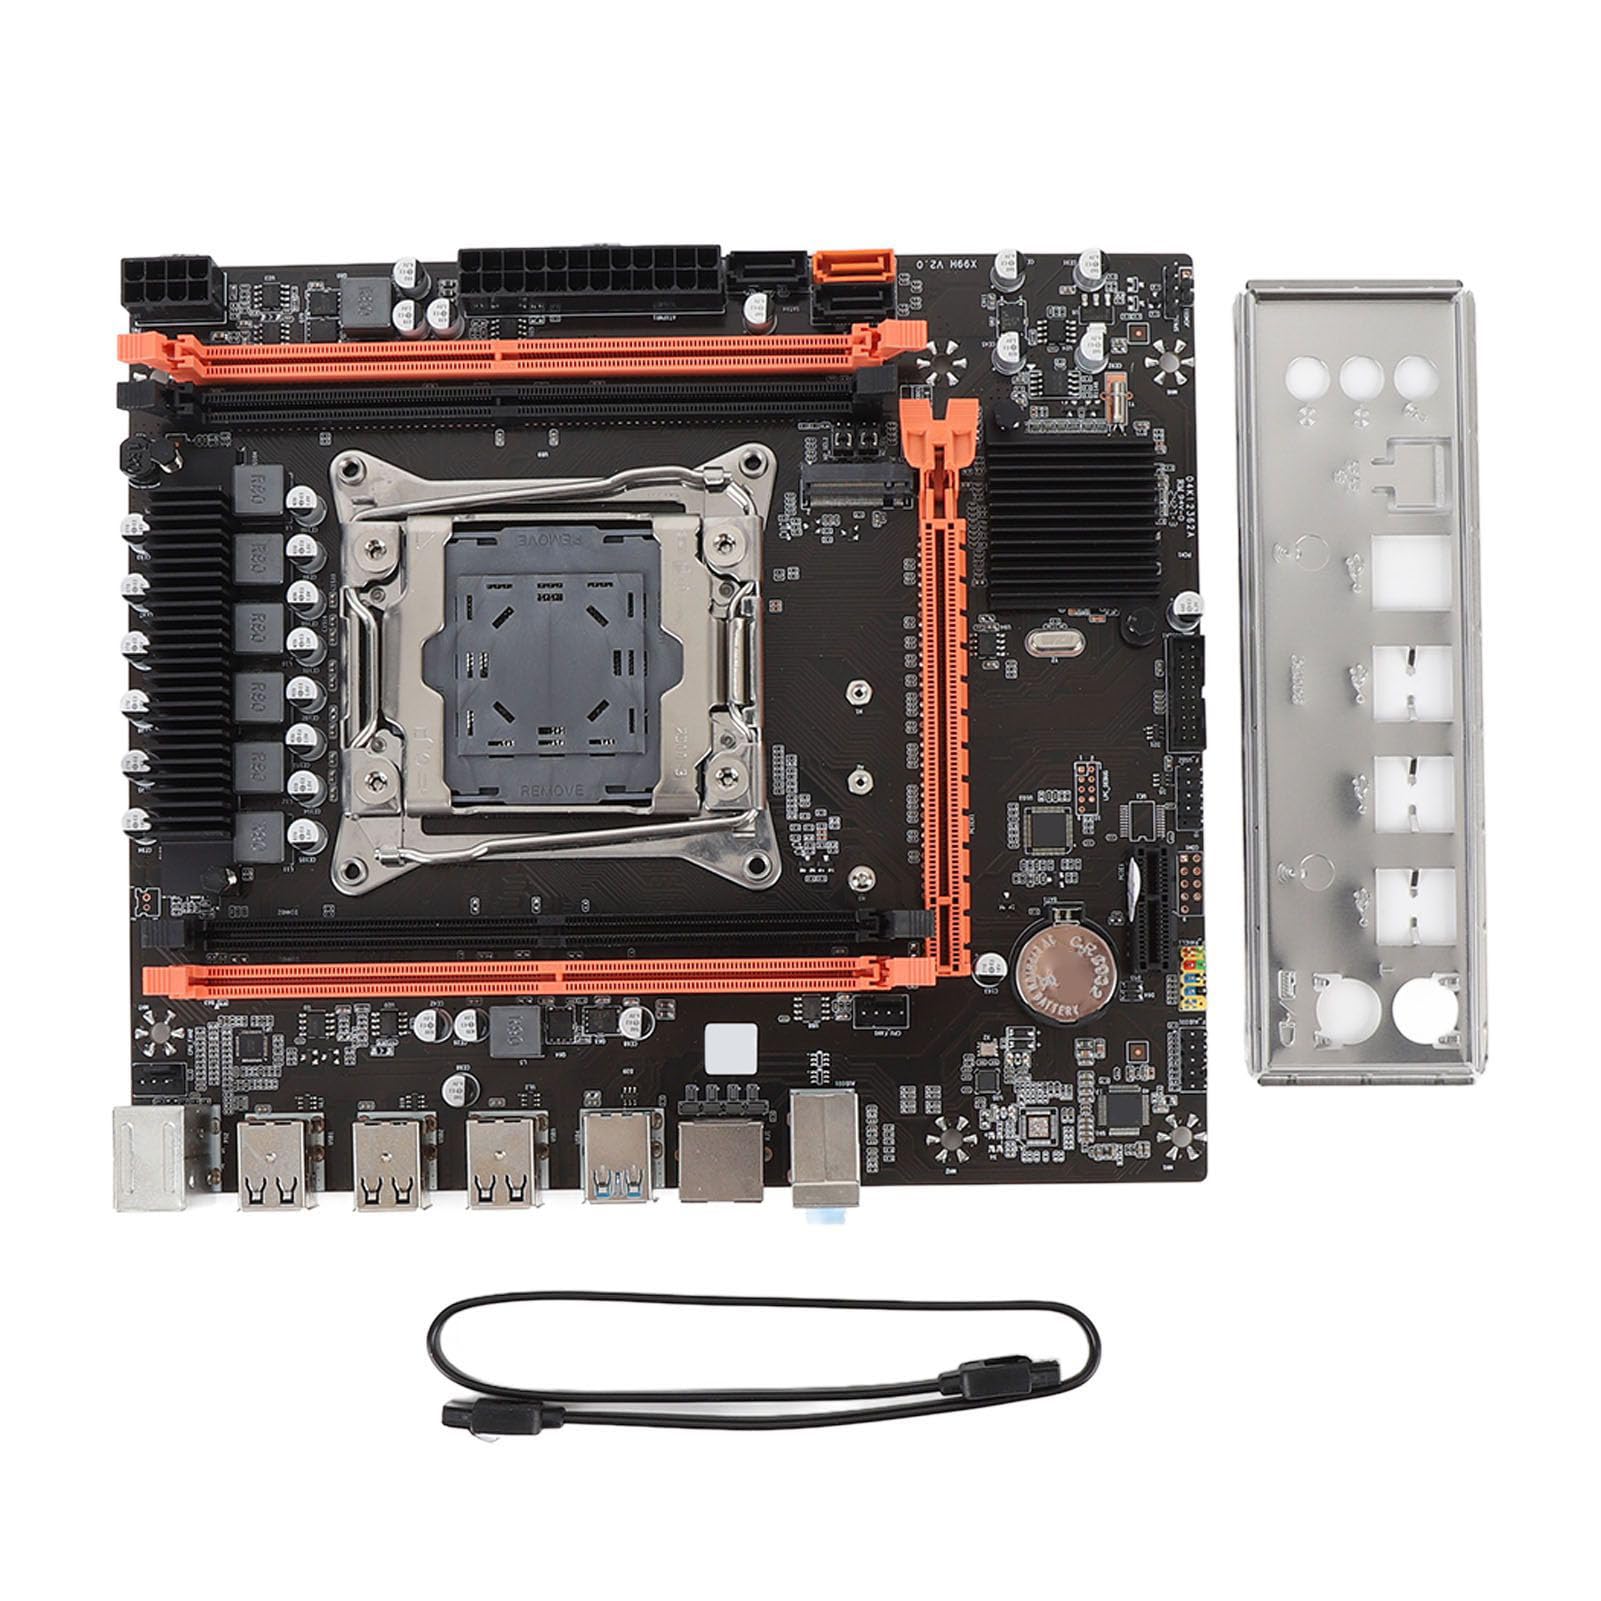
그림 2.1: 이상view of the Zyyini X99H Motherboard Kit.
주요 특징:
- 강력한 호환성: Features an LGA 2011-3 CPU socket, supporting Intel E5 V3/V4 and i7 58xx/68xx series processors. Includes one 8-pin and one 24-pin power socket for stable power delivery.
- Impressive Memory Support: Equipped with four DDR4 DIMM slots, supporting up to 128GB of DDR4 memory at speeds of 2666, 2400, or 2133MHz.
- Serial ATA Ports: Includes Serial ATA ports for compact and easy storage device installation, ensuring high compatibility.
- 안정적인 성능: Utilizes all solid capacitors for enhanced stability and extended operational lifespan, contributing to reliable motherboard performance.
- Easy Expansion: Provides HD multimedia (HDMI) and VGA interfaces for display output, along with an M.2 slot that supports both NGFF and NVME protocols for high-speed storage expansion. It also features a PCI Express 16X slot for graphics cards.
3. 사양
Below are the detailed technical specifications for the Zyyini X99H Motherboard Kit:

그림 3.1: 상향식 view of the Zyyini X99H Motherboard, highlighting component layout.
| 특징 | 사양 |
|---|---|
| 마더보드 구조 | M-ATX |
| 칩셋 | X99H |
| CPU 소켓 | LGA 2011-3 |
| 지원되는 CPU 유형 | Intel E5 V3/V4, i7 58xx/68xx series |
| 메모리 유형 | DDR4 2666/2400/2133MHz |
| 메모리 슬롯 | DDR4 DIMM 4개 |
| 최대 메모리 용량 | 128GB |
| Graphics Card Standard Support | PCI Express 16X |
| 확장 슬롯 | 1 x PCIE x16, 1 x PCIE x1, 1 x NVME M.2 Interface (Serial ATA, PCIE with Jumper Switch) |
| USB 인터페이스 | 6 x USB 2.0, 2 x USB 3.0 (rear I/O), USB3.0 Pins (1 Set), USB2.0 Pins (1 Set) |
| Serial ATA Ports | 2 x Serial ATA 2.0, 1 x Serial ATA 3.0 |
| 비디오 출력 | HDMI, VGA |
| 네트워크 인터페이스 | 1 X RJ45 |
| PS/2 Interface | 1 x PS/2 Keyboard/Mouse Universal Interface |
| 내장 배터리 | CR2032x1 240mah |
4. 설정 및 설치
시스템의 안정성과 성능을 위해서는 올바른 설치가 매우 중요합니다. 다음 단계를 주의 깊게 따르세요.
4.1. 준비
- 작업 공간이 깨끗하고 조명이 밝은지 확인하세요.
- 필요한 도구를 모으세요: 십자 드라이버, 정전기 방지 손목 스트랩(권장).
- 부품을 다루기 전에 접지된 금속 물체를 만져 정전기를 방전시키십시오.
4.2. CPU 설치
Carefully install your LGA 2011-3 processor into the CPU socket.
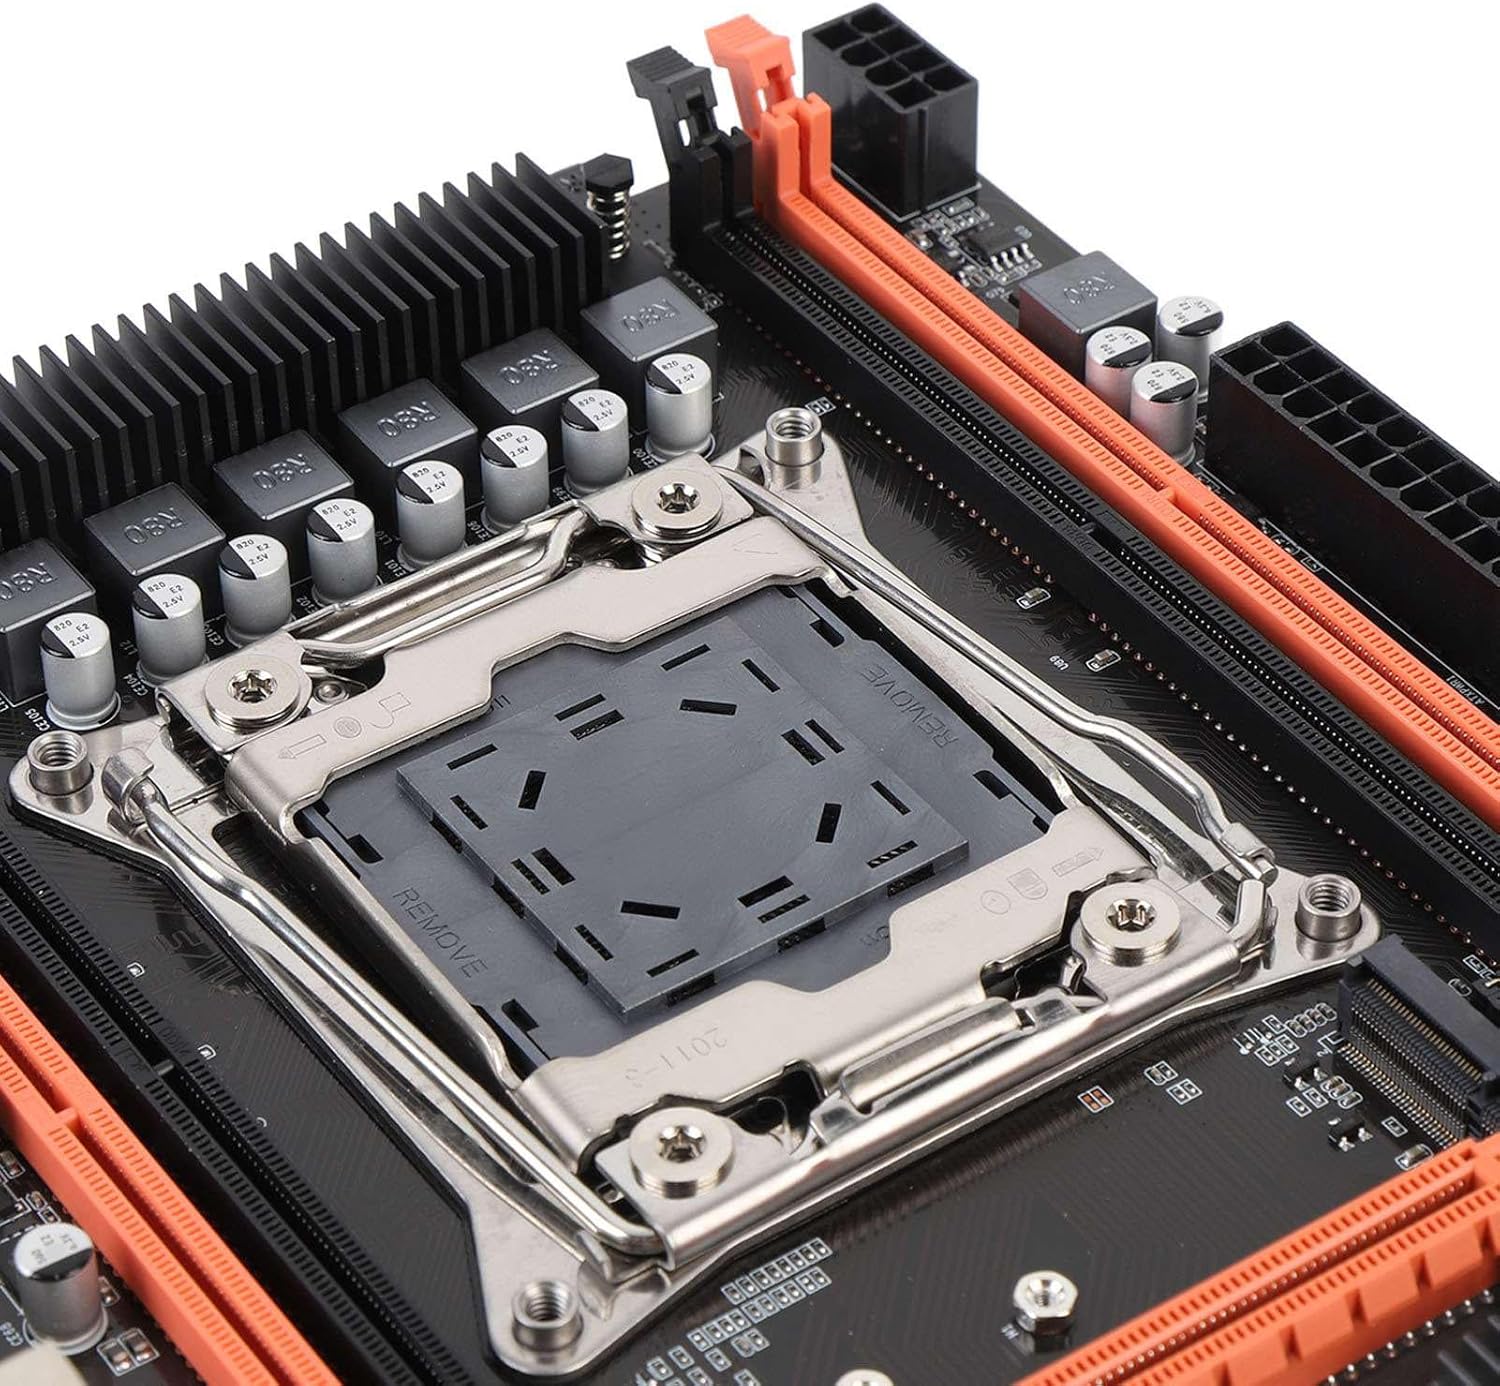
그림 4.1: 클로즈업 view of the LGA 2011-3 CPU socket.
- CPU 소켓 고정 장치를 엽니다.
- CPU의 금색 삼각형이 소켓의 표시와 일치하는지 확인하여 CPU를 소켓에 맞춥니다.
- CPU를 억지로 끼우지 말고 조심스럽게 소켓에 넣으세요.
- 고정 장치를 닫아 CPU를 고정합니다.
- 제조업체의 지침에 따라 CPU 쿨러를 설치하세요.
4.3. RAM 설치
Install DDR4 memory modules into the DIMM slots.
- DIMM 슬롯 양쪽 끝에 있는 클립을 엽니다.
- 메모리 모듈을 슬롯에 맞춰서 모듈의 홈이 슬롯의 키와 일치하는지 확인합니다.
- 클립이 제자리에 고정될 때까지 메모리 모듈의 양쪽 끝을 단단히 누릅니다.
4.4. 마더보드 장착
Mount the motherboard into your PC case.
- I/O 쉴드를 케이스 후면 개구부에 설치하십시오.
- PC 케이스의 스탠드오프에 맞춰 마더보드를 정렬하십시오.
- 나사로 마더보드를 고정합니다.
4.5. 전원 연결하기
전원 공급 장치(PSU) 케이블을 마더보드에 연결하십시오.
- Connect the 24-pin ATX power cable to the main power connector.
- Connect the 8-pin CPU power cable to the CPU power connector.
4.6. 저장 장치 연결
Connect your SATA and NVME M.2 storage devices.

그림 4.2: 클로즈업 view of the M.2 slot and SATA ports.
- For SATA drives, connect one end of the SATA data cable to the motherboard's SATA port and the other to the drive. Connect the SATA power cable from the PSU to the drive.
- For NVME M.2 SSDs, insert the M.2 module into the M.2 slot and secure it with the provided screw.
4.7. 주변기기 및 전면 패널 연결
Connect USB devices, front panel connectors, and other I/O.

그림 4.3: 클로즈업 view of the rear I/O ports.
- Connect your mouse and keyboard to the PS/2 or USB ports.
- Connect front panel USB, audio, power switch, reset switch, and LED indicators to the corresponding headers on the motherboard. Refer to your PC case manual for specific pin assignments.
- Connect network cables to the RJ45 port.
4.8. 그래픽 카드 설치
Install your PCI Express graphics card.
- PCIe x16 슬롯의 고정 클립을 엽니다.
- 그래픽 카드를 슬롯에 맞춰 끼우고 딸깍 소리가 나면서 제자리에 고정될 때까지 세게 누르십시오.
- 그래픽 카드를 나사로 케이스에 고정합니다.
- Connect any required PCIe power cables from the PSU to the graphics card.
5. 사용 설명서
Once all components are installed, you can proceed with powering on your system.
5.1. 첫 번째 부팅
- 모든 전원 케이블이 단단히 연결되어 있고 전원 공급 장치가 켜져 있는지 확인하십시오.
- PC 케이스의 전원 버튼을 누르세요.
- 시스템 전원이 켜지고 모니터에 화면이 표시될 것입니다.
5.2. BIOS/UEFI 액세스
The BIOS (Basic Input/Output System) or UEFI (Unified Extensible Firmware Interface) allows you to configure fundamental system settings.
- 시스템 시작 중에 지정된 키(일반적으로)를 반복해서 누르십시오. 델, F2, F10, 또는 F12)을 눌러 BIOS/UEFI 설정 유틸리티로 들어갑니다.
- Within the BIOS/UEFI, you can adjust boot order, system time, fan speeds, and other hardware-related settings.
5.3. 드라이버 설치
After installing your operating system, install the necessary drivers for your motherboard and other components.
- Obtain the latest drivers from the Zyyini web사이트 또는 구성 요소 제조업체의 websites (e.g., chipset, audio, LAN, graphics card).
- Install drivers in the recommended order (typically chipset first, then graphics, audio, LAN, etc.).
5.4. 운영체제 설치
부팅 가능한 USB 드라이브나 DVD에서 원하는 운영 체제(예: Windows, Linux)를 설치합니다.
- Configure the boot order in BIOS/UEFI to prioritize your installation media.
- Follow the on-screen instructions of your operating system installer.
6. 유지관리
정기적인 유지관리는 마더보드와 시스템의 수명과 안정적인 작동을 보장하는 데 도움이 됩니다.
- 깨끗하게 유지하세요: 압축 공기를 사용하여 PC 케이스 내부, 특히 팬과 방열판 주변의 먼지를 주기적으로 청소하세요. 청소하기 전에 시스템 전원을 끄고 플러그를 뽑으세요.
- 연결 확인: Occasionally verify that all cables (power, data, peripheral) are securely connected to the motherboard and other components.
- BIOS/UEFI 업데이트: Check the Zyyini support webBIOS/UEFI 업데이트 사이트입니다. 업데이트를 통해 호환성, 안정성 및 성능을 향상시킬 수 있습니다. 시스템 손상을 방지하기 위해 업데이트 지침을 주의 깊게 따르십시오.
- 소프트웨어 업데이트: 최적의 성능과 보안을 유지하려면 운영 체제와 드라이버를 최신 상태로 유지하십시오.
7. 문제 해결
이 섹션에서는 일반적으로 발생할 수 있는 문제에 대한 해결책을 제공합니다.
7.1. 전원이 켜지지 않음 / 시스템이 켜지지 않음
- 전원 연결 확인: Ensure the 24-pin ATX and 8-pin CPU power cables are firmly connected to the motherboard and the power supply.
- 전원 공급 장치 스위치: Verify that the power switch on the PSU is in the 'ON' position.
- 전면 패널 커넥터: Double-check the power switch connector on the motherboard's front panel header.
- 벽면 콘센트: 벽면 콘센트에 다른 기기로 전원이 공급되는지 테스트해 보세요.
7.2. 모니터에 디스플레이가 표시되지 않음
- 모니터 연결: Ensure the display cable (HDMI/VGA) is securely connected to both the graphics card/motherboard and the monitor.
- 그래픽 카드: If using a dedicated graphics card, ensure it is properly seated in the PCIe slot and any required power cables are connected.
- 숫양: RAM 모듈을 다시 장착하십시오. RAM 모듈이 여러 개인 경우 하나만 장착하고 부팅을 시도해 보십시오.
- CPU: Ensure the CPU is correctly installed and the CPU cooler is making proper contact.
7.3. 시스템 불안정/랜덤 충돌
- 과열: Check CPU and GPU temperatures. Ensure all fans are working correctly and heatsinks are free of dust.
- RAM 문제: Run a memory diagnostic tool (e.g., Windows Memory Diagnostic) to check for faulty RAM.
- 드라이버 문제: Ensure all drivers are up-to-date and correctly installed.
- 전원 공급 장치: An insufficient or failing power supply can cause instability.
7.4. Component Not Detected (e.g., Storage, USB Device)
- 연결 확인: Verify that the component's power and data cables are securely connected.
- BIOS/UEFI 설정: Check if the component is enabled in the BIOS/UEFI settings. For M.2 drives, ensure the correct protocol (NVME/SATA) is selected if applicable via jumper switch.
- 운전자: Install the latest drivers for the component.
- 장치 관리자: In your operating system, check Device Manager (Windows) or equivalent to see if the device is listed, even with an error.
8. 지원 및 보증
For technical support or warranty inquiries, please contact Zyyini customer service through the retailer where you purchased the product or visit the official Zyyini support website. Please have your product model (X99H) and purchase information ready when contacting support.
Specific warranty terms and conditions may vary by region and retailer. Please refer to your purchase documentation for detailed warranty information.