
1. 서론
구매해주셔서 감사합니다asing the DEPSTECH DS620-TL Triple Lens Endoscope Camera. This device is designed for visual inspection in hard-to-reach areas, featuring a 1080P triple-lens camera, a 5-inch IPS monitor, and an IP67 waterproof semi-rigid cable. This manual provides essential information for safe and effective use of your endoscope camera.
2. 제품 오버view
2.1 주요 특징
- 1080P Triple Lens Camera: Equipped with three cameras (front, side B, side C) for multi-angle inspection.
- 5-inch IPS Monitor: Provides clear, real-time images with excellent color reproduction.
- IP67 방수 프로브: The 7.9mm diameter semi-rigid cable is waterproof, suitable for wet environments.
- 조정 가능한 LED 조명: Features 8+1+1 high-brightness LED chips with adjustable intensity for optimal illumination.
- 5M Semi-Rigid Cable: Offers flexibility and durability for navigating various spaces.
- 충전식 배터리: Built-in battery provides approximately 2-3 hours of continuous operation.
2.2 패키지 내용
패키지에 모든 품목이 들어 있는지 확인하세요.
- DEPSTECH DS620-TL Endoscope Camera
- Type-C 충전 케이블
- Hook and Magnet Attachments
- 수납용 조임끈 파우치
- 사용자 설명서

그림 2.2: 포함된 액세서리 및 본체.
3. 안전 정보
- 가연성 또는 폭발성 가스가 있는 환경에서는 본 기기를 사용하지 마십시오.
- 장치를 강한 전자기장에서 멀리 두십시오.
- Avoid direct exposure of the camera lens to strong light sources.
- 기기를 분해하거나 개조하지 마십시오. 수리는 허가받은 담당자만 수행해야 합니다.
- 점검 중 중단을 방지하기 위해 사용 전에 기기가 완전히 충전되었는지 확인하십시오.
- Clean the probe and lens after each use, especially after contact with liquids or corrosive substances.
4. 설정
4.1 장치 충전
Connect the provided Type-C charging cable to the device's charging port and a suitable USB power adapter (not included). The charging indicator will show the charging status. A full charge typically takes 2-3 hours.
4.2 마이크로 SD 카드 삽입
To save photos and videos, a Micro SD card (Class 10/Class 10 or higher, 8-32GB) is required (not included). Locate the Micro SD card slot on the side of the monitor unit and insert the card until it clicks into place.
4.3 액세서리 부착하기
The endoscope comes with hook and magnet attachments. These can be screwed onto the tip of the camera probe for retrieving small objects or maneuvering in tight spaces.

Figure 4.3: Magnet and hook attachments for the probe.
5. 사용 설명서
5.1 전원 켜기/끄기
Press and hold the power button (usually located on the side or front panel) for a few seconds to turn the device on. The screen will display the DEPSTECH logo. To power off, press and hold the power button again.

Figure 5.1: Monitor button layout and functions.
5.2 Switching Lenses
The DS620-TL features a triple-lens system. Press the lens switch button (often labeled with a camera icon or 'M') to cycle between Front Camera A, Side Camera B, and Side Camera C. This allows for comprehensive viewing without repositioning the probe.

Figure 5.2: Triple lens camera detail.
5.3 LED 밝기 조정
Use the up/down arrow buttons on the monitor to adjust the brightness of the LED lights on the camera probe. There are multiple levels of brightness to suit different inspection environments.
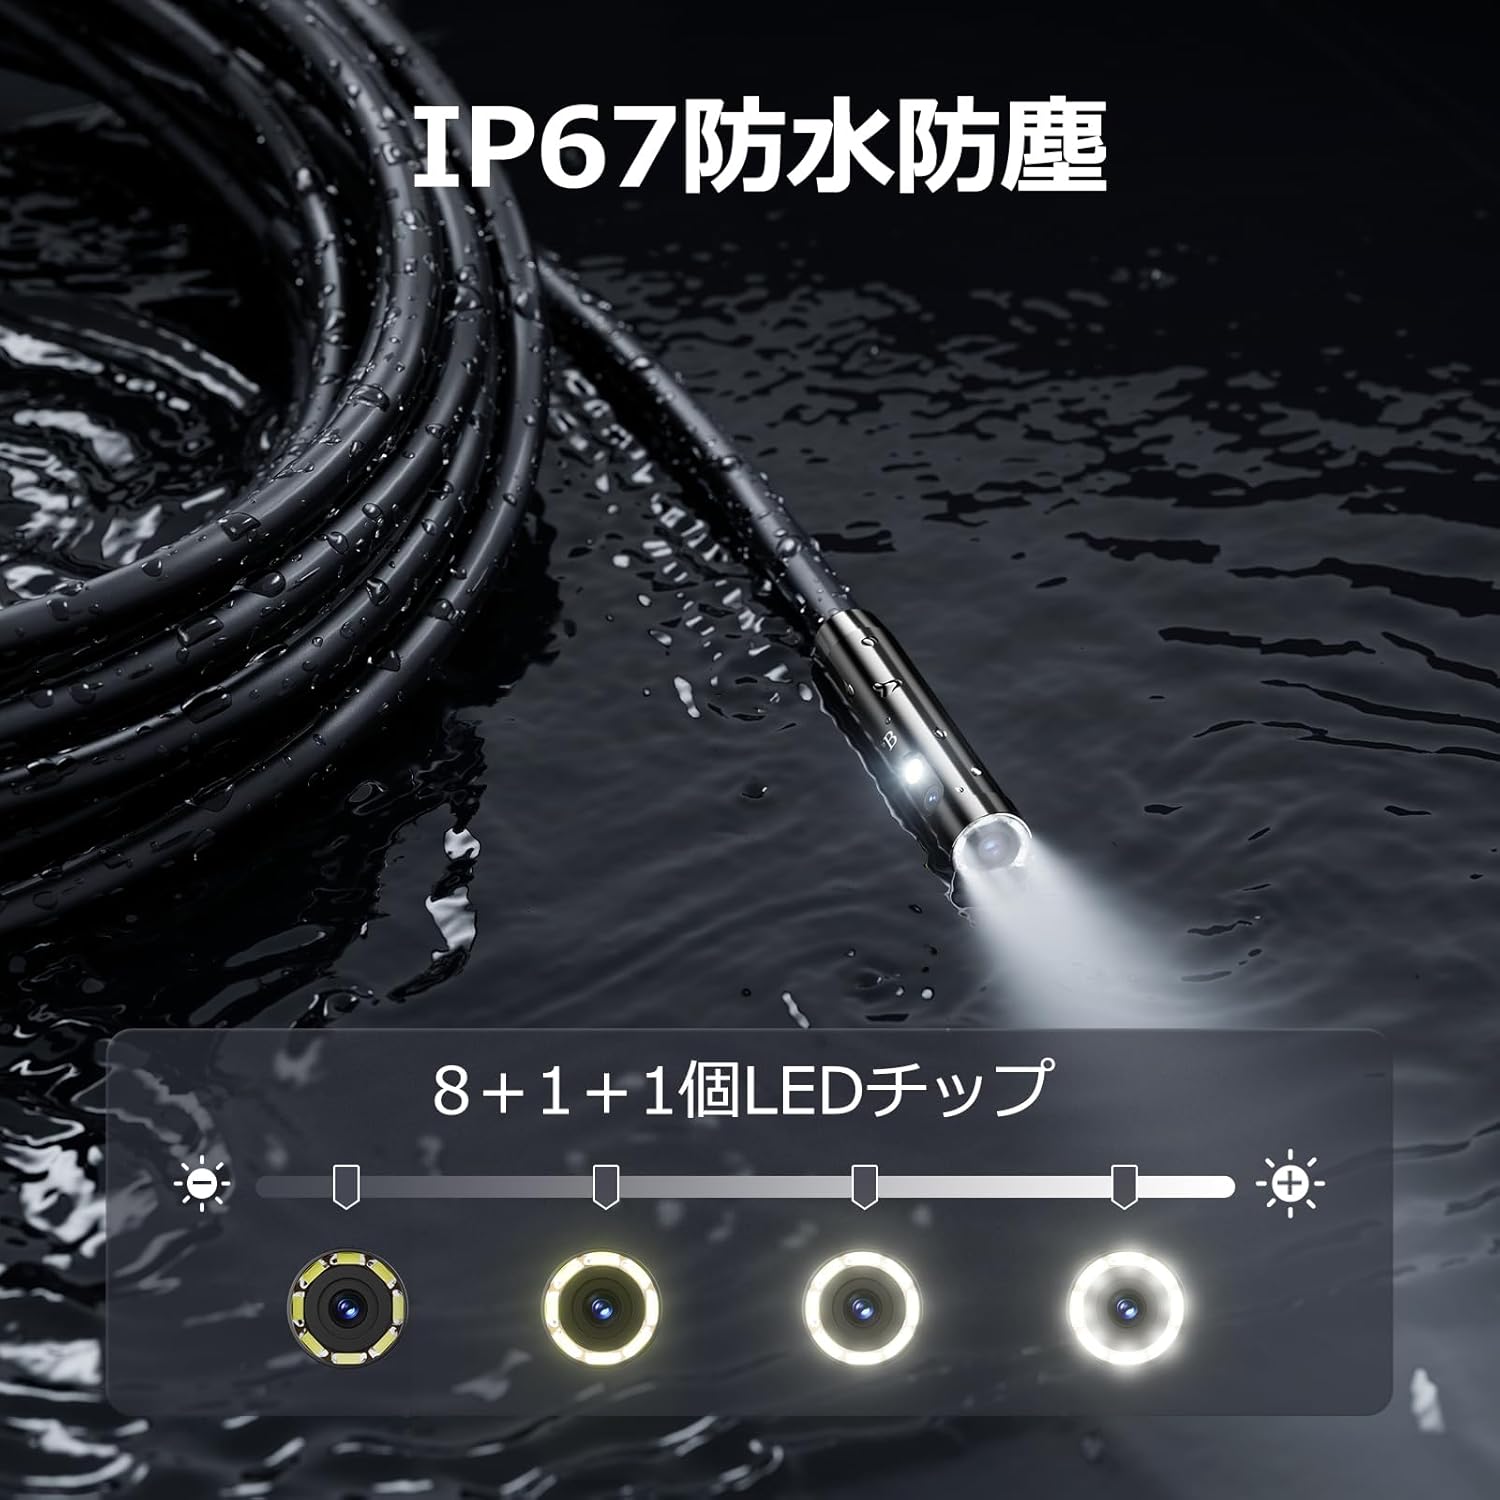
Figure 5.3: IP67 waterproof probe with adjustable LED illumination.
5.4 사진 촬영 및 비디오 녹화
Press the photo/video button (usually a camera icon) to capture a still image. To record video, press and hold the photo/video button; press again to stop recording. Ensure a Micro SD card is inserted to save your media.

Figure 5.4: Monitor interface for photo and video capture.
5.5 화면 회전
Press the screen rotation button (often a circular arrow icon) to rotate the image on the monitor by 180 degrees. This is useful when the probe is in an inverted position.
5.6 실제 적용 사례
The DS620-TL is suitable for various tasks including home appliance maintenance, pipe inspection, wall wiring checks, and automotive repairs.

Figure 5.6: Various inspection scenarios for the endoscope.
5.7 제품 시연 영상
Video 5.7: A demonstration of the DEPSTECH DS620-TL endoscope camera in use, showcasin그 특징과 응용 분야.
6. 유지관리
6.1 프로브 및 렌즈 청소
After each use, especially in dirty or wet conditions, gently wipe the camera probe and lens with a soft, dry cloth. For stubborn dirt, a slightly damp 천으로 닦은 후 말리십시오. 연마성 세제나 용제를 사용하지 마십시오.
6.2 보관
Store the endoscope camera in a cool, dry place, away from direct sunlight and extreme temperatures. Use the provided drawstring bag for protection. Ensure the cable is coiled neatly without sharp bends.
6.3 배터리 관리
To prolong battery life, avoid fully discharging the device frequently. If storing for an extended period, charge the battery to approximately 50% every three months.
7. 문제 해결
7.1 화면에 이미지가 없습니다
- 장치의 전원이 켜져 있고 완전히 충전되어 있는지 확인하세요.
- Check if the camera cable is securely connected to the monitor unit.
- 점검 영역에 적절한 조명이 확보되도록 LED 밝기를 조절하십시오.
7.2 사진/동영상 녹화 불가
- Verify that a compatible Micro SD card (Class 10/Class 10 or higher, 8-32GB) is inserted correctly.
- 마이크로 SD 카드에 충분한 여유 공간이 있는지 확인하세요.
- Ensure the Micro SD card is not locked (read-only).
- Try formatting the Micro SD card (this will erase all data).
7.3 기기가 충전되지 않음
- Ensure the Type-C charging cable is properly connected to both the device and the power source.
- 다른 USB 전원 어댑터나 충전 케이블을 사용해 보세요.
- 충전 포트에 이물질이나 손상이 있는지 확인하세요.
If you encounter issues not listed here or if the problem persists, please contact DEPSTECH customer support.
8. 사양
| 특징 | 사양 |
|---|---|
| 상표 | 뎁스텍 |
| 모델명 | DS620TL-JP |
| 색상 | 검은색 |
| 방수 수준 | IP67 |
| 미디어 유형 | SD Memory Card (8-32GB, Class 10/Class 10 or higher recommended) |
| File 체재 | MP4, MOV, AVI, JPEG, RAW |
| 비디오 캡처 형식 | MP4 |
| View파인더 유형 | IPS |
| 센서 유형 | CMOS |
| 사진 센서 해상도 | 2.1 MP |
| 초점 기능 | 고정 초점 |
| 자동 초점 | 아니요 |
| 배터리 평균 수명 | 2시간 |
| 포함된 구성 요소 | Type-C Cable, Attachments, Storage Drawstring Bag |
| 제조업체 보증 | 2년 |
| 원산지 | 중국 |
9. 보증 및 지원
9.1 제조업체 보증
The DEPSTECH DS620-TL comes with a 24-month manufacturer warranty. Your order number serves as proof of purchase for warranty claims.
9.2 고객 지원
For any inquiries, technical assistance, or warranty claims, please contact our dedicated support team:
- 이메일: support@depstech.com
- 응답 시간: We aim to respond to all inquiries within 24 hours. For requests submitted on weekends or holidays, a response will be provided on the next business day.

Figure 9.2: DEPSTECH support details.