
1. 서론
This manual provides essential information for the safe and efficient operation of your DATOUBOSS 48V 300Ah LiFePO4 Powerwall Lithium Battery. Please read this manual thoroughly before installation and use, and retain it for future reference. This battery is designed for deep cycle energy storage in various applications including home backup, solar power systems, RVs, and off-grid setups.

Figure 1: DATOUBOSS 48V 300Ah LiFePO4 Powerwall Lithium Battery.
2. 안전 정보
경고: 이러한 안전 지침을 따르지 않을 경우 감전, 화재, 심각한 부상 또는 사망이 발생할 수 있습니다.
- Always wear appropriate personal protective equipment (PPE) including insulated gloves and eye protection when handling batteries.
- 배터리 단자를 단락시키지 마십시오.
- 배터리를 화기, 고온 또는 직사광선에 노출시키지 마십시오.
- 배터리를 물이나 다른 액체에 담그지 마십시오.
- 설치 및 작동 중에는 적절한 환기를 확보하세요.
- 배터리를 어린이와 애완동물의 손이 닿지 않는 곳에 보관하세요.
- Only use compatible chargers and inverters.
- Do not attempt to open, disassemble, or repair the battery. Contact qualified personnel for service.
- 현지 규정에 따라 배터리를 폐기하십시오.
- Ensure the installation environment is free from flammable materials.

그림 2: 이상view of the battery's multiple protection functions, including overvoltage, overcharge, overdischarge, short circuit, and temperature protections.
3. 제품 오버view
3.1 주요 특징
- High-Quality LiFePO4 Cells: Utilizes A-grade LiFePO4 cells for durability and long cycle life (up to 15,000 cycles).
- Advanced 210A BMS: Integrated Battery Management System provides comprehensive protection against various electrical faults.
- 스마트 LCD 디스플레이: 볼륨의 실시간 모니터링tage, State of Charge (SOC), temperature, and BMS status.
- 통신 인터페이스: Equipped with RS485, CAN, and RS232 for wide inverter compatibility and remote monitoring.
- 확장 가능한 에너지 저장 장치: Supports parallel connection of multiple units for increased capacity.
- 유연한 설치: Designed for both floor-standing and wall-mounted configurations.
- 모빌리티 디자인: Optional wheels/pulleys for easy relocation.
3.2 패키지 내용
패키지에 모든 품목이 들어 있는지 확인하세요.

Figure 3: Contents of the product package, including the battery pack, mounting bracket, wall-mount brackets, battery connection cables, communication cable, screws, and instruction manual.
- Finished home energy storage battery pack (1 unit)
- 장착 브래킷 (1개)
- Wall-Mount Brackets (2 units)
- Positive Battery Connection Cable (1 unit)
- Negative Battery Connection Cable (1 unit)
- Communication cable (1 unit)
- Screws (Set)
- 사용설명서(1개)
3.3 구성 요소 식별

그림 4: 상세 view of the battery's control panel and ports, including DIP switches, RS485, CAN, RS232 communication ports, reset switch, indicators, battery terminals, push button switch, and air switch.
- DIP Address: Switches for parallel communication address selection.
- RS485 (External Communication): Port for external communication.
- RS232 : Reserve communication port.
- CAN : External communication port.
- 리셋 스위치: Reboots or shuts down the unit when pressed.
- Switching Indicator: Shows switch status.
- 작동 표시기: 작동 상태를 표시합니다.
- 경보 표시기 : Alerts for system issues.
- 배터리 표시기: Shows remaining capacity.
- Battery Positive Terminal: 긍정적인 연결 지점.
- Battery Negative Terminal: 음의 연결 지점.
- 푸시 버튼 스위치: 전원을 켜고 끄는 기능을 제어합니다.
- 에어 스위치: Disconnects input and output.
- 액정표시장치: Touchscreen display for monitoring and control.
4. 설정 및 설치
4.1 설치 위치 선택
- Do not install the battery pack on flammable building materials.
- It should be installed on a solid surface.
- It is recommended to install the battery box at eye level for easy LCD display readability.
- 최적의 작동을 위해서는 주변 온도가 0°C에서 55°C 사이여야 합니다.
- It is recommended to install vertically on the wall.
- Ensure sufficient heat dissipation space and wiring removal space (at least 20cm/7.8in from sides, 50cm/19.6in from top/bottom).

Figure 5: Illustration of recommended clearances for wall-mounted installation, showing minimum distances from surrounding surfaces for proper ventilation and access.
4.2 Installation Steps (Wall Mount)
- First, fix the mounting bracket to the wall using expansion screws.
- Fix the wall-mount brackets to the back shell of the machine with short screws.
- Hang the battery unit onto the fixed wall bracket.
Note: Only suitable for installation on concrete or other non-flammable surfaces.
4.3 전기 연결
Connect the positive and negative battery cables to your inverter or load according to the inverter's manual. Ensure all connections are secure and correctly polarized.
WARNING: Incorrect wiring can cause severe damage to the battery and connected equipment, and poses a fire hazard.
4.4 병렬 연결(옵션)
Multiple units can be connected in parallel to increase total energy storage capacity. Up to 15 units can be connected in parallel.

Figure 6: Visual representation of how multiple DATOUBOSS battery units can be connected in parallel to expand energy storage capacity.
When connecting battery packs in parallel, use the DIP addressing function. If DIP6 is connected to ON, use the default automatic address assignment. Otherwise, use the DIP switch on the BMS to set the address to distinguish different data packets.

Figure 7: Explanation of DIP switch settings for addressing multiple battery units in a parallel configuration, including binary address assignments.

Figure 8: Diagram illustrating parallel wiring instructions and examples of automatic address assignment for multiple battery units.
5. 운영
5.1 전원 켜기/끄기
To power on the battery, ensure the air switch is in the "ON" position, then press the push button switch. To power off, reverse the process.
5.2 LCD 디스플레이 및 모니터링
The high-definition color LCD screen provides real-time information about the battery's status. You can switch between multiple pages for detailed data.
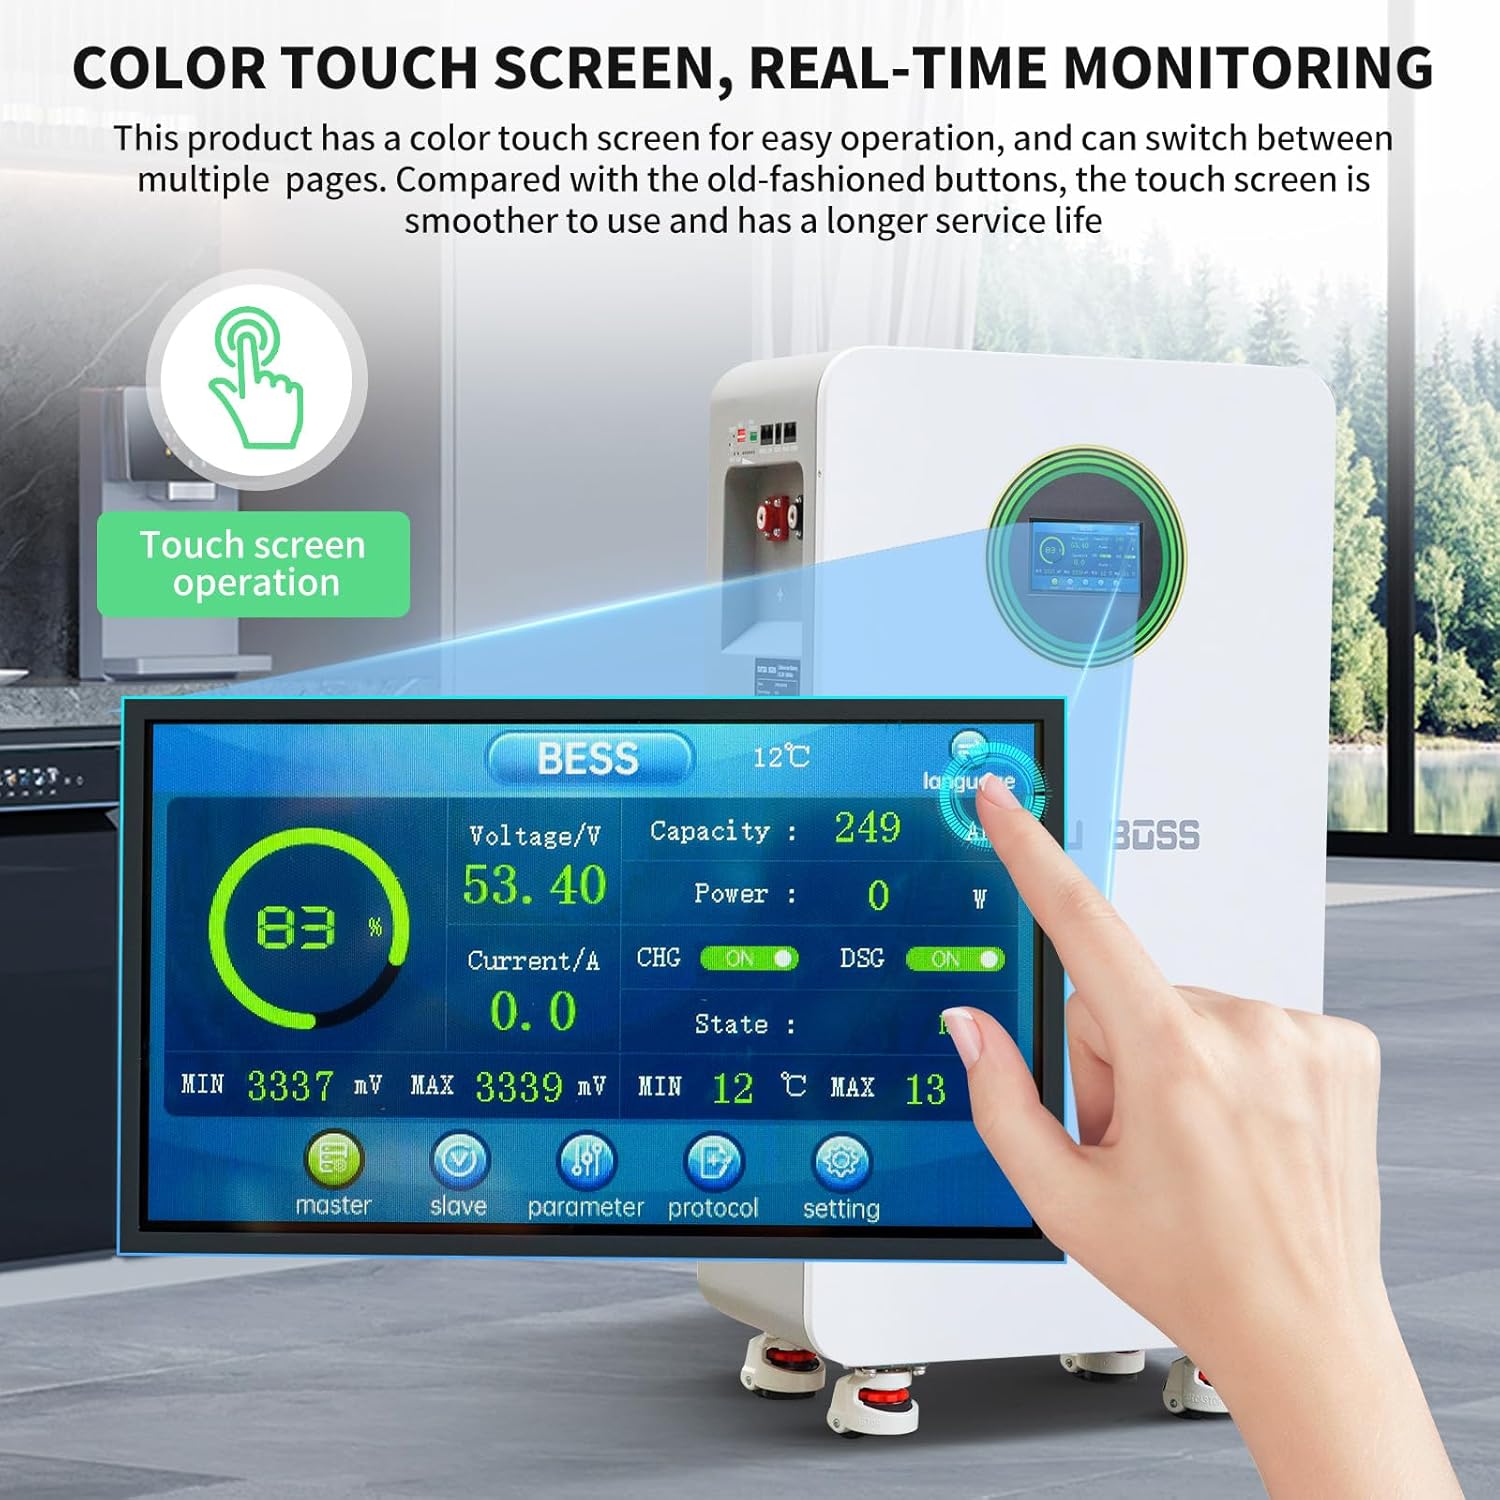
Figure 9: Close-up of the color touch screen displaying real-time battery parameters such as voltage, capacity, power, current, state of charge (SOC), and temperature.
디스플레이에는 다음이 표시됩니다.
- 권tag전자 (V)
- Capacity (SOC %)
- 전력(W)
- 현재 (A)
- 온도(°C)
- BMS Status (CHG/DSG, ON/OFF)
5.3 통신 인터페이스
The battery supports RS485, CAN, and RS232 communication protocols for integration with various inverters and monitoring systems. This allows for remote monitoring, control, and parameter adjustments.

Figure 10: Diagram showing the RS485, CAN, and RS232 communication ports and a table defining the pin assignments for each interface.
Interface Definition Table:
| 인터페이스 | RS485 | 할 수 있다 | RS232 | RS485 | ||||
|---|---|---|---|---|---|---|---|---|
| 기능 설명 | Connection to host computer or Inverter | Connection to host computer or Inverter | 병렬 통신 | 병렬 통신 | ||||
| 핀 설명 | 핀 | 설명 | 핀 | 설명 | 핀 | 설명 | 핀 | 설명 |
| 1, 8 | RS485-B1 | 1, 8 | NC | 1, 2, 6 | NC | 1, 8 | RS485-B2 | |
| 2, 7 | RS485-A1 | 2, 7 | NC | 3 | TX | 2, 7 | RS485-A2 | |
| 4 | NC | 4 | CANH1 | 4 | RX | 4 | NC | |
| 5 | NC | 5 | CANH1 | 5 | 접지 | 5 | NC(L)/아웃(R) | |
| 3, 6 | 접지 | 3, 6 | 접지 | 3, 6 | 접지 | |||
6. 유지관리
- 정기 검사: Periodically check the battery for any physical damage, loose connections, or signs of overheating.
- 청소: Keep the battery surface clean and free from dust and debris. Use a dry, soft cloth for cleaning. Do not use liquids.
- 통풍: 적절한 열 방출을 위해 환기구가 막히지 않도록 하십시오.
- 온도: Operate the battery within the recommended temperature range (0°C to 55°C).
- 펌웨어 업데이트: 가능하다면 BMS의 펌웨어 업데이트를 정기적으로 확인하고 적용하여 최적의 성능과 보안을 유지하십시오.
7. 문제 해결
이 섹션에서는 일반적인 문제에 대한 해결책을 제공합니다. 여기에 나열되지 않은 문제는 고객 지원팀에 문의하세요.
| 문제 | 가능한 원인 | 해결책 |
|---|---|---|
| Battery not powering on | Air switch off, push button not pressed, low battery voltage, 내부 오류. | Ensure air switch is ON. Press the push button. Check battery voltage on LCD. If fault persists, contact support. |
| 출력 전력 없음 | Overload, short circuit, BMS protection activated, loose connections. | Reduce load. Check for short circuits. Verify all connections are secure. Check alarm indicator on LCD. Reset if necessary. |
| 인버터와의 통신 오류 | Incorrect cable, wrong port, incompatible protocol, incorrect DIP switch settings. | Verify communication cable type and connection. Ensure correct port is used. Check inverter compatibility and protocol settings. Adjust DIP switches for parallel units. |
| 배터리 과열 | Poor ventilation, excessive load, high ambient temperature. | Ensure adequate clearance around the battery. Reduce load. Move to a cooler environment if possible. |
8. 사양
The following table details the technical specifications of the DATOUBOSS 48V 300Ah LiFePO4 Lithium Battery.

Figure 11: Key technical specifications of the DATOUBOSS 48V 300Ah Lithium Iron Phosphate battery, including capacity, voltage, current, cycle life, and communication protocols.
| 매개변수 | 값 |
|---|---|
| 모델 | 48V 300Ah LiFePO4 리튬 배터리 |
| 배터리 용량 | 15.36kWh (48V 300Ah) |
| 정격 작동 볼륨tage | 51.2V(직류) |
| 최대 출력 전류 | 210A |
| 표준 입력 전류 | 150A (maximum 210A) |
| 피크 충전 전류 | 215A/2초 |
| 피크 방전 전류 | 215A/2초 |
| Power-off Self Consumption | <300uA |
| Battery Cycle Life (25°C, 70% SOH) | ≥8000 사이클 |
| Battery Cycle Life (45°C, 70% SOH) | ≥3000 사이클 |
| 통신 프로토콜 | RS232, RS485, 수 |
| 치수(길이 x 너비 x 높이) | 453 x 260 x 879mm(17.83 x 10.24 x 34.65인치) |
| 품목 무게 | 110kg(242파운드) |
| 오버볼tage 보호 | 58.4V |
| 과충전 보호 복구 | 54.0V |
| 과방 전 방지 | 43.2V |
| Overdischarge Protection Recovery (within 30 seconds) | 48V(조정 가능) |
| 충전 고온 보호 | 50도 |
| 충전 고온 보호 복구 | 45°C (adjustable) |
| 저온 보호 충전 | 0°C (adjustable) |
| 충전 냉동 보호 복구 | 5도 |
| 방전 과열 보호 | 50도 |
| Discharge Over-Temperature Protection Recovery | 45도 |
| 저온 보호 | 영하 15도 |
| 저온 보호 복구 | 영하 10도 |
| 충전 과전류 | 215A |
| 방전 과전류 보호 | 215A |
| 단락 보호 | Recovery method: "Charge Removal, Load Removal" |
| 운송된 전기량 | 40%에서 60%까지 |
| 평준화 | 수동적 평형 |
9. 보증 및 지원
DATOUBOSS provides a 10년 보증 for this battery. This warranty covers quality issues under normal use and service conditions.
For any issues or inquiries, please contact DATOUBOSS customer support. We aim to respond and assist within 24 hours.

Figure 12: Image depicting professional customer support representatives, indicating available assistance for product inquiries.