
1. 서론
This manual provides detailed instructions for the installation, operation, and maintenance of the Phanteks Premium Gen5 Vertical GPU Bracket. This product is designed to vertically mount your graphics card, offering both aesthetic enhancement and robust support, while ensuring full PCI Express 5.0 performance and integrated D-RGB lighting.
Please read these instructions carefully before installation to ensure proper setup and to prevent damage to your components.
2. 패키지 내용
패키지에 모든 구성 요소가 들어 있는지 확인하세요.
- Premium Vertical GPU Bracket
- PCIe 5.0 Riser Cable (integrated)
- 장착 하드웨어(나사, 스탠드오프)
- 사용 설명서 (본 문서)
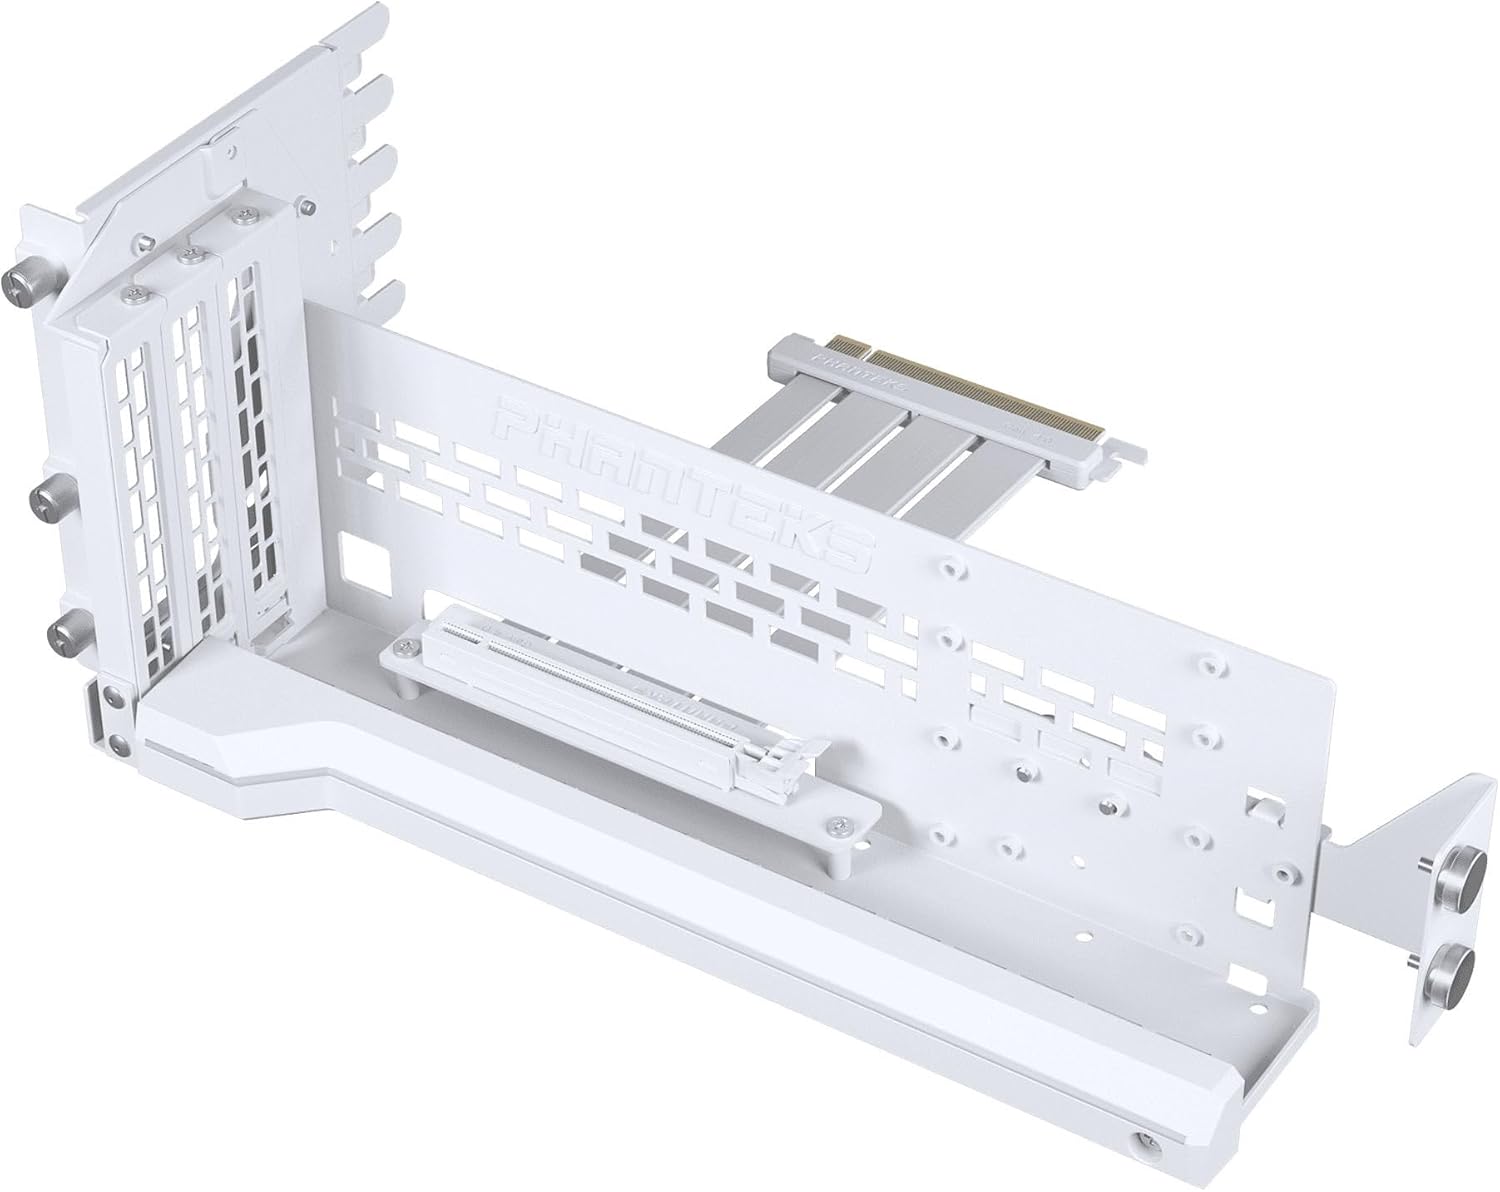
그림 2.1: 이상view of the Phanteks Premium Gen5 Vertical GPU Bracket, showing the main bracket and integrated PCIe 5.0 riser cable.
3. 설정 및 설치
Before beginning installation, ensure your computer is powered off and disconnected from the main power supply. It is recommended to wear an anti-static wrist strap to prevent electrostatic discharge (ESD) damage to components.
3.1 호환성 검사
- Requires a chassis with at least 7 open PCI slot areas.
- Compatible with most standard ATX cases.
- Ensure sufficient clearance for your GPU and cooling solution.
3.2 설치 단계
- 섀시 준비: Remove the rear PCI slot covers from your computer case. You will need access to at least 7 open slots.
- 브래킷을 설치하십시오: Position the vertical GPU bracket inside your chassis. Align the mounting holes of the bracket with the screw holes in your case's PCI slot area. Secure the bracket using the provided screws.
- Adjust GPU Position (Optional): The bracket supports tilted positions up to 30 degrees. Adjust the bracket's angle as desired before securing the GPU.
- 그래픽 카드를 설치하세요: Carefully insert your graphics card into the PCIe 5.0 slot on the vertical GPU bracket. Ensure it is fully seated.
- Secure the Graphics Card: Use the secure GPU mounting system to physically hold the GPU to the bracket. This typically involves screws or a latch mechanism.
- 라이저 케이블을 연결하세요: Connect the integrated PCIe 5.0 riser cable from the vertical bracket to the corresponding PCIe x16 slot on your motherboard. Ensure a firm connection.
- Connect D-RGB Cable: Connect the D-RGB cable from the bracket to an available 3-pin D-RGB header on your motherboard or a compatible D-RGB controller.

Figure 3.1: The vertical GPU bracket secured within a PC chassis, ready for graphics card installation.

Figure 3.2: Illustration of the adjustable tilt feature, allowing the GPU to be angled for optimal display or airflow.

Figure 3.3: A graphics card securely installed on the vertical GPU bracket, showcasing its vertical orientation.
4. Operating Instructions (D-RGB Lighting)
The Phanteks Premium Gen5 Vertical GPU Bracket features integrated D-RGB lighting. To control the lighting effects:
- If connected to a motherboard D-RGB header, use your motherboard's lighting control software (e.g., ASUS Aura Sync, MSI Mystic Light, Gigabyte RGB Fusion, ASRock Polychrome Sync) to customize colors and effects.
- If connected to a Phanteks D-RGB controller (sold separately), use the controller's physical buttons or associated software for customization.

Figure 4.1: The vertical GPU bracket with its D-RGB lighting active, enhancing the visual appeal of the system.
5. 유지관리
Regular maintenance helps ensure the longevity and optimal performance of your vertical GPU bracket:
- 청소: Periodically clean the bracket and riser cable with a soft, dry cloth to remove dust. Avoid using liquid cleaners directly on the components.
- 케이블 검사: Occasionally check the PCIe riser cable and D-RGB cable connections to ensure they are secure and free from damage.
- 장착 보안: Verify that the GPU and bracket remain securely mounted within the chassis.
6. 문제 해결
If you encounter issues with your Phanteks Premium Gen5 Vertical GPU Bracket, refer to the following common solutions:
- GPU가 감지되지 않았습니다:
- Ensure the PCIe 5.0 riser cable is fully seated in both the GPU and the motherboard's PCIe x16 slot.
- Verify that your motherboard's BIOS/UEFI settings are configured correctly for PCIe Gen5 operation, or try setting the PCIe slot speed to Gen4 or Gen3 as a test.
- Test the GPU directly in the motherboard's PCIe slot to rule out a GPU issue.
- D-RGB 조명이 작동하지 않음:
- Check that the D-RGB cable is securely connected to a compatible 3-pin D-RGB header on your motherboard or controller.
- Ensure your motherboard's lighting software is installed and updated, and that the D-RGB header is enabled.
- Confirm that the D-RGB header is receiving power.
- 신체적 불안정성:
- Re-check all mounting screws for the bracket and the GPU to ensure they are tightened appropriately.
- Ensure the chassis itself is stable and on a flat surface.
7. 사양
| 모델명 | Premium Gen5 Vertical GPU Bracket |
| 부품 번호 | PH-PGPUKT5.0_DWT01 |
| 품목 모델 번호 | PH-PGPUKT5.0_xxx |
| 상표 | 판텍스 |
| 색상 | 하얀색 |
| 재료 | Powder coated steel, ABS plastic |
| 제품 치수 | 14.37 x 6.69 x 7.28 인치 |
| 품목 무게 | 2.93파운드 |
| PCIe 표준 | PCIe x16 Gen5.0 |
| 조명 | Integrated D-RGB |
| 호환 장치 | Desktop, Gaming Console (referring to PC cases) |
| 한국어: | 886523004059 |
8. 보증 및 지원
Phanteks products are designed and manufactured to the highest quality standards. For detailed warranty information, please refer to the official Phanteks web사이트에 접속하거나 제품에 포함된 보증 카드를 확인하세요.
For technical support, troubleshooting assistance, or to inquire about replacement parts, please visit the official Phanteks support page:
When contacting support, please have your product model number (PH-PGPUKT5.0_xxx) and proof of purchase ready.