
소개
The Vividia VS-2329 is a portable sewer pipe inspection camera system designed for detailed visual inspection of pipes, drains, ducts, and other hard-to-reach areas. This manual provides essential information for the safe and effective operation, maintenance, and troubleshooting of your device.
패키지 내용
아래 나열된 모든 품목이 패키지에 포함되어 있는지 확인하세요.
- VS-2329 Pipe Inspection Camera System
- 충전기
- 사용 설명서 (본 문서)
- Industrial Carrying Case

Image: The durable industrial carrying case for the VS-2329 system, designed for transport and protection.
제품 끝view
Familiarize yourself with the main components of the Vividia VS-2329 system.
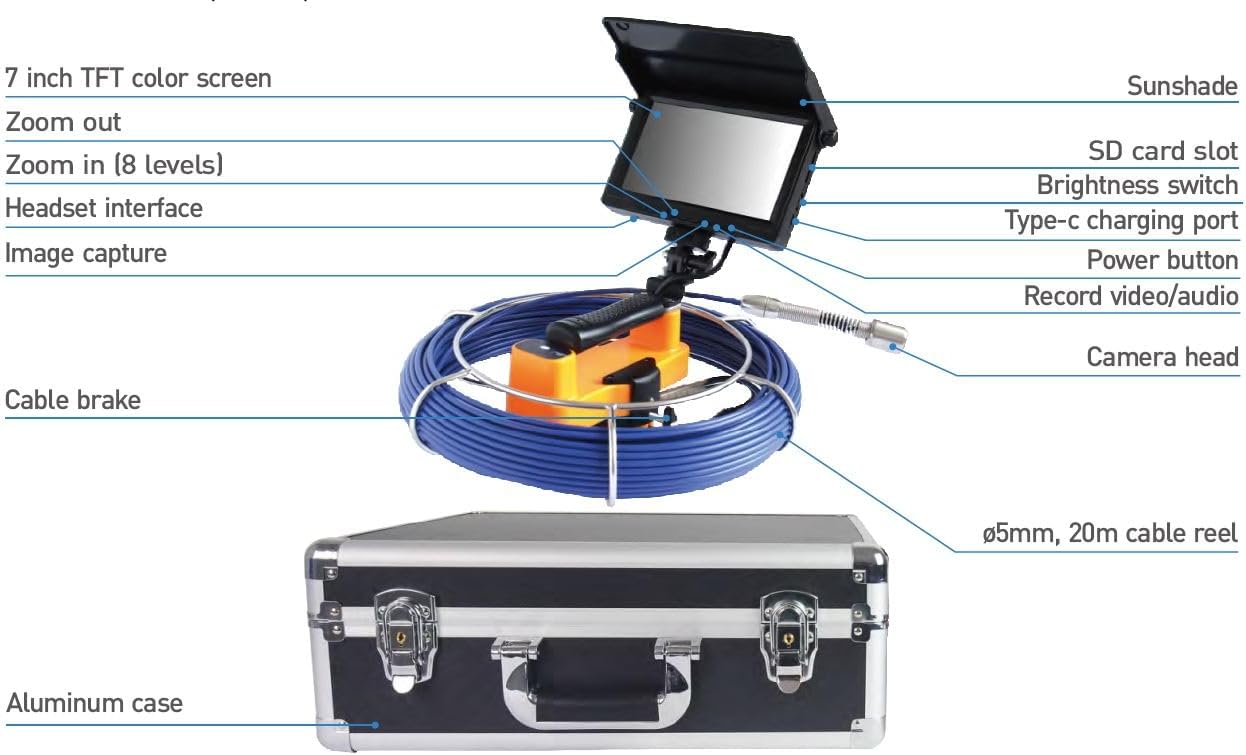
Image: Labeled diagram showing the 7-inch TFT color screen, sunshade, SD card slot, brightness switch, headset interface, Type-C charging port, image capture button, power button, record video/audio button, camera head, cable brake, 5mm 20m cable reel, and aluminum case.
주요 구성 요소:
- 7인치 TFT 컬러 모니터: Provides a clear display of the inspection area.
- 카메라 헤드: 23mm diameter, waterproof (IP68), with 12 adjustable LED lights.
- Push-Rod Cable: 30m (98 ft) long glass fiber cable for extended reach.
- 제어 장치: Integrated with the monitor, featuring controls for recording, zoom, and LED brightness.
- 충전식 배터리: 6000mAh for portable operation.
- Industrial Carrying Case: For protection and transport.
설정
1. 배터리 충전
Before first use, fully charge the integrated 6000mAh lithium battery. Connect the provided charger to the Type-C charging port on the monitor unit and to a power outlet. The charging indicator will show the charging status. A full charge provides approximately 4 hours of operation.
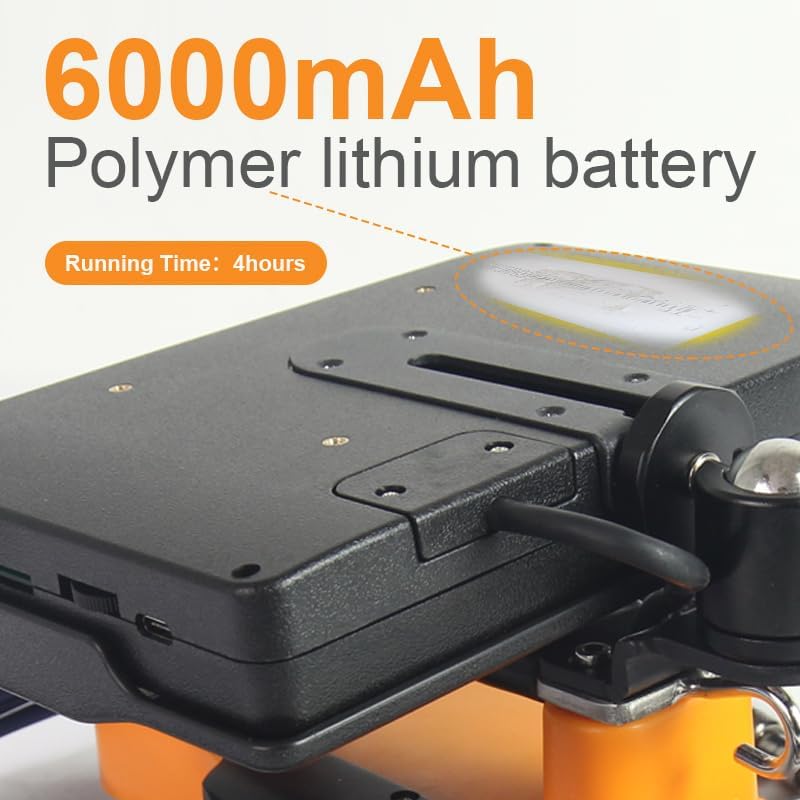
Image: Close-up of the 6000mAh polymer lithium battery, indicating a running time of 4 hours.
2. TF 카드 삽입
Locate the SD card slot on the monitor unit. Insert the included 8GB TF card (or another compatible MicroSD card) into the slot until it clicks into place. This card is necessary for recording photos and videos.
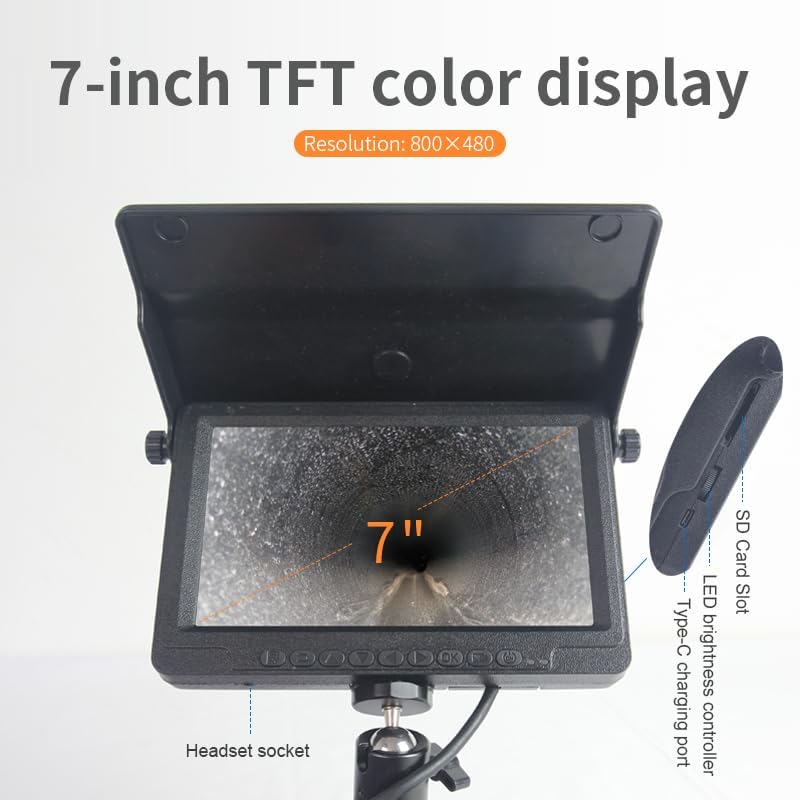
Image: The 7-inch TFT color display, highlighting the SD card slot, LED brightness controller, and Type-C charging port.
3. Connecting the Camera Head and Cable
Ensure the camera head is securely connected to the push-rod cable. The cable reel should be placed on a stable surface. The camera head is designed to be waterproof (IP68 rated) for use in wet environments.

Image: The 23mm camera head with its flexible spring, designed for navigating bends in pipes.

Image: The cable reel holding the blue 30-meter push-rod cable, with a handle for easy deployment.
작동 지침
1. 전원 켜기 / 끄기
Press and hold the Power button on the monitor unit to turn the system on or off. The 7-inch TFT color screen will display the live feed from the camera.

Image: The front panel of the 7-inch monitor, showing the array of control buttons below the screen.
2. LED 밝기 조절
Use the LED brightness controller (often a rotary knob or dedicated buttons) on the monitor unit to adjust the intensity of the 12 LED lights on the camera head. This helps illuminate dark inspection areas.
3. 디지털 줌
The monitor features an 8-level digital zoom function. Use the designated zoom buttons (Zoom In / Zoom Out) to magnify or reduce the view on the screen for closer inspection of details.
4. Recording Photos and Videos
- 사진을 캡처하려면: Press the "Image Capture" button. Photos are saved as JPEG fileTF 카드에 저장하세요.
- 비디오를 녹화하려면: Press the "Record Video/Audio" button to start recording. Press it again to stop. Videos are saved as AVI fileTF 카드에 저장하세요.
5. 카메라 설치
Carefully feed the camera head and push-rod cable into the pipe or inspection area. Use the cable brake to control the cable's deployment and retraction. Monitor the screen for the live feed. The camera head's flexible spring helps it navigate bends.

Image: Close-up of the deep waterproof lens of the camera head, showing its 80-degree view잉 각도.
유지
청소
- After each use, especially in dirty environments, clean the camera head and cable with a damp 옷감. 가혹한 화학 물질을 피하십시오.
- 선명한 이미지를 얻으려면 카메라 렌즈가 깨끗한지 확인하십시오.
- Wipe down the monitor and control unit with a soft, dry cloth.
저장
- Store the system in its industrial carrying case to protect it from dust, moisture, and physical damage.
- 보관하기 전에 케이블이 릴에 깔끔하게 감겨 있는지 확인하십시오.
- 직사광선을 피해 시원하고 건조한 곳에 보관하세요.
배터리 관리
- 배터리 수명을 연장하려면 배터리를 자주 완전히 방전하지 마세요.
- If storing for extended periods, charge the battery to approximately 50-70% and recharge every few months.
문제 해결
| 문제 | 가능한 원인 | 해결책 |
|---|---|---|
| 화면에 이미지가 없습니다. |
|
|
| 화질이 나쁘다 |
|
|
| 사진/동영상을 녹화할 수 없습니다. |
|
|
| 배터리 수명이 짧음 |
|
|
명세서
| 특징 | 세부 사항 |
|---|---|
| 모델명 | VS-2329 |
| 상표 | 비비디아 |
| 카메라 헤드 직경 | 23mm / 0.9인치 |
| 방수 등급 | IP68 |
| LED 조명 | 12개의 조절 가능한 LED |
| 비디오 캡처 해상도 | 720x576 |
| 효과적인 스틸 해상도 | 0.41 MP |
| Push-Rod Cable Length | 30m / 98피트 |
| 화면 크기 | 7 Inches TFT Color |
| 화면 해상도 | 800x480 |
| 디지털 줌 | 8단계 |
| 연결 기술 | MicroSD Card, USB-C |
| File Format (Video/Photo) | AVI / JPEG |
| 배터리 용량 | 6000mAh |
| 배터리 런타임 | 최대 4시간 |
| 제조업체 | 비비디아 테크놀로지스 |
보증 정보
The Vividia VS-2329 Portable Sewer Pipe Inspection Camera comes with a 1년 제조사 보증. This warranty covers defects in materials and workmanship under normal use. Please retain your proof of purchase for warranty claims. For specific terms and conditions, please refer to the warranty card included with your product or contact customer support.
고객 지원
If you encounter any issues or have questions regarding your Vividia VS-2329 system that are not addressed in this manual, please contact Vividia customer support. You can typically find contact information on the manufacturer's web사이트 또는 제품 포장에 표시되어 있습니다.
When contacting support, please have your product model number (VS-2329) and purchase details ready.