
소개
This manual provides detailed instructions for the installation, operation, and maintenance of the ASUS B760M-AYW WiFi D4 II microATX motherboard. Please read this manual thoroughly before installing or using the product to ensure correct setup and optimal performance.
안전 정보
- 내부 부품을 만지기 전에 항상 전원 케이블을 벽면 콘센트에서 분리하십시오.
- Wear an anti-static wrist strap or frequently touch a grounded object to prevent electrostatic discharge (ESD) damage to components.
- 민감한 부분을 만지지 않으려면 구성품의 가장자리를 잡으세요.
- 과열을 방지하려면 PC 케이스 내부의 적절한 환기를 확보하세요.
설정
1. CPU 설치
The motherboard supports Intel LGA 1700 socket processors. Carefully align the CPU with the socket, ensuring the triangular mark on the CPU matches the mark on the socket. Lower the CPU gently into the socket, then close the load plate and secure the retention lever.
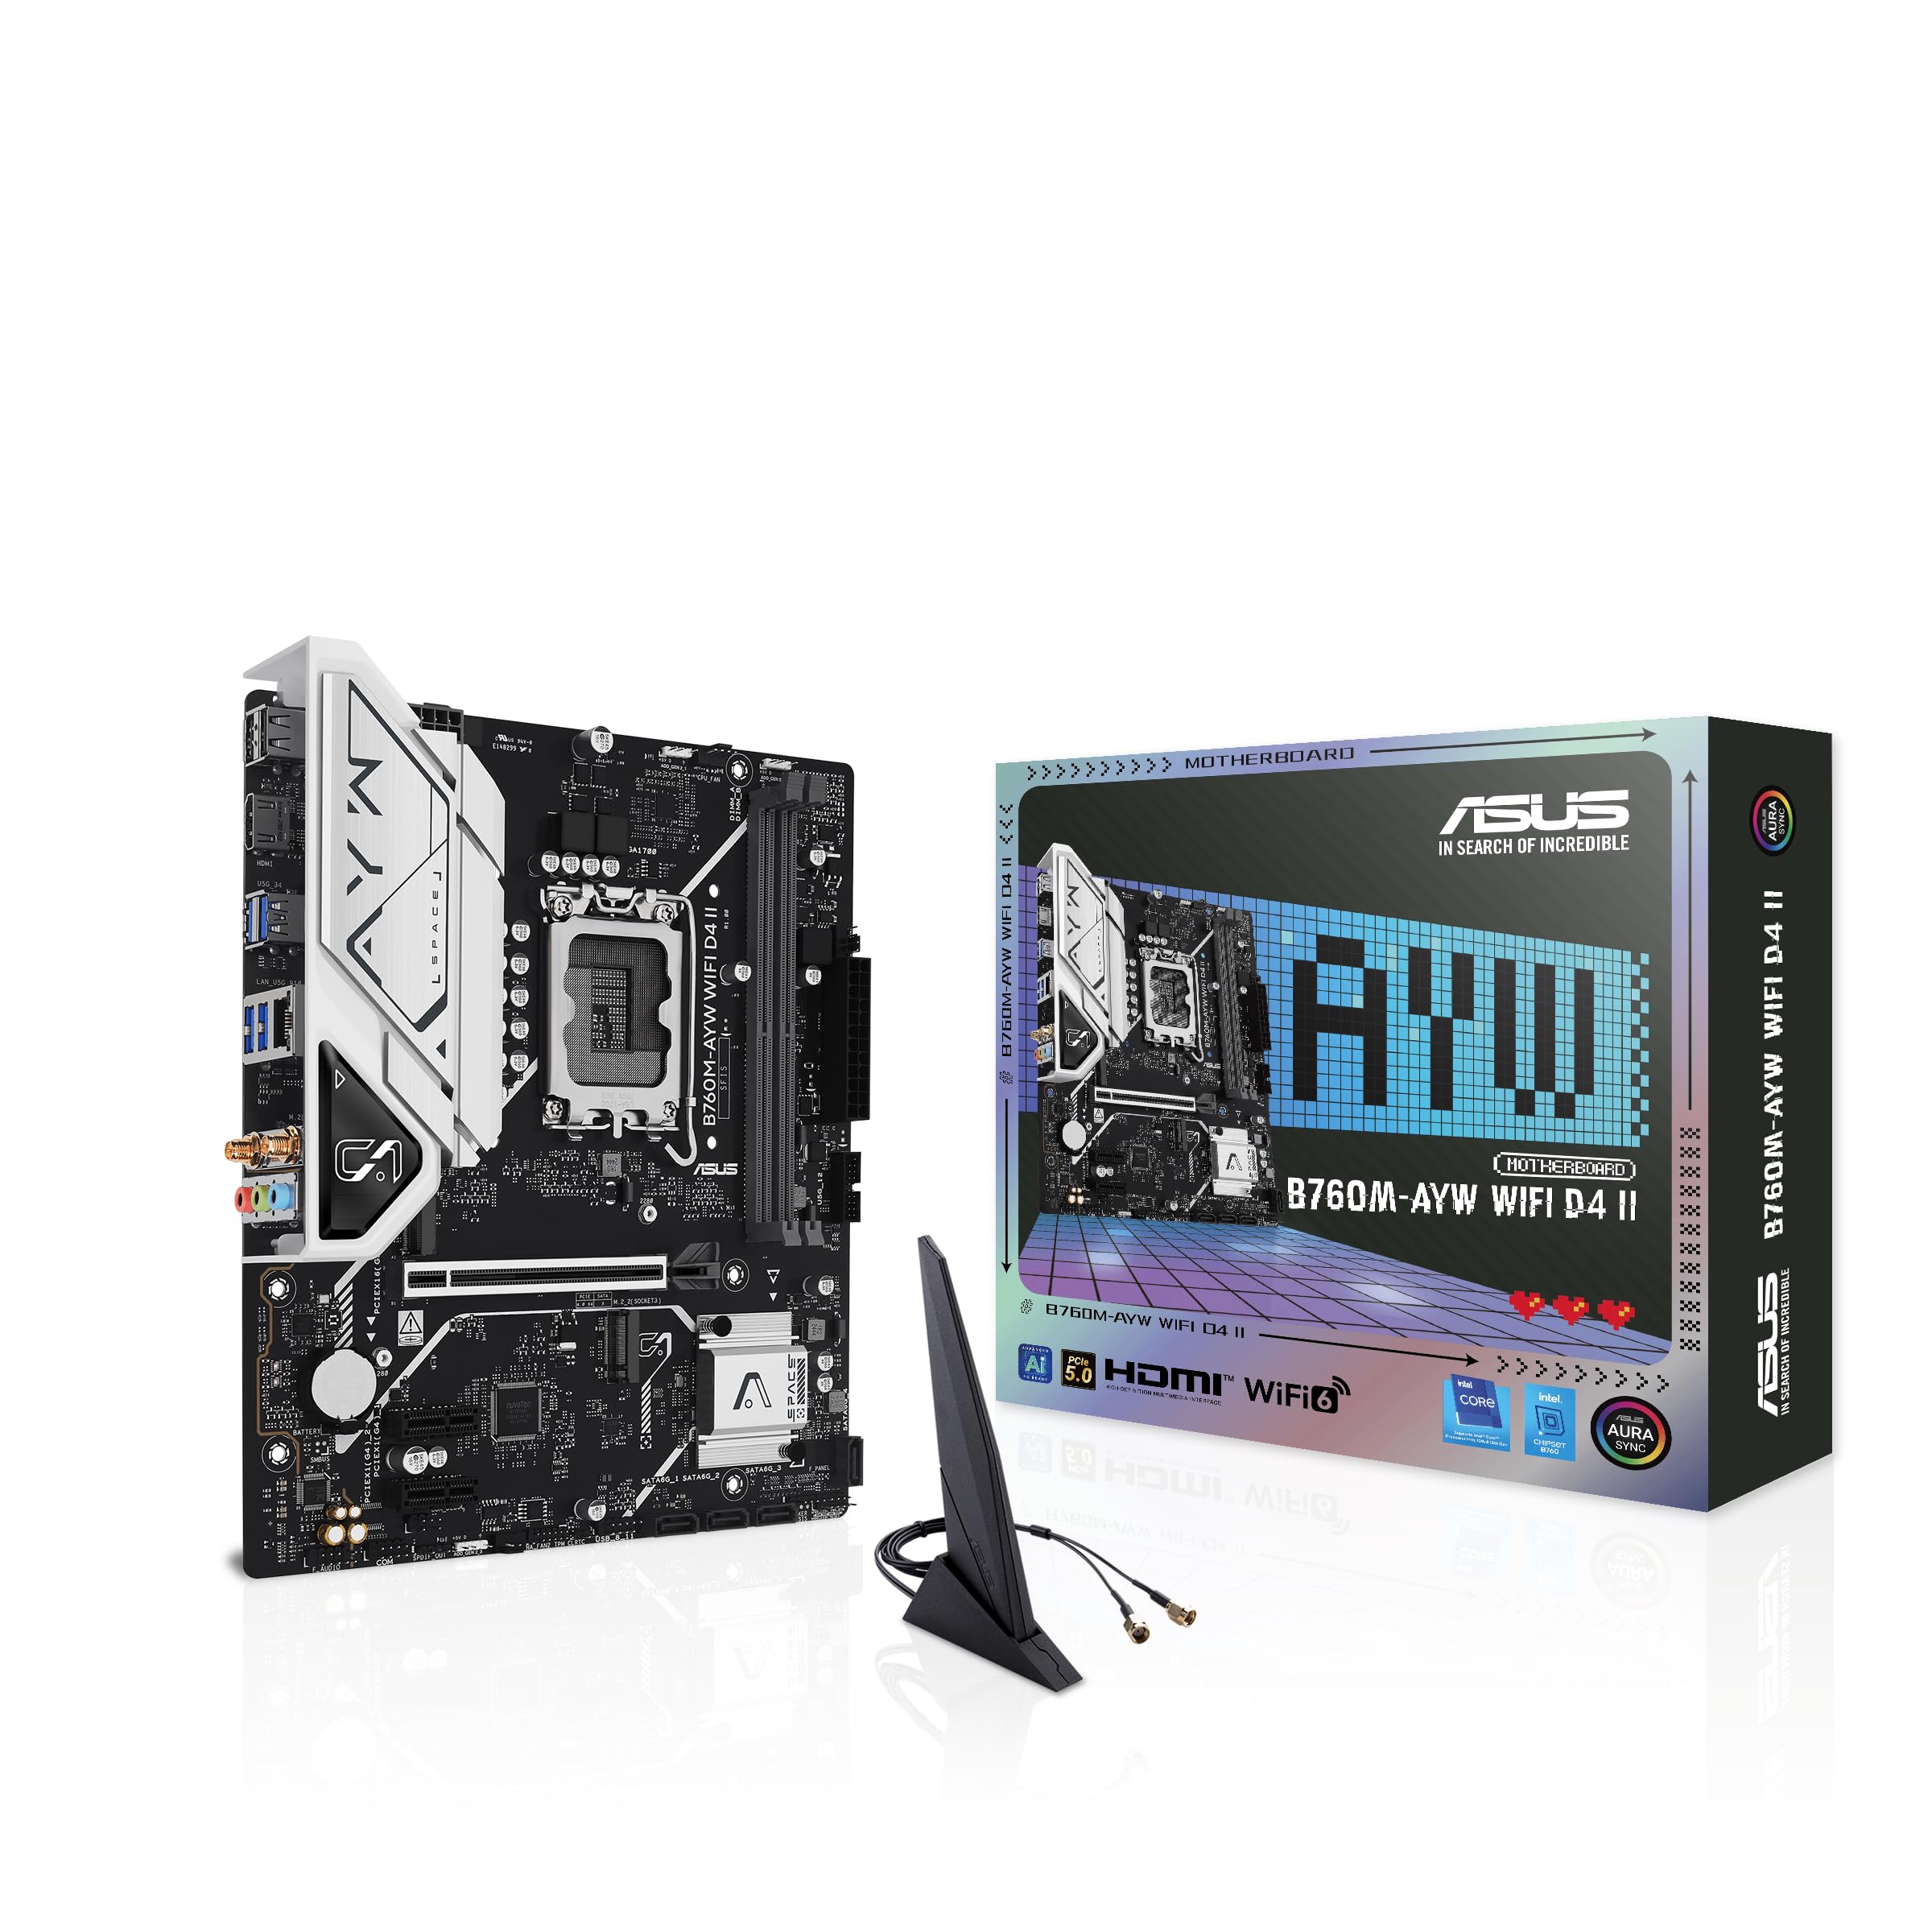
이미지: 위에서 아래로 view of the ASUS B760M-AYW WiFi D4 II motherboard, highlighting the LGA 1700 CPU socket.
2. 메모리(RAM) 설치
This motherboard features two DDR4 DIMM slots. For optimal performance, install memory modules in a dual-channel configuration. Open the clips on both ends of the DIMM slot, align the memory module with the slot key, and press down firmly until the clips snap into place.
3. 스토리지 설치(M.2 및 SATA)
The motherboard includes two M.2 slots for NVMe SSDs and four SATA 6 Gbps ports for traditional hard drives or SSDs.
- M.2 SSD: Insert the M.2 SSD into the slot at a 30-degree angle, then push it down and secure it with the provided M.2 screw package.
- SATA 드라이브: Connect SATA data cables from your storage drives to the SATA ports on the motherboard. Connect power cables from your power supply to the drives.

Image: The ASUS B760M-AYW WiFi D4 II motherboard shown with its retail box, Wi-Fi antenna, SATA cables, and M.2 screw packages.
4. 확장 카드 설치(PCIe)
The motherboard features one PCIe 5.0 x16 slot for graphics cards and additional PCIe 4.0 x1 slots for other expansion cards. Insert the card firmly into the desired slot until it clicks into place and secure it with a case screw.
5. 전원 연결
전원 공급 장치의 24핀 ATX 전원 커넥터와 8핀 CPU 전원 커넥터를 마더보드의 해당 포트에 연결합니다.
6. 전면 패널 연결
Connect your PC case's front panel cables (USB 5Gbps, audio, power switch, reset switch, power LED, HDD LED) to the corresponding headers on the motherboard. Refer to the motherboard layout for exact header locations.
7. 후면 I/O 연결
Connect your peripherals to the rear I/O ports. These include HDMI, USB 5Gbps Type-A, Realtek 2.5Gb Ethernet, and audio jacks.
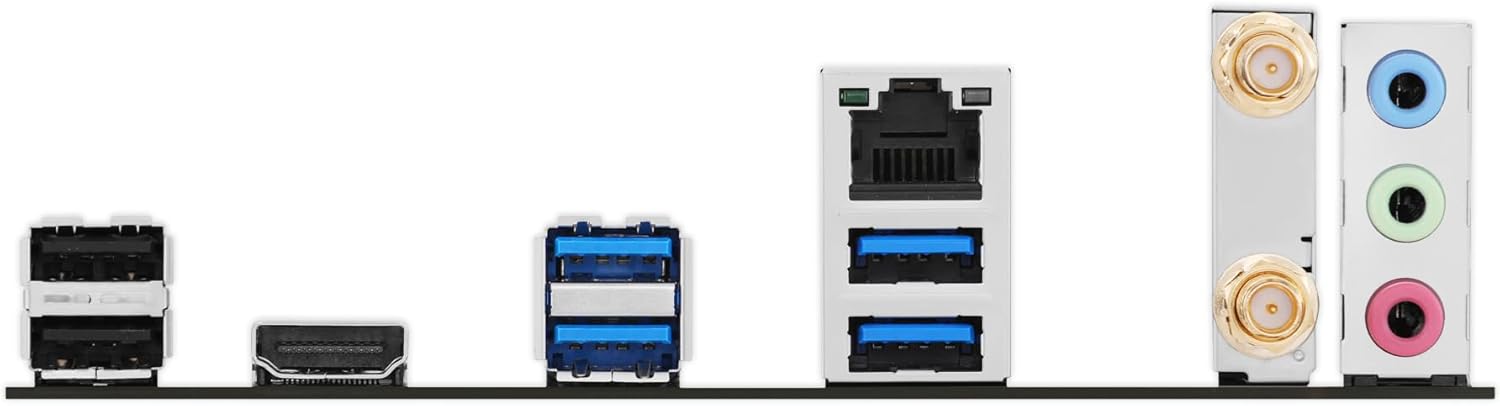
이미지: 자세한 view of the rear input/output panel of the ASUS B760M-AYW WiFi D4 II motherboard, showing USB ports, Ethernet, and audio jacks.
8. 와이파이 안테나 설치
동봉된 Wi-Fi 안테나를 후면 I/O 패널의 안테나 커넥터 두 개에 나사로 고정하십시오. 최적의 신호 수신을 위해 안테나 위치를 조정하십시오.
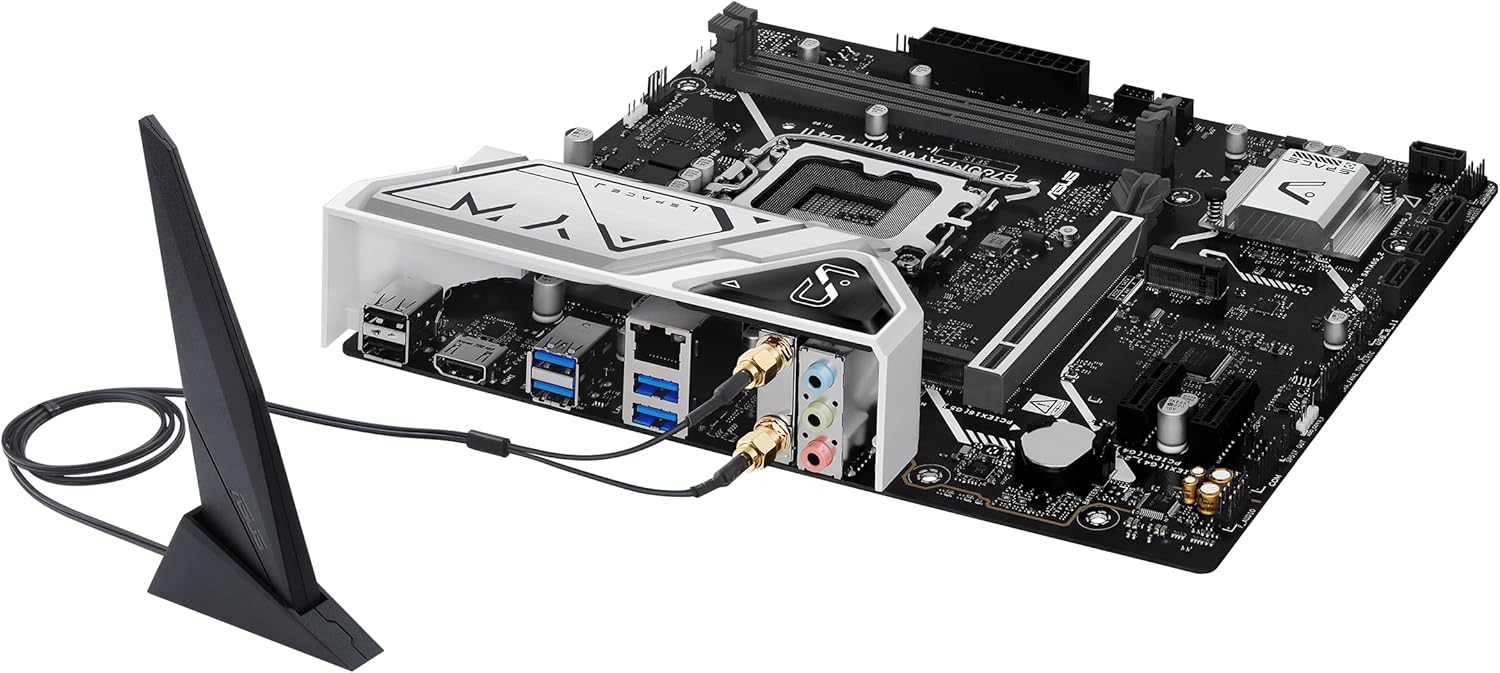
Image: The ASUS B760M-AYW WiFi D4 II motherboard with its external Wi-Fi antenna connected to the rear I/O ports.
운영
1. BIOS/UEFI 구성
BIOS/UEFI 설정 유틸리티에 액세스하려면 다음을 누르십시오. 삭제 key during the Power-On Self-Test (POST). Here you can configure boot order, enable XMP for memory, adjust fan speeds, and manage other system settings.
2. 드라이버 설치
After installing your operating system, install the necessary drivers for the motherboard's components. These include chipset drivers, LAN drivers, Wi-Fi drivers, and audio drivers. Drivers can be found on the ASUS support web귀하의 특정 마더보드 모델에 대한 사이트입니다.
3. 소프트웨어 유틸리티
ASUS provides several utilities to enhance your system experience:
- 오라 동기화: For controlling RGB lighting on compatible components.
- 팬 엑스퍼트 2+: 고급 팬 제어 및 시스템 냉각 최적화를 위해.
- 무기고 상자: A centralized software suite for system monitoring, driver updates, and utility management.
유지
1. BIOS 업데이트
정기적으로 ASUS 지원을 확인하세요 website for BIOS updates. BIOS updates can improve system stability, add support for new hardware, or fix bugs. Use the ASUS EZ Flash utility within the BIOS to perform updates, following the instructions carefully.
2. 드라이버 업데이트
Keep your drivers updated to ensure optimal performance and compatibility. Regularly check the ASUS support web메인보드용 최신 드라이버를 찾을 수 있는 사이트입니다.
3. 청소
To maintain optimal performance and longevity, regularly clean dust from your PC case and motherboard components. Use compressed air to remove dust from heatsinks, fans, and slots. Ensure the system is powered off and unplugged before cleaning.
문제 해결
1. Q-LED Core Indicators
The motherboard features Q-LED Core indicators that light up to indicate the status of key components during POST. These LEDs can help diagnose issues:
- CPU LED: Indicates CPU initialization status.
- DRAM LED: Indicates memory detection status.
- VGA LED: Indicates graphics card detection status.
- 부트 LED: Indicates boot device detection status.
If an LED remains lit, it suggests an issue with the corresponding component.
2. 일반적인 문제
- 전원 없음: 모든 전원 연결(24핀 ATX, 8핀 CPU, GPU 전원)을 확인하세요. 전원 공급 장치가 켜져 있는지 확인하세요.
- 디스플레이 없음: Verify the graphics card is properly seated and connected to power. Ensure the monitor cable is connected to the graphics card, not the motherboard (unless using integrated graphics).
- 시스템 불안정성: Check memory seating, run memory diagnostic tools, ensure CPU cooler is properly installed, and verify BIOS settings.
- 주변 장치가 감지되지 않음: Ensure the device is properly connected and its drivers are installed. Try a different port if available.
명세서
| 특징 | 사양 |
|---|---|
| 상표 | 아수스 |
| 모델명 | B760M-AYW WIFI D4 II |
| CPU 소켓 | LGA 1700 |
| 호환 프로세서 | Intel Core 14th, 13th, 12th Gen, Pentium Gold, Celeron Processors |
| 칩셋 유형 | 인텔 B760 |
| RAM 메모리 기술 | DDR4 |
| 사용 가능한 메모리 슬롯 | 2 |
| 최대 메모리 저장 용량 | 96GB (XNUMX기가바이트) |
| 그래픽 카드 인터페이스 | PCI 익스프레스 5.0 x16 |
| Total M.2 Slots | 2 |
| 총 SATA 포트 수 | 4 |
| 이더넷 | 리얼텍 2.5Gb 이더넷 |
| 와이파이 | 와이파이 6 |
| HDMI 포트 | 1 |
| 전면 USB | USB 5Gbps support |
| 후면 USB | USB 5Gbps 유형 A |
| 폼 팩터 | 마이크로ATX |
| 품목 치수(L x W x H) | 9.6인치 길이 x 8.3인치 너비 x 1.4인치 높이 |
보증 정보
The ASUS B760M-AYW WiFi D4 II motherboard comes with a 3-year limited warranty. For detailed terms and conditions, please refer to the warranty card included with your product or visit the official ASUS support web대지.
지원하다
기술 지원, 드라이버 다운로드, BIOS 업데이트 및 기타 제품 정보는 ASUS 공식 지원 페이지를 방문하십시오. web대지:
You can also find FAQs and troubleshooting guides on the support portal.