
1. 제품 오버view
The TOMLOV TM3K-3D Max is a versatile 3D digital microscope designed for detailed inspection and repair tasks. It features a 10.1-inch IPS screen with 3K UHD resolution, magnetic dual lenses for easy switching between wide-angle (W) and long-distance (L) viewing, and a flexible arm stand for stable and adjustable positioning. This microscope supports 3D side-viewing, allowing for comprehensive inspection of electronic components, coins, and other intricate objects. Connectivity options include HDMI for large-screen viewing and USB for computer analysis, making it suitable for professionals and hobbyists alike.
동영상 1.1 : 오버view of the TOMLOV 3D HDMI Digital Microscope with Magnetic Dual Lens, showcasin그 특징과 응용 분야.
2. 상자 안에 무엇이 들어있나요?
패키지에 모든 품목이 들어 있는지 확인하세요.
- 1x TM3K-3D Max Digital Microscope
- 1x Flex Arm Stand
- 1x 4-inch Stand
- 1x Lens W (Wide-Angle)
- 1x Lens L (Long-Distance)
- 납땜 매트 1개
- 1x 전원 어댑터
- 1x HDMI 케이블
- 1x USB 케이블
3. 설정 지침
Follow these steps to assemble and set up your TOMLOV TM3K-3D Max microscope:
- 플렉스 암 스탠드를 조립하세요:
C-cl을 부착하세요amp to your desktop. Secure the monitor arm to the base, then attach the bracket to the arm. Ensure all connections are tightened for stability. - 현미경 장치를 부착하세요:
Slide the microscope monitor unit onto the arm bracket and secure it using the provided knob. - 렌즈를 설치하십시오:
Gently grip the desired lens (L or W) and align it with the interface at the bottom of the microscope unit. The magnetic attachment will secure it in place. - 전원 및 케이블 연결:
Connect the power adapter to the microscope and a power outlet. If using external displays, connect the HDMI or USB cable to the respective ports on the microscope and your monitor/computer. Organize cables using the integrated cable management on the arm. - 현미경 위치 조정:
Adjust the flexible arm to position the microscope over your working area. Ensure the object is within the focal range of the selected lens.
동영상 3.1 : Demonstrates how to install the flexible arm stand for the LCD microscope, including attaching the C-clamp and securing the arm.

이미지 3.1: The magnetic dual lens system allows for quick and easy switching between the L (long-distance) and W (wide-angle) lenses.

이미지 3.2: The microscope supports triple screen display via its built-in IPS screen, HDMI output, and USB connection to a computer.

이미지 3.3: The 360° articulating arm stand provides stability and full adjustability for optimal view각도를 나타냅니다.
4. 사용 설명서
4.1 전원 켜기 및 기본 제어
Press the 'POWER' button to turn on the microscope. Use the 'OK' button to confirm selections and the arrow buttons to navigate menus or adjust settings on the 10.1-inch IPS screen.

이미지 4.1: The 10.1-inch IPS screen provides a clear 3K UHD display for detailed observation.
4.2 Using 3D Side-View잉
The TM3K-3D Max offers a unique 3D side-viewing capability. To activate this, rotate the lens adjustment ring from 2D to 3D. This allows you to inspect objects from multiple angles, providing a 360° rotating view for tasks like PCB repair or jewelry inspection.
동영상 4.2 : Demonstrates how to use the 360-degree 3D view feature of the soldering microscope, showing the rotation of the lens for angled inspection.

이미지 4.2: The microscope allows users to switch between 2D and 3D viewing modes for versatile inspection.
4.3 Switching Lenses (W and L)
The microscope comes with two magnetic lenses: the W (Wide-Angle) lens and the L (Long-Distance) lens. To switch lenses, gently pull the currently attached lens downward to detach it, then align and attach the desired lens. No tools are required.
- W Wide-Angle Lens: Ideal for full-frame views of larger objects like coins, jewelry, or specimens, capturing fine details across a broader area.
- L Long-Distance Lens: Provides an expanded working space, making it perfect for tasks requiring tools, such as PCB soldering or micro soldering. It offers clear, high-magnification imaging for precise work.

이미지 4.3: The W Wide-Angle Lens is suitable for viewing larger objects like coins and jewelry.
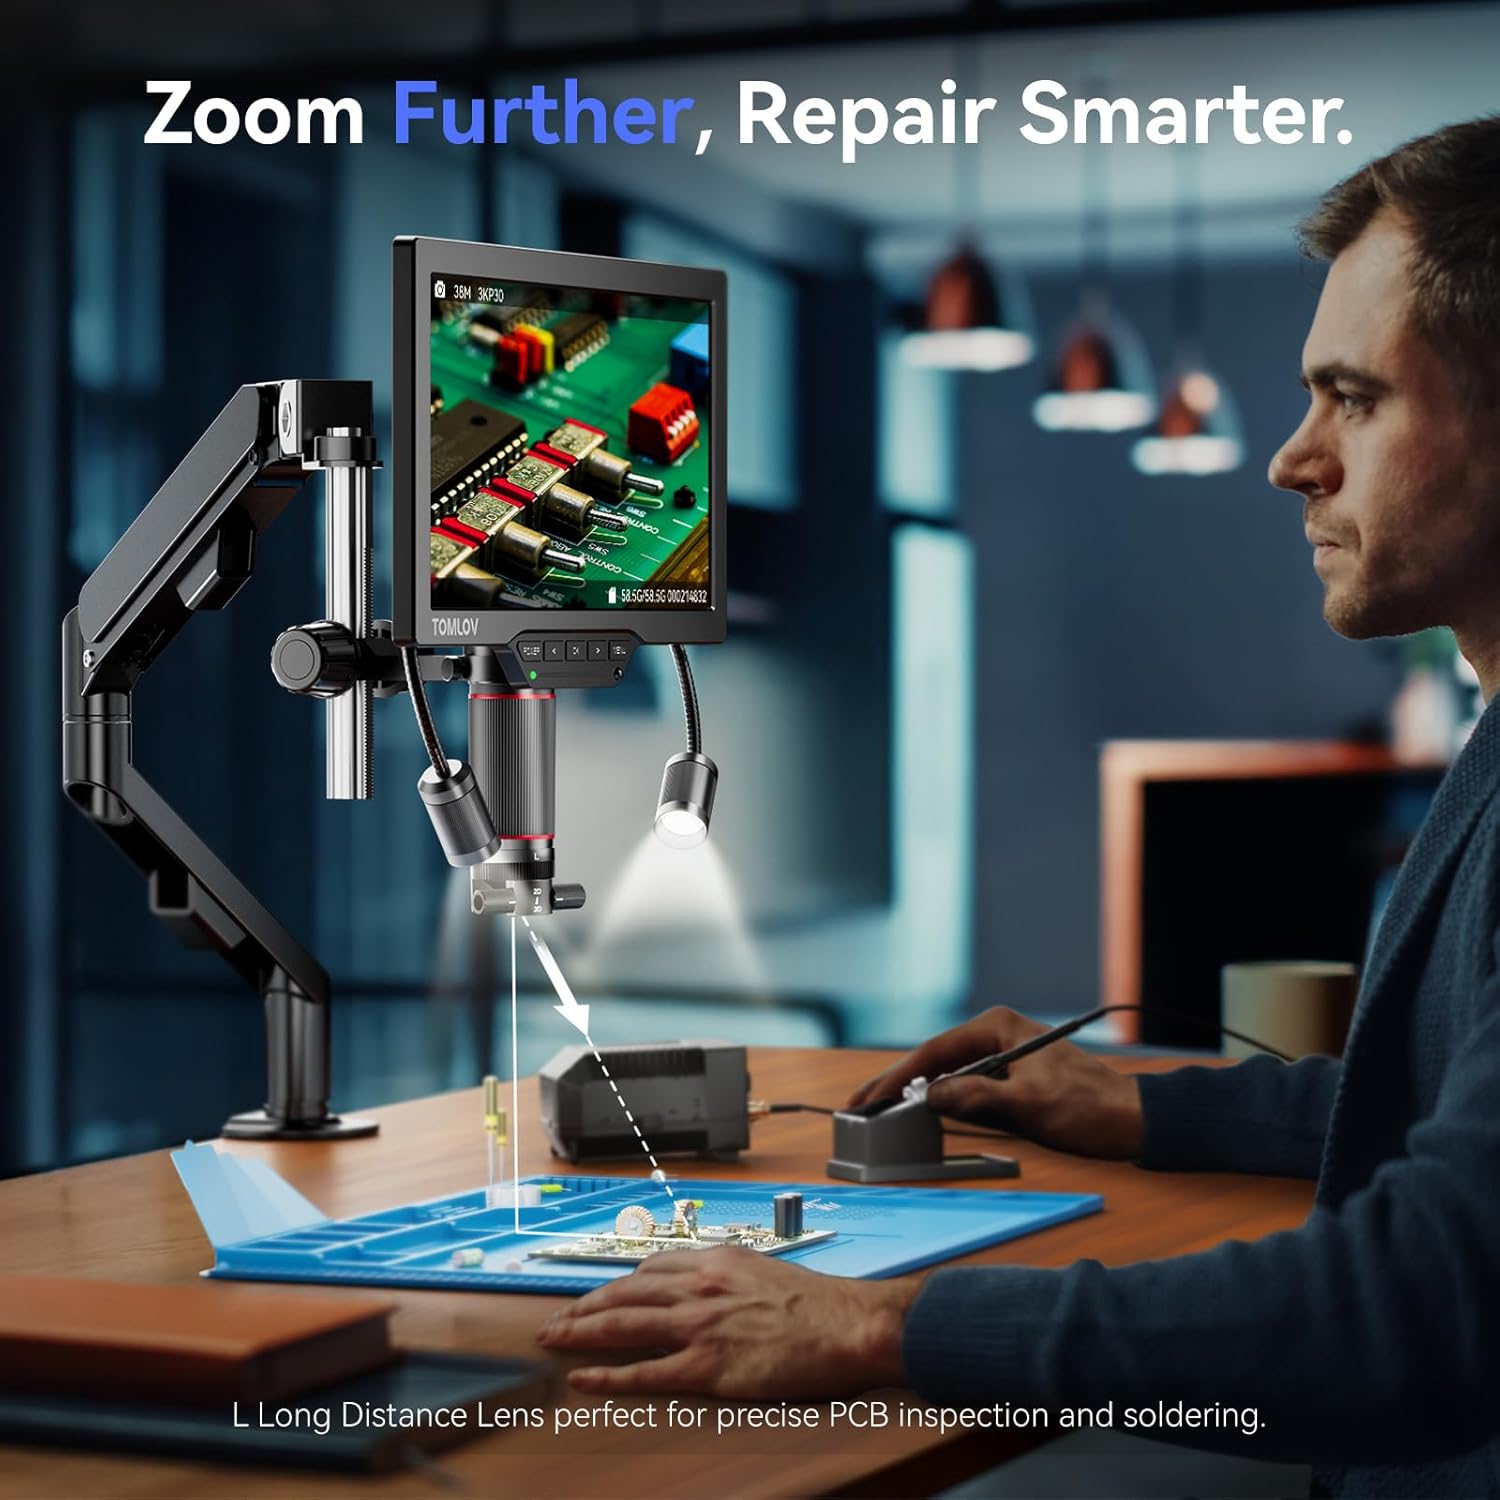
이미지 4.4: The L Long-Distance Lens provides ample working space for soldering and intricate repairs.
동영상 4.3 : A brief demonstration of how to change the objective lens on the 3D coin microscope.
4.4 조명 조절
The microscope features an LED gooseneck spotlight for targeted illumination. Adjust the position and angle of the lights to eliminate shadows and achieve optimal brightness for your inspection area. The brightness can be controlled via the microscope's interface.
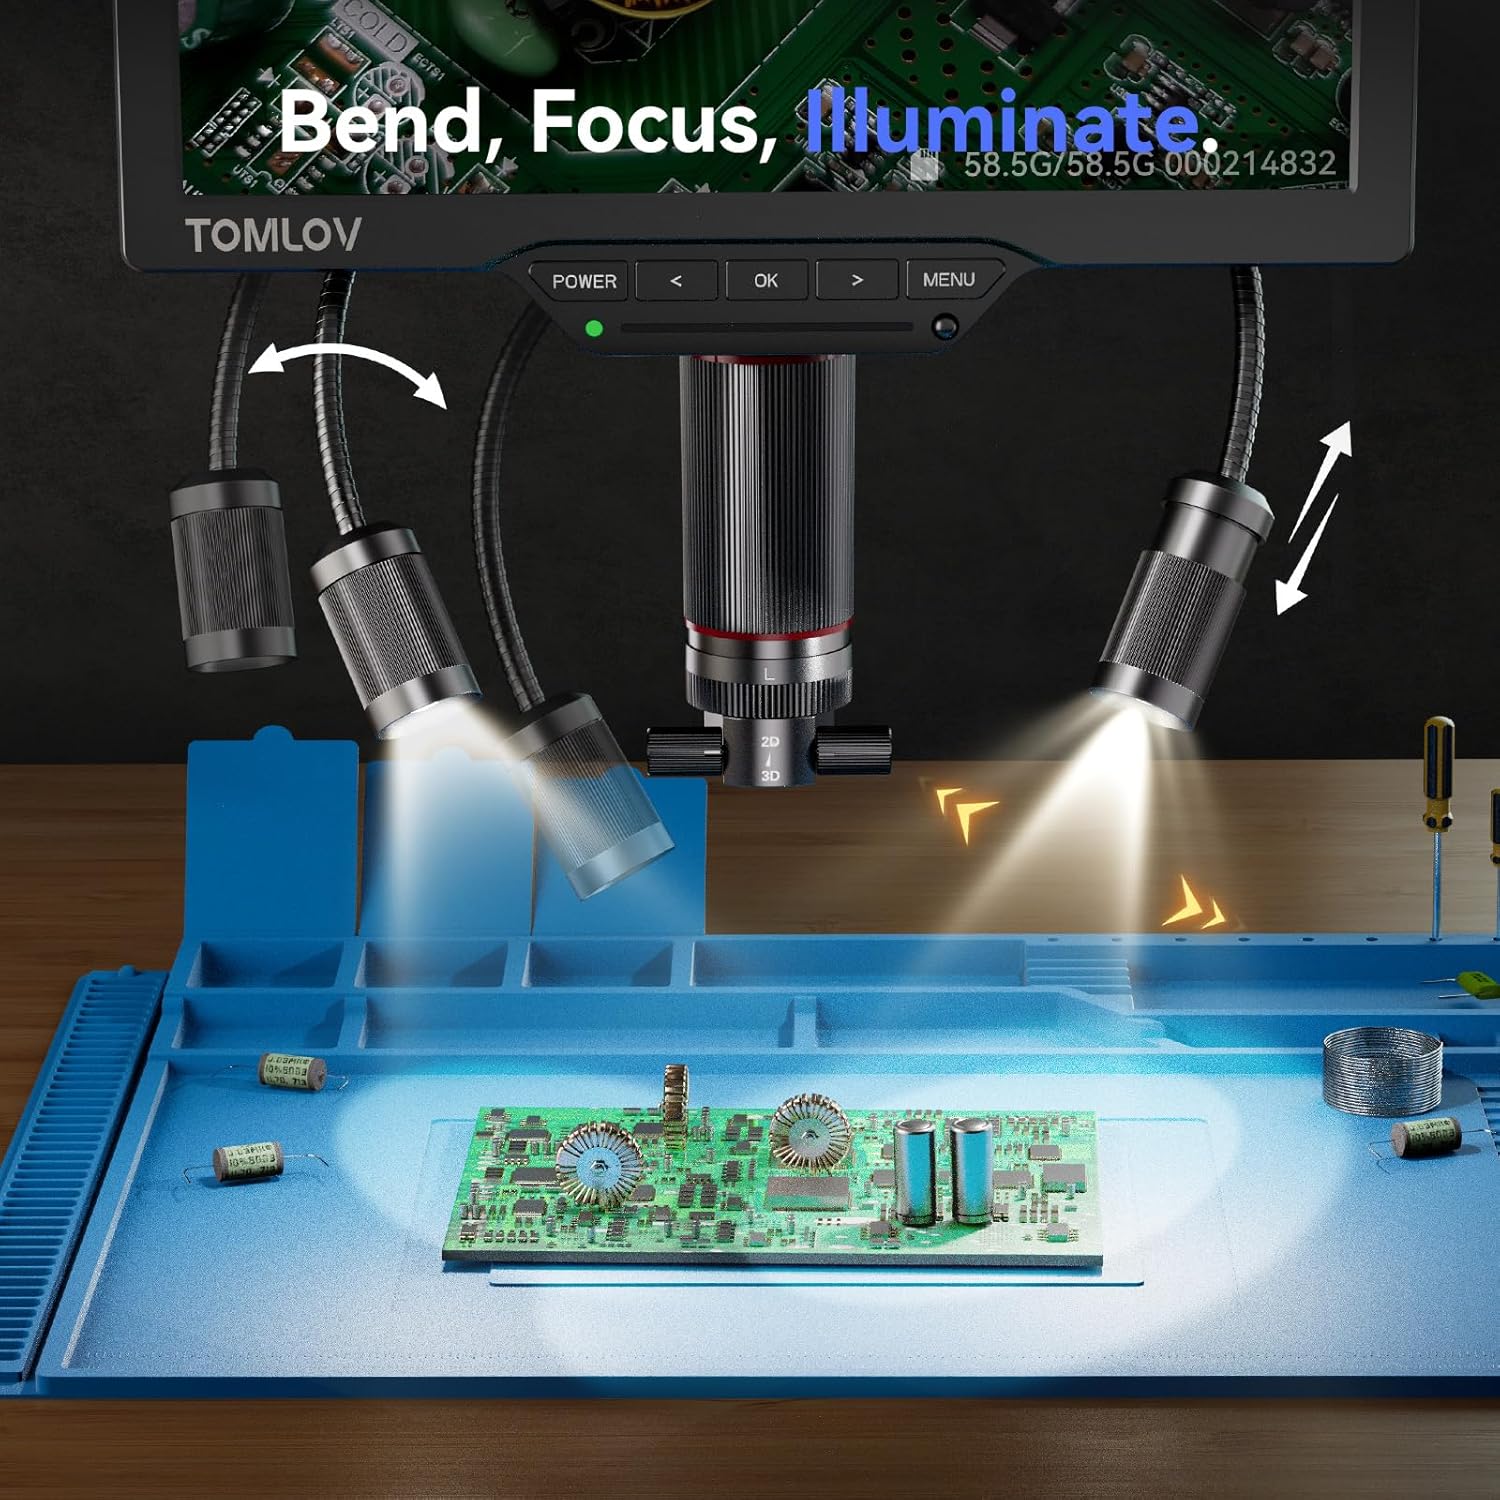
이미지 4.5: The LED gooseneck spotlights provide customizable brightness and beam direction to reduce glare and shadows.
동영상 4.4 : A short video demonstrating how to use the DualWing LED lights of the 3D digital microscope to adjust illumination.
4.5 Recording and Capturing Images
The microscope supports recording videos and capturing still images directly to a microSD card (64GB included). Use the menu options to access these functions. Ensure the microSD card is properly inserted and formatted if you encounter issues saving files.
5. 유지관리
- 청소: Use a soft, dry cloth to clean the microscope body and screen. For lenses, use a specialized lens cleaning cloth and solution to avoid scratches.
- 저장: 현미경은 직사광선과 극한 온도 변화를 피해 깨끗하고 건조한 곳에 보관하십시오.
- 렌즈 관리: Handle lenses carefully. Avoid touching the optical surfaces with bare hands.
6. 문제 해결
- 화면에 이미지가 없습니다:
- Ensure the microscope is powered on and all cables are securely connected. Check the focus and zoom settings. If using an external display, verify the HDMI/USB connection and input source on the display.
- 이미지가 흐릿하거나 초점이 맞지 않게 보입니다.
- Adjust the focus knob on the microscope. Ensure the object is within the optimal working distance for the currently attached lens (L or W). Clean the lens if smudges are visible.
- Cannot save images/videos to microSD card:
- Verify that the microSD card is correctly inserted. Try reformatting the card through the microscope's menu (this will erase all data). If the issue persists, try a different microSD card.
- 조명이 작동하지 않습니다:
- Check the power connection. Ensure the light control knob is rotated to increase brightness. Verify that the gooseneck lights are securely connected to the microscope unit.
7. 사양
| 특징 | 세부 사항 |
|---|---|
| 모델명 | TM3K-3D Max |
| 화면 크기 | 10.1인치 IPS |
| 해결 | 3K UHD |
| 배율 최대 | 2000배 |
| 렌즈 | Magnetic Dual Lenses (W Wide-Angle, L Long-Distance) |
| 연결성 | HDMI, USB |
| 광원 유형 | LED Gooseneck Spotlight |
| 제품 치수 | 11 x 3 x 12 인치 |
| 품목 무게 | 3파운드 |
| 재료 | 금속 |
| 권tage | 5 볼트 |
8. 보증 및 지원
For warranty information, technical support, or service inquiries, please contact TOMLOV customer service. Refer to the product packaging or the official TOMLOV web최신 연락처 정보는 사이트에서 확인하세요.