
1. 서론
This manual provides detailed instructions for the MAGEX 10.1 Inch Touch Screen Monitor, Model GH101TP-C. This monitor is designed for versatility, offering a high-resolution IPS display with 10-point touch functionality, integrated dual speakers, and a cooling fan. It is specifically optimized for use with Raspberry Pi models and various other devices and operating systems.
The monitor features a robust case that allows for direct installation of a Raspberry Pi, ensuring a compact and tidy setup. Its full HD resolution (1920x1200) and wide viewing angles provide a clear and vibrant visual experience, while eye-care technologies reduce strain during extended use.

Image: The MAGEX 10.1 inch touch screen monitor used in diverse applications such as a Raspberry Pi display, secondary camera screen, car dashboard, smart home interface, retail kiosk, and 3D printer control panel.
2. 패키지 내용
아래 나열된 모든 품목이 패키지에 포함되어 있는지 확인해 주세요. 품목이 누락되었거나 손상된 경우 고객 지원팀에 문의해 주세요.
- MAGEX 10.1 Inch Touch Screen Monitor
- 12V/3A DC Power Charger
- USB-A to USB-C 케이블
- 표준 HDMI 케이블
- Type-C to Type-C 케이블
- 3핀 터치 케이블
- HDMI-A Board (for Pi 1B/2B/3B)
- HDMI-D Board (for Pi 4B/5)
- Micro USB Board (for Pi 1B/2B/3B)
- Type-C Board (for Pi 4B/5)
- Pi3 Side Panel (for Pi 1B/2B/3B/5)
- Pi4 Side Panel (for Pi 4B)
- M2.5 Screw * 4
- 필립스 스크류 드라이버

Image: A visual representation of all items included in the product package, detailing the monitor, power supply, various connection cables (HDMI, USB-C), Raspberry Pi adapter boards, side panels, and a screwdriver for assembly.
Video: An unboxing demonstration of the MAGEX 10.1 inch touch screen monitor, showing all components included in the package.
3. 설정 지침
3.1 라즈베리 파이에 연결하기
The monitor is designed for direct integration with Raspberry Pi boards. Follow these steps for a secure and tidy setup:
- Connect the Pi board to the monitor's PCB: Carefully align and connect your Raspberry Pi (e.g., Pi 5) to the designated pins on the monitor's Printed Circuit Board (PCB).
- Mount Pi on the Monitor: Secure the Raspberry Pi board within the monitor's casing using the provided screws.
- Secure the Pi to the monitor's PCB: Ensure the Pi is firmly attached to prevent movement.
- Plug in the USB touch cable: Connect the appropriate USB touch cable from the Raspberry Pi to the monitor's USB touch port.
- Attach the back cover: Once all connections are made, attach the detachable back cover to enclose the Raspberry Pi and conceal all cables.
- Start using the touchscreen: Power on your Raspberry Pi and the monitor. The touchscreen should be ready for use.
Note for Raspberry Pi 5 Users: If you experience insufficient power issues with Raspberry Pi 5, it is recommended to edit the `config.txt` file located in `/boot/firmware/` by adding the following lines:
hdmi_force_hotplug=1
config_hdmi_boost=7
Additionally, to force the correct resolution, you may add the following line to `cmdline.txt` in `/boot/firmware/`:
video=HDMI-A-1:1280x800@60D
Image: A visual guide illustrating the process of integrating a Raspberry Pi 5 into the monitor's casing, connecting the necessary cables, and securing the back cover for a complete setup.
Video: A detailed guide on how to connect a Raspberry Pi 5 to the MAGEX 10.1-inch touchscreen display, demonstrating the physical installation and cable connections.
3.2 General Device Connection
For other devices, connect the monitor using the appropriate cables:
- 비디오 입력 : Use the HDMI port for video signal.
- 터치 기능: Connect the USB touch port to your device to enable touch input. No drivers are typically required for Windows, Raspbian, and other compatible OS.
- 힘: Connect the 12V/3A DC power charger to the monitor.
메모: Touch functionality is not supported when connected to iOS phones, iPads, or Mac devices.
4. 사용 설명서
4.1 터치스크린 조작
The monitor features a 10-point capacitive touchscreen with a fast response time (3-5ms). It supports standard multi-touch gestures for intuitive interaction:
- Click/Tap: 한 번의 터치로 선택하세요.
- 확대/축소: Pinch gestures with two fingers.
- Scroll/Move: Drag with one or more fingers.
- 더블 클릭: Two quick taps for specific actions.
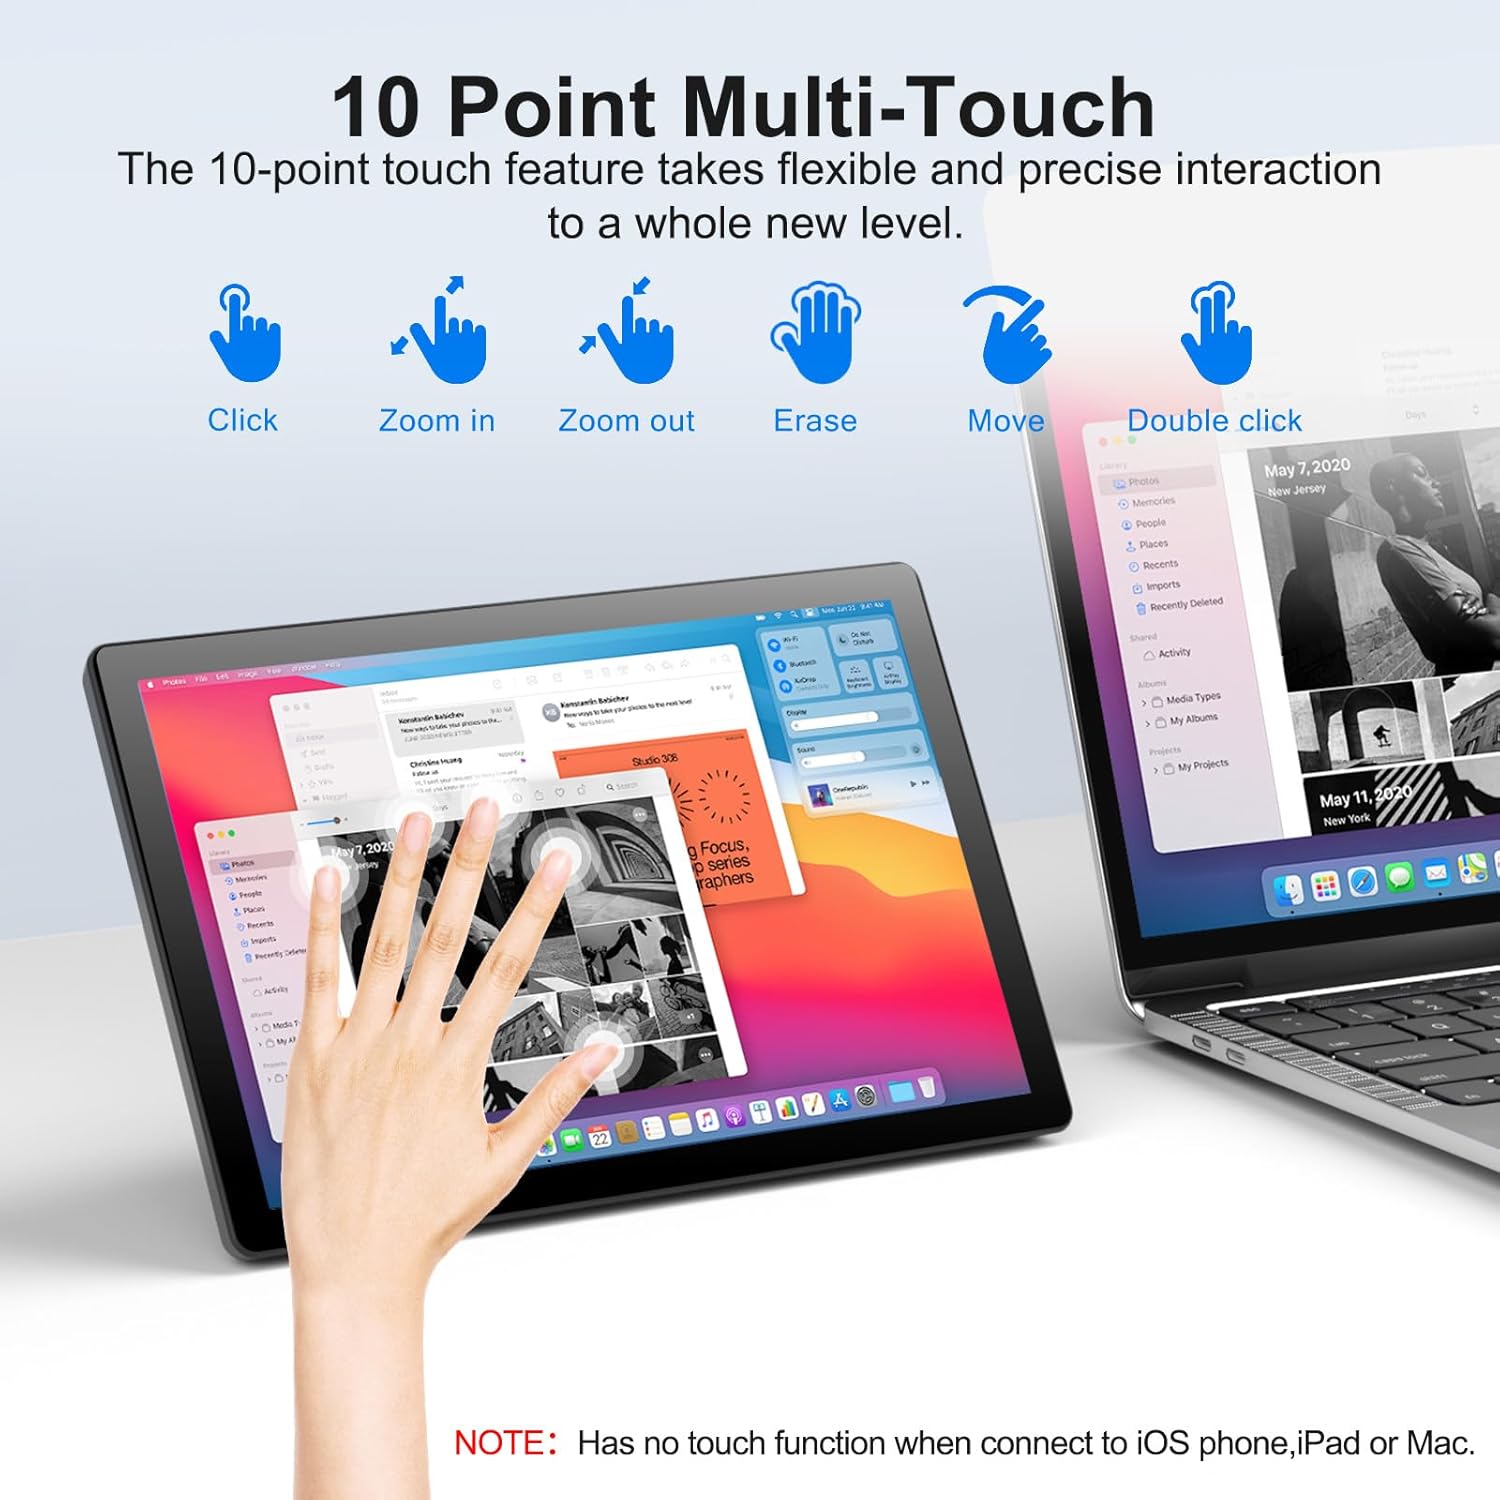
Image: A visual guide demonstrating various 10-point multi-touch gestures supported by the monitor, such as single tap, pinch-to-zoom, and dragging.
4.2 온스크린 디스플레이(OSD) 메뉴
The monitor includes physical buttons for accessing and navigating the On-Screen Display (OSD) menu. These buttons are typically located on the back or side of the monitor.
- 전원 버튼: 모니터를 켜거나 끕니다.
- 메뉴 버튼: OSD 메뉴를 엽니다.
- 위/아래 버튼: 메뉴 옵션을 탐색합니다.
- 종료 버튼 : 현재 메뉴나 OSD를 종료합니다.
Through the OSD menu, you can adjust settings such as brightness, contrast, color temperature, and input source.

Image: A visual representation of the monitor's brightness adjustment feature, accessible via the OSD menu.
Video: A demonstration of the MAGEX 10.1-inch touchscreen display running RetroPie, showcasing its performance and touch responsiveness for gaming applications.
5. 호환성
The MAGEX 10.1 Inch Touch Screen Monitor offers broad compatibility with various devices and operating systems:
5.1 지원되는 장치
- 라즈베리 파이: Compatible with Pi 5, Pi 4, Pi 3B+, Pi 3, Pi 2, and Pi Zero.
- Other Single Board Computers: OctoPi, BB Black, Banana Pi, Orange Pi, RetroPi.
- 게임 콘솔: XBOX, PS4, PS5.
- 일반 컴퓨팅: Computers (Laptops, Desktops), TV boxes.
5.2 지원되는 운영 체제
- 윈도우(11/10/8/7)
- 라즈비안
- NOOBS
- Kali-Linux
- 데비안
- 우분투
- 코디
- Mac OS (video output only, no touch)

Image: A comprehensive chart showcasing the monitor's compatibility with different operating systems (e.g., Windows, Mac OS, Raspbian, Ubuntu) and hardware platforms (e.g., Raspberry Pi 1B to 5, XBOX, PS4/5, laptops, desktops).
6. 특징
6.1 IPS Full-Color Display & Eye-Care
- 화면 크기: 10.1인치
- 해결: FHD 1920 x 1200P
- 디스플레이 기술: Advanced IPS glossy screen
- View각도: 178° 폭 viewing angles for consistent image quality from various positions.
- 색상 재현: Delivers sharp, vivid visuals with accurate color.
- 눈 건강 관리: Features blue light reduction and flicker-free technology for comfortable long view세션을 진행 중입니다.

Image: A visual demonstration of the monitor's 178-degree wide viewing angle, ensuring consistent color and clarity from almost any position.
6.2 10-Point Capacitive Touch
- 기술: High-sensitivity capacitive touchscreen.
- 응답 시간: Ultra-fast 3-5ms.
- 멀티 터치: Supports 10-point touch for precise and intuitive gestures.
- Driver-Free: Plug-and-play functionality for most compatible operating systems (Windows, Raspbian, etc.).
6.3 Built-in Dual Speakers and Mini Fan
- 듀얼 스피커: Integrated speakers provide clear audio for your projects and multimedia.
- Mini Fan: An integrated mini fan actively circulates air for efficient heat dissipation, preventing CPU overheating and ensuring stable operation.

이미지: 자세한 view of the monitor's rear, highlighting the built-in mini fan for cooling and the dual speakers for audio output.
6.4 VESA Mountable & Integrated Stand
- VESA 호환성: Supports VESA mounting standards for flexible installation options.
- 일체형 킥스탠드: Features a 90° adjustable kickstand for desktop use, allowing for various view각도를 나타냅니다.
Image: The monitor displayed on a VESA mount, illustrating its adaptability for various setups beyond its integrated kickstand.
7. 사양
| 특징 | 사양 |
|---|---|
| 상표 | MAGEX |
| 모델 번호 | GH101TP-C |
| 화면 크기 | 10.1 인치 |
| 해결 | FHD 1920 x 1200P |
| 종횡비 | 16시 10분 |
| 화면 표면 설명 | 광택있는 |
| 대비율 | 2000시 1분 |
| 새로 고침 빈도 | 60Hz |
| 디스플레이 유형 | 액정표시장치 |
| 디스플레이 기술 | LCD (IPS) |
| View잉 각도 | 178도 |
| 명도 | 370 칸델라 |
| Picture Quality Enhancement | IPS, Eye Care (Blue Light Reduction, Flicker-Free) |
| 품목 치수(D x W x H) | 0.38인치 깊이 x 9.65인치 너비 x 6.3인치 높이 |
| HDMI 포트 총 개수 | 1 |
| 연결 기술 | HDMI, USB 타입 C |
| 추가 기능 | Built-In Speakers, Eye Care, Touchscreen, VESA |
| 응답 시간 | 2밀리초 |
8. 문제 해결
This section addresses common issues you might encounter with your MAGEX 10.1 Inch Touch Screen Monitor.
8.1 디스플레이 없음 / 검은색 화면
- 전원 확인: Ensure the 12V/3A DC power adapter is securely connected to the monitor and a working power outlet.
- HDMI 연결을 확인하세요: Verify that the HDMI cable is firmly connected to both the monitor and your source device (e.g., Raspberry Pi, computer). Try a different HDMI cable if available.
- 입력 소스: Use the OSD menu buttons to ensure the correct input source (HDMI) is selected.
- Raspberry Pi Configuration: For Raspberry Pi 5, refer to the 'Setup Instructions' section (3.1) regarding `config.txt` and `cmdline.txt` modifications for power and resolution issues.
- 장치 출력: Confirm that your source device is outputting a video signal. Try connecting your source device to another known working display.
8.2 터치 기능이 작동하지 않음
- USB Touch Cable: Ensure the USB touch cable is correctly connected from the monitor's USB touch port to your source device.
- 호환성: Confirm your operating system and device support touch input. Remember, iOS devices (iPhone, iPad, Mac) do not support touch functionality with this monitor.
- Driver-Free: While generally driver-free, ensure your OS is up-to-date. For some Linux distributions, specific configurations might be needed, though typically not for Raspbian.
- 장치 재시작: 모니터와 연결된 장치를 모두 재시작해 보세요.
8.3 Overheating Issues (Raspberry Pi)
- 일체형 팬: Ensure the built-in mini fan is operating. If not, check its connection.
- 통풍: Ensure the monitor's casing has adequate airflow and is not obstructed.
- 전원 공급 장치: An insufficient power supply to the Raspberry Pi can cause instability and heat. Use the recommended 12V/3A power adapter for the monitor and an appropriate power supply for your Raspberry Pi.
9. 유지관리
적절한 유지관리는 모니터의 수명과 최적의 성능을 보장합니다.
- 화면 청소: 전자제품용으로 특별히 제작된 부드럽고 보푸라기가 없는 천을 사용하세요. 가볍게ampen the cloth with water or a screen-cleaning solution. Avoid harsh chemicals, abrasive materials, or direct spraying onto the screen.
- C 청소asing: 모니터의 c를 닦으세요asin부드럽고 마른 천으로 닦아주세요. 잘 지워지지 않는 얼룩은 약간 거친 천으로 닦아주세요.amp 천을 사용한 후 마른 천으로 닦아낼 수 있습니다.
- 통풍: Keep the ventilation openings clear of dust and debris to ensure efficient heat dissipation by the internal fan.
- 저장: 장기간 사용하지 않을 경우 모니터를 직사광선과 극한 온도 변화를 피해 서늘하고 건조한 곳에 보관하십시오.
- 손질: 화면에 과도한 압력을 가하거나 모니터를 떨어뜨리지 마십시오.
10. 보증 및 지원
The MAGEX 10.1 Inch Touch Screen Monitor comes with a 2년 품질 보증 구매일로부터.
If you encounter any issues or have questions regarding your product, please do not hesitate to contact our professional after-sales service team. We offer 24시간 지원 귀하에게 도움이 되고자 합니다.
For warranty claims or technical assistance, please refer to the contact information provided with your product packaging or visit the official MAGEX web대지.