1. 서론
The IVANKY 13-in-1 Docking Station is designed to expand the connectivity and storage capabilities of your Mac mini M4 or M4 Pro. This dock integrates seamlessly with your Mac mini, providing a wide array of ports and an M.2 NVMe SSD enclosure to enhance your workflow and productivity.
This manual provides detailed instructions for setting up, operating, and maintaining your IVANKY docking station, along with troubleshooting tips and product specifications.
2. 제품 특징
- 13-in-1 연결성: Features a comprehensive selection of ports including HDMI, USB-A, USB-C, SD/TF card readers, and dual audio ports.
- 고속 데이터 전송: Equipped with 10 Gbps USB-A and USB-C ports, and upgraded SD/TF 4.0 card readers for rapid data transfer.
- M.2 NVMe SSD 외장 케이스: Supports M.2 NVMe and SATA SSDs up to 8TB, offering 10Gbps transfer speeds for expanded storage. Compatible with 2230/2242/2260/2280 form factors.
- 4K@120Hz HDMI 출력: Delivers crisp 4K resolution at a 120Hz refresh rate for smooth visual experiences, ideal for professionals and creators. Supports dual displays when connected to the Mac mini's Thunderbolt port.
- Sufficient Power Supply: Includes a 20W PD power adapter to ensure stable power delivery, especially when connecting multiple high-power devices.
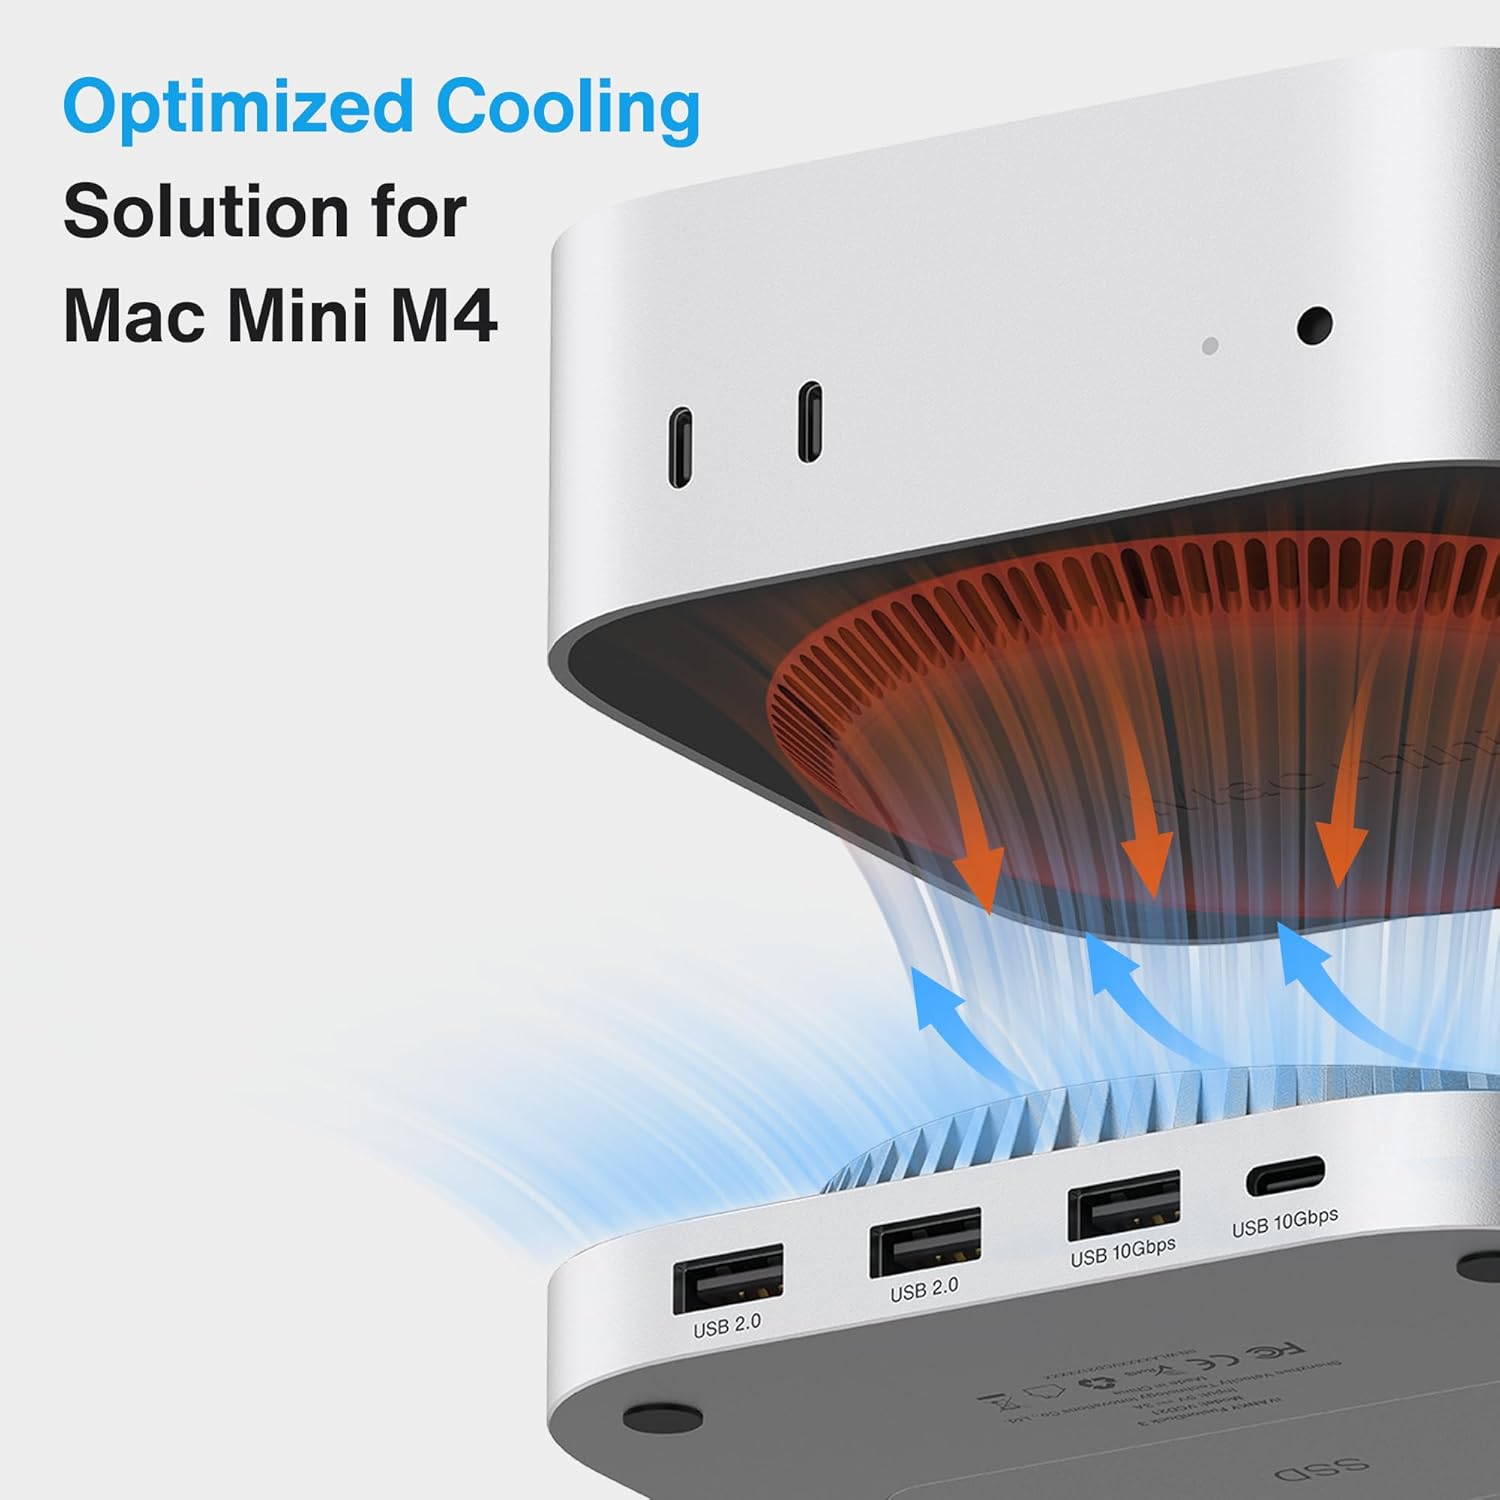
- 최적화된 냉각 시스템: Features a top-vent design and slight elevation to facilitate airflow, protecting the Mac mini's bottom fan and ensuring reliable performance.
3. 패키지 내용
패키지에 모든 품목이 들어 있는지 확인하세요.
- 1 x IVANKY 13-in-1 Docking Station (FusionDock)
- 1 x 20W 전원 어댑터
- 1x25cm USB-C 케이블
- 1 x 드라이버
- Screws for SSD installation
Note: SSD is not included with this product.
4. 설정 지침
4.1. SSD 설치
To expand your storage, follow these steps to install an M.2 SSD:
- Carefully turn the docking station upside down.
- Locate the SSD cover on the bottom of the dock. Use the provided screwdriver to remove the screw securing the cover.
- Remove the SSD cover.
- Insert your M.2 NVMe or SATA SSD into the slot. Ensure it is fully seated.
- 제공된 나사로 SSD를 고정합니다.
- Replace the SSD cover and secure it with its screw.

4.2. 도킹 스테이션을 맥 미니에 연결하기
Follow these steps to connect your Mac mini to the docking station:
- Connect the 20W power adapter to the provided 1m USB-C cable.
- Connect the other end of the USB-C cable to the 'PD IN' port on the docking station.
- 전원 어댑터를 벽면 콘센트에 꽂으세요.
- Place your Mac mini M4 or M4 Pro directly on top of the IVANKY docking station. The dock is designed to fit perfectly underneath the Mac mini.
- Use the provided 25cm USB-C cable to connect the Mac mini's Thunderbolt port to the 'Mac mini' port on the docking station. This establishes the primary connection for data and display.

4.3. Quick Installation Video
5. 사용 설명서
5.1. 포트 사용
도킹 스테이션은 다음과 같은 포트를 제공합니다.
- HDMI(4K@120Hz): Connect an external monitor for high-resolution video output.
- USB-A 10Gbps (x2): For high-speed peripherals like external hard drives.
- USB-C 10Gbps (x2): For high-speed USB-C devices.
- USB-A 2.0 (3개): For standard peripherals such as keyboards, mice, and printers.
- SD/TF 4.0 카드 리더기: For fast access to SD and microSD cards.
- 듀얼 오디오 포트: For connecting headphones, microphones, or speakers.
- PD IN (20W): Connect the included power adapter for stable operation.
- USB-C Host (Mac mini): Connects to your Mac mini's Thunderbolt port.
5.2. 디스플레이 연결
Connect your monitor to the HDMI port on the docking station. For dual display setups, connect the dock's HDMI port to your Mac mini's Thunderbolt port. This configuration allows for extended display functionality at 4K@120Hz, providing a smooth visual experience for various tasks.

5.3. 데이터 전송
Utilize the 10Gbps USB-A and USB-C ports for transferring large files quickly to and from high-performance drives. The SD/TF 4.0 card readers also offer enhanced speeds for memory cards. The integrated M.2 SSD enclosure provides 10Gbps data transfer for installed SSDs.

5.4. 전원 공급
The included 20W PD power adapter is crucial for maintaining power stability, especially when multiple high-power devices (e.g., external hard drives, charging peripherals) are connected to the dock. Always use the matching cable and adapter to prevent power-related issues.
6. 유지관리
To ensure the longevity and optimal performance of your IVANKY docking station:
- 청소: 부드럽고 마른 천을 사용하여 기기 외부를 닦으세요. 액체 세척제나 연마재는 사용하지 마세요.
- 통풍: Ensure the top-vent design is not obstructed to allow for proper airflow and cooling. The slight elevation of the dock helps safeguard the Mac mini's bottom fan.
- 저장: 사용하지 않을 때는 장치를 서늘하고 건조한 곳에 보관하십시오.
- 케이블 관리 : 손상을 방지하려면 케이블을 정리하고 꼬임이나 과도한 굽힘이 없도록 하세요.
7. 문제 해결
- 전원 없음/장치 인식 안 됨: Ensure the 20W PD power adapter is correctly connected to the dock and a power outlet. Verify the 25cm USB-C cable is securely connected between the Mac mini and the dock.
- SSD가 감지되지 않음: Check that the M.2 SSD is properly installed and secured within the enclosure. Ensure the SSD is compatible (NVMe or SATA M.2). Try re-seating the SSD.
- 화면 표시 문제 (신호 없음/해상도 오류): Confirm the HDMI cable is securely connected to both the dock and the monitor. Ensure the Mac mini's display settings are configured correctly for the external monitor. If using dual displays, ensure the dock's HDMI is connected to the Mac mini's Thunderbolt port.
- 과열: While the dock has an optimized cooling system, ensure it is placed on a flat, stable surface with adequate ventilation. Avoid placing it in enclosed spaces. If an SSD is installed, prolonged heavy use can generate heat; ensure the SSD is properly seated and the cover is secured.
- 느린 데이터 전송: Ensure you are using the 10Gbps USB-A/C ports for high-speed devices. Check that your connected devices and cables support the advertised speeds.
8. 사양
| 특징 | 사양 |
|---|---|
| 모델 번호 | VCD21 |
| 총 포트 수 | 13 |
| HDMI 출력 | 1 x 4K@120Hz |
| USB-A 포트 | 2 x 10Gbps, 3 x 5Gbps (USB 2.0) |
| USB-C 포트 | 2x10Gbps |
| SD/TF 카드 리더 | 1 x SD/TF 4.0 (312MB/s) |
| 오디오 포트 | 2(3.5mm) |
| SSD 인클로저 | M.2 NVMe/SATA (up to 8TB, 10Gbps) |
| 전력 공급 | 20W PD Power Adapter included |
| 호환 장치 | 맥 미니 M4, 맥 미니 M4 프로 |
| 치수 | 7.6 x 6.93 x 2.2 인치 |
| 품목 무게 | 1.39파운드 |
9. 보증 및 지원
IVANKY offers a 24-month warranty for this product, along with responsive customer service. Should you experience any issues with your product, we provide free returns or replacements to ensure your complete satisfaction.
For technical support or warranty claims, please contact us:
- 이메일: support@ivanky.com
- Customer service response time is typically within 24 hours.
- 평생 기술 지원이 제공됩니다.