
1. 제품 오버view
The NVX QB10SPA is a 10-inch shallow slot ported powered subwoofer enclosure designed to enhance the bass performance of your vehicle's audio system. It features a built-in Class D amplifier, a durable enclosure, and includes a remote bass knob for convenient control.
주요 특징:
- 강력한 베이스 성능: Delivers deep, punchy bass with a peak power output of 1200W and 350W RMS.
- 내장 클래스 D Amp정수기: Features an integrated Class D monoblock amplifier with a low-pass crossover (50–250 Hz) for precise bass control and high efficiency.
- 원격 베이스 레벨 조절: Easily adjust bass output with the included wired remote bass knob.
- 내구성 있는 케이스: Constructed from 3/4" MDF with a CNC-cut ported design, black carpet finish, stitched NVX logo, and a pre-installed metal grille for protection.
- 쉬운 설치 및 호환성: Works with both factory and aftermarket head units using RCA or speaker-level inputs. Includes a removable power plug and a 30A fuse for safe wiring.
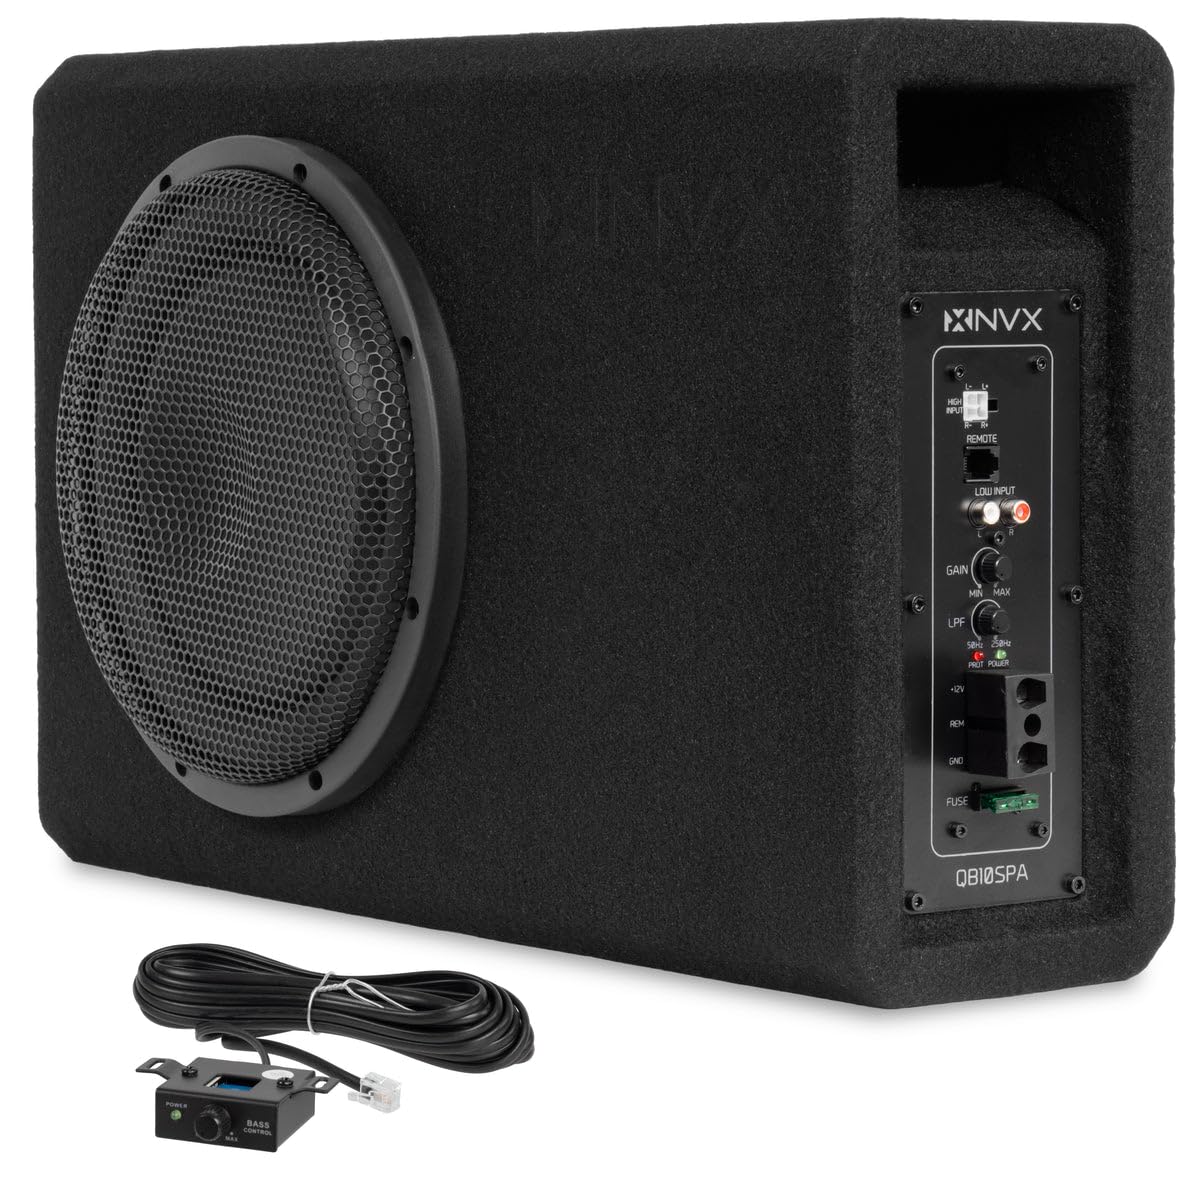
그림 1: 전면 view of the NVX QB10SPA subwoofer enclosure.
2. 안전 정보
Please read all instructions carefully before installing and operating your NVX QB10SPA subwoofer. Failure to follow these guidelines may result in damage to the product, your vehicle, or personal injury.
일반 안전 예방 조치:
- 전기 작업을 시작하기 전에 항상 차량의 배터리 음극 단자를 분리하세요.
- 모든 배선이 올바르게 연결되고 고정되어 끼임, 마찰 또는 단락이 발생하지 않도록 하세요.
- 설치 설명서에 명시된 대로 전원 및 접지 연결에는 적절한 굵기의 전선을 사용하십시오.
- 서브우퍼를 드라이버의 움직임을 방해하는 위치에 설치하지 마십시오. view 또는 차량 운행을 방해합니다.
- 장치를 습기나 극한 온도에 노출시키지 마십시오.
- 설치 과정 중 확실하지 않은 부분이 있으면 전문 자동차 오디오 설치자에게 문의하세요.
3. 상자 안에 무엇이 들어있나요?
설치를 시작하기 전에 모든 구성 요소가 있는지 확인하세요.
- NVX QB10SPA Amplified Ported Loaded Subwoofer Enclosure
- Wired Remote Bass Knob with Cable
- 높은 수준의 입력 하니스
- 장착 나사
- Allen Wrenches (for adjustments)
- Spare 30A Fuse

Figure 2: Included accessories with the NVX QB10SPA.
4. 설정 및 설치
최적의 성능과 안전을 위해서는 올바른 설치가 매우 중요합니다. 다음 단계를 주의 깊게 따르세요.
4.1 설치 위치
Choose a secure location in your vehicle, such as the trunk or under a seat, where the subwoofer will not shift during driving. Ensure adequate ventilation around the amp리퍼 패널.

Figure 3: The compact design of the QB10SPA allows for flexible mounting options.
4.2 배선 연결
The QB10SPA offers both low-level (RCA) and high-level (speaker wire) input options.

Figure 4: Rear panel connections for power, ground, remote, and audio inputs.
전원 연결 :
- 전원(+12V): Connect a suitable gauge power wire (e.g., 8 AWG) directly from the vehicle's positive battery terminal to the +12V terminal on the subwoofer. Install an in-line fuse (not supplied, typically 30A) within 18 inches of the battery.
- 접지(GND): Connect a short, heavy gauge ground wire (e.g., 8 AWG) from the GND terminal to a clean, unpainted metal surface on the vehicle chassis. Ensure a good electrical connection.
- 원격(REM): Connect a remote turn-on wire from your head unit's remote output to the REM terminal. If your head unit does not have a remote output, you can use the high-level input with DC offset sensing (see below).
오디오 입력 연결:
- 저수준 입력(RCA): If your head unit has RCA pre-outs, connect RCA cables from the head unit's subwoofer or full-range outputs to the L and R LOW INPUT jacks on the subwoofer.
- 고레벨 입력(스피커 레벨): If your head unit does not have RCA outputs, use the supplied high-level input harness. Connect the speaker wires from your head unit's speaker outputs to the corresponding wires on the harness. The QB10SPA features DC offset sensing, which can automatically turn the subwoofer on when it detects an audio signal, eliminating the need for a separate remote wire.

그림 5: 상세 view of the control panel, showing input and adjustment options.
5. 운영 및 조정
Once installed, you can fine-tune the subwoofer's performance using the controls on the amplifier panel and the remote bass knob.
5.1 Ampliifier 컨트롤:
- GAIN(입력 레벨): This control matches the output of your head unit to the input of the subwoofer. Start with the gain at minimum. Play a familiar track and slowly increase the gain until you hear distortion, then back off slightly.
- LPF(저역통과필터): This control sets the upper frequency limit for the subwoofer, allowing only frequencies below the set point to pass through. Adjust between 50 Hz and 250 Hz to blend the subwoofer's output seamlessly with your main speakers. A common starting point is 80-100 Hz.
5.2 Remote Bass Knob:
The included remote bass knob allows for convenient, on-the-fly adjustment of the subwoofer's output level from the driver's seat.

Figure 6: The wired remote bass knob for convenient level adjustment.
- Connect the remote bass knob cable to the designated port on the subwoofer's amp리퍼 패널.
- Mount the knob in an easily accessible location.
- Use the dial to increase or decrease the bass level as desired.
6. 유지관리
The NVX QB10SPA requires minimal maintenance to ensure long-lasting performance.
- 청소: Periodically wipe the enclosure with a soft, dry cloth to remove dust. Do not use harsh chemicals or abrasive cleaners.
- 점검: 배선 연결부가 단단히 고정되어 있고 부식이 없는지 정기적으로 점검하십시오.
- 통풍: 다음을 확인하세요. amplifier panel and port remain unobstructed to allow for proper heat dissipation.
7. 문제 해결
If you experience issues with your QB10SPA, refer to the following common problems and solutions:
| 문제 | 가능한 원인 | 해결책 |
|---|---|---|
| 전원 없음 / 표시등 없음 |
|
|
| 소리가 출력되지 않음 |
|
|
| 왜곡된 소리 |
|
|
| 서브우퍼 과열 |
|
|
If these steps do not resolve the issue, please contact NVX customer support.
8. 사양
| 특징 | 세부 사항 |
|---|---|
| 상표 | 엔비엑스 |
| 모델 번호 | QB10SPA |
| 스피커 크기 | 10 인치 |
| 스피커 유형 | 서브우퍼 |
| 최대 출력 전력 | 1200 와트 |
| RMS 전원 | 350 와트 |
| Amp정수기 유형 | 내장 클래스 D |
| Low-Pass Crossover (LPF) | 50-250Hz |
| 연결 기술 | 유선(RCA, 스피커 레벨) |
| 인클로저 재료 | MDF, Metal (grille) |
| 품목 치수(D x W x H) | 20.86인치 깊이 x 5.7인치 너비 x 12.99인치 높이 |
| 품목 무게 | 20 파운드 |
| 내장 미디어 | Amplified Ported Loaded Subwoofer Enclosure, Remote Bass Knob |
| 한국어: | 810021846606 |
9. 보증 및 지원
The NVX QB10SPA is covered by a 1년 제조업체 보증 구매일로부터. 이 보증은 정상적인 사용 하에서 재료 및 제조상의 결함을 포함합니다.
보증은 다음으로 인한 손상을 보장하지 않습니다.
- 설치 또는 배선 불량.
- 사고, 남용 또는 오용.
- Exposure to moisture, extreme heat, or cold.
- 무단 수리 또는 개조.
For warranty claims or technical support, please contact NVX customer service through their official website or your retailer. Please have your proof of purchase and product model number ready.