
머큐시스 ME80X
Mercusys ME80X AX3000 WiFi 6 Range Extender User Manual
Model: ME80X | Brand: MERCUSYS
소개
This manual provides detailed instructions for setting up, operating, maintaining, and troubleshooting your Mercusys ME80X AX3000 WiFi 6 Range Extender. Please read this guide carefully to ensure optimal performance and proper use of your device.
상자 안에 무엇이 들어있나요?
- Mercusys ME80X AX3000 WiFi 6 Range Extender
- Quick Installation Guide (not included in this digital manual, but typically provided)
Ensure all components are present and in good condition. If any item is missing or damaged, please contact customer support.
주요 특징
- Dual Band AX3000 Speeds: 5GHz 대역에서 최대 2402Mbps, 2.4GHz 대역에서 최대 574Mbps의 속도를 제공합니다.
- WiFi 6 기술: Enhances speed, efficiency, and capacity for a better network experience.
- 기가비트 이더넷 포트: Provides fast wired connections for devices like PCs, IPTVs, and gaming consoles.
- 보편적 인 호환성 : Works with any standard Wi-Fi router.
- One-Touch WPS Setup: Easy expansion of Wi-Fi coverage by pressing the WPS button.
- 이중 작동 모드: Functions as a Range Extender (RE) or an Access Point (AP).
- 스마트 앱 제어: Manage your network via the MERCUSYS app on iOS or Android devices.
- EasyMesh 호환 가능: Create a unified mesh network for seamless roaming.
제품 끝view
The Mercusys ME80X is designed to extend your existing Wi-Fi coverage, eliminating dead zones and providing strong, reliable wireless connectivity throughout your home or office.
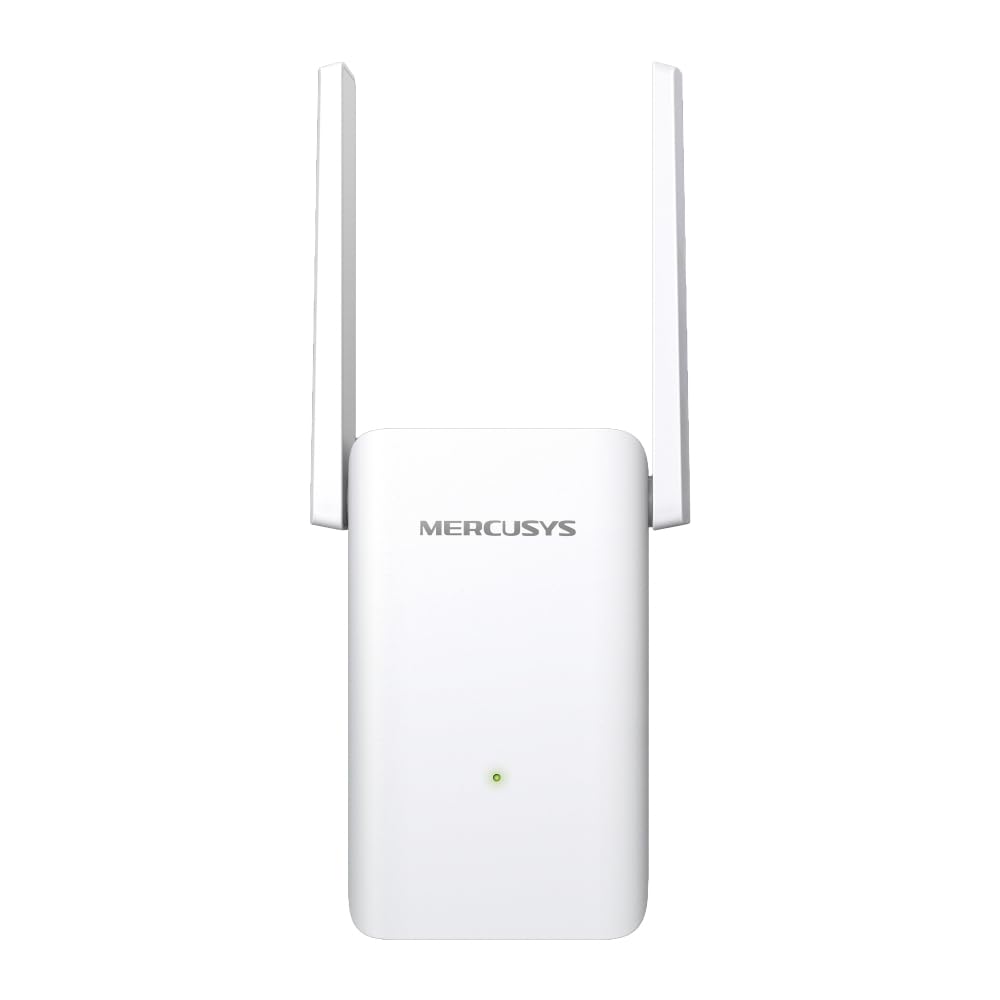
이미지: 앞면 view of the Mercusys ME80X AX3000 WiFi 6 Range Extender, showing the MERCUSYS logo and an LED indicator.

Image: Diagram highlighting key features of the ME80X, including WiFi 6, Gigabit Ethernet, adjustable high-gain antennas, AX3000 speeds, compatibility with any router, built-in Access Point mode, EasyMesh, and MERCUSYS App Control.

Image: Visual representation of WiFi 6 benefits, showing 2.4 GHz at 574 Mbps and 5 GHz at 2402 Mbps, emphasizing higher speed, larger capacity, and ultra-low latency.
설정
There are several methods to set up your Mercusys ME80X Range Extender. Choose the method that best suits your needs.
방법 1: WPS(Wi-Fi Protected Setup)
WPS is the quickest way to extend your Wi-Fi network if your router supports it.
- Plug the ME80X into an electrical outlet near your router.
- Wait for the LED on the ME80X to turn solid red or orange.
- 메인 라우터의 WPS 버튼을 누르세요.
- Within two minutes, press the WPS button on the ME80X.
- The LED on the ME80X should change to solid green, indicating a successful connection.
- Relocate the ME80X to an optimal location between your router and the Wi-Fi dead zone. Ensure the LED remains solid green for a good connection.

Image: Diagram illustrating the one-touch WPS setup process, showing pressing the WPS button on both the router and the ME80X, and the LED indicator for connection status (green for good, orange for too far).
방법 2: MERCUSYS 앱을 통해
The MERCUSYS app provides an intuitive way to set up and manage your extender.
- Download the MERCUSYS app from the App Store (iOS) or Google Play (Android).
- Plug the ME80X into an electrical outlet near your router.
- Open the MERCUSYS app and follow the on-screen instructions to add your new device.
- The app will guide you through connecting the extender to your existing Wi-Fi network.
- Once connected, relocate the ME80X to an optimal location.
방법 3: 경유 Web 브라우저
For advanced configuration or if WPS/App setup is not preferred.
- Plug the ME80X into an electrical outlet near your router.
- Connect your computer or mobile device to the ME80X's Wi-Fi network (e.g., "MERCUSYS_Extender").
- 열기 web 브라우저와 유형 mwlogin.net or the default IP address (check the label on the device or quick start guide) into the address bar.
- 메시지가 표시되면 로그인 비밀번호를 생성하세요.
- 화면의 지시에 따라 호스트 네트워크를 선택하고 확장기를 구성하십시오.
- Relocate the ME80X to an optimal location.
Access Point (AP) Mode Setup
In Access Point mode, the ME80X connects to your router via an Ethernet cable to create a new Wi-Fi access point.
- ME80X를 전기 콘센트에 꽂으세요.
- Connect an Ethernet cable from your main router's LAN port to the Gigabit Ethernet port on the ME80X.
- Access the ME80X's web management page (as described in Method 3).
- Navigate to the operating mode settings and select "Access Point Mode".
- Configure the Wi-Fi network name (SSID) and password for the new access point.
- Save the settings. The ME80X will now function as a wired access point.

Image: The ME80X plugged into a wall outlet, connected via Ethernet cable to a laptop, demonstrating its use in Access Point mode to provide Wi-Fi to nearby devices.
EasyMesh Setup
The ME80X is EasyMesh compatible, allowing it to form a unified mesh network with a compatible EasyMesh router. This provides seamless roaming and a single Wi-Fi network name.
Note: This process requires your main router to also support EasyMesh and have the feature enabled.
- Factory Reset ME80X: If the ME80X has been previously set up, perform a factory reset by holding the Reset/WPS button for approximately 10-20 seconds until the LED behavior changes.
- Enable EasyMesh on Router: 로그인하세요 web-based router management interface (not through an app). Locate and enable the EasyMesh feature, usually found in the wireless or system settings.
- 초기 배치: Plug the ME80X into an electrical outlet next to your router.
- Initiate WPS Pairing: Once the ME80X's LED turns orange, press the WPS button on your router, then immediately press the WPS button on the ME80X.
- Add Mesh Device: On your router's web management interface, scroll to the bottom (or relevant section) and select "Add Mesh" or "검색 WPS connection".
- 확인: The router should detect and automatically set up the ME80X as part of the mesh network. The ME80X's LED should turn solid green.
- Verify Network: Confirm that there is no separate "ME80X_Ext" network visible. Only your main home network SSID should be broadcast.
- 고쳐 놓다: You can now unplug the ME80X and relocate it to its permanent desired location within your home. Ensure the LED remains solid green for optimal mesh performance.
범위 확장기 작동
LED 표시기 이해
The LED on the front of the ME80X provides important status information:
- 솔리드 그린: The extender is connected to the router and is in a good location.
- 단색 주황색: The extender is connected to the router but is too far from it. Relocate the extender closer to the router.
- 단색 빨간색: 익스텐더가 라우터에 연결되어 있지 않습니다.
- Flashing Green/Orange: WPS 페어링이 진행 중입니다.
- 끄다: The extender is powered off or experiencing an error.
Relocating the Extender
After initial setup, you can unplug the extender and move it to a new location. The ideal location is halfway between your router and the Wi-Fi dead zone. Ensure the LED turns solid green after relocation to confirm a good connection.

Image: Diagram showing a house with a router and the ME80X extender placed strategically to extend Wi-Fi coverage to previously unreachable areas.

Image: The Mercusys ME80X plugged into a wall outlet in a modern living room setting, demonstrating its discreet placement.
유지
펌웨어 업데이트
Regularly check for firmware updates to ensure optimal performance, security, and access to new features. You can usually find firmware updates on the official MERCUSYS website or through the MERCUSYS app.
- Visit the official MERCUSYS support website for your model (ME80X).
- 최신 펌웨어를 다운로드하세요 file.
- Access the ME80X's web management page (mwlogin.net).
- Navigate to System Tools > Firmware Upgrade and follow the instructions to upload the new firmware.
- 중요한: Do not power off the device during the firmware upgrade process.
청소
To maintain proper airflow and prevent overheating, periodically clean the exterior of the extender. Use a soft, dry cloth. Do not use liquid cleaners or aerosols.
문제 해결
No Internet Access After Connecting to Extender
- Ensure the extender's LED is solid green, indicating a good connection to the router.
- 메인 라우터에 인터넷 접속이 가능한지 확인하세요.
- 라우터와 익스텐더를 모두 다시 시작해 보세요.
- If using a static IP on your device, ensure it's compatible with the extender's network.
Slow Speed or Frequent Disconnections
- Relocate the extender closer to your main router. The LED should be solid green.
- Ensure there are no major obstructions (thick walls, metal objects, large appliances) between the extender and your devices, or between the extender and the router.
- Check for interference from other wireless devices (e.g., cordless phones, microwaves).
- Update the firmware of both your router and the extender.
- If using EasyMesh, ensure the setup was completed correctly and the extender is integrated into the mesh.
WPS 설정이 실패합니다
- Ensure your router supports WPS and that it is enabled.
- Press the WPS button on the router and extender within two minutes of each other.
- 시도해보세요 web browser or app setup method instead.
How to Factory Reset the ME80X
If you encounter persistent issues or forget your login password, a factory reset can restore the extender to its default settings.
- With the extender powered on, locate the Reset/WPS button (often a small pinhole or combined with WPS).
- Press and hold the button for approximately 10-20 seconds until the LED flashes rapidly or changes color, then release.
- The extender will restart with factory default settings. You will need to set it up again.
명세서
| 특징 | 세부 사항 |
|---|---|
| 상표 | 머큐 시스 |
| 모델 번호 | ME80X |
| 무선 표준 | 802.11a/b/g/n/ac/ax(Wi-Fi 6) |
| 주파수 대역 | 듀얼 밴드(2.4GHz 및 5GHz) |
| 데이터 전송 속도 | 최대 3000Mbps (5GHz 대역에서 2402Mbps, 2.4GHz 대역에서 574Mbps) |
| 이더넷 포트 | 1x 기가비트 이더넷 포트 |
| 특별 기능 | Beamforming, Mesh Wi-Fi (EasyMesh), Access Point Mode, Guest Mode |
| 호환 장치 | Gaming Consoles, PCs, Routers, Smart TVs, Tablets |
| 색상 | 하얀색 |
| 포함된 구성 요소 | Range Extender Wi-Fi (ME80X) |
| 제조업체 | TP-Link (as per product data) |
보증 및 지원
보증 정보 및 기술 지원에 대해서는 MERCUSYS 공식 웹사이트를 참조하십시오. web사이트를 방문하거나 고객 서비스에 직접 문의하세요. 보증 청구를 위해 구매 영수증을 보관하세요.
MERCUSYS Official Web대지: www.mercusys.com
Ask a question about this manual
Ask about setup, troubleshooting, compatibility, parts, safety, or missing instructions. Manuals+ will review the question and use this page’s manual context to help answer it.