
1. 서론
The Raspberry Pi 500 Desktop Computer Kit is a compact and powerful personal computer integrated into a keyboard. Designed for both beginners and experienced users, this kit provides a complete computing experience with its quad-core processor, ample RAM, and essential peripherals. This manual will guide you through the setup, operation, and maintenance of your Raspberry Pi 500.
2. 패키지 내용
Before you begin, please ensure all items listed below are present in your kit:
- Raspberry Pi 500 Computer (integrated into keyboard)
- 32GB microSD Card (pre-loaded with Raspberry Pi OS)
- English Beginner's Guide
- Micro HDMI to HDMI-A Cable
- USB 마우스
- US Keyboard (integrated with Raspberry Pi 500)
- 미국 전력 공급
3. 설정 가이드
Follow these steps to set up your Raspberry Pi 500 Desktop Computer Kit:
- MicroSD 카드 삽입: Locate the microSD card slot on the rear of the Raspberry Pi 500 keyboard. Gently insert the pre-loaded 32GB microSD card until it clicks into place.
- 주변기기 연결:
- 생쥐: Connect the USB mouse to one of the USB ports on the rear of the Raspberry Pi 500.
- 표시하다: Connect one end of the micro HDMI to HDMI-A cable to one of the micro HDMI ports on the Raspberry Pi 500 and the other end to an HDMI input on your monitor or TV.
- 전원 연결: Plug the US Power Supply into the USB-C power port on the Raspberry Pi 500, then plug the power supply into a wall outlet. The Raspberry Pi 500 will automatically power on and begin booting the operating system.
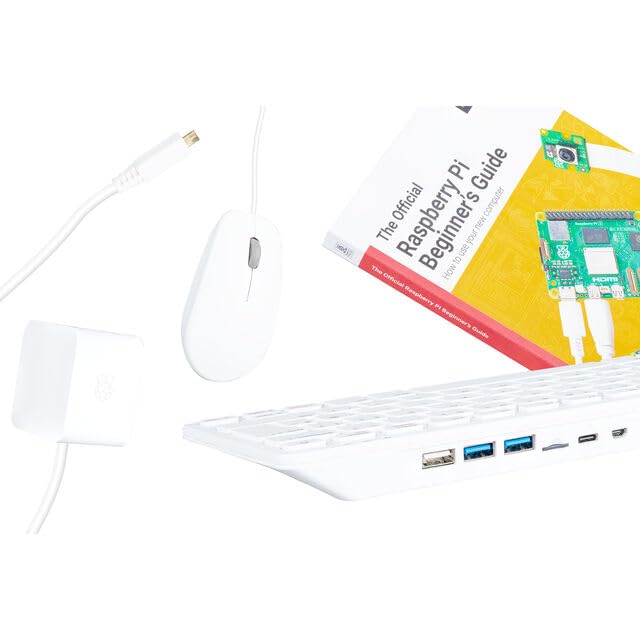
This image shows the Raspberry Pi 500 integrated into a keyboard, along with the included mouse and necessary cables for connection, illustrating a typical setup.
포함된 내용을 참조하세요 English Beginner's Guide for more detailed setup instructions and initial software configuration.
4. 사용 설명서
Once powered on, your Raspberry Pi 500 will boot into the Raspberry Pi OS desktop environment. Here are some basic operating guidelines:
- 첫 번째 부팅: The first boot may take a few minutes as the system initializes. Follow any on-screen prompts for initial setup, such as setting your region, language, and Wi-Fi network.
- 연결성:
- Wi-Fi 및 블루투스: The Raspberry Pi 500 has built-in Wi-Fi and Bluetooth. You can configure these through the desktop environment's network settings.
- 이더넷: For a wired network connection, plug an Ethernet cable into the Gigabit Ethernet port.
- USB 포트: Use the USB 2.0 and USB 3.0 ports for connecting additional peripherals like external storage, webcams, or other accessories.
- 디스플레이 출력: The dual micro HDMI outputs allow you to connect two monitors for an extended desktop experience. The system supports OpenGL for graphics processing.
- GPIO Expansion: The General Purpose Input/Output (GPIO) pins provide advanced users with the ability to connect and control various electronic components and sensors for custom projects.
- 종료: Always shut down the Raspberry Pi OS properly through the desktop menu (usually under the 'Raspberry Pi' icon) to prevent data corruption on the microSD card. Do not simply unplug the power.
5. 유지관리
적절한 유지관리는 Raspberry Pi 500의 수명과 최적의 성능을 보장합니다.
- 청소: Keep the device clean and free from dust. Use a soft, dry cloth for the keyboard and exterior. For hard-to-reach areas, use compressed air. Ensure the device is powered off before cleaning.
- 통풍: The Raspberry Pi 500 includes a heat sink to manage operating temperatures. Ensure the vents are not obstructed to allow for proper airflow. Avoid operating the device in enclosed spaces or direct sunlight.
- 소프트웨어 업데이트: Regularly update the Raspberry Pi OS and installed software to benefit from the latest features, security patches, and performance improvements. This can typically be done via the terminal using commands like
sudo apt update그리고sudo apt upgrade. - 데이터 백업: Periodically back up important data from your microSD card to an external storage device to prevent data loss.
6. 문제 해결
If you encounter issues with your Raspberry Pi 500, consider the following troubleshooting steps:
- 전원 없음:
- Ensure the power supply is correctly connected to both the Raspberry Pi 500 and a working wall outlet.
- Verify the power supply is the official Raspberry Pi 500 power supply or a compatible 5V USB-C power supply with sufficient current (e.g., 3A).
- 디스플레이 출력 없음:
- Check that the micro HDMI to HDMI-A cable is securely connected to both the Raspberry Pi 500 and your monitor.
- Ensure your monitor is set to the correct HDMI input source.
- Try a different micro HDMI port or cable if available.
- Peripherals Not Responding (Mouse):
- Ensure the USB mouse is firmly plugged into a USB port.
- 마우스를 다른 USB 포트에 연결해 보세요.
- Restart the Raspberry Pi 500.
- 운영 체제가 부팅되지 않음:
- Ensure the microSD card is properly inserted and not damaged.
- If the microSD card is corrupted, you may need to re-flash the Raspberry Pi OS image onto it using a computer and imaging software.
7. 사양
Key technical specifications for the Raspberry Pi 500 Desktop Computer Kit:
| 특징 | 세부 사항 |
|---|---|
| 모델명 | 라즈베리파이500 |
| 모델 번호 | 스1285 |
| 프로세서 | 2.4GHz Quad-Core ARM Cortex-A76 |
| 숫양 | 8GB LPDDR4 |
| 저장 | 32GB MicroSD 카드 (포함) |
| 운영 체제 | 라즈베리파이 OS |
| 연결성 | Wi-Fi, Bluetooth, Gigabit Ethernet, 1x USB 2.0, 2x USB 3.0 |
| 비디오 출력 | Dual Micro HDMI (supports OpenGL) |
| 확장 | GPIO 핀 |
| 치수(길이 x 너비 x 높이) | Approximately 11.260" x 4.800" x 0.8" (integrated into keyboard) |
| 무게 | 약 2파운드 |
8. 보증 및 지원
Please note that no warranty is provided with this product. For technical assistance, software updates, community forums, and additional resources, please visit the official Raspberry Pi web사이트에서 www.라스베리파이.com. The Raspberry Pi community offers extensive documentation and support for all Raspberry Pi products.