
소개
This manual provides detailed instructions for the installation, operation, and maintenance of your SHINYSNAKE G600 MATX MFF Gaming Case. The G600 is designed for high-performance computing in a compact form factor, featuring a solid wood front panel, tempered glass side panel, and an optional 11.3-inch auxiliary screen for real-time hardware monitoring. Please read this manual thoroughly before beginning assembly to ensure proper setup and optimal performance.
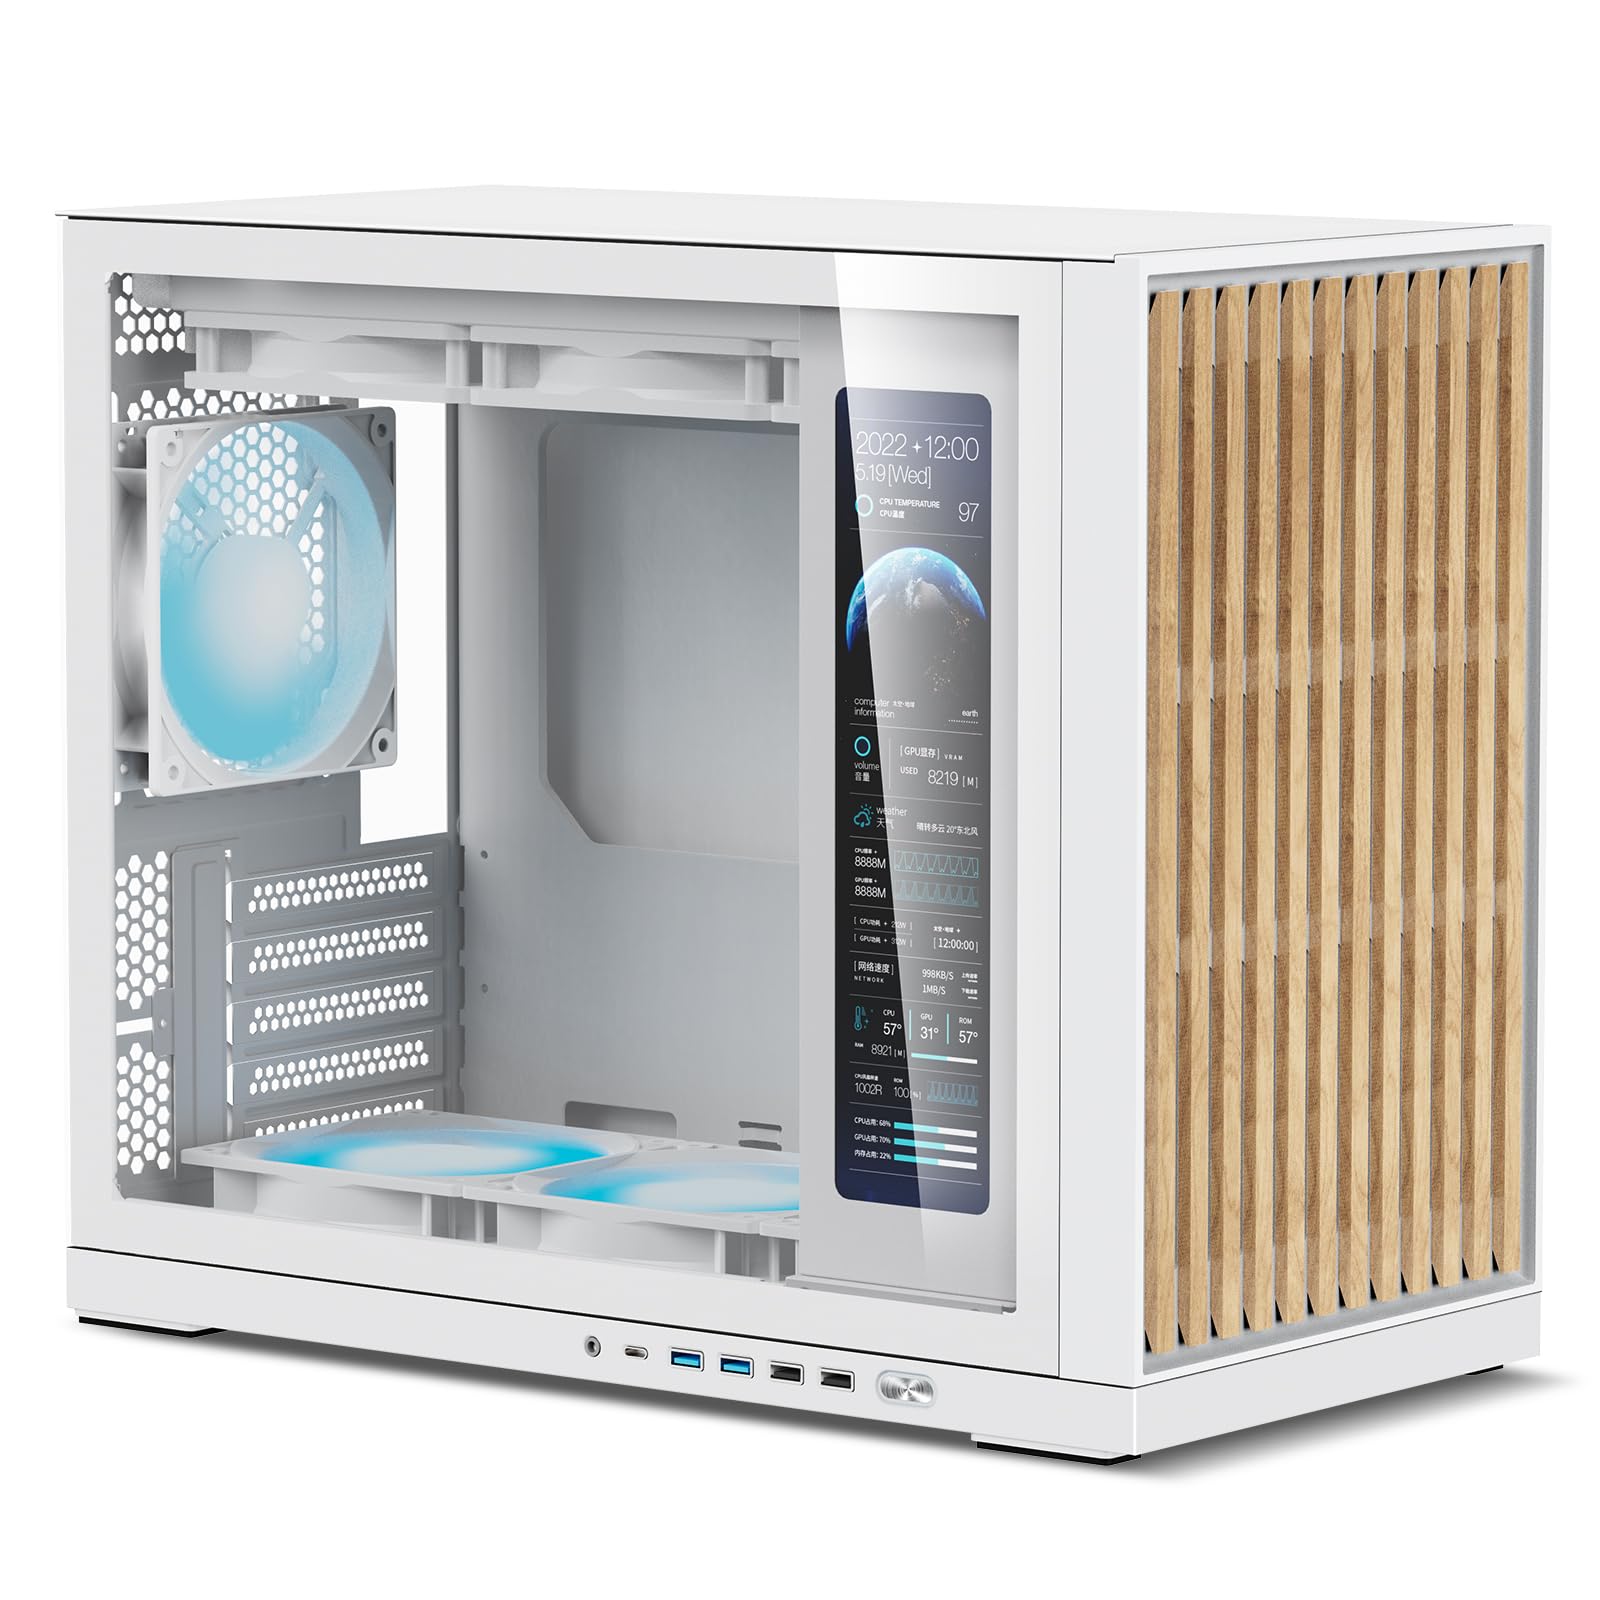
Image: The SHINYSNAKE G600 MATX MFF Gaming Case in white with its auxiliary screen displaying system information.
안전 정보
- 구성 요소를 설치하거나 제거하기 전에 항상 벽면 콘센트에서 전원 공급 장치를 분리하세요.
- 정전기 방전(ESD)으로 인한 민감한 부품 손상을 방지하기 위해 정전기 방지 손목 스트랩을 착용하십시오.
- 물리적 손상을 방지하기 위해 구성품을 조심스럽게 다루십시오.
- 작은 부품이나 도구는 어린이의 손이 닿지 않는 곳에 보관하십시오.
- 과열을 방지하려면 케이스 주변의 적절한 환기를 확보하세요.
- Do not operate the system with the side panels removed unless performing maintenance or troubleshooting.
패키지 내용
조립을 시작하기 전에 모든 구성품이 있는지 확인하십시오.
- SHINYSNAKE G600 MATX MFF Gaming Case (Auxiliary Screen Version)
- 부속품 상자 (나사, 케이블 타이, 스탠드오프 등)
- 사용 설명서 (본 문서)
- Auxiliary Screen USB Cable
- Auxiliary Screen Power Cable
설정 및 설치
Follow these steps for proper assembly of your PC components within the G600 case.
1. 사건 준비
- Carefully remove the tempered glass side panel and the solid wood front panel. These are typically secured with thumbscrews or a snap-on mechanism.
- Unpack the accessory box and identify the various screws and mounting hardware.

Image: The SHINYSNAKE G600 case with its side panel removed, showing the internal layout.
2. 마더보드 설치
- Install the CPU, CPU cooler (if air cooler), and RAM onto your Micro-ATX or Mini-ITX motherboard outside the case.
- Align the motherboard with the standoffs inside the case. Ensure the I/O shield is correctly positioned.
- 제공된 나사를 사용하여 마더보드를 고정합니다.
3. 전원 공급 장치(PSU) 설치
The G600 supports ATX PSUs up to 160mm in length and features a 3-level adjustable PSU chamber to optimize clearance for GPUs and cooling.
- Determine the optimal PSU chamber level based on your GPU length and AIO radiator thickness. Refer to the diagrams below for guidance.
- Mount the PSU to the adjustable bracket and secure it in the desired position.
- Route the necessary PSU cables through the cable management cutouts.

Image: Diagram illustrating the adjustable ATX PSU chamber for optimized clearance.

Image: Configuration for PSU Chamber Level 1, showing GPU and PSU length compatibility.

Image: Configuration for PSU Chamber Level 2, showing GPU and PSU length compatibility.

Image: Configuration for PSU Chamber Level 3, showing GPU and PSU length compatibility.
4. 그래픽 카드(GPU) 설치
The G600 supports GPUs up to 400mm in length (5-slot).
- 필요한 PCIe 슬롯 덮개를 제거하십시오.
- Insert your GPU into the primary PCIe slot on the motherboard.
- 나사로 GPU를 고정합니다.
- Connect the appropriate PCIe power cables from the PSU to the GPU.
5. 냉각 시스템 설치
The G600 offers flexible cooling options:
- 공랭식: Supports CPU air coolers up to 170mm tall. Up to 7 x 120mm fans can be installed (3x top, 1x rear, 3x bottom).
- 액체 냉각: Supports 360mm AIO radiators at the top or bottom, or a 120mm AIO at the rear. Note: A 360mm AIO at the top or bottom may affect other component clearances.
- Install your chosen fans or AIO radiator in the designated mounting points.
- Connect fan power cables to the motherboard or a fan controller.

Image: Diagram showing air cooling fan configurations and CPU cooler height support.

Image: Diagram showing liquid cooling AIO radiator support for top, bottom, and rear mounts.
6. 저장 장치 설치
The G600 supports various storage configurations:
- Rear: 1 x 2.5” SSD mount
- Bottom: 1 x 3.5” HDD mount (optional)
- Auxiliary Screen Bracket: 2 x 2.5” SSD mounts (if not using the screen)
- Mount your SSDs and HDDs in the appropriate locations using the provided screws.
- Connect SATA data and power cables.

Image: Visual representation of SSD and HDD mounting points within the case.
7. 전면 I/O 패널 연결
전면 패널 케이블을 마더보드에 연결하세요.
- USB 3.2 타입 C 포트 1개 (10Gbps)
- 2 x USB 3.0(5Gbps)
- 2개의 USB 2.0
- 1 x 헤드폰/마이크 콤보 잭
- Power Button / Reset Button / LED indicators

Image: Close-up of the front I/O panel showing USB ports and audio jack.
8. Auxiliary Screen Setup
The 11.3-inch auxiliary screen (1920x480 resolution) displays real-time hardware data.
- Connect the auxiliary screen's USB cable to an available USB 2.0 header on your motherboard.
- Connect the auxiliary screen's power cable to a SATA power connector from your PSU.
- Download and install the necessary monitoring software from the official SHINYSNAKE web대지.
- Configure the display settings and choose from over 20 customizable themes to show CPU/GPU temperatures, clock speeds, fan RPM, and more.

Image: Features of the 11.3-inch auxiliary screen, including resolution, USB connection, and monitoring themes.
9. 최종 조립
- Perform cable management to ensure optimal airflow and a clean aesthetic.
- Reattach the tempered glass side panel and the solid wood front panel.
Installation Video (SHINY SNAKE G350 - General Guidance)
While this video is for the SHINY SNAKE G350 model, it may provide general visual guidance for PC component installation within a compact SHINY SNAKE chassis. Please note that specific steps and component layouts may differ for the G600.
Video: Installation instructions for the SHINY SNAKE G350 PC case. Provides general steps for component installation.
Operating the Auxiliary Screen
Once your system is fully assembled and powered on, the auxiliary screen will activate. Ensure the monitoring software is installed and running in your operating system.
- 소프트웨어 구성 : Use the SHINYSNAKE monitoring software to customize the information displayed on the screen. You can select from various metrics such as CPU temperature, GPU temperature, CPU/GPU load, fan speeds, and more.
- 테마 선택: The software offers over 20 customizable themes. Experiment with different themes to find one that suits your aesthetic and informational needs.
- Troubleshooting Display: If the screen does not power on or display information, verify the USB and power connections, and ensure the monitoring software is correctly installed and configured.
제품 끝view Video (SHINY SNAKE G600)
이 비디오는 이상을 제공합니다view of the SHINY SNAKE G600 MATX Chassis, highlighting its features including the auxiliary screen.
비디오: 끝view of the SHINY SNAKE G600 MATX Chassis with Auxiliary Screen, demonstrating its design and features.
유지
- 먼지 필터: Regularly clean the dust filters (if present) to maintain optimal airflow and prevent dust buildup inside the case.
- 외부 청소: 부드러운 d를 사용하세요amp cloth to clean the exterior surfaces. Avoid abrasive cleaners or solvents that could damage the finish or wood panel.
- 내부 청소 : 주기적으로 케이스를 열고 압축 공기를 사용하여 부품과 내부 표면의 먼지를 제거하십시오. 청소하기 전에 시스템의 전원을 끄고 전원 플러그를 뽑으십시오.
- 강화 유리: Clean the tempered glass panel with a microfiber cloth and a glass cleaner designed for electronics to avoid streaks or damage.
문제 해결
System Does Not Power On
- Check all power connections: PSU to wall, PSU to motherboard (24-pin and CPU 8-pin), and front panel power switch cable to motherboard.
- 파워서플라이 스위치가 "켜짐" 위치에 있는지 확인하십시오.
- Verify that the power button cable is correctly connected to the motherboard's front panel header.
Auxiliary Screen Not Displaying
- Confirm the USB and SATA power cables for the auxiliary screen are securely connected.
- Ensure the monitoring software is installed and running in your operating system.
- Check your motherboard's BIOS/UEFI settings to ensure USB 2.0 headers are enabled.
Poor Airflow / Overheating
- Verify all case fans are spinning and oriented correctly for optimal airflow (front/bottom intake, rear/top exhaust).
- Clean any dust filters or internal components that may be obstructing airflow.
- Ensure proper cable management to avoid blocking airflow paths.
명세서
| 특징 | 세부 사항 |
|---|---|
| 제품 크기 (LxWxH) | 427 x 220 x 362mm / 16.81인치 x 8.66인치 x 14.25인치 |
| 마더보드 호환성 | Micro-ATX, Mini-ITX |
| GPU 길이 지원 | Up to 400mm (5-slot) |
| CPU 쿨러 높이 지원 | 최대 170mm |
| PSU Type & Length | ATX PSU, up to 160mm (adjustable chamber) |
| 팬 마운트 | Top: 3 x 120mm or 2 x 140mm; Rear: 1 x 120mm; Bottom: 3 x 120mm |
| AIO 라디에이터 지원 | Top/Bottom: 120/240/280/360mm; Rear: 120mm |
| 스토리지 베이 | 1 x 2.5" SSD (rear), 1 x 3.5" HDD (bottom, optional), 2 x 2.5" SSD (auxiliary screen bracket, if no screen) |
| 전면 I / O 포트 | 1 x USB 3.2 Type-C (10Gbps), 2 x USB 3.0 (5Gbps), 2 x USB 2.0, 1 x Headphone/Mic Combo Jack |
| 보조 화면 | 11.3-inch, 1920x480 resolution, real-time hardware monitoring |
| 재료 | SPCC Steel, Tempered Glass, Wood |
| 품목 무게 | 6.5 킬로그램 |

Image: Detailed specifications table for the SHINYSNAKE G600 case.
보증 및 지원
보증 정보
The SHINYSNAKE G600 MATX MFF Gaming Case comes with a 2년 보증 구매일로부터 적용됩니다. 이 보증은 정상적인 사용 조건에서 발생하는 제조상의 결함 및 재료상의 하자에 적용됩니다. 단, 오용, 사고, 무단 개조 또는 부적절한 설치로 인한 손상은 보증 대상에서 제외됩니다.
보증 청구를 위해 구매 증명서를 보관하십시오.
고객 지원
For technical assistance, troubleshooting, or warranty inquiries, please contact SHINYSNAKE customer support through their official website or the retailer where the product was purchased. You may need to provide your product model number (G600-AS-WT) and proof of purchase.
Official SHINYSNAKE Web대지: Visit the SHINYSNAKE Store on Amazon