
Acegeek AG-KNIGHT-V1-BK
Acegeek Knight-V1 Gaming Chair User Manual
Model: AG-KNIGHT-V1-BK
소개
This manual provides comprehensive instructions for the assembly, safe operation, and proper maintenance of your Acegeek Knight-V1 Gaming Chair. Please read this manual thoroughly before assembly and use to ensure optimal performance and longevity of your product. Keep this manual for future reference.
안전 정보
중요한 안전 예방 조치:
- 최대 중량 한도를 초과하지 마십시오. 110kg(242파운드)이 한도를 초과하면 의자가 손상되거나 부상을 입을 수 있습니다.
- Use all adjustable mechanisms (recline, height, armrests) only as instructed in this manual. Improper use can lead to instability or damage.
- 사용 전에 모든 나사와 볼트가 단단히 조여졌는지 확인하고, 주기적으로 헐거워지지 않았는지 점검하십시오.
- 조정하는 동안 손과 손가락이 움직이는 부품에 닿지 않도록 주의하세요.
- 의자 위에 서지 마세요.
- 조립 중에는 어린이와 애완동물이 의자에 접근하지 못하도록 하세요.
- 의자를 평평하고 안정된 표면에 놓으세요.
패키지 내용
Before beginning assembly, verify that all components are present and undamaged. If any parts are missing or damaged, please contact Acegeek customer support.
- 등받이
- 좌석베이스
- 팔걸이(2)
- 스타베이스
- 캐스터 (5)
- 가스 리프트 실린더
- 가스 리프트 커버
- 메커니즘 플레이트
- 요추 쿠션
- 헤드레스트 쿠션
- 하드웨어 키트(나사, 와셔, 육각 렌치)
- 사용 설명서(본 문서)
설정 및 조립
Follow these steps carefully to assemble your Acegeek Knight-V1 Gaming Chair. It is recommended to have two people for assembly.
Step 1: Attach Casters to Star Base
별 모양 받침대의 각 다리 끝에 있는 구멍에 다섯 개의 바퀴를 각각 끼워 넣으세요. 딸깍 소리가 나면서 제자리에 고정될 때까지 세게 밀어 넣으세요.

Image: The chair's star base with casters being inserted into the leg openings.
Step 2: Install Gas Lift Cylinder
Place the gas lift cylinder into the center hole of the assembled star base. Then, slide the gas lift cover over the cylinder.
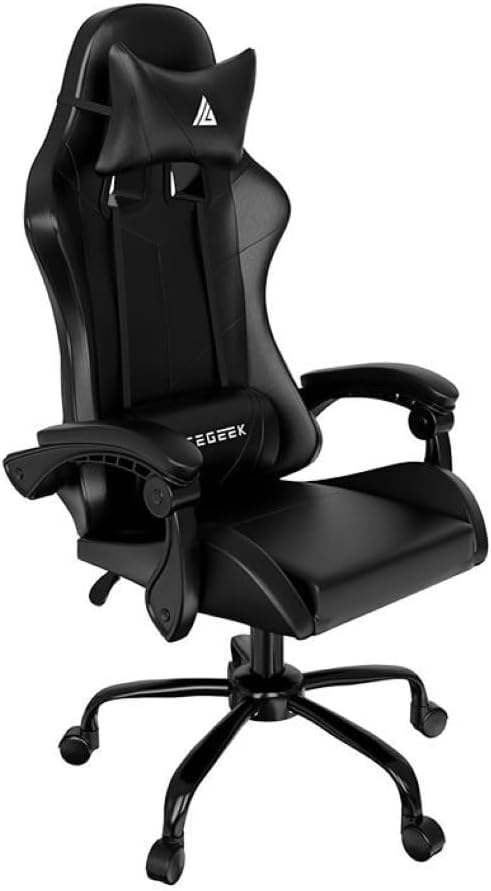
Image: The gas lift cylinder being placed into the center of the five-star base.
Step 3: Attach Mechanism Plate to Seat Base
Align the mechanism plate with the pre-drilled holes on the underside of the seat base. Secure it using the provided screws and Allen key. Ensure the front of the mechanism plate faces the front of the seat.

Image: The underside of the seat base with the mechanism plate attached, showing screw points.
Step 4: Attach Armrests to Seat Base
Attach the armrests to the sides of the seat base using the designated screws. Pay attention to the "L" (left) and "R" (right) markings on the armrests.

Image: The seat base with one armrest partially attached, showing the screw holes.
Step 5: Attach Backrest to Seat Base
Align the backrest with the mounting brackets on the seat base and armrests. Secure it with the remaining screws. It may be helpful to have another person hold the backrest in place during this step.

Image: The backrest being attached to the seat base, showing the connection points.
6단계: 시트 어셈블리를 가스 리프트에 연결
조립된 시트와 등받이를 가스 리프트 실린더 위에 조심스럽게 올려놓고, 메커니즘 플레이트의 중앙 구멍이 가스 리프트 상단과 일치하는지 확인하십시오. 아래로 단단히 눌러 고정하십시오.

Image: The fully assembled chair, viewed from the side, showing its overall structure.
7단계: 쿠션 부착
Attach the headrest cushion to the top of the backrest using its elastic straps. Position the lumbar cushion on the lower backrest, adjusting its height for personal comfort.
작동 지침
높이 조정
To adjust the chair's height, pull the lever located on the right side of the seat upwards. To raise the chair, lift the lever while standing. To lower the chair, lift the lever while seated.
리클라인 조정
The backrest can be reclined between 90 and 120 degrees. Pull the recline lever, typically located on the left side of the seat, to adjust the angle. Release the lever to lock the backrest in your desired position.
팔걸이 조정
The armrests are adjustable. Locate the adjustment buttons or levers on the armrests to change their height or angle, if applicable to your model. Adjust to support your arms and shoulders comfortably.
Lumbar and Headrest Cushion Adjustment
The lumbar and headrest cushions are adjustable. Slide them up or down along the backrest straps to find the most comfortable and supportive position for your neck and lower back.
유지 보수 및 관리
Proper maintenance ensures the longevity and appearance of your gaming chair.
- 청소: 광고로 의자를 닦다amp cloth. Avoid using abrasive cleaners, harsh chemicals, or solvents, as these can damage the PU and PVC material.
- 점검: 모든 나사와 볼트가 단단히 조여져 있는지 정기적으로 점검하세요. 흔들림이나 불안정성을 방지하기 위해 필요하면 다시 조여주세요.
- 캐스터 : Keep the casters clean and free of debris (hair, dust) to ensure smooth movement.
- 직사광선을 피하세요: 직사광선에 장시간 노출되면 소재가 변색되거나 갈라질 수 있습니다.
- 중량 제한: Always adhere to the maximum weight recommendation of 110 kg.
문제 해결
If you encounter issues with your Acegeek Knight-V1 Gaming Chair, refer to the following common problems and solutions:
| 문제 | 가능한 원인 | 해결책 |
|---|---|---|
| 의자가 흔들리거나 불안정하게 느껴집니다. | Loose screws or bolts. Uneven floor. | 조립 나사를 모두 확인하고 조여주세요. 의자가 평평한 표면에 놓여 있는지 확인하세요. |
| Gas lift not adjusting height. | Gas lift cylinder malfunction. Lever not engaged. | 높이 조절 레버가 완전히 당겨져 있는지 확인하십시오. 문제가 지속되면 가스 리프트를 교체해야 할 수 있습니다. 고객 지원팀에 문의하십시오. |
| 캐스터가 원활하게 굴러가지 않습니다. | Debris caught in casters. Damaged casters. | 바퀴에 머리카락이나 이물질이 끼어 있는 것을 제거하십시오. 바퀴가 손상된 경우 교체해야 할 수 있습니다. |
| Backrest not reclining or locking. | 등받이 조절 장치가 고장났거나 손상되었습니다. | Ensure the recline lever is fully engaged. Check for any obstructions. If the mechanism is damaged, contact support. |
명세서
| 상표 | Acegeek |
| 모델 | AG-KNIGHT-V1-BK |
| 색상 | 검은색 |
| 소재(프레임) | Metal + Plate |
| 재질 (표지) | PU + PVC |
| Material (Filling) | Normal Foam |
| 가스 리프트 클래스 | 3학년 |
| 리클라이닝 각도 | 90-120도 |
| 기본 유형 | 320 mm Metal Base |
| 캐스터 크기 | 50 mm Nylon |
| 최대 중량 용량 | 110kg(242파운드) |
| 제품 크기(D x W x H) | 81cm x 26cm x 62cm |
| 조립이 필요합니다 | 예 |
| 특별 기능 | Adjustable headrest and lumbar cushions, adjustable armrests, high backrest with integrated headrest. |
보증 정보
Specific warranty details for the Acegeek Knight-V1 Gaming Chair are typically provided at the point of purchase or on the official Acegeek website. Please retain your proof of purchase for any warranty claims. The warranty generally covers manufacturing defects under normal use. It does not cover damage resulting from misuse, accidents, unauthorized modifications, or exceeding the weight limit.
고객 지원
For technical assistance, missing parts, or warranty inquiries, please contact Acegeek customer support through their official website or the retailer where the product was purchased. Have your model number (AG-KNIGHT-V1-BK) and proof of purchase ready when contacting support.
온라인 지원: Visit the official Acegeek webFAQ 및 연락처 정보는 사이트를 참조하세요.
이메일 지원: Refer to your purchase documentation for the appropriate email address.
Ask a question about this manual
Ask about setup, troubleshooting, compatibility, parts, safety, or missing instructions. Manuals+ will review the question and use this page’s manual context to help answer it.