
1. 서론
This manual provides detailed instructions for the installation, operation, and maintenance of your JOYING Android 13 Car Stereo Head Unit (Model JY-HT145N8). This unit is designed to integrate seamlessly with Honda Civic models from 2016 to 2021, offering advanced features such as CarPlay, Android Auto, GPS navigation, and enhanced audio capabilities.
설치 및 사용 전에 본 설명서를 꼼꼼히 읽어주시기 바랍니다. 그래야 제품이 제대로 작동하고 제품 또는 차량에 손상이 가는 것을 방지할 수 있습니다.

이미지: 이상view of the JOYING Android 13 Car Stereo Head Unit highlighting key features.
2. 안전 정보
- Always ensure the vehicle's ignition is off before performing any installation or wiring.
- Disconnect the vehicle's battery to prevent electrical shorts or damage.
- 설치 과정에 대해 확신이 서지 않는 부분이 있으면 전문가에게 문의하십시오.
- 운전에 방해가 되는 방식으로 기기를 작동하지 마세요.
- Ensure all connections are secure to prevent intermittent issues or hazards.
3. 패키지 내용
아래 나열된 모든 품목이 패키지에 포함되어 있는지 확인하세요.
- 9" radio x1
- Single Din Cage x1
- Left & Right Bracket x1
- WiFi 안테나 x1
- GPS 안테나 x1
- 4G 안테나 x2
- 외부 마이크 x1
- USB 케이블 x2
- AR 케이블 1개
- 스크린 리본 케이블 1개
- 전원 케이블 x1
- 사용 설명서 x1

Image: All components included in the JOYING Android 13 Car Stereo package.
4. 설정 및 설치
The JOYING head unit is designed for a plug-and-play installation, supporting factory reverse camera, steering wheel controls, USB, and lanewatch camera. Follow these general steps for installation:
- Remove Original Dashboard Components: Carefully remove the side panel trims and the original radio unit from your vehicle's dashboard.
- 배선 하네스 연결: Connect the provided wiring harnesses to the new head unit and your vehicle's existing connectors. Ensure all compatible plugs are securely connected. Some plugs may not be used depending on your vehicle's configuration.
- 안테나 연결: Attach the WiFi, GPS, and 4G antennas to their respective ports on the head unit.
- USB 케이블 연결: Plug in the USB cables for data transfer and charging.
- Connect Camera Inputs: Connect your reverse camera to the "CAM IN" port.
- CAN Bus Setting: If your vehicle is equipped with a CAN bus, ensure the communication protocol (white button) on the head unit is set to the right side (CAN).
- Radio Antenna Adapter: For sedan 4-door Honda Civic models, you may need to remove the rear passenger seat panel trim to access and bypass the HD radio box using the included green and gray cables.
- 테스트 기능: Before fully reassembling the dashboard, loosely fit the head unit and test all functions (power, audio, navigation, camera, steering wheel controls) to ensure everything is working correctly.
- 대시보드 재조립: 모든 기능이 검증되면 대시보드 구성 요소를 조심스럽게 다시 조립하십시오.

Image: JOYING head unit seamlessly integrated into a Honda Civic dashboard.

Image: Purchase guide illustrating different wiring harnesses (A, B, C) based on OEM radio type.

Image: Important note on setting the CAN bus communication protocol.
설치 동영상:
Video: Detailed installation guide for an Android 13 car stereo in a Honda Civic (from Dasaita Offical Store). This video provides comprehensive steps for removing the old unit and connecting the new one.
Video: Installation steps for a new radio in a Honda Civic (from Dasaita Offical Store). This video focuses on the initial removal and wiring process.
Video: Wiring installation guide (from Jingelsye-US). This video demonstrates the connection of various cables to the head unit.
5. 사용 설명서
5.1 기본 기능
- 전원 켜기/끄기: The unit will typically power on with the vehicle's ignition. A fast boot feature allows it to start in 2 seconds after the initial 30-40 second boot.
- 볼륨 조절: 물리적인 볼륨 조절 다이얼이나 화면상의 컨트롤을 사용하여 오디오 레벨을 조정하십시오.
- Android OS Navigation: Navigate through the Android 13 interface using the touchscreen.
5.2 연결 기능
- CarPlay 및 Android Auto: Connect your mobile phone via USB cable or Bluetooth to mirror apps, access navigation, make calls, and listen to music on the larger screen.
- 블루투스 5.0 : 핸즈프리 통화 및 오디오 스트리밍을 위해.
- 내장형 4G 모듈: Insert a SIM card for internet access (does not support phone calls or SMS). Supports FDD-LTE: B2/B4/B5/B7/B12/B13/B14/B17/B25/B26/B38/B66/B71 and TDD-LTE: B41.
- WiFi 신호: Independent WiFi antenna ensures stable 2.4GHz/5GHz internet access.
- USB 포트: Three USB ports are available for various connections.
- 마이크로 SD 카드 슬롯: 추가 저장 공간.

Image: Demonstration of Built-in CarPlay and Android Auto connectivity.

Image: Illustration of the upgraded WiFi signal with an independent antenna.
5.3 내비게이션 및 멀티미디어
- GPS 네비게이션: Precise GPS engines with included GPS antennas for accurate positioning and faster real-time navigation. Supports offline maps.
- FM/AM 라디오: Built-in FM RDS tuner radio for selecting your favorite radio stations.
- DSP Sound: TDA7851 chip, 48-band graphic equalizer, and 4x50W max output power for high-quality sound. Supports aftermarket amplifiers via optical fiber and coaxial digital output.
- 화면 분할 멀티태스킹: 화면에서 두 개의 애플리케이션을 동시에 실행하세요.
- HDMI 출력: Full digital image and sound-sending interface for projection screen display or on-screen display (1080P clear picture, zero delays). HDMI cable not included.

Image: High-quality sound enjoyment features including DSP chip and graphic equalizer.
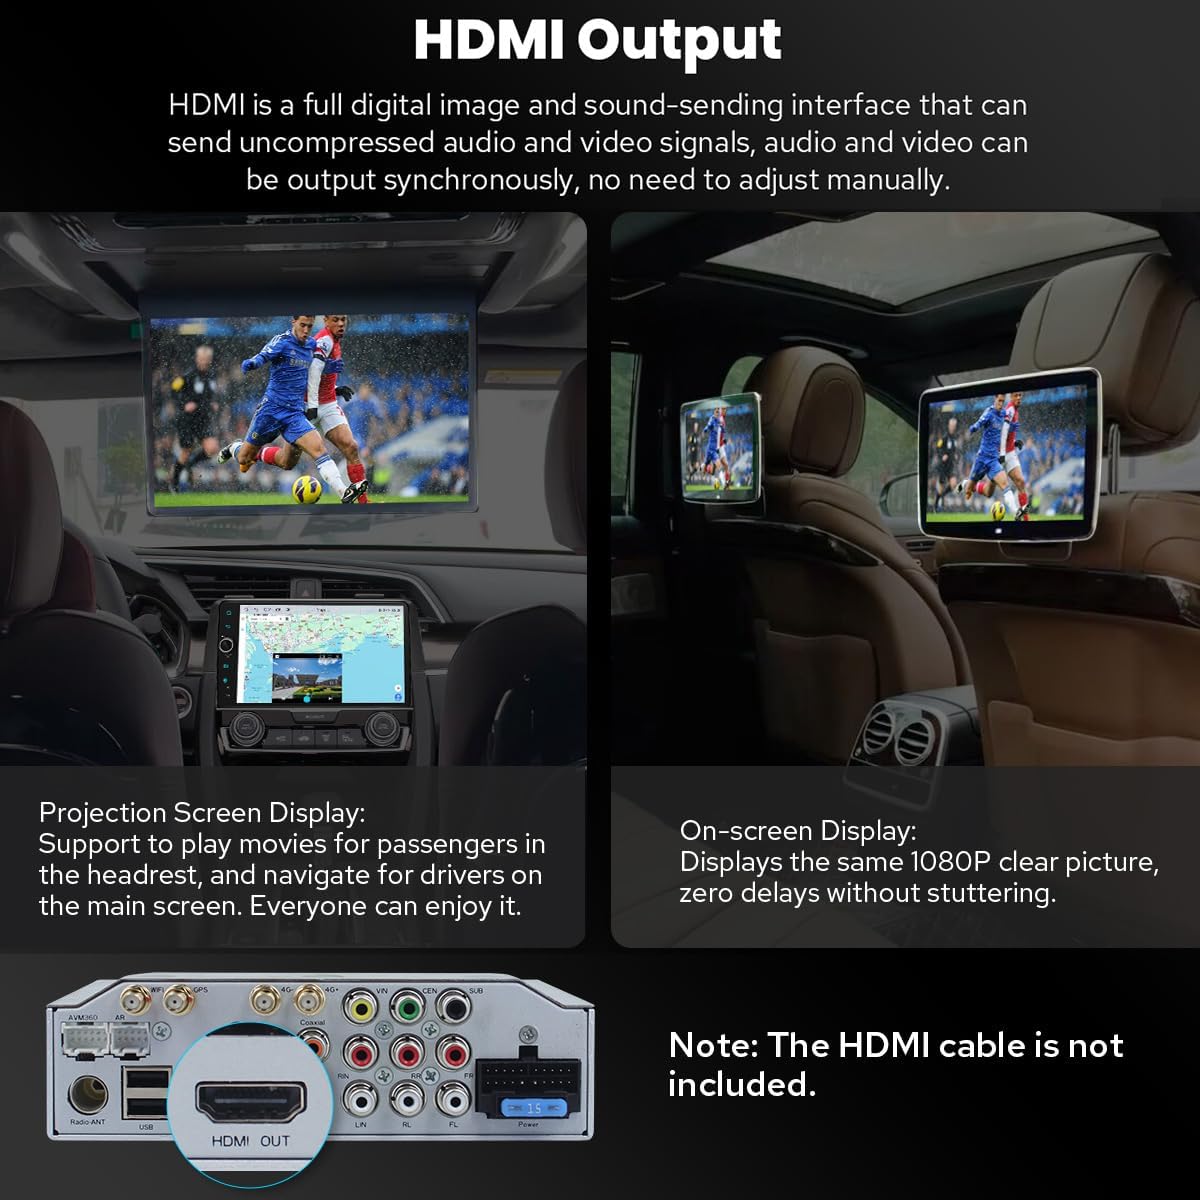
Image: HDMI output for connecting external displays.

Image: Demonstration of split-screen multitasking on the head unit.
5.4 Personalization and Other Features
- 개인 설정: Customize car boot logo, wallpapers, and changeable button colors. Adjustable screen brightness.
- 냉각 시스템: Dual heat sink design for superior heat dissipation and temperature control. Fan automatically turns on if CPU temperature or radio volume exceeds a warning value.
- 선택 사양: Supports external OBD2 (for real-time data and trouble codes), AR Front Camera (records front road), and AR Rear Camera (switches automatically when reversing).

Image: Personalized settings for the head unit interface.

Image: Illustration of the upgraded dual heat sink cooling system.

Image: Optional accessories that can be integrated with the head unit.
6. 유지관리
- 청소: 부드럽고 마른 천을 사용하여 화면과 기기를 닦으세요. 연마성 세척제나 용제는 사용하지 마세요.
- 소프트웨어 업데이트: Periodically check for software updates via the system settings. Updates can improve performance and add new features.
- 온도 조절: The dual heat sink design helps manage temperature. Ensure proper ventilation around the unit.
7. 문제 해결
문제가 발생할 경우 다음의 일반적인 문제 해결 팁을 참조하십시오.
- 전원 없음: 모든 전원 케이블 연결을 확인하세요. 차량의 시동이 켜져 있는지 확인하세요.
- 소리 없음: Verify audio cable connections (RR, RL for touring amp). Check volume levels and DSP settings.
- 후방 카메라가 작동하지 않습니다: Ensure the "CAM IN" cable is properly connected. Check factory settings for reversing camera (Setting > Factory settings > Others > Prohibit reverse and set "Enable").
- 스티어링 휠 컨트롤이 작동하지 않음: Check factory settings (Setting > Car > Factory settings > Canbus > Canbus Select and choose NO.21).
- GPS 신호 문제: GPS 안테나가 단단히 연결되어 있고 시야가 확보되어 있는지 확인하십시오. view 하늘의.
- Wi-Fi/4G Connectivity Problems: Check antenna connections and ensure correct SIM card insertion (for 4G). Verify network settings.
- 느린 성능: Ensure the unit's cooling system is functioning. Close unnecessary background applications.
8. 사양
| 품목 무게 | 6파운드 |
| 패키지 크기 | 12.6 x 9.06 x 7.68 인치 |
| 품목 모델 번호 | JY-HT145N8 |
| 디스플레이 크기 | 9 인치 |
| 음성 명령 | 터치스크린 |
| 차량 서비스 유형 | 자동차 |
| 특징 | 블루투스, 터치스크린 |
| 연결 기술 | 블루투스, 이더넷, USB, Wi-Fi |
| 지도 유형 | 북아메리카 |
| 오디오 출력 모드 | 스테레오 재생 |
| 장착 유형 | 대시 보드 마운트 |
| 운영 체제 | 기계적 인조 인간 |
9. 보증 및 지원
9.1 보증 정보
The JOYING Android 13 Car Stereo Head Unit comes with a 2년 보증보증 청구를 위해 구매 증빙 서류를 보관하세요.
9.2 제품 지원
For technical assistance, troubleshooting, or warranty inquiries, please contact JOYING customer support through the Amazon platform or visit the official JOYING website. Refer to the included warranty card for specific contact details.
반품 정책: This product is eligible for a 30-day refund/replacement policy from the date of purchase, subject to Amazon's return guidelines.