소개
This manual provides essential information for the installation, operation, and maintenance of your new Generic GX22 Carburetor Kit. This kit is designed as a direct replacement for specific Honda 4-stroke engines, ensuring efficient fuel delivery and optimal engine performance. Please read these instructions thoroughly before proceeding with installation or use.
안전 정보
Always prioritize safety when working with engine components. Failure to follow these safety guidelines may result in injury or damage to equipment.
- Ensure the engine is completely off and cooled down before beginning any work.
- 우발적인 시동을 방지하기 위해 점화 플러그 와이어를 분리하십시오.
- 연료 증기를 흡입하지 않도록 환기가 잘 되는 곳에서 작업하십시오.
- 안전 안경과 장갑 등 적절한 개인 보호 장비를 착용하세요.
- Handle fuel with extreme care. Avoid spills and ensure no open flames or sparks are present.
- 모든 부품과 도구는 어린이와 반려동물의 손이 닿지 않는 곳에 보관하십시오.
- 어떤 단계에 대해 확신이 없다면 자격을 갖춘 기술자에게 문의하세요.
패키지 내용
Verify that all components listed below are present in your kit before beginning installation. If any parts are missing, please contact the seller.
- 기화기 1개
- 1x Fuel Line Kit
- 프라이머 전구 2개
- 1x 그로밋
- 가스켓 1개
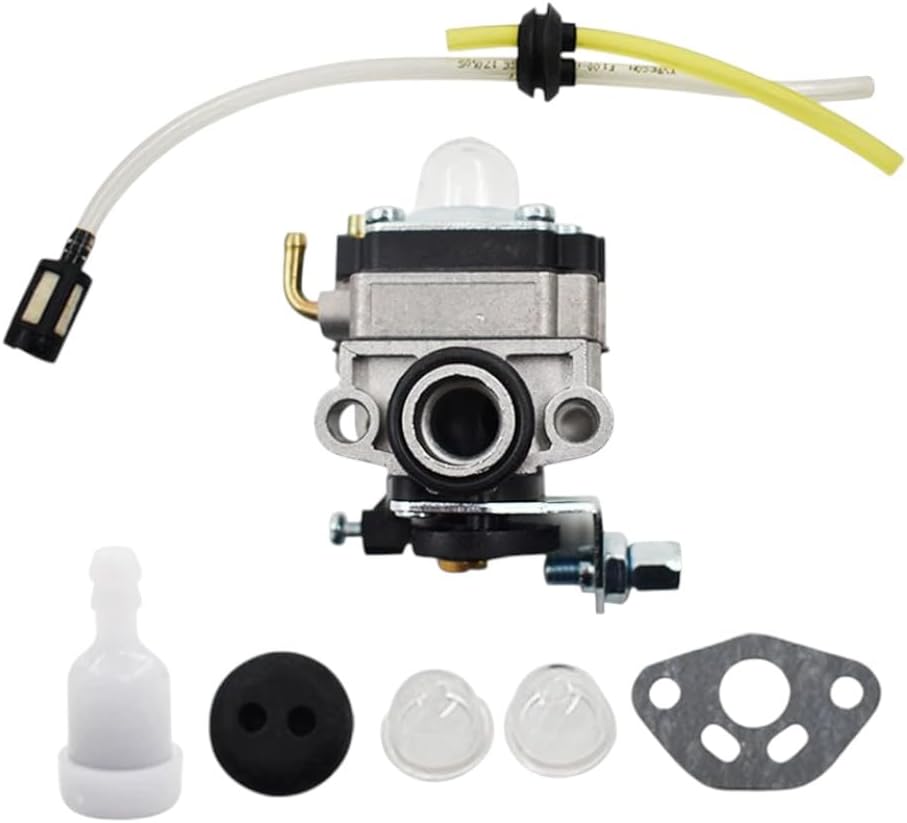
Image: All components of the carburetor kit, including the carburetor, fuel lines, primer bulbs, grommet, and gasket, are displayed on a white background.
호환성
This carburetor kit is compatible with the following Honda 4-stroke engine models:
- 혼다 GX22
- 혼다 GX25
- 혼다 GX31
- 혼다 GX35
- Honda FG100 Little Wonder Mantis Tiller
- Honda HHE31C Edger
- Honda HHT31S Trimmer series
- Honda UMK431 Trimmer series
The Manufacturer Part Number (MPN) for this carburetor is 16100-ZM5-803.
설치 가이드
This section provides general steps for replacing a carburetor. Specific procedures may vary slightly depending on your engine model. Refer to your engine's service manual for detailed instructions if needed.
- 준비: Ensure the engine is cool and the fuel tank is empty or the fuel line is clamped. Disconnect the spark plug wire.
- 에어 필터 어셈블리를 제거하십시오: Carefully remove the air filter housing and air filter element to gain access to the carburetor.
- 연료 라인을 분리하십시오: Identify and disconnect the fuel lines connected to the old carburetor. Be prepared for minor fuel spills.
- 스로틀 링크를 분리하십시오: Detach the throttle cable and any other linkages connected to the carburetor. Note their positions for reassembly.
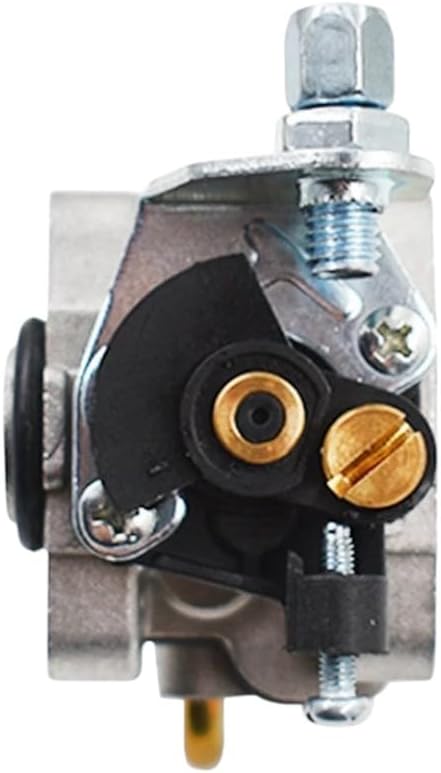
이미지: 상단 view of the carburetor, highlighting the throttle linkage mechanism and adjustment screws.
- 기존 기화기를 제거하세요: Unbolt the old carburetor from the engine manifold. Remove any old gaskets.
- 새로운 개스킷 설치: Place the new gasket provided in the kit onto the engine manifold, ensuring proper alignment.
- 새 기화기를 장착하세요: Position the new carburetor onto the gasket and secure it with the mounting bolts. Do not overtighten.
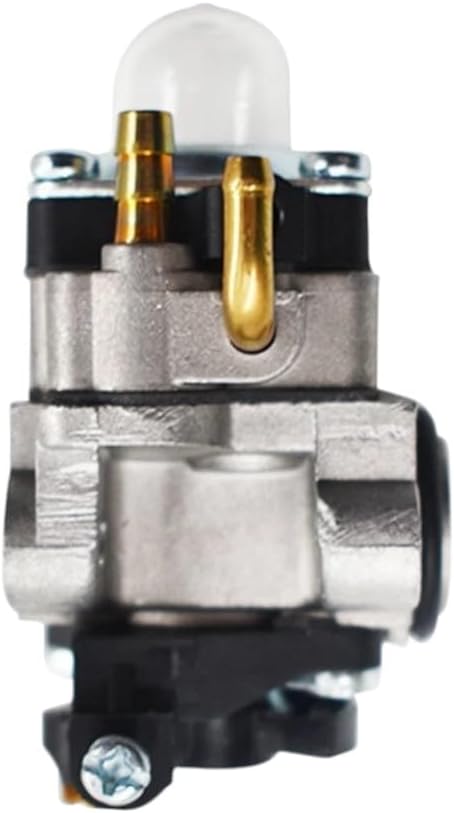
이미지: 측면 view of the carburetor, showing the fuel inlet and outlet ports.
- Connect Throttle Linkage: Reattach the throttle cable and other linkages to the new carburetor. Ensure smooth operation.
- 연료 라인을 연결하세요: Attach the new fuel lines from the kit to the carburetor and fuel tank. Ensure all connections are secure and leak-free. Replace the primer bulb and grommet if necessary.

이미지: 하단 view of the carburetor, featuring the clear primer bulb and fuel connections.
- 에어필터 어셈블리를 다시 설치하십시오. Reattach the air filter element and housing.
- 최종 점검: Double-check all connections, ensure no tools or debris are left in the engine area. Reconnect the spark plug wire.
작업
After successful installation, follow these steps to start and operate your engine:
- Fill the fuel tank with the appropriate fuel type for your engine.
- 연료가 보일 때까지 프라이머 펌프를 여러 번 눌러 기화기를 예열하십시오.
- Set the choke lever to the "Choke" or "Start" position (if applicable).
- 엔진이 시동될 때까지 스타터 코드를 단단히 당기세요.
- Once the engine starts, gradually move the choke lever to the "Run" position.
- 엔진에 부하를 걸기 전에 몇 분 동안 예열하십시오.
The carburetor is pre-adjusted for optimal performance. No further adjustments should be necessary under normal operating conditions.
유지
Regular maintenance helps ensure the longevity and reliable performance of your carburetor and engine.
- 연료 품질: 항상 신선하고 깨끗한 연료를 사용하십시오. 오래되거나 오염된 연료는 기화기 고장의 흔한 원인입니다.
- 연료 필터: Inspect and replace the fuel filter regularly to prevent debris from entering the carburetor.
- 에어 필터: 공기-연료 혼합이 제대로 이루어지도록 공기 필터를 깨끗하게 유지하십시오. 공기 필터가 더러우면 엔진이 과다 연료로 작동할 수 있습니다.
- 저장: 장기간 보관하기 전에 연료 탱크를 비우고 엔진이 멈출 때까지 작동시켜 기화기에서 연료를 제거하거나 연료 안정제를 사용하십시오.
- 점검: Periodically inspect fuel lines, primer bulb, and gaskets for cracks, leaks, or signs of wear. Replace as needed.
문제 해결
Refer to the table below for common issues and potential solutions.
| 문제 | 가능한 원인 | 해결책 |
|---|---|---|
| 엔진이 시동되지 않습니다 | No fuel, clogged fuel filter, no spark, incorrect choke setting, primer bulb not primed. | Check fuel level, replace fuel filter, check spark plug, adjust choke, prime carburetor. |
| 엔진이 거칠게 작동하거나 멈춥니다. | Dirty air filter, stale fuel, fuel line obstruction, carburetor jets clogged. | Clean/replace air filter, use fresh fuel, check fuel lines, clean carburetor (if experienced). |
| 연료 누출 | Loose fuel line connection, cracked fuel line, faulty gasket, damaged primer bulb. | Tighten connections, replace fuel lines, replace gasket, replace primer bulb. |
| 엔진의 동력이 부족합니다 | Dirty air filter, restricted exhaust, incorrect engine speed adjustment. | Clean/replace air filter, check exhaust for blockages, ensure throttle linkage is free. |
If troubleshooting steps do not resolve the issue, it is recommended to consult a professional engine technician.
명세서
| 상표 | 일반적인 |
| 모델 | 기화기 키트 |
| Manufacturer Part Number (MPN) | 16100-ZM5-803 |
| 품목 모델 번호 | 396606149251 |
| Additional Model Numbers | RY34421, RY34441, RY34442, RY34422 |
| 호환성 | Honda GX22, GX25, GX31, GX35, FG100, HHE31C, HHT31S, UMK431 series |
보증 및 지원
Specific warranty information for this Generic product is not provided in the product details. For any questions regarding product defects, missing parts, or technical support, please contact the seller directly through your purchase platform. Customer satisfaction is important, and the seller aims to respond to inquiries within 6 hours.


