
1. 서론
Welcome to the XTUGA F4A 4-Channel Audio Mixer. This manual provides essential information for setting up, operating, and maintaining your audio mixer. Please read it thoroughly to ensure optimal performance and longevity of your device.
2. 주요 특징
- 4채널 믹서: Features 4 input channels for versatile audio mixing.
- 무선 블루투스 연결: Built-in Bluetooth for seamless audio streaming from compatible devices.
- 99 DSP 효과: Integrated Digital Signal Processor with 99 effects for enhanced audio customization.
- 평준화: Includes 3-band equalization adjustment per channel and a 7-band stereo equalizer for precise tone control.
- PAD/HPF Functions: High Pass Filter (HPF) removes low-frequency interference below 80Hz. Pad (Constant Attenuation) button attenuates input signals by 26dB.
- Stereo Pan: Converts 4 mono modes to 2 stereo modes (e.g., channels 1/2 and 5/6).
- USB/PC/Phone Playback & Recording: Supports direct connection for audio playback and recording via USB to PC or phone.
- 팬텀 파워 : 콘덴서 마이크용 +48V 팬텀 전원.
3. 설정 가이드
3.1 포장 풀기 및 초기 검사
Carefully remove all components from the packaging. Verify that all items listed in the product list are present and undamaged.

Image: XTUGA F4A Mixer and included accessories.
3.2 전원 연결
Connect the provided power adapter to the DC 12V input on the mixer and then to a suitable power outlet. Ensure the power switch is in the OFF position before connecting.
3.3 오디오 입력 연결
Connect your microphones, instruments, or other audio sources to the appropriate input channels. The mixer supports XLR and 6.35mm (1/4 inch) inputs for microphones and line-level devices.

Image: Front panel of the XTUGA F4A mixer showing various inputs and controls.
3.3.1 Condenser Microphones (+48V Phantom Power)
For condenser microphones, activate the +48V phantom power by pressing the dedicated button for the respective channel. A red indicator light will confirm activation.
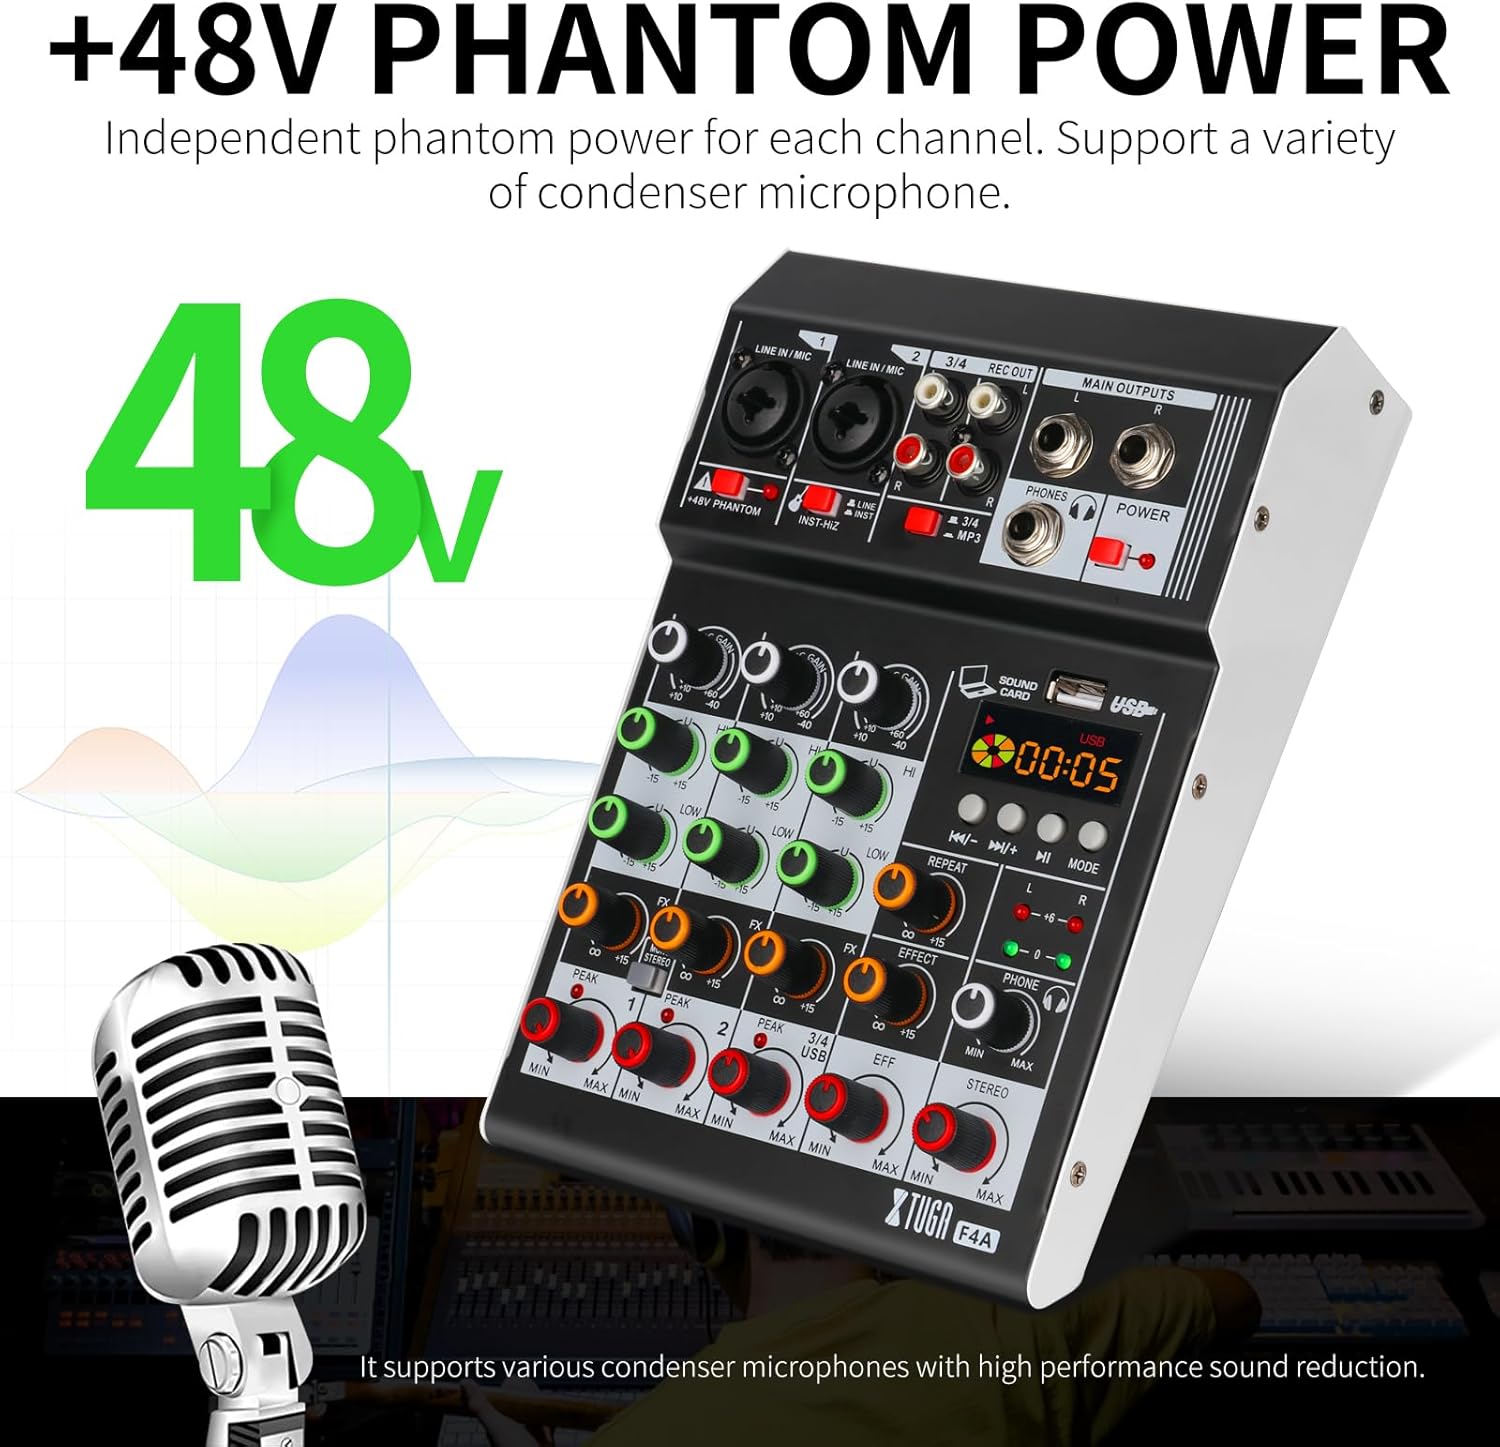
Image: Close-up of the XTUGA F4A mixer highlighting the +48V phantom power button for condenser microphones.
3.3.2 USB/PC/Phone Connection
Connect the mixer to a PC or phone using a USB cable for digital audio input and output. This allows for direct playback and recording.

Image: Diagram showing how to connect the XTUGA F4A mixer to a computer or USB device for playback and recording.
3.3.3 블루투스 페어링
To connect via Bluetooth, activate the Bluetooth function on the mixer and search for 'BT-AUDIO' on your smart device. Pair the devices to stream audio wirelessly.

Image: The XTUGA F4A mixer connected wirelessly via Bluetooth to a smartphone.
3.4 헤드폰 모니터링
Connect your headphones to the PHONES output for monitoring the mixed audio. Adjust the headphone level using the dedicated knob.
Video: Demonstrates the method for connecting and operating headphone monitoring with the mixer.
4. 사용 설명서
4.1 채널 제어
Each channel features individual controls for GAIN, PAN, HIGH, MID, LOW, AUX, and EFF. Adjust these knobs to shape the sound of each input source.
4.1.1 PAD/HPF Functionality
Press the PAD button to attenuate the input signal by 26dB, useful for high-level sources. Activate the HPF (High Pass Filter) to remove unwanted low-frequency noise below 80Hz.
4.2 평형화(EQ)
Utilize the 3-band EQ on each channel for basic tone adjustments. The 7-band stereo graphic equalizer provides finer control over the overall mix frequency response.
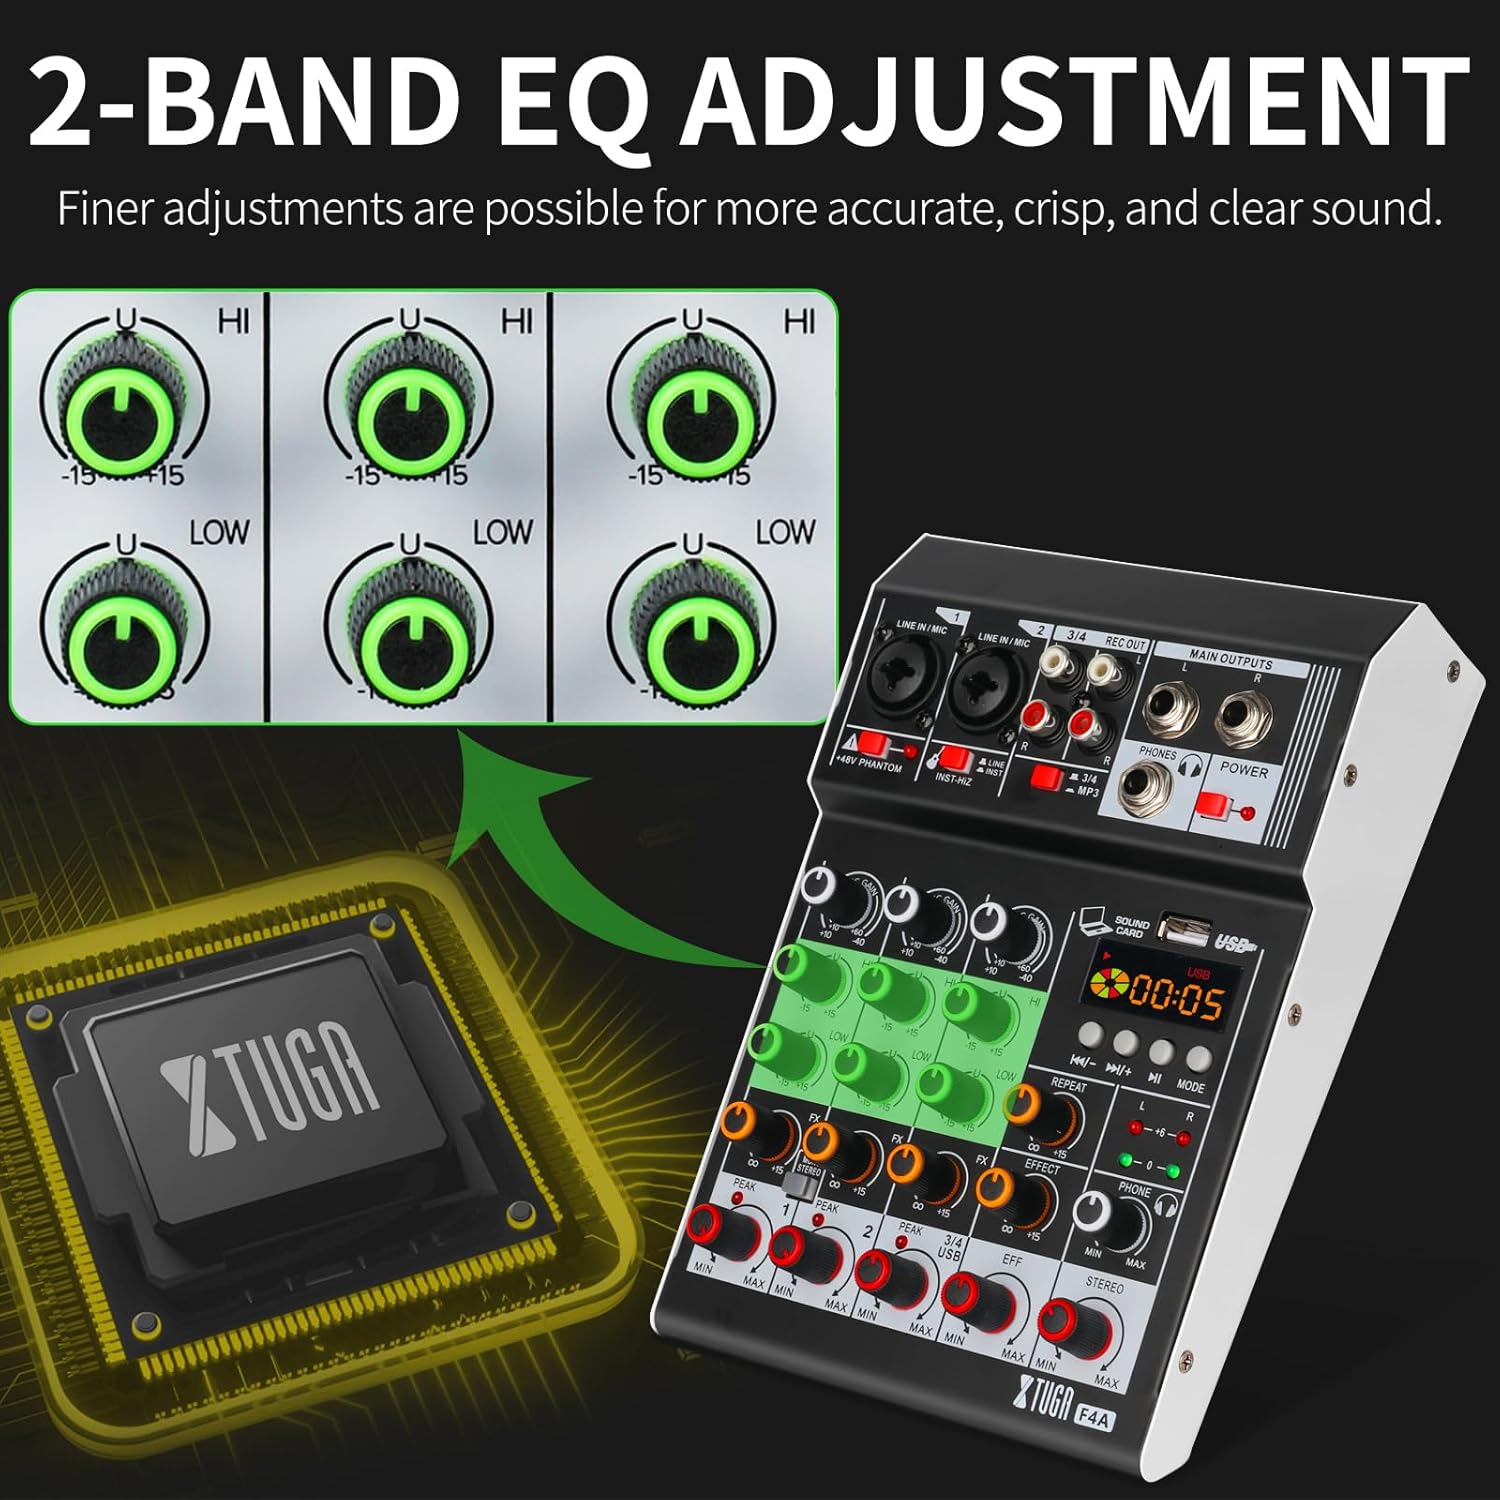
Image: Close-up of the XTUGA F4A mixer's 2-band EQ section, illustrating how to make finer adjustments for accurate sound.
4.3가지 DSP 효과
The built-in 99 DSP effects can be applied to individual channels or the main mix. Rotate the PROGRAM knob to select an effect and adjust its parameters as needed. This allows for diverse soundscapes suitable for various performance types.
비디오: 끝view of the professional audio mixer, demonstrating its features including the MP3 player functionality.
4.4 USB/블루투스 재생
When connected via USB or Bluetooth, use the dedicated controls on the mixer's media player section to play, pause, skip tracks, and adjust volume for the digital audio source.
5. 유지관리 및 관리
- 청소: Use a soft, dry cloth to clean the mixer's surface. Avoid liquid cleaners or abrasive materials.
- 저장: 믹서기는 직사광선과 극한의 온도를 피해 서늘하고 건조한 곳에 보관하세요.
- 손질: Handle the mixer with care to prevent damage to knobs, faders, and ports.
6. 문제 해결
6.1 사운드 출력 없음
- 믹서의 전원이 켜져 있고 모든 케이블이 제대로 연결되어 있는지 확인하십시오.
- Check master volume faders and individual channel levels.
- Verify that input sources are active and producing sound.
6.2 오디오 품질이 좋지 않음
- Check for proper gain staging to avoid clipping (PEAK indicators).
- Ensure correct microphone type is used with or without phantom power.
- 케이블에 손상이나 느슨한 연결 부분이 있는지 점검하십시오.
6.3 블루투스 연결 문제
- Ensure the mixer's Bluetooth mode is active and discoverable.
- 기기의 블루투스가 켜져 있고 블루투스 범위 내에 있는지 확인하세요.
- Forget and re-pair the device if connection is unstable.
7. 기술 사양
- 모델: F4A
- 채널: 4
- DSP 효과: 99
- 이퀄라이저 : 채널당 3밴드, 7밴드 스테레오 그래픽 이퀄라이저
- 연결성: Bluetooth, USB, XLR, 6.35mm (1/4 inch)
- 팬텀 파워 : +48V
- 품목 무게: 23파운드
- 패키지 크기: 11 x 7.3 x 4 인치
8. 보증 정보
This product is covered by the manufacturer's standard warranty. Please refer to the warranty card included in your product packaging or visit the XTUGA official web자세한 이용 약관은 사이트를 참조하세요.
9. 고객 지원
For further assistance, technical support, or service inquiries, please contact XTUGA customer support through the contact information provided on the official web사이트나 제품 설명서에서 확인하세요.