1. 서론
This manual provides detailed instructions for the installation, operation, and maintenance of your ELUSH 60Amp MPPT Solar Charge Controller. This device is designed to efficiently manage power from your solar panels to charge various battery types, including LiFePO4, AGM, and Gel batteries, in 12V, 24V, and 48V systems.
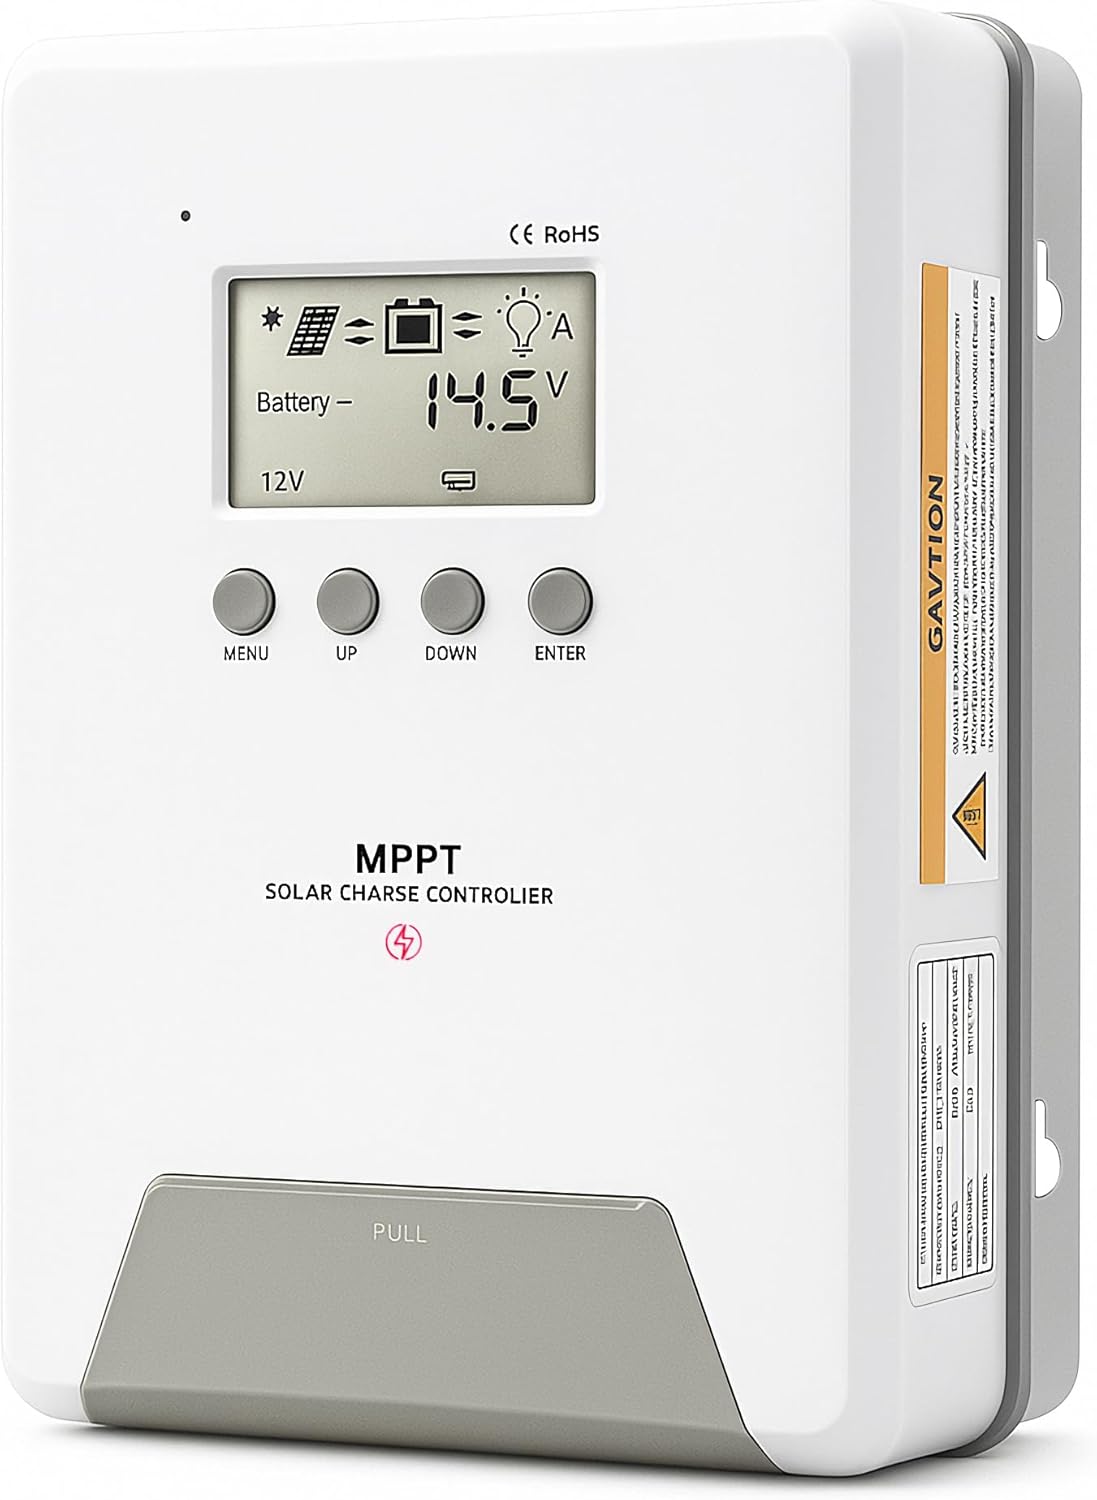
Image 1.1: ELUSH 60Amp MPPT 태양광 충전 컨트롤러.
2. 주요 특징
- 고급 MPPT 기술: Maximizes energy harvest from solar panels with tracking efficiency no less than 99% and peak conversion efficiency up to 98%.
- System Auto-Detection: Automatically detects 12V, 24V, and 48V DC system voltages upon startup.
- 폭넓은 배터리 호환성: Supports Sealed (AGM), Gel, Flooded lead-acid batteries, and Lithium batteries (LiFePO4, Ternary Lithium/Li-ion).
- 명확한 LCD 디스플레이: PV 볼륨을 실시간으로 모니터링합니다.tage, 배터리 용량tage/current, charging power, accumulated energy generation, and load status.
- Essential Built-in Protections: Includes safeguards against overvoltage, 과전류, 언더볼tag그리고 고온.
- 효율적인 열 발산: Features a high-quality aluminum heatsink for stable operation and optimal performance.

Image 2.1: MPPT Technology highlighting 99% tracking efficiency and 98% peak conversion efficiency.
3. Safety Information and System Protection
The ELUSH MPPT Solar Charge Controller is equipped with multiple protection features to ensure safe and reliable operation of your solar power system. Always adhere to local electrical codes and safety guidelines during installation and operation.
- 과방전 보호: Prevents batteries from being discharged below a safe voltag전자 수준.
- 과부하 보호: Safeguards against excessive current draw from the load terminals.
- 단락 보호: Protects against short circuits in the solar panel, battery, or load circuits.
- 역 극성 보호 : Prevents damage from incorrect battery or solar panel connections.
- 과충전 보호: Ensures batteries are not overcharged, extending their lifespan.
- 온도 보상: Adjusts charging parameters based on battery temperature for optimal charging.
- 역전류 보호: Prevents current from flowing back from the battery to the solar panel at night.

Image 3.1: Visual representation of the controller's system protection features.
4. 설치 및 배선
태양광 충전 컨트롤러의 안전하고 효율적인 작동을 위해서는 올바른 설치가 매우 중요합니다. 다음 단계를 주의 깊게 따르십시오.
4.1 연결 순서
Always connect components in the following order to prevent damage:
- 배터리 연결: Connect the battery to the controller's battery terminals. Ensure correct polarity (+ to + and - to -). The battery terminals should be installed with safety fuses. Ensure the distance does not exceed 150mm.
- 부하를 연결합니다: DC 부하를 컨트롤러의 부하 단자에 연결하십시오.
- Connect the solar panel: Connect the solar panel to the controller's solar energy terminals. Ensure correct polarity.
- Power on the controller: The controller will automatically power on once all connections are secure.
메모: If you want to connect an inverter, connect it directly to the battery, not to the load terminal of the controller.

Image 4.1: Diagram showing the connection points for solar energy, battery, and load.

Image 4.2: Step-by-step visual guide for connecting the system components.
4.2 Hidden Installation Wiring
For a clean and secure installation, the wiring can be routed and hidden. After all connections are properly made and tested, tighten the screws on the terminals and close the bottom cover of the controller to complete the installation. This protects the wiring and provides a neat appearance.
5. 사용 설명서
The controller features an intuitive LCD display and buttons for monitoring and configuration.
5.1 LCD 디스플레이 및 버튼
The LCD screen provides real-time information about your system. The buttons allow you to navigate menus and adjust settings.
- 온도 센서: Located on the controller, it measures ambient temperature for accurate charging compensation.
- LCD 디스플레이: Shows PV voltage, 배터리 용량tage, charging current, load status, and other system parameters.
- 메뉴 버튼: Used to enter and exit menu settings.
- 위로 버튼: Navigates upwards through menu options or increases values.
- 다운 버튼: Navigates downwards through menu options or decreases values.
- 입력 버튼: 선택 사항을 확인하거나 하위 메뉴로 들어갑니다.
Image 5.1: The controller's LCD display and button layout for user interaction.
5.2 자동 볼륨tage Recognition and Battery Compatibility
The controller automatically detects the system voltage (12V, 24V, or 48V) upon startup. It is compatible with a wide range of battery types, ensuring efficient and safe charging for your specific setup.
- Lithium-ion batteries (Li): For standard lithium-ion chemistries.
- Lithium Iron Phosphate batteries (LiFePO4): Specifically designed for LiFePO4 batteries.
- Lead-acid batteries (BAT): Includes Sealed (AGM), Gel, and Flooded types.

Image 5.2: Illustration of automatic voltage recognition and compatibility with various battery types.
6. 사양
| 상표 | ELUSH |
| 모델 번호 | DM60A |
| 현재 평가 | 60A |
| 시스템 볼륨tage | 12V/24V/48V Auto Detection |
| 최대 PV 입력 Voltage | 150V |
| 재료 | 알류미늄 |
| 디스플레이 유형 | 액정표시장치 |
| 색상 | 검은색 |
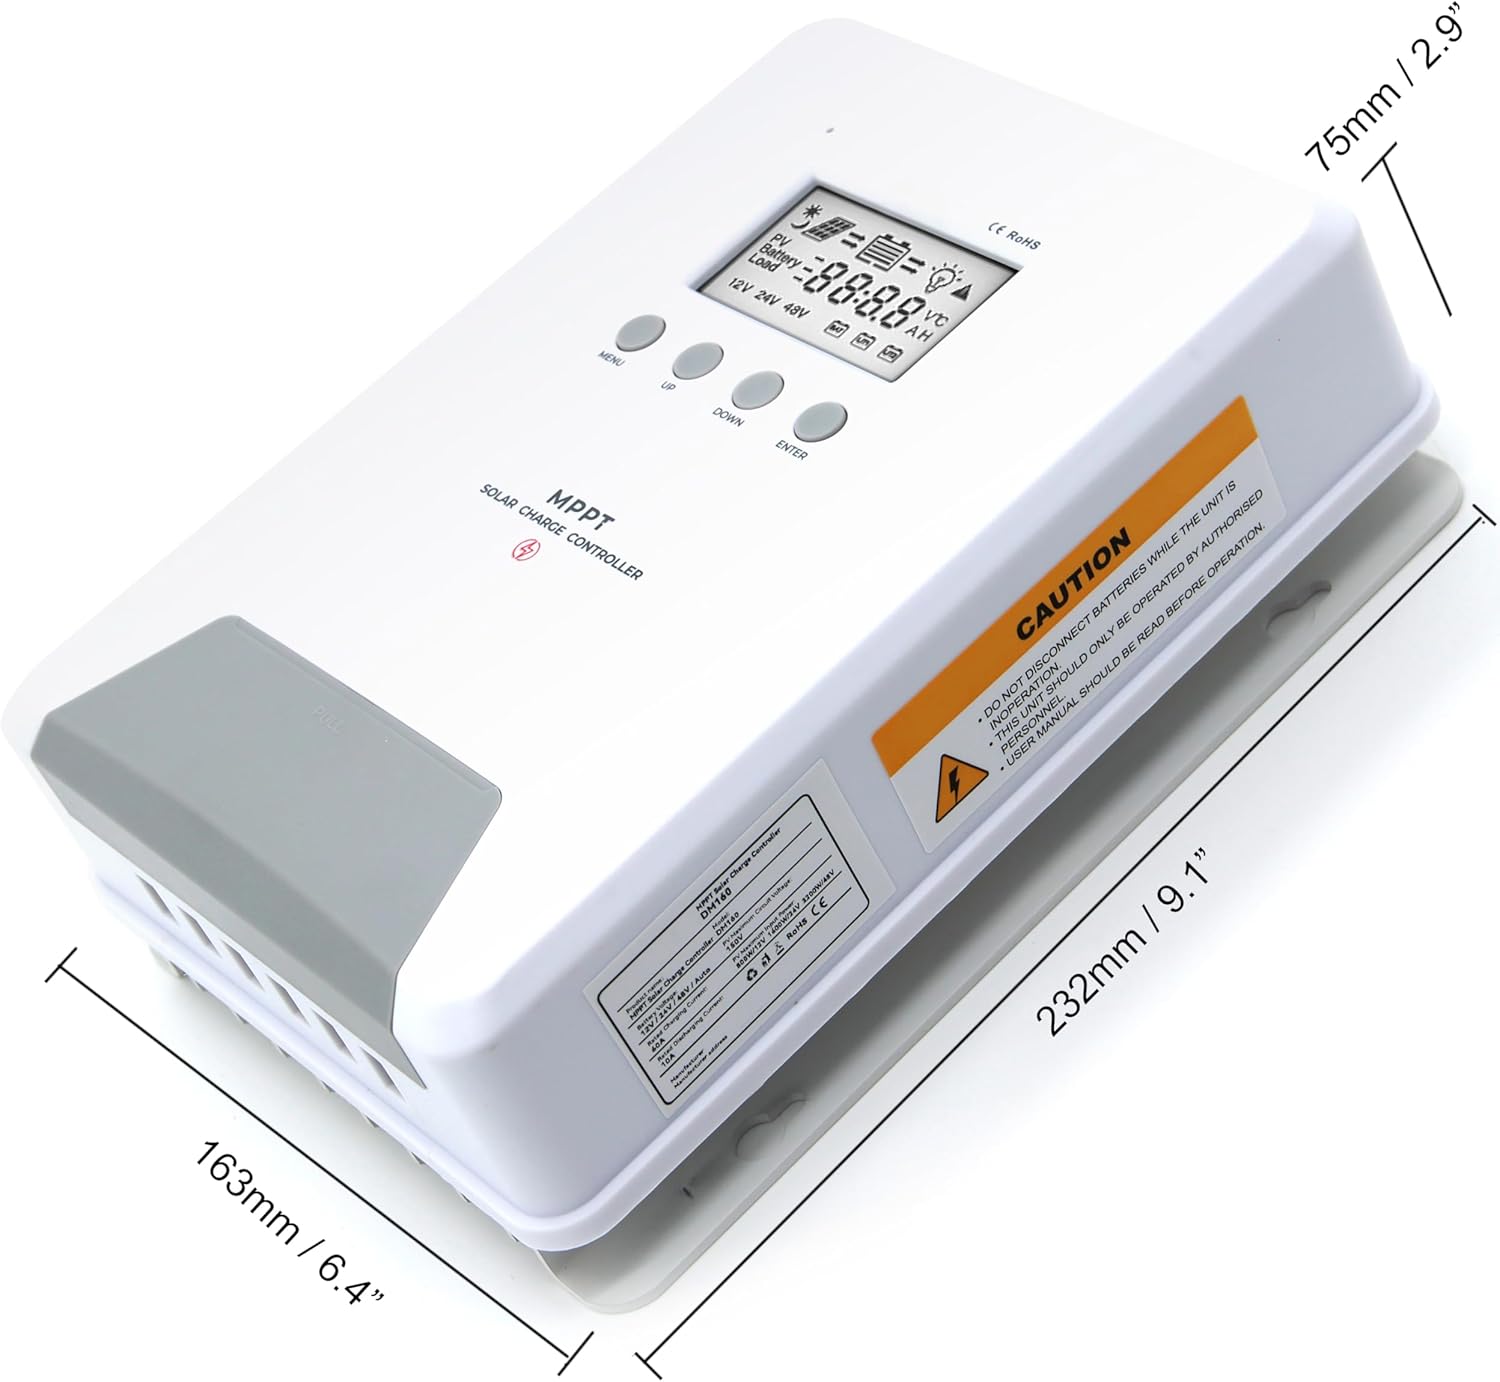
Image 6.1: Physical dimensions of the ELUSH 60Amp MPPT 태양광 충전 컨트롤러.
7. 유지관리
태양광 충전 컨트롤러의 최적 성능과 수명 연장을 위해 정기적인 유지보수를 권장합니다.
- 연결 검사: 모든 배선 연결부의 조임 상태와 부식 여부를 주기적으로 점검하십시오. 연결이 헐거워지면 과열 및 손상이 발생할 수 있습니다.
- 컨트롤러 청소: 컨트롤러를 깨끗하게 유지하고 먼지와 이물질이 쌓이지 않도록 하십시오. 외부를 닦을 때는 마른 천을 사용하십시오. 통풍구가 막히지 않도록 주의하십시오.
- 모니터 성능: Regularly check the LCD display for normal operating parameters. Note any unusual readings or error codes.
- 배터리 상태: 배터리는 제조사의 지침에 따라 적절히 관리하십시오.
8. 문제 해결
If you encounter issues with your ELUSH MPPT Solar Charge Controller, refer to the following basic troubleshooting steps:
- 디스플레이 없음/전원 없음: 배터리 연결 상태를 확인하고 배터리 용량이 충분한지 확인하십시오.tage는 컨트롤러의 작동 범위 내에 있습니다. 퓨즈가 손상되지 않았는지 확인하십시오.
- 배터리가 충전되지 않음: Confirm solar panel connections and polarity. Check for sufficient sunlight and ensure solar panel voltage는 배터리 전압보다 높습니다.tage. Verify battery type settings are correct.
- 로드가 작동하지 않음: Check load connections and ensure the load current does not exceed the controller's rating. Verify load output settings on the controller.
- 오류 코드: If the LCD displays an error code, consult the full product manual (if available) or contact technical support for specific guidance.
- 과열: Ensure the controller is installed in a well-ventilated area, away from direct sunlight or heat sources. Check for any obstructions to the heatsink.
9. 보증 및 지원
ELUSH provides professional technical support for its products. If you have any questions, require assistance with installation, operation, or troubleshooting, please feel free to contact us. Refer to your purchase documentation for specific warranty terms and contact information.