
1. 서론
This manual provides instructions for the safe and efficient use of your Brother CP2160F Computerized Sewing Machine. Please read this manual thoroughly before operating the machine to ensure proper function and to prevent damage or injury. Keep this manual in a safe place for future reference.
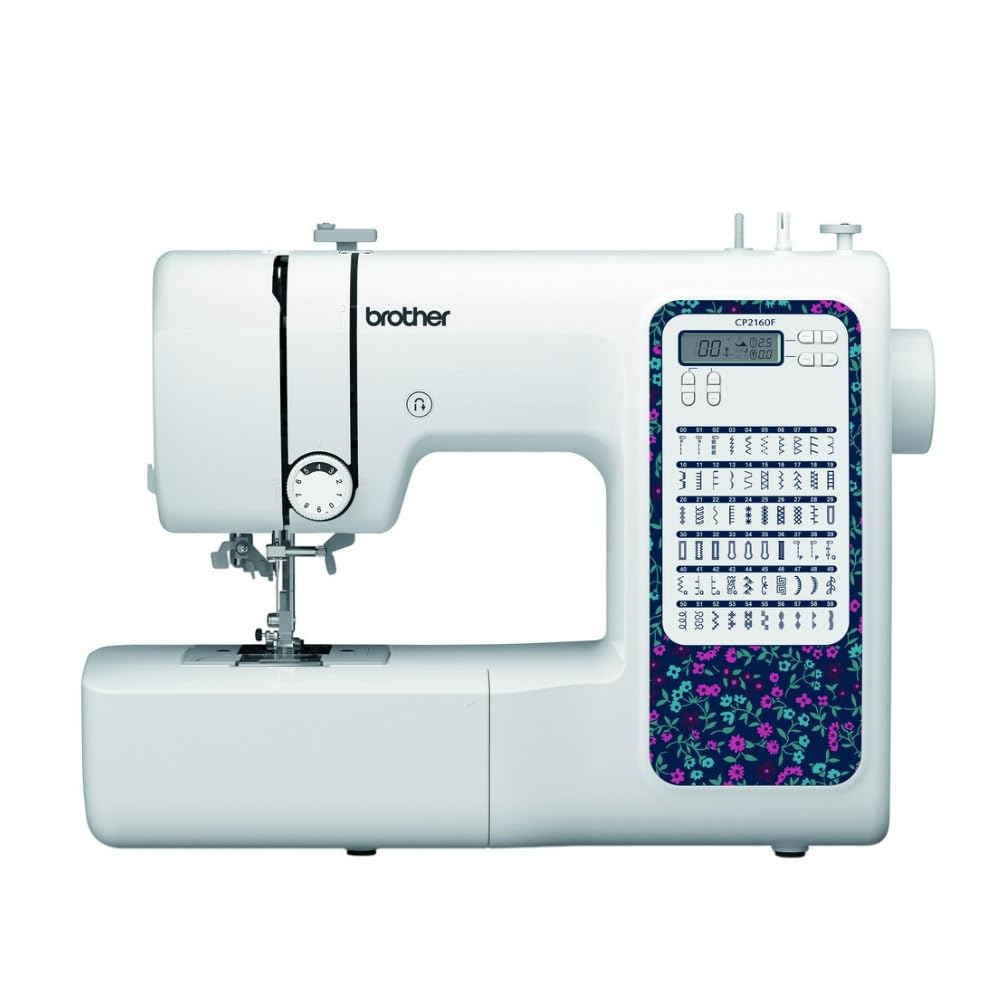
Figure 1: Brother CP2160F Computerized Sewing Machine. This image shows the overall view of the sewing machine, highlighting its compact design and the LCD screen for stitch selection.
2. 중요 안전 지침
전기 제품을 사용할 때는 다음을 포함한 기본적인 안전 예방 조치를 항상 따라야 합니다.
- 이 재봉틀을 사용하기 전에 모든 지침을 읽으십시오.
- 움직이는 모든 부품에서 손가락을 멀리하십시오. 재봉틀 바늘 주변에는 특별한주의가 필요합니다.
- 항상 적절한 바늘판을 사용하십시오. 잘못된 판은 바늘이 부러지는 원인이 될 수 있습니다.
- 바늘에 실을 끼우거나, 바늘을 바꾸거나, 실통에 실을 끼우거나, 압력 발을 바꾸는 등 바늘 부분을 조정할 때는 재봉틀을 끄세요.
- 덮개를 제거하거나 윤활유를 칠하거나 사용 설명서에 언급된 기타 사용자 서비스 조정을 할 때는 항상 전기 콘센트에서 재봉기의 플러그를 뽑으십시오.
- 어떠한 구멍에도 물건을 떨어뜨리거나 넣지 마십시오.
- 옥외에서는 사용하지 마십시오.
- 에어로졸(스프레이) 제품을 사용하거나 산소를 공급하는 곳에서는 작동하지 마십시오.
- 연결을 끊으려면 모든 제어 장치를 꺼짐 위치로 돌린 다음 콘센트에서 플러그를 뽑으세요.
3. 패키지 내용
패키지에 모든 구성 요소가 들어 있는지 확인하세요.
- Brother CP2160F Computerized Sewing Machine
- 전원 코드
- 풋 컨트롤러
- Accessory Bag (containing bobbins, needle set, twin needle, screwdriver, spool caps, extra spool pin, seam ripper, cleaning brush)
- 7 Sewing Feet: Buttonhole foot, Zipper foot, Blind stitch foot, Button sewing foot, Overcasting foot, Monogramming foot, Zigzag foot (on machine)
- 사용 설명서(본 문서)
4. 설정
4.1 전원 연결
- 기계를 안정적이고 평평한 표면에 놓으십시오.
- Insert the machine plug into the jack on the right side of the machine.
- Insert the power supply plug into a standard electrical outlet.
- Turn on the main power switch, located on the right side of the machine. The LCD screen will illuminate.
4.2 보빈 와인딩
- 실패꽂이에 실패를 놓습니다.
- Guide the thread through the upper thread guide and around the pre-tension disc.
- Place an empty bobbin onto the bobbin winder shaft and push it to the right.
- 실을 시계 방향으로 북실에 몇 번 감아주세요.
- Press the foot controller (or Start/Stop button) to begin winding. The machine will stop automatically when the bobbin is full.
- Cut the thread, push the bobbin winder shaft to the left, and remove the wound bobbin.
4.3 재봉틀에 실 끼우기 (윗실)
- 노루발 레버를 올립니다.
- 실패꽂이에 실패를 놓습니다.
- 실을 위쪽 실 가이드에 통과시키세요.
- Follow the numbered threading path indicated on the machine, ensuring the thread passes through the tension discs and takes up lever.
- Use the advanced needle threading system: Lower the presser foot, lower the needle, then push down the needle threader lever to engage it. Guide the thread through the hook and release the lever.
- Pull the thread loop through the needle eye.
4.4 바늘 설치
- 기계의 전원을 끄세요.
- 바늘 cl 풀기amp screw by turning it counter-clockwise.
- 오래된 바늘을 제거하세요.
- 새 바늘의 평평한 면이 기계 뒷면을 향하도록 하여 최대한 깊숙이 밀어 넣으세요.
- 바늘을 조여주세요amp 나사를 단단히 조입니다.
5. 운영
5.1 스티치 선택
The CP2160F features 60 built-in stitches. Use the stitch selector buttons (usually '+' and '-') to navigate through the stitch patterns displayed on the LCD screen. The recommended stitch length and width will be displayed automatically, but can be adjusted if desired.
5.2 자동 단추구멍
This machine includes 7 auto-size buttonhole styles. Attach the buttonhole foot. Place the button you wish to match into the buttonhole foot's holder. Select the desired buttonhole stitch. The machine will automatically sew a buttonhole to the correct size.
5.3 Free-Arm Sewing
To convert to free-arm sewing, slide off the accessory box located at the front of the machine. This exposes the free arm, ideal for sewing cylindrical items like cuffs, sleeves, and pant hems.
5.4 Sewing Thick Fabrics
The CP2160F's robust feed system and fixed needle bar are designed to handle thick materials such as denim and tweed. Ensure you use the correct needle type and size for the fabric thickness to prevent needle breakage and ensure smooth feeding.
5.5 Using Included Sewing Feet
The machine comes with seven specialized sewing feet. Refer to the specific stitch instructions for which foot to use. To change a presser foot:
- 바늘과 노루발을 올립니다.
- Press the black lever at the back of the presser foot holder to release the current foot.
- Align the new foot with the pin on the presser foot holder and lower the presser foot lever until it snaps into place.
6. 유지관리
6.1 기계 청소
Regular cleaning helps maintain optimal performance. Always unplug the machine before cleaning.
- 개에게 먹이를 주세요: Remove the needle plate and use the cleaning brush to remove lint and dust from the feed dogs and bobbin area.
- Hook Race: Carefully remove the bobbin case and clean the hook race area with the brush.
- 외부: Wipe the exterior surfaces with a soft, dry cloth. Do not use liquid cleaners or harsh chemicals.
Note: This machine does not require user lubrication.
7. 문제 해결
고객 지원에 문의하기 전에 다시 문의하세요.view 다음은 흔히 발생하는 문제점과 그 해결책입니다.
| 문제 | 가능한 원인 | 해결책 |
|---|---|---|
| 바늘 부러짐 | Incorrect needle size/type for fabric; bent needle; needle not fully inserted; pulling fabric while sewing. | Use correct needle; replace bent needle; re-insert needle correctly; guide fabric gently. |
| 건너뛴 스티치 | Needle bent or dull; incorrect needle insertion; improper threading; wrong needle for fabric. | Replace needle; re-insert needle; re-thread machine; use appropriate needle. |
| Thread jams | Improper threading; lint in bobbin case; bobbin wound unevenly. | Re-thread machine; clean bobbin area; re-wind bobbin evenly. |
| 기계 전원이 켜지지 않습니다 | Power cord not connected; power switch off; electrical outlet issue. | Check power cord connections; ensure switch is ON; test outlet with another appliance. |
8. 사양
- 모델: Brother CP2160F
- 스티치 수: 내장 스티치 60개
- 단추구멍: 7 One-step auto-size buttonholes
- 바늘 끼우기: Advanced Needle Threading System
- 표시하다: LCD 화면
- Sewing Area: Free-arm capability
- 피드 시스템: Exceptional feed for thick fabrics
- Included Feet: 7 (Buttonhole, Zipper, Blind Stitch, Button Sewing, Overcasting, Monogramming, Zigzag)
- 색상: 하얀색
- 재료: 금속, 플라스틱
- 제품 크기(깊이 x 너비 x 높이): 6.65인치 x 12.2인치 x 16.26인치
- 품목 무게: 226온스(약 14.1파운드)
- 전원: 코드식 전기
- 한국어: 196271536956
9. 고객 지원 및 보증
For technical assistance, warranty information, or service inquiries, please contact Brother customer support. Refer to the official Brother web최신 연락처 정보 및 보증 조건은 웹사이트 또는 구매 시 함께 제공된 문서를 참조하십시오.
온라인 지원: www.brother-usa.com/support
참고: 보증 조건은 지역 및 판매점에 따라 다를 수 있습니다. 보증 청구를 위해 구매 증빙 자료를 보관하십시오.