
HITBOX TIG200PRO
HITBOX TIG200PRO 6-in-1 Digital Welder
사용 설명서
1. 서론
Thank you for choosing the HITBOX TIG200PRO 6-in-1 Digital Welder. This professional welding machine is designed for versatility and precision, supporting MMA, DC HF TIG, Pulsed TIG, TIG Clean, and Spot Welding functions. It is ideal for welding thin and highly thermally conductive metals without burn-through. This manual provides essential information for safe operation, setup, maintenance, and troubleshooting to ensure optimal performance and longevity of your welder.
2. 안전 정보
경고: 용접은 위험할 수 있습니다. 부상이나 사망을 예방하기 위해 항상 안전 예방 조치를 준수하십시오.
- 전기 충격: Can kill. Do not touch live electrical parts. Wear dry welding gloves and protective clothing. Ensure the workpiece is properly grounded.
- 연기 및 가스: 건강에 해로울 수 있습니다. 머리를 연기 속으로 들이밀지 마십시오. 환기 또는 배기 장치를 사용하여 호흡 영역에서 연기를 제거하십시오.
- 아크 광선: 눈과 피부에 화상을 입힐 수 있습니다. 적절한 차광 필터가 장착된 용접 헬멧과 보호복을 착용하십시오.
- 화재 및 폭발: 용접 시 발생하는 불꽃은 화재나 폭발을 일으킬 수 있습니다. 인화성 물질이 용접 구역에 접근하지 못하도록 하십시오. 소화기를 가까이에 비치하십시오.
- 번스: 뜨거운 금속은 심한 화상을 유발할 수 있습니다. 뜨거운 부분을 맨손으로 만지지 마십시오.
- 소음: 과도한 소음은 청력을 손상시킬 수 있습니다. 귀 보호구를 착용하십시오.
- 움직이는 부품: Keep clear of moving parts to avoid injury.
3. 패키지 내용
패키지에 모든 품목이 들어 있는지 확인하세요.
- HITBOX TIG200PRO Welder (200A)
- TIG-26 Torch (4m)
- 접지 Clamp (300A)
- Electrode Holder (200A)
- WT20 Tungsten Electrode
- Argon Gas Tube
- 호스 CLamps
- 와이어 브러쉬
- 망치
- Auto-darkening Cold Welding Helmet
- 풋 페달
- TIG Consumables (collets, collet bodies, ceramic nozzles)

Image: All accessories included with the HITBOX TIG200PRO welder, laid out for inspection.
4. 설정
4.1 전원 연결
- Ensure the welder is connected to a 230V power supply.
- Verify that the power outlet and circuit breaker can handle the required amp분노.
4.2 가스 연결 (TIG 용접용)
- Connect the argon gas tube to the gas inlet on the rear panel of the welder.
- Connect the other end of the gas tube to your argon gas cylinder via a pressure regulator.
- 가스 누출을 방지하기 위해 모든 연결이 안전한지 확인하십시오.
4.3 용접 케이블 연결
The connection polarity depends on the welding mode:
- TIG 모드: Connect the TIG torch to the negative (-) terminal and the ground clamp (+) 단자에.
- MMA 모드: 전극 홀더를 양극(+) 단자에 연결하고 접지 단자를 접지에 연결하십시오.amp (-) 단자에.

Image: Diagrams illustrating the correct connection setup for TIG and MMA welding modes, including gas cylinder for TIG.
4.4 풋 페달 연결
- Connect the 8-pin foot pedal cable to the dedicated foot pedal interface on the welder's front panel.
- The foot pedal allows for remote and precise amp용접 중 압력 제어.

Image: The HITBOX TIG200PRO welder shown with its optional 8-pin foot pedal and an auto-darkening welding helmet, demonstrating remote control capability.
4.5 용접 헬멧
- Always wear the provided auto-darkening welding helmet to protect your eyes and face from arc rays and sparks.
5. 사용 설명서
5.1 제어판 이상view
The TIG200PRO features a high-definition LED screen for clear display of all welding parameters. The intuitive panel allows for easy adjustment.

Image: Close-up of the HITBOX TIG200PRO's high-definition LED display, showing various customizable welding parameters and digital controls.
5.2 용접 모드
The HITBOX TIG200PRO offers 6 functions:
- MMA (Manual Metal Arc) Welding: For general-purpose stick welding.
- DC HF TIG Welding: High-frequency start TIG for precise welding of various metals (not aluminum).
- Pulsed TIG Welding: Offers precise digital control over parameters like base current, peak current, frequency, and duty cycle, reducing heat input and distortion.
- TIG Clean: A specialized function for cleaning the weld area (torch not included for this specific function).
- Spot Welding: High-precision spot welding for ultra-thin materials (down to 0.1 mm).
- 냉간 TIG 용접: A mode for welding with minimal heat input.
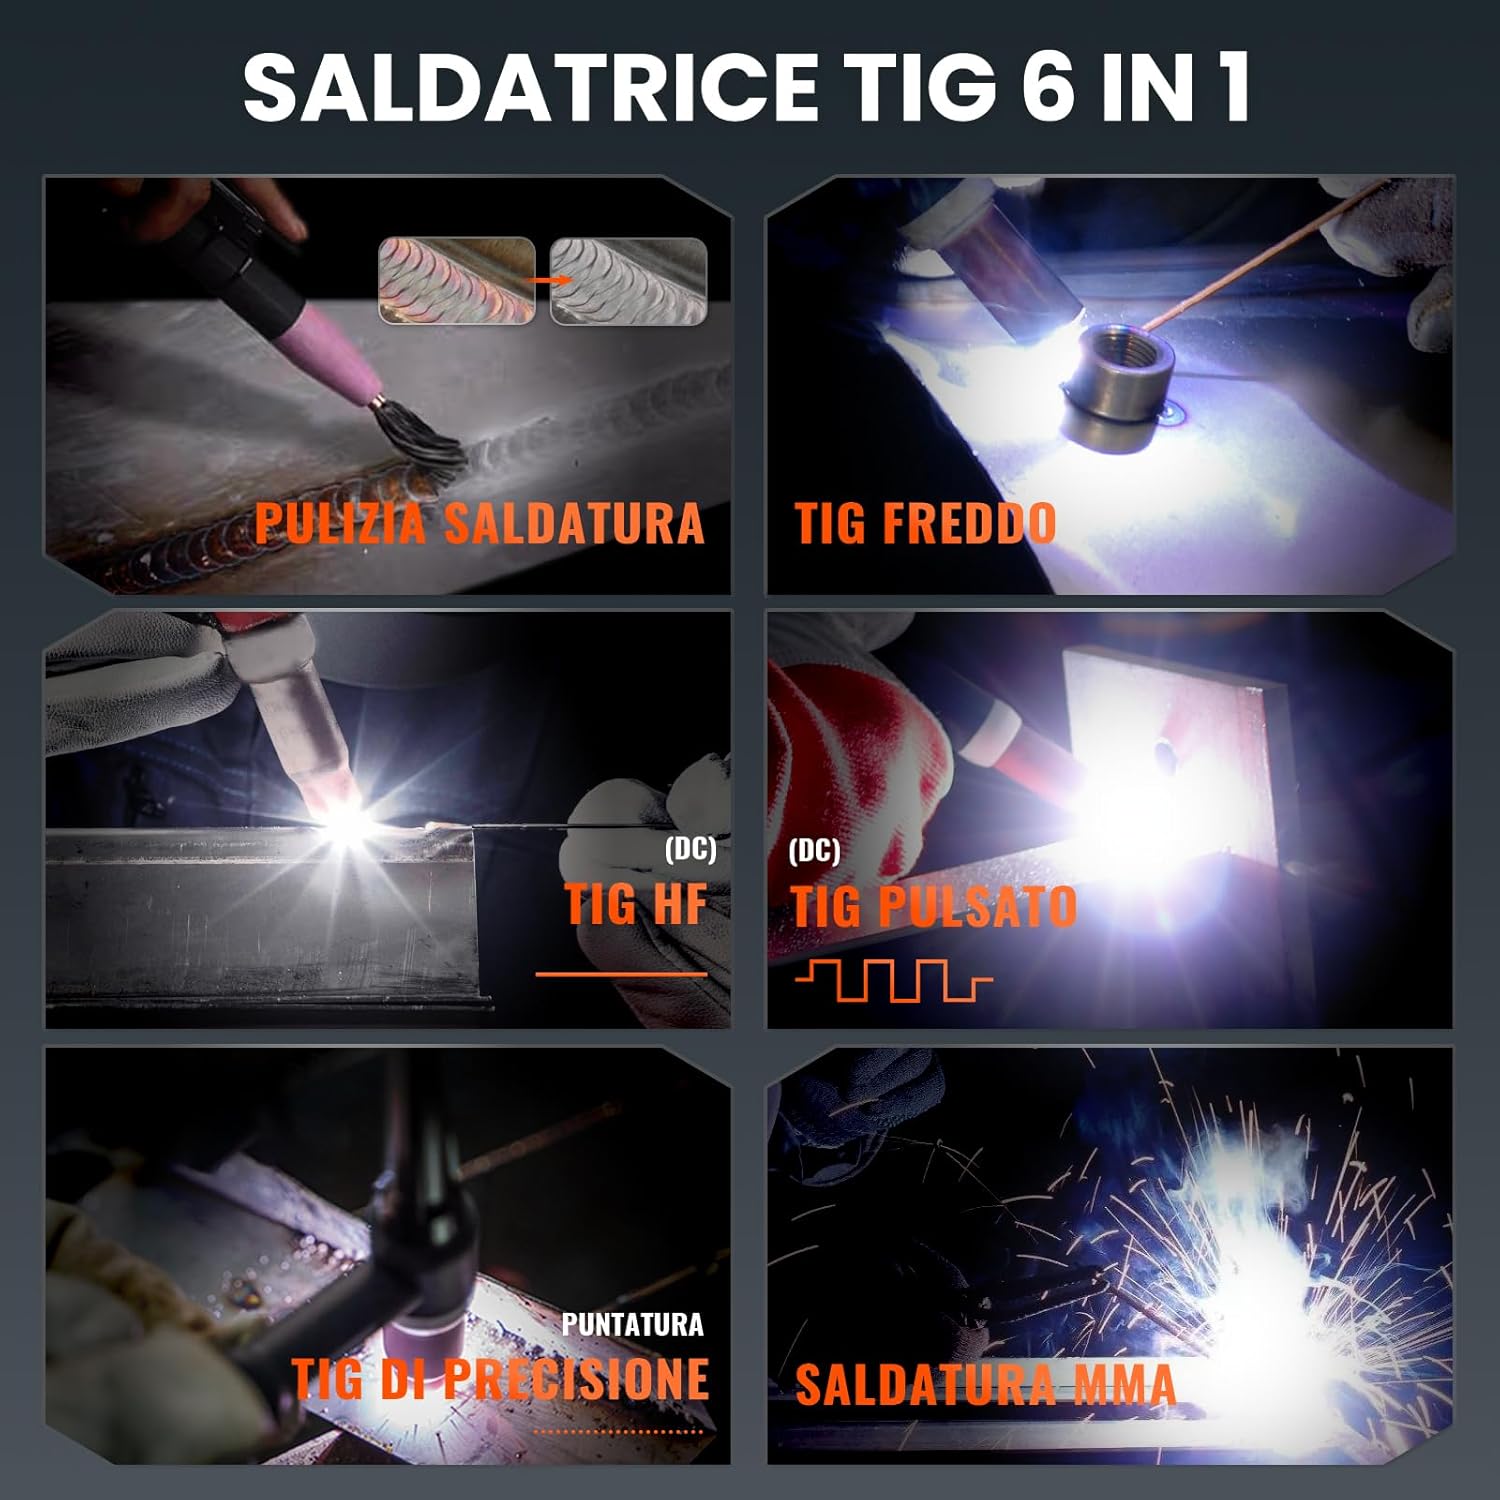
Image: Visual representation of the six welding functions available on the HITBOX TIG200PRO: Weld Clean, Cold TIG, DC HF TIG, Pulsed TIG, Precision Spot TIG, and MMA welding.
5.3 매개변수 조정
The digital control allows precise adjustment of various parameters:
- 현재의: 1-200 A
- Pre-gas: 0-10 seconds (ensures oxidation-free start)
- Post-gas: 1-10 seconds (protects weld pool as it cools)
- Spot Welding Time: 0.01~9초
- Spot Welding Interval: 1~900밀리초
- Pulsed TIG Frequency: 0.1-500Hz
- Pulsed TIG Duty Cycle: 10%-90%
- Base Current (Pulsed TIG): 10-180A
- Peak Current (Pulsed TIG): 10-200A
- R 시작amp (Pulsed TIG): 0~10초
- 종료 Ramp (Pulsed TIG): 0~10초
- End Current (Pulsed TIG): 10-200A

이미지: 전amples of weld beads produced using TIG DC and Pulsed TIG modes, showcasing the precision achievable with the HITBOX TIG200PRO.

Image: Diagram illustrating the pre-gas and post-gas functions in TIG welding, which prevent oxidation and ensure clean welds.
5.4 2T/4T Mode Selection
The welder supports both 2T (Two-Touch) and 4T (Four-Touch) modes for continuous and spot welding applications.
- 2T Mode: Press and hold the torch button to start welding; release to stop. Suitable for short welds.
- 4T Mode: Press and release to start welding; press and release again to stop. Ideal for longer welds, reducing hand fatigue.

Image: Graphs illustrating the current profiles for 2T and 4T TIG welding modes, showing how current changes with button presses for different welding durations.
5.5 재료 호환성
The TIG200PRO is suitable for welding steel, stainless steel, copper, brass, and similar metals. It is not suitable for aluminum, which requires an AC/DC welding machine.

Image: A collage showing various metal types compatible with the HITBOX TIG200PRO welder, including copper, mild steel, cast iron, square tube, stainless steel, and sheet metal. Aluminum is explicitly noted as not supported.
5.6 Welding Thickness

Image: Visual comparison illustrating the minimum and maximum welding thicknesses for TIG (0.1mm to 4mm) and MMA (2mm to 10mm) processes.
6. 유지관리
6.1 청소
- Regularly clean the welder's exterior with a dry, soft cloth.
- 적절한 공기 흐름을 유지하려면 통풍구에 먼지와 이물질이 없는지 확인하세요.
6.2 검사
- Periodically inspect all cables, connections, and the torch for damage or wear. Replace any damaged components immediately.
- Check the gas tube for leaks and ensure secure connections.
6.3 Smart Fan Operation
- The intelligent fan activates only when necessary, reducing noise and power consumption. This is normal operation.
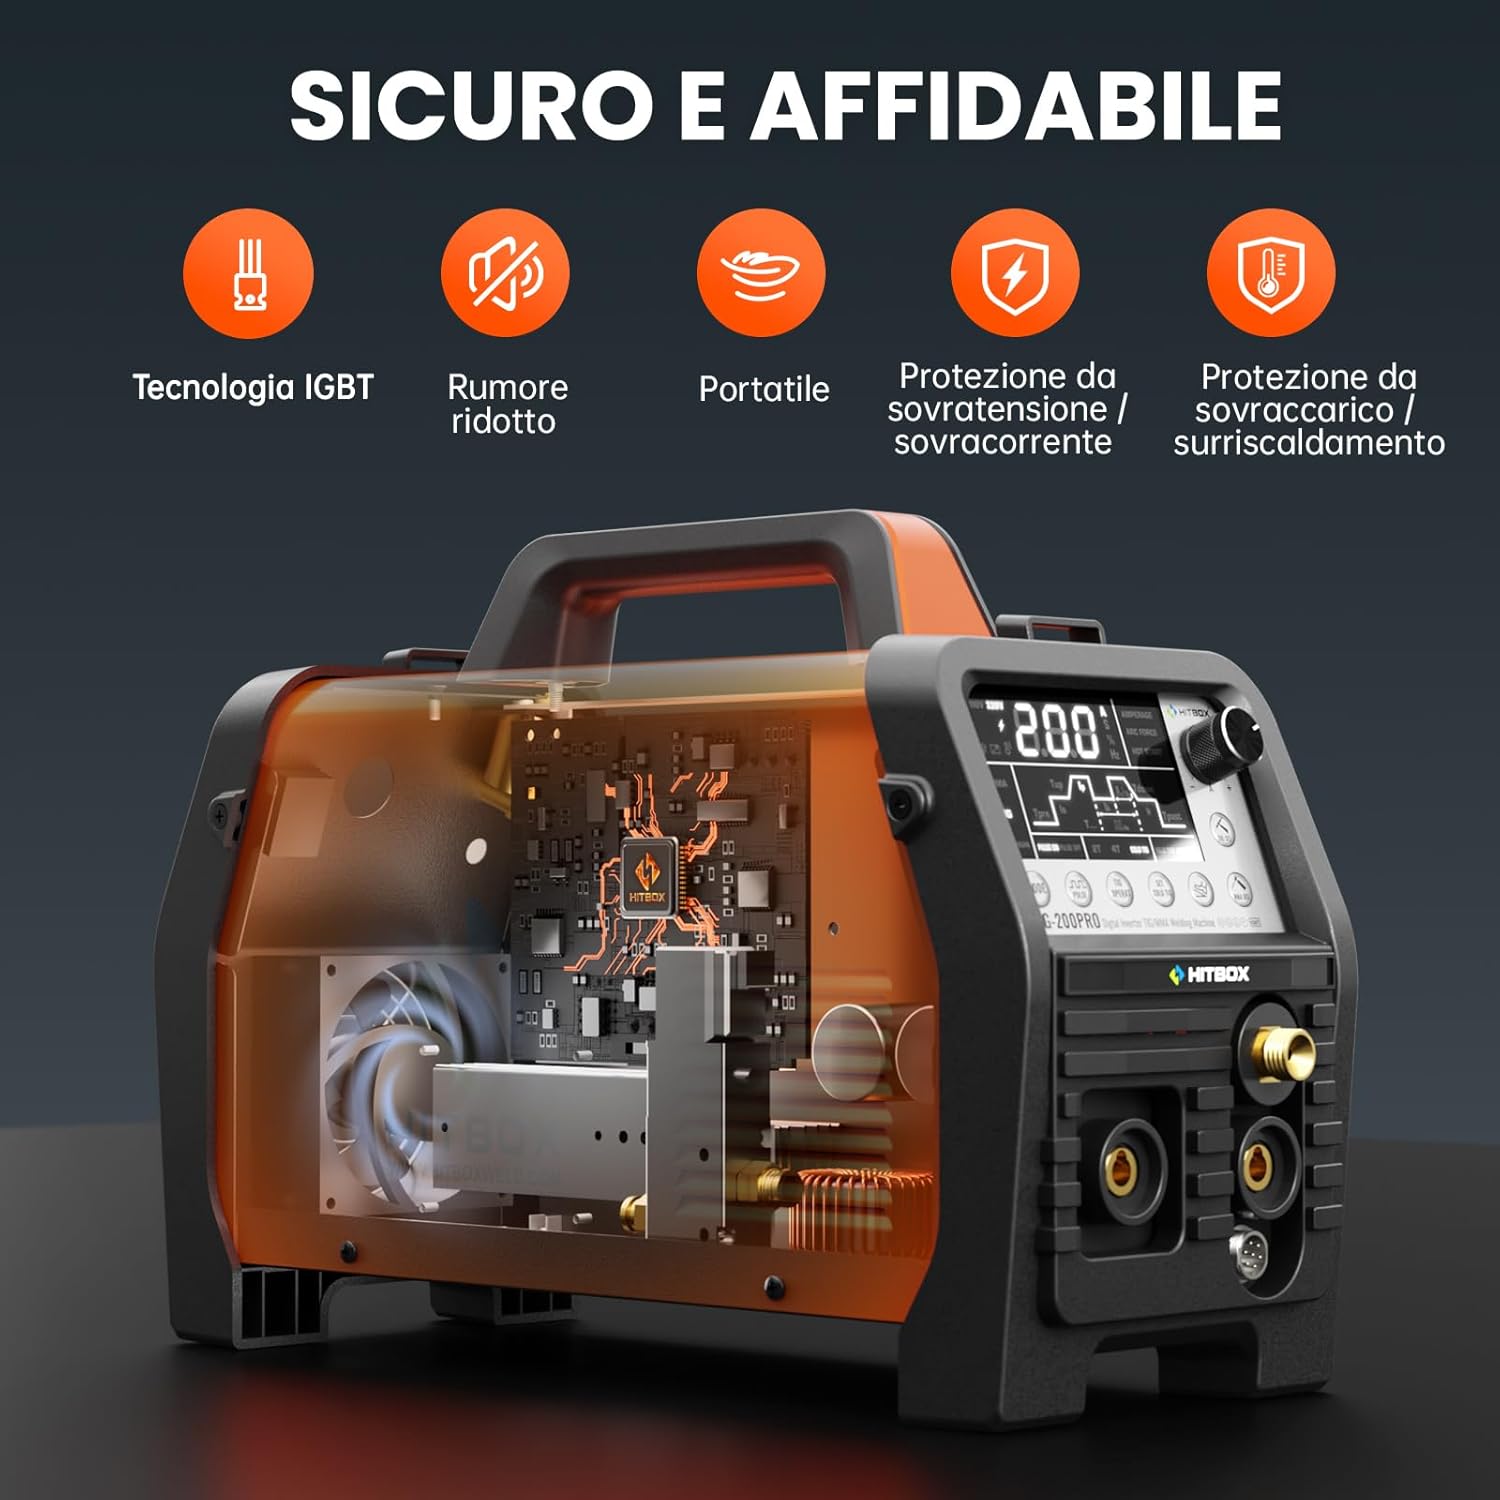
이미지: 내부 view of the HITBOX TIG200PRO welder, showcasing its robust design and safety features such as IGBT technology, efficient cooling fan, and various protection circuits.
7. 문제 해결
If you encounter issues with your HITBOX TIG200PRO welder, refer to the following common problems and solutions:
- 전원 없음: 전원 케이블 연결 상태, 메인 전원 스위치 및 회로 차단기를 점검하십시오.
- 아크 없음: Ensure proper grounding, correct electrode/tungsten setup, and sufficient welding current. Check for loose connections.
- 용접 품질 불량: Adjust welding current, gas flow (for TIG), travel speed, and arc length. Ensure workpiece is clean.
- 과열 보호: If the welder stops and an overheat indicator lights up, allow the machine to cool down. Ensure proper ventilation and do not exceed the duty cycle.
- Gas Flow Issues (TIG): Check argon cylinder pressure, regulator settings, and gas tube connections for leaks or blockages.
For persistent issues or problems not listed here, please contact HITBOX customer support.
8. 사양
8.1 일반 사양
| 특징 | 값 |
|---|---|
| 제조업체 | 히트박스 |
| 모델 번호 | TIG200PRO |
| 품목 코드 | H1022007 |
| 파워 타입 | DC |
| 권tage | 230 볼트 |
| 항목 수 | 1 |
| 품목 무게 | 7.26 킬로그램 |
| 패키지 크기 | 58 x 51.5 x 30cm |
| 배터리가 포함되어 있나요? | 아니요 |
| 배터리가 필요하세요? | 아니요 |
8.2 TIG Welding Specifications

Image: Table detailing recommended current, tungsten electrode diameter, gas flow rate, nozzle diameter, and filler wire diameter for TIG welding.
8.3 Stick (MMA) Welding Specifications

Image: Table outlining recommended current for Stick welding based on electrode diameter and workpiece thickness.
9. 보증 및 지원
For warranty information and customer support, please refer to the documentation provided with your purchase or visit the official HITBOX website. If you require technical assistance or have questions regarding the operation or maintenance of your TIG200PRO welder, please contact HITBOX customer service directly.
Ask a question about this manual
Ask about setup, troubleshooting, compatibility, parts, safety, or missing instructions. Manuals+ will review the question and use this page’s manual context to help answer it.