
1. 서론
This manual provides instructions for the safe and effective operation of the Landtek MILA48500 Digital Illuminance Lux Light Meter Datalogger. This device is designed for measuring illuminance (brightness) in various environments, offering a wide measurement range, data logging capabilities, and Bluetooth connectivity for real-time monitoring.
기기의 정상적인 작동과 손상 방지를 위해 사용 전에 본 설명서를 꼼꼼히 읽어 주십시오.
2. 안전 정보
- 장치를 열거나 개조하지 마십시오. 모든 정비는 자격을 갖춘 기술자에게 맡기십시오.
- 장치를 물, 습기 및 극한의 온도로부터 멀리 두십시오.
- 장기간 기기를 사용하지 않을 경우 배터리 누출을 방지하기 위해 배터리를 제거하세요.
- 배터리와 기기를 지역 규정에 따라 폐기하세요.
- Avoid pointing the light sensor directly at extremely bright light sources for prolonged periods, as this may affect sensor longevity.
3. 패키지 내용
포장을 풀 때 모든 품목이 있는지 확인하세요.
- Digital Illuminance Lux Light Meter Datalogger (MILA48500)
- 운반 파우치
- 영어 사용 설명서
- 1.5V AAA 배터리 2개 (사전 장착 또는 별도 구매)

그림 3.1: The Landtek MILA48500 Lux Meter package contents, showing the meter, a black protective pouch, and the instruction manual.
4. 디바이스 오버view
Familiarize yourself with the components of the Landtek MILA48500 Lux Meter:

그림 4.1: 전면 및 후면 view of the Landtek MILA48500 Lux Meter with labeled components. Key parts include the light sensor, LCD screen, various function buttons (MAX/MIN, HOLD, UNIT, Power), and the battery compartment.
- 조도 센서: 주변광을 감지합니다.
- LCD 화면: Displays measurement readings, units, and status indicators. Features a backlight for low-light conditions.
- 최대/최소 버튼: 기록된 최대값과 최소값 사이를 전환합니다.
- 홀드 버튼: Freezes the current reading on the display. Also activates Bluetooth when pressed for 2 seconds.
- 단위 버튼: Switches between LUX and FC measurement units. Also activates the backlight when pressed for 2 seconds.
- 전원 버튼: 장치를 켜거나 끕니다.
- 배터리 칸: Located on the rear, houses two AAA batteries.
5. 설정
5.1 배터리 설치
- 장치 뒷면에서 배터리 덮개를 찾으세요.
- 덮개를 밀거나 풀어서 여세요.
- 1.5V AAA 배터리 2개를 넣을 때, 배터리함 안쪽에 표시된 극성(+/-)을 정확히 맞춰주세요.
- 배터리함 덮개를 단단히 다시 닫으십시오.
5.2 전원 켜기/끄기
- 전원을 켜려면: 를 누르세요 전원 버튼 (). The LCD screen will illuminate.
- 전원을 끄려면: 를 누르세요 전원 버튼 다시 한번 말씀드리지만, 이 기기는 배터리 수명 절약을 위해 자동 전원 차단 기능도 갖추고 있습니다.
6. 사용 설명서
6.1 기본 측정
After powering on, the device will immediately begin measuring illuminance. Point the light sensor towards the light source or area you wish to measure.
6.2 Unit Selection (LUX / FC)
를 누르세요 단위 버튼 to toggle between LUX (lux) and FC (foot-candle) measurement units. The selected unit will be displayed on the LCD screen.

그림 6.1: The meter's display showing measurements in FC (left) and LUX (right) units.
6.3 데이터 홀드 기능
를 누르세요 HOLD 버튼 버튼을 짧게 누르면 디스플레이에 현재 측정값이 고정됩니다. 다시 누르면 고정이 해제되고 실시간 측정이 재개됩니다.
6.4 MAX / MIN Display
를 누르세요 최대/최소 버튼 to cycle through the maximum, minimum, and current readings recorded since the device was powered on or the function was reset. The display will indicate 'MAX' or 'MIN' accordingly.
6.5 백라이트 기능
를 누르고 계세요 단위 버튼 for approximately 2 seconds to turn the LCD backlight on or off.
6.6 Measurement Range Multipliers
The meter automatically adjusts its measurement range. When 'X10' or 'X100' appears on the display, the displayed reading must be multiplied by that factor to obtain the actual illuminance value.
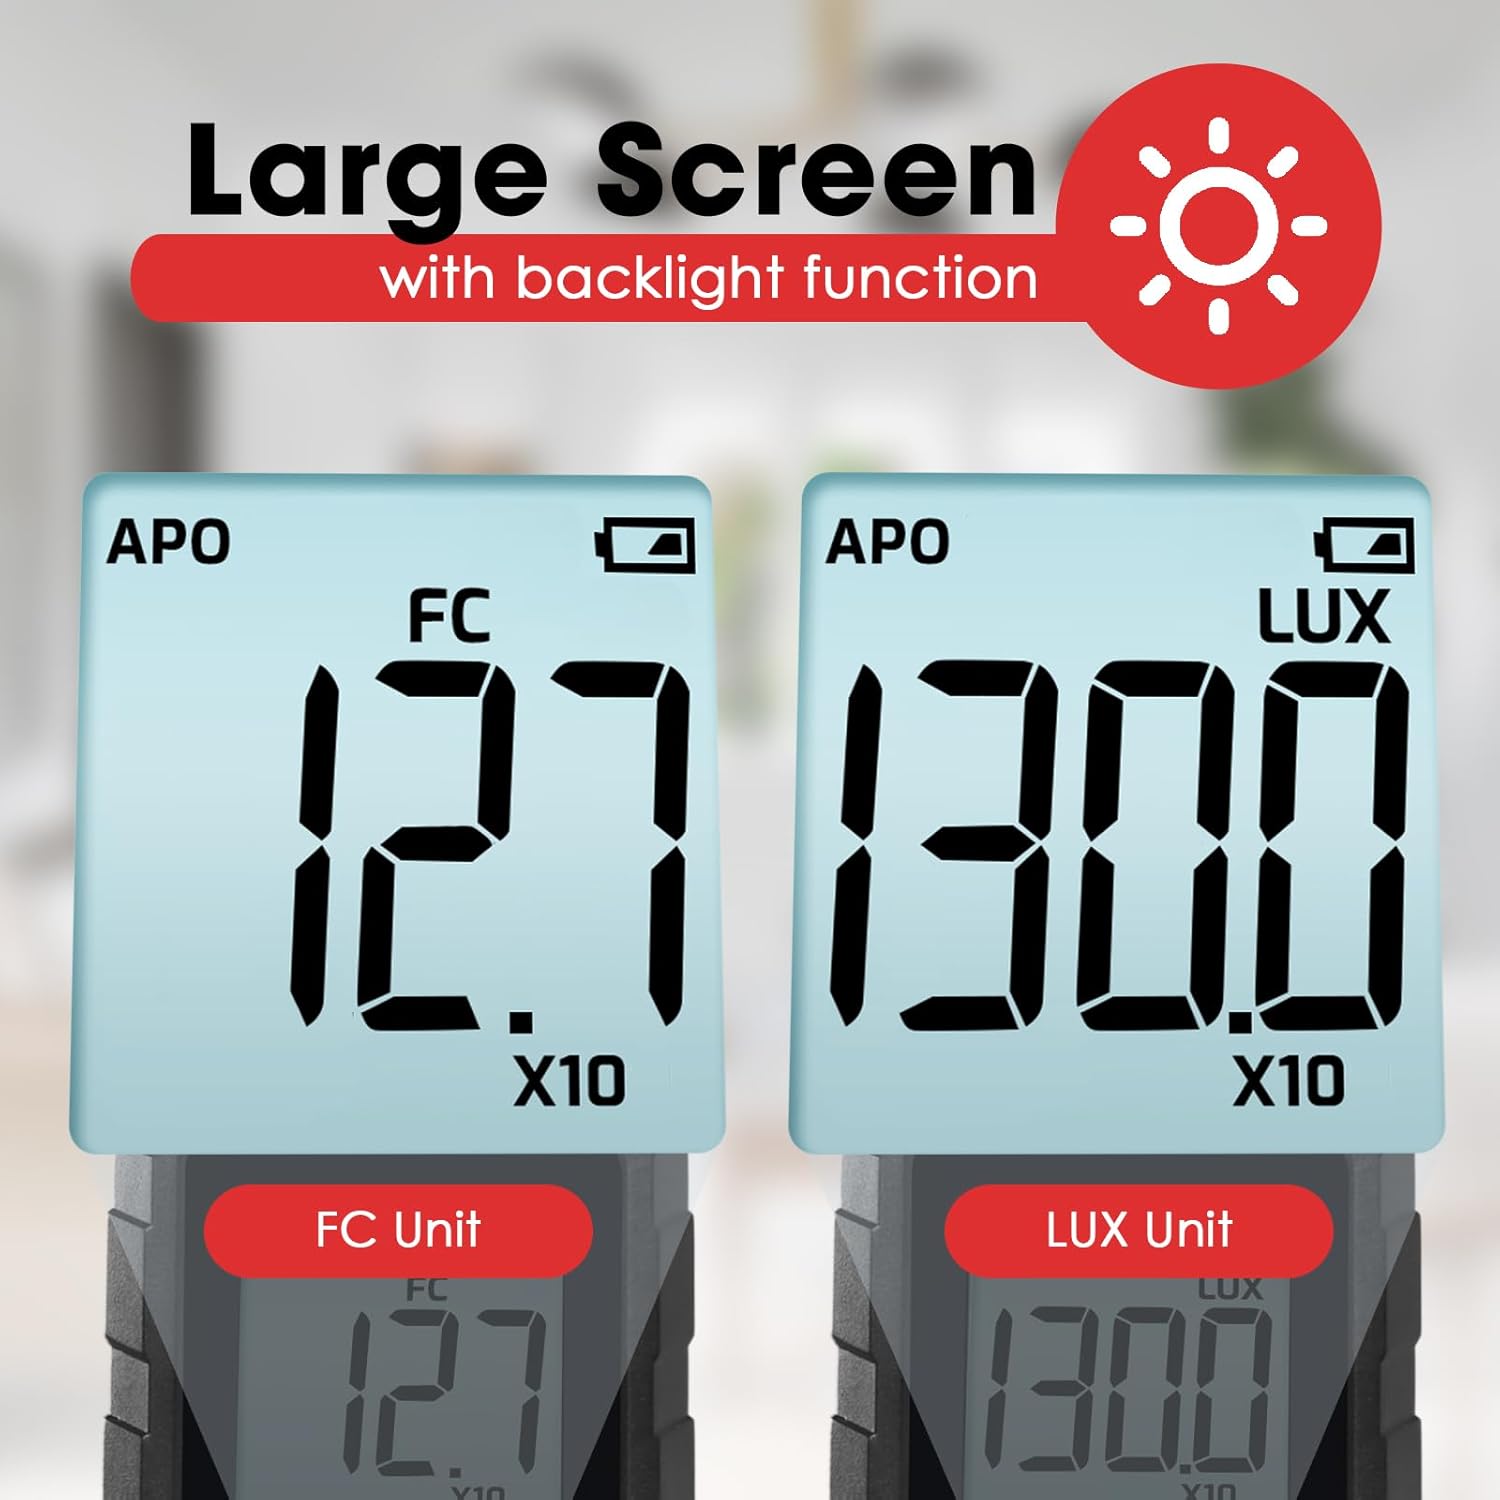
그림 6.2: Explanation of how to interpret readings when 'X10' or 'X100' multipliers are active on the display.
- If 'X10' is displayed, multiply the reading by 10. For example, a display of 16.47 with 'X10' means 164.7 LUX.
- If 'X100' is displayed, multiply the reading by 100. For example, a display of 16.47 with 'X100' means 1647 LUX.
6.7 Bluetooth Connectivity and Data Logging
The device supports Bluetooth connectivity for real-time monitoring and data logging via a compatible smartphone application.
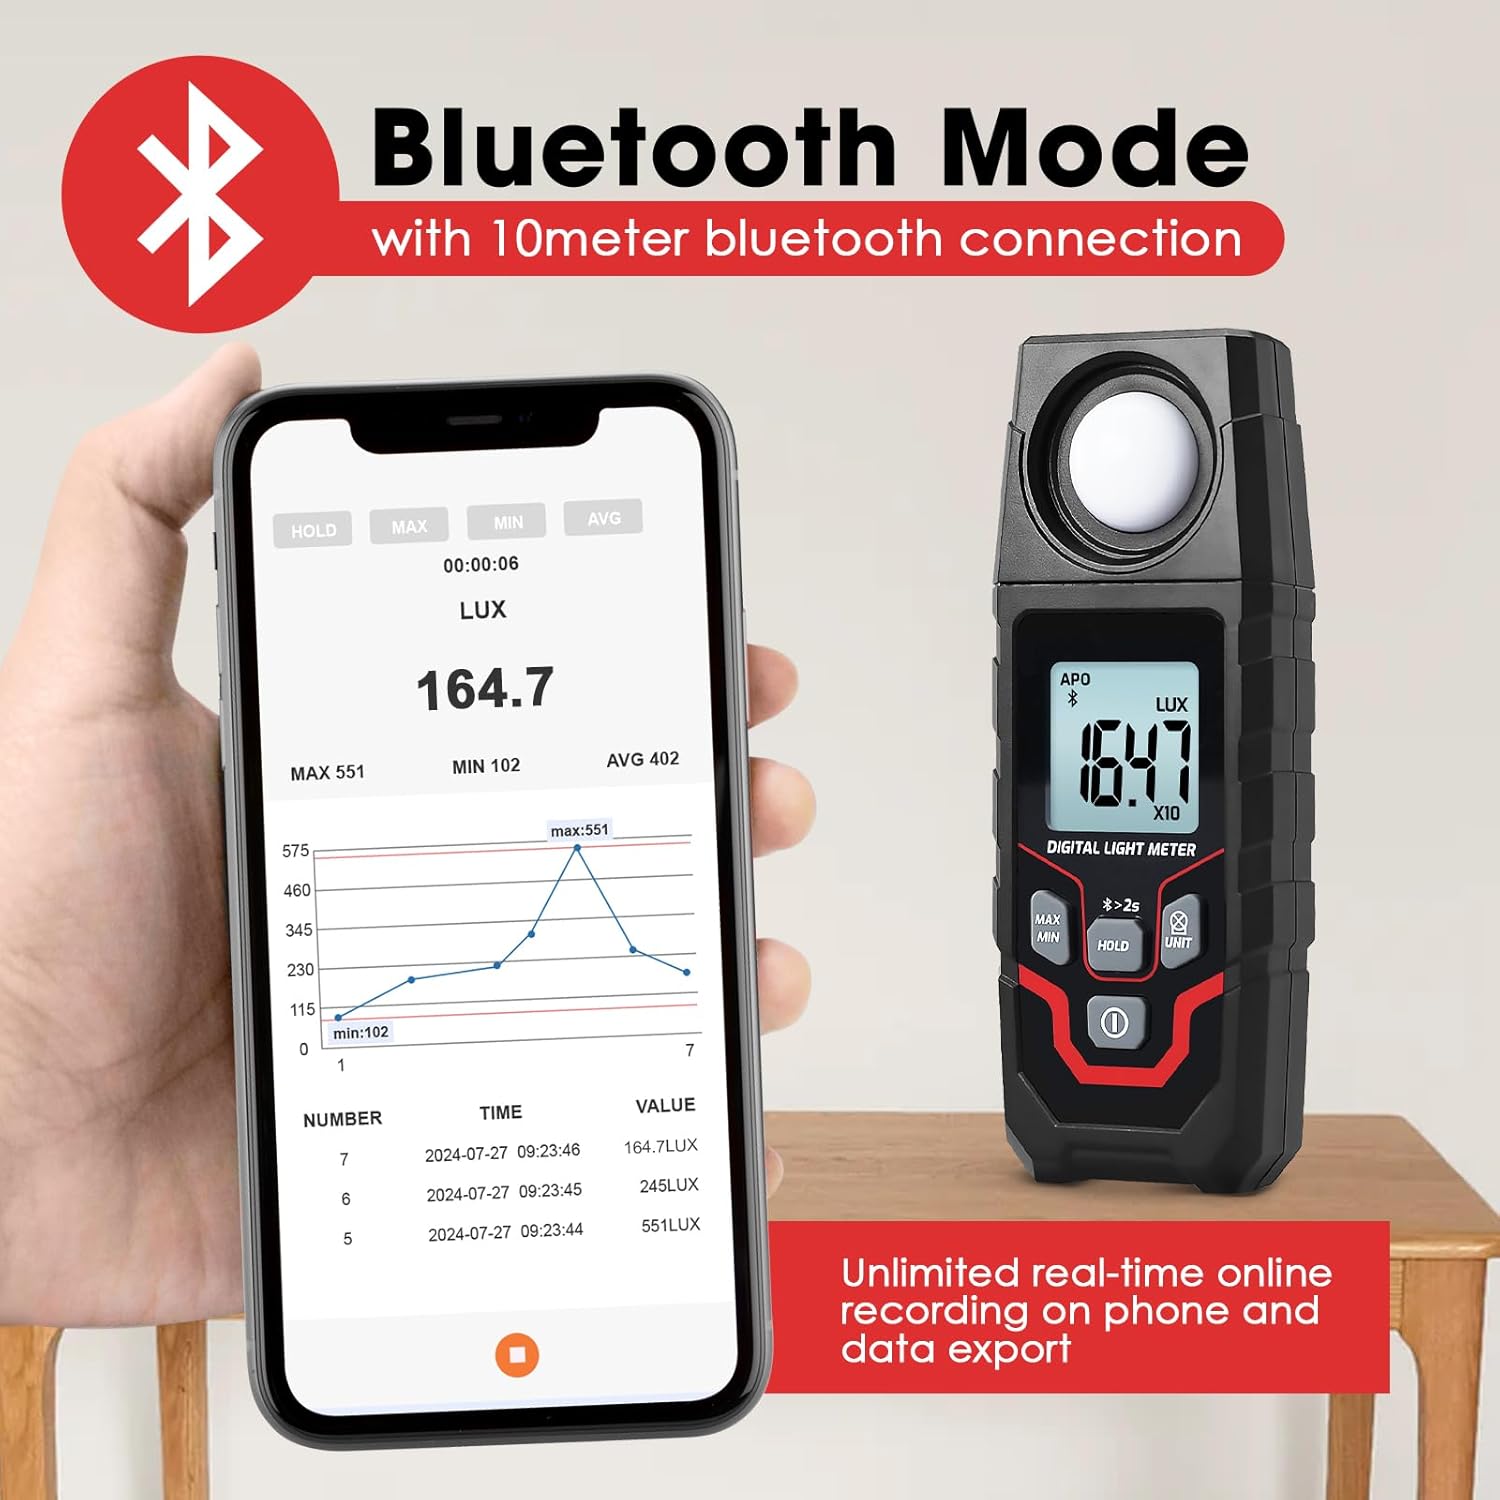
그림 6.3: The Lux Meter connected to a smartphone via Bluetooth, displaying real-time data and a historical graph.
- 블루투스 활성화: 를 누르고 계세요 HOLD 버튼 for approximately 2 seconds. A Bluetooth icon will appear on the meter's display.
- 앱 다운로드 : Download the official Landtek application from your smartphone's app store.
- 연결하다: Open the app on your smartphone and follow the instructions to pair with the MILA48500 device. The Bluetooth range is up to 10 meters.
- 데이터 로깅: The app allows for unlimited real-time online recording and data export. The meter can also store up to 2000 groups of data for offline recording, which can be downloaded to the app later.
7. 유지관리
- 청소: Use a soft, dry cloth to clean the device. Do not use abrasive cleaners or solvents. Ensure the light sensor is kept clean and free of dust.
- 저장: Store the device in a cool, dry place, away from direct sunlight and extreme temperatures. If storing for an extended period, remove the batteries.
- 배터리 교체: 정확한 측정을 위해 디스플레이에 배터리 부족 표시등이 켜지면 배터리를 교체하십시오.
8. 문제 해결
| 문제 | 가능한 원인 | 해결책 |
|---|---|---|
| 장치의 전원이 켜지지 않습니다. | 배터리가 방전되었거나 잘못 설치되었습니다. | 배터리 극성을 확인하십시오. 새 AAA 배터리로 교체하십시오. |
| 부정확한 판독값. | Dirty light sensor; low battery; incorrect unit/multiplier interpretation. | Clean the light sensor. Replace batteries. Ensure correct interpretation of LUX/FC units and X10/X100 multipliers. |
| 블루투스 연결에 실패했습니다. | Bluetooth not activated on meter; app issue; out of range. | Press and hold HOLD button for 2s to activate Bluetooth. Restart app/phone. Ensure meter is within 10m of phone. |
| 디스플레이가 어둡거나 깜빡입니다. | 배터리가 부족합니다. | 배터리를 교체하세요. |
9. 사양
| 특징 | 사양 |
|---|---|
| 측정 방법 | 적분형 |
| 범위 | 0.1~200000 LUX / 0.01~20000 FC |
| Measuring Levels (LUX) | 200 / 2,000 / 20,000 / 200,000 |
| Measuring Levels (FC) | 20 / 200 / 2,000 / 20,000 |
| 정확성 | ±(4% + 10 digits) (calibrated under standard incandescent lamp (2856°K) |
| Resolution (LUX) | <200: 0.1; ≥200: 1 |
| Resolution (FC) | <20: 0.01; 20≤FC<200: 0.1; ≥200: 1 |
| 표시하다 | 4-digit LCD, max 1999 |
| 화면 크기 | 34 x 31mm |
| 조도 센서 | 필터가 있는 실리콘 포토다이오드 |
| Samp링율 | 약. 초당 2회 |
| Incident Angle | 120° |
| Repeatability Deviation | ±2% |
| 스펙트럼 범위 | 400~700nm |
| 블루투스 범위 | Up to 10 meters proximity |
| 작동 조건 | -10~50°C, 최대 80% RH, 실내 고도 <2000m |
| 보관 조건 | -10~50°C, max 70% RH (with battery removed) |
| 전원 공급 장치 | 2 x 1.5V AAA 배터리 |
| 치수 | 150 x 56 x 28mm |
| 무게 | 약 150g (배터리 제외) |

그림 9.1: Physical dimensions and weight of the Landtek MILA48500 Lux Meter.
10. 보증 및 지원
This product is covered by a manufacturer's warranty. Please refer to the warranty card included in your package or contact Landtek customer support for detailed warranty terms and conditions.
For technical assistance, troubleshooting, or service inquiries, please contact your local distributor or the manufacturer directly. Contact information can typically be found on the manufacturer's web사이트 또는 제품 포장에 표시되어 있습니다.