1. 소개 및 이상view
The ASUS NUC 15 Pro Slim Mini PC is a compact and powerful computing solution designed for various applications, from business productivity to everyday personal use. This model (RNUC15CRKI3063CU) comes fully configured with an Intel Series 1 Core 3 100U processor, 16GB DDR5 RAM, a 512GB PCIe G4x4 NVMe SSD, and Windows 11 Pro. It offers extensive connectivity options including Thunderbolt™ 4, Wi-Fi 7, and Bluetooth 5.4, all within a tool-less chassis for easy upgrades.
This manual provides essential information for setting up, operating, maintaining, and troubleshooting your ASUS NUC 15 Pro Slim Mini PC.
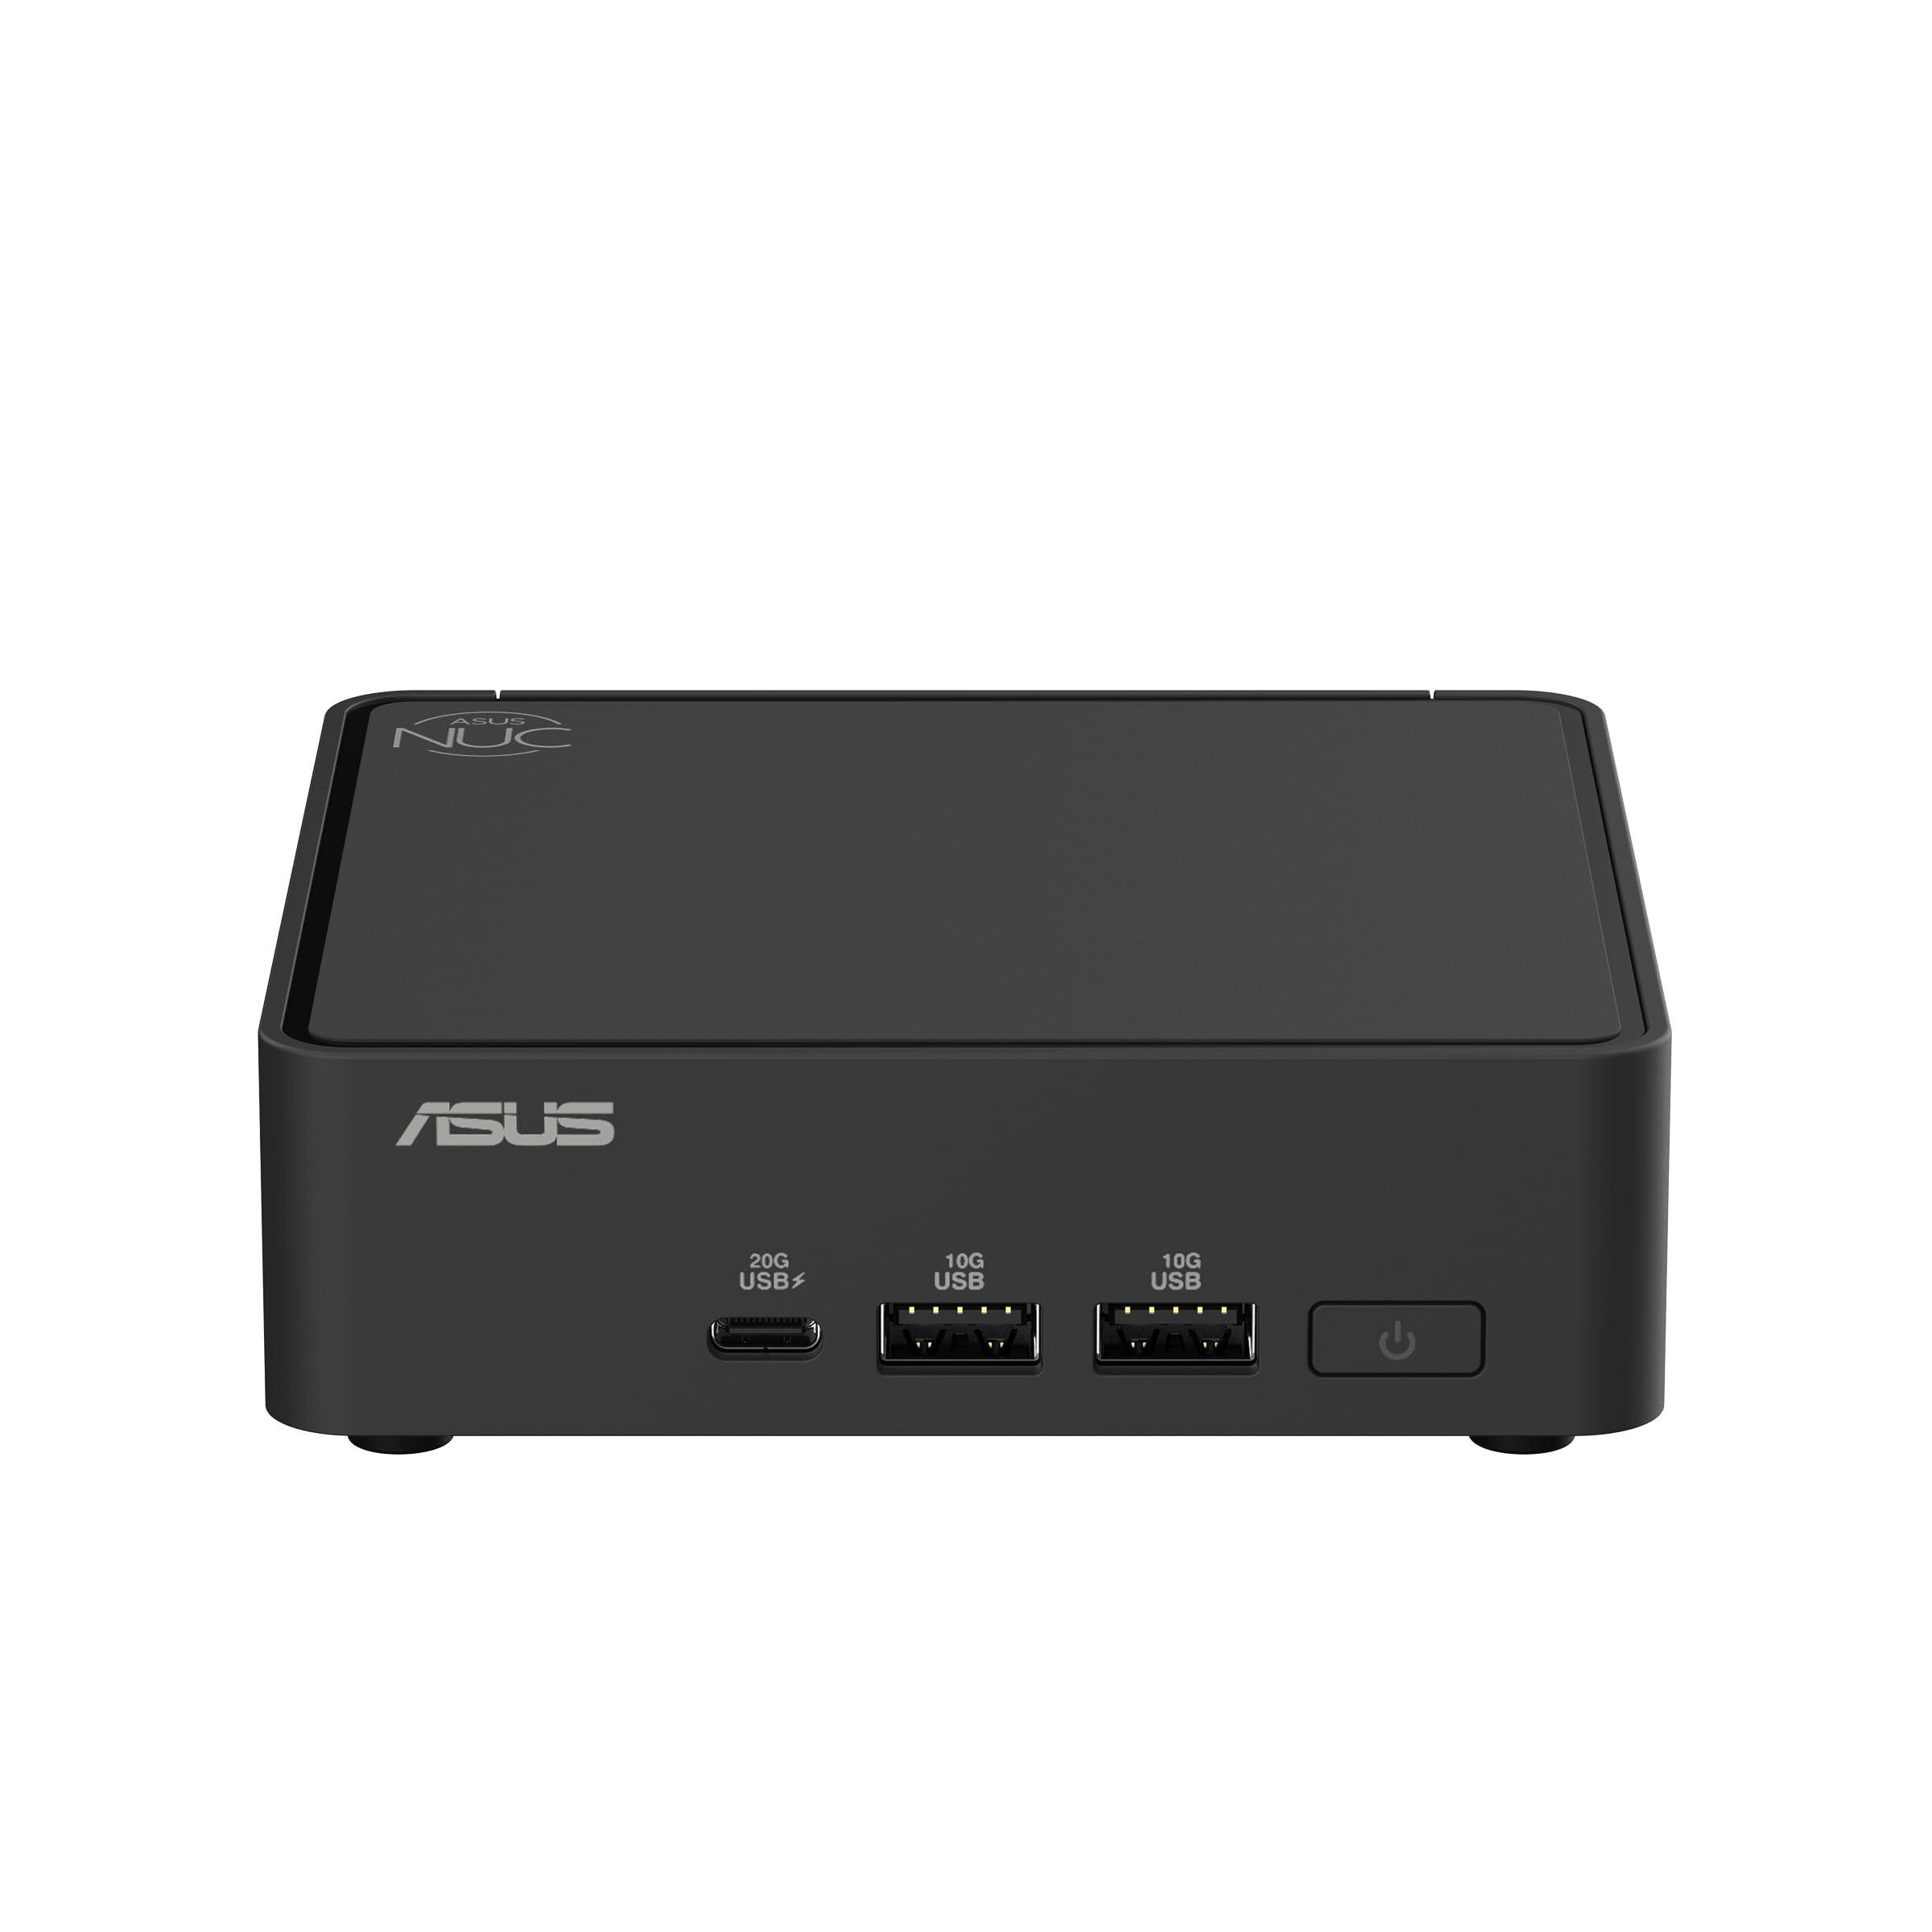
Figure 1: ASUS NUC 15 Pro Slim Mini PC, a compact and powerful computing device.
2. 상자 안에 무엇이 들어있나요?
Carefully unpack your ASUS NUC 15 Pro Slim Mini PC and ensure all items are present:
- ASUS NUC 15 Pro Slim Mini PC (Model: RNUC15CRKI3063CU)
- VESA 마운트 키트
- AC 전원 어댑터
- 전원 코드
3. 설정 지침
3.1 주변기기 연결하기
미니 PC 전원을 켜기 전에 필요한 주변 장치를 모두 연결하십시오.
- 디스플레이 연결: Use an HDMI 2.1 or Thunderbolt 4 cable to connect your monitor(s) to the corresponding ports on the Mini PC. The device supports up to four 4K displays.
- 키보드와 마우스 연결: USB 키보드와 마우스를 사용 가능한 USB 3.0 또는 USB 2.0 포트에 연결하십시오.
- 네트워크 연결(선택 사항): For a wired internet connection, connect an Ethernet cable to the 2.5Gb Ethernet port. For wireless, ensure your Wi-Fi network is available during initial setup.
- 전원 연결: Plug the AC Power Adapter into the DC-in port on the Mini PC, then connect the power cord to an electrical outlet.

Figure 2: Front ports including USB 3.2 Gen 2x2 Type-C, 2x USB 3.2 Gen2 Type-A, and Power button.

Figure 3: Rear ports including Security mechanism for power cable, HDMI 2.1, 2.5Gb Ethernet, USB 3.2 Gen2 Type-A, USB 2.0 Type-A, and Thunderbolt 4 ports.
3.2 VESA 마운트 설치 (선택 사항)
The included VESA mount allows you to attach the Mini PC to the back of a compatible monitor or to a wall, saving desk space. Follow the instructions provided with the VESA mount kit for proper installation.

Figure 4: Flexible configuration with VESA mounting for space-saving setup.
4. 사용 설명서
4.1 전원 켜기/끄기
- 전원을 켜려면: 미니 PC 전면에 있는 전원 버튼을 누르세요.
- 전원을 끄려면: From Windows 11 Pro, click the Start button, then Power > Shut down. Alternatively, you can press and hold the power button for 4 seconds to force a shutdown (use only when necessary).
4.2 Windows 11 Pro 초기 설정
Upon first boot, follow the on-screen instructions to complete the Windows 11 Pro setup, including region, keyboard layout, network connection, and user account creation.
4.3 네트워크 연결
- 유선 연결: If an Ethernet cable is connected, the system will automatically detect and use the wired network.
- 무선 연결: During Windows setup or via the Windows Settings menu, select your Wi-Fi network and enter the password. The Mini PC supports Intel Wi-Fi 7 for fast wireless speeds.
4.4 Using Thunderbolt™ 4 Ports
The Thunderbolt™ 4 ports offer versatile connectivity for high-speed data transfer, video output, and power delivery. You can connect external displays, storage devices, or docking stations.
5. 유지관리
5.1 청소
Regularly clean the exterior of the Mini PC with a soft, dry cloth. Avoid using liquid cleaners or solvents. Ensure ventilation openings are free from dust and obstructions to maintain optimal cooling.
5.2 소프트웨어 업데이트
Keep your Windows 11 Pro operating system and device drivers updated to ensure optimal performance and security. Windows Update can be accessed via Settings > Windows Update.
5.3 Hardware Upgrades (Tool-less Access)
The ASUS NUC 15 Pro Slim features a tool-less chassis design, allowing for easy access to internal components for upgrades such as RAM or storage. Refer to the detailed upgrade guide on the ASUS support web특정 지침을 위한 사이트.

Figure 5: Tool-less integration allows for easy and quick hardware upgrades.
6. 문제 해결
이 섹션에서는 Mini PC에서 발생할 수 있는 일반적인 문제에 대해 설명합니다.
| 문제 | 가능한 해결책 |
|---|---|
| 전원이 없습니다 | Ensure the power adapter and cord are securely connected to both the Mini PC and a working electrical outlet. Test the outlet with another device. |
| 디스플레이 없음 | Verify that the monitor is powered on and the display cable (HDMI or Thunderbolt) is securely connected to both the Mini PC and the monitor. Try a different display cable or monitor if possible. |
| 인터넷 연결 없음 | For wired connections, check the Ethernet cable and router status. For Wi-Fi, ensure Wi-Fi is enabled in Windows settings, you are connected to the correct network, and the password is correct. Restart your router/modem. |
| System Slowdown / Overheating | Ensure the Mini PC's ventilation openings are clear. Close unnecessary applications. Check for background processes consuming high resources via Task Manager. Ensure drivers and Windows are up to date. |
7. 사양
Detailed technical specifications for the ASUS NUC 15 Pro Slim Mini PC (RNUC15CRKI3063CU):
| 특징 | 세부 사항 |
|---|---|
| 프로세서 | Intel Series 1 Core 3 100U (1.2 GHz) |
| 숫양 | 16GB DDR5(5600MHz) |
| 저장 | 512 GB PCIe G4x4 NVMe SSD |
| 그래픽 코프로세서 | 통합 인텔 그래픽 |
| 운영 체제 | 윈도우 11 프로 |
| 최대 화면 해상도 | 3840 x 2160 픽셀(4K) |
| 비디오 출력 | HDMI 2.1, Thunderbolt™ 4 (supports up to four 4K displays) |
| 무선 연결 | Intel Wi-Fi 7 (802.11.be), Bluetooth 5.4 |
| USB 포트 | 1x USB 3.2 Gen 2x2 Type-C, 2x USB 3.2 Gen2 Type-A, 1x USB 2.0 Type-A (front); 1x USB 3.2 Gen2 Type-A, 1x USB 2.0 Type-A (rear) |
| 이더넷 | 2.5Gb 이더넷 |
| 치수(길이x너비x높이) | 4.61 x 4.41 x 1.45 인치 |
| 품목 무게 | 12.6 온스 |
| Chassis Access | Tool-less 2.0 |
| 설치 | VESA Mount Included |
| 신뢰할 수 있음 | 24/7 reliability, MIL-STD-810H certification |
8. 보증 및 지원
보증 정보, 기술 지원 및 추가 자료는 ASUS 공식 지원 페이지를 방문하십시오. web해당 사이트에서 드라이버, FAQ 및 고객 서비스 연락처 정보를 찾을 수 있습니다.
ASUS 지원 Web대지: www.asus.com/support/