
1. 서론
This manual provides essential instructions for the setup, operation, and maintenance of your Generic A3 L805 UV Flatbed Printer. This versatile printer is designed for high-resolution printing on a wide array of materials, offering capabilities such as flat printing, cylinder printing, varnish effects, 3D embossing, and UV DTF printing. It is suitable for customizing items like phone cases, bottles, glass, leather, metal, and PVC.
중요 참고 사항: This UV printer is not compatible with PP and PE materials.

Figure 1: The Generic A3 L805 UV Flatbed Printer shown with various customized items.
2. 패키지 내용
다음 품목이 모두 패키지에 포함되어 있는지 확인하세요.
- 1x UV DTF Printer
- 1x Bottle Holder
- 6x Ink Bottles
- 1x Software (on USB)
- 1x USB User Manual (on USB)
- 1x Ink Damper
- 1x Syringe
- USB 케이블
- 전원 케이블

그림 2: 제품 패키지에 포함된 모든 구성품.
3. 사양
Refer to the table below for detailed technical specifications of the A3 L805 UV Flatbed Printer:
| 특징 | 사양 |
|---|---|
| 프린터 종류 | A3 L805 UV flatbed printer |
| Print Platform Size | 33 x 50cm |
| UV 엘amp 유효 면적 | 32 x 50cm |
| Maximum Bottle Size | Diameter 110mm, length 500mm |
| Diameter Range of Bottle | 5~11cm |
| Printer Nozzle Type | EPSON L805 |
| Software Setting Precision | 2880 x 1440dpi |
| 인쇄 속도 | 178 seconds (Photo mode) |
| 인쇄 소프트웨어 | AcroRIP White ver10.3 |
| 인쇄 인터페이스 | USB2.0 |
| Color of Printing | CMYK+V or CMYK+2W |
| 프린터 크기 | 76 x 63 x 51cm |
| 컴퓨터 운영 체제 | 윈도우 7-11 |
| 제품 크기(D x W x H) | 19인치 x 21인치 x 25인치 |

Figure 3: Technical specifications of the A3 L805 UV Flatbed Printer.
4. 설정
Follow these general steps for initial setup. For detailed visual guidance, refer to the USB user manual and any included video instructions.
- 짐 풀기: 모든 구성품을 포장에서 조심스럽게 꺼내세요. 나중에 운반하거나 보관할 수 있도록 포장을 보관하세요.
- 놓기: 프린터를 안정적이고 평평한 표면에 놓고 작동 및 환기를 위한 충분한 공간을 확보하십시오.
- 사이: Connect the power cable to the printer and a suitable power outlet. Connect the USB cable from the printer to your computer.
- 소프트웨어 설치: Insert the provided USB drive into your computer. Install the necessary printing software (AcroRIP White ver10.3) and drivers.
- Ink Loading: Follow the instructions in the USB manual for safely loading the ink into the printer's ink tanks. Ensure correct color placement.
- 초기 교정: Perform any initial calibration steps as outlined in the software or USB manual to ensure optimal print head alignment and height detection.
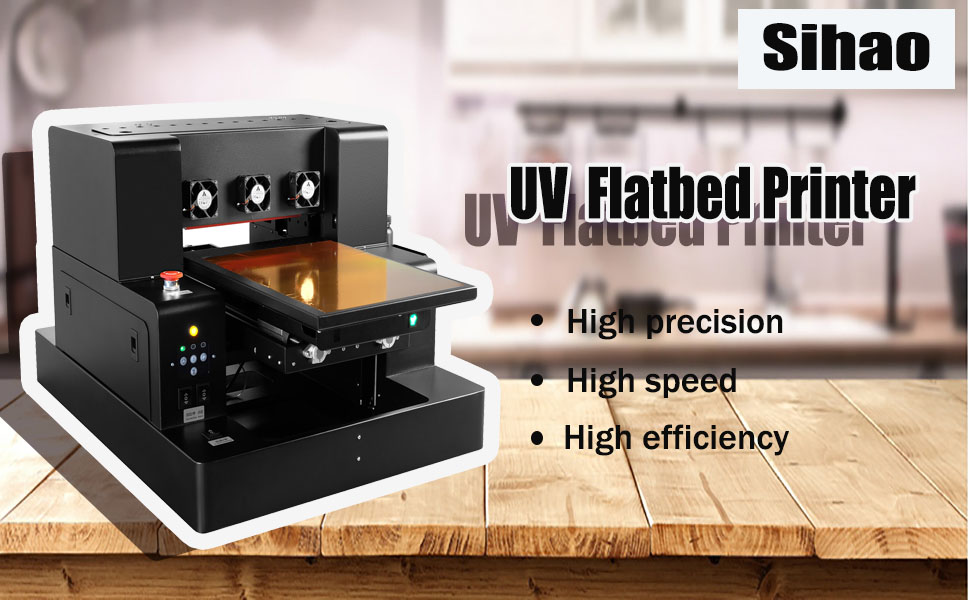
Figure 4: The UV flatbed printer ready for setup.
5. 사용 설명서
The A3 L805 UV Flatbed Printer supports various printing modes and offers intuitive controls.
5.1 기본 인쇄 프로세스
- Computer Typesetting: Design your desired image or text using the provided software on your computer.
- 재료 배치: Carefully place the item to be printed on the printer's platform. For cylindrical items, install the bottle holder accessory (see Figure 5). The printer features automatic height detection (see Figure 6).
- 인쇄 시작: Initiate the print job from the software.
- 완제품 : Once printing is complete, remove the customized item.

그림 5: 이상view of the printing workflow.
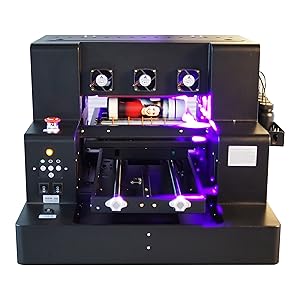
Figure 6: Printer with bottle holder for cylindrical items.
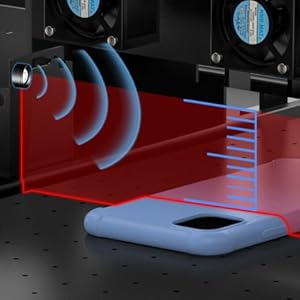
Figure 7: Automatic height detection mechanism.
5.2 제어판 기능
The printer's control panel provides access to various functions:
- 비상 정지 스위치: A red button for immediate shutdown of the printer in emergencies.
- 기능 버튼: Used to cycle through various printer functions.
- Paper Button: Controls paper/material feeding.
- Ink Button: Manages ink-related operations.
- Automatic Stop/Manual: 자동 모드와 수동 모드 간 전환 기능을 제공합니다.
- In and Out / Stop: Controls the movement of the print platform.
- 청소 버튼: Initiates the print head cleaning cycle.
- 삭제 버튼: Used to clear print jobs or settings.
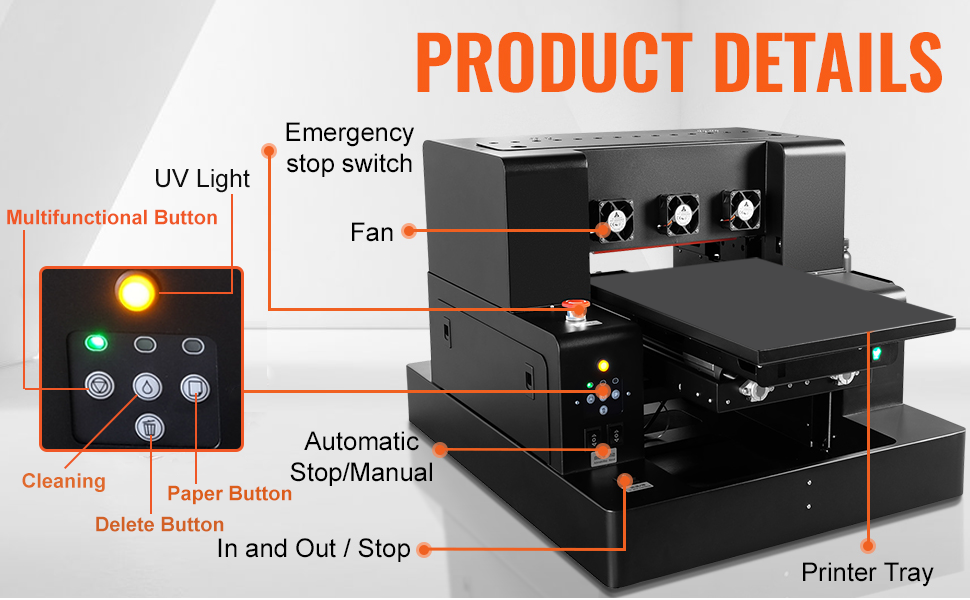
그림 8: 상세 view of the printer's control panel and components.
5.3 응용 시나리오
The printer's capabilities extend to a wide range of materials and products:
- 휴대폰 케이스
- 유리 제품
- 가죽제품
- 금속 표면
- PVC materials
- Bottles and cylindrical objects (with bottle holder)
- Stickers and labels (UV DTF printing)
- Items requiring 3D embossing or varnish effects

Figure 9: Diverse applications of the UV flatbed printer.
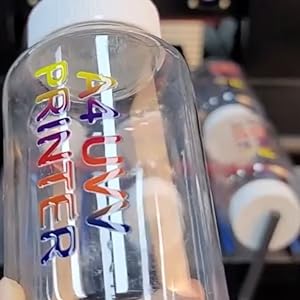
그림 10: 예ample of printing on a bottle.
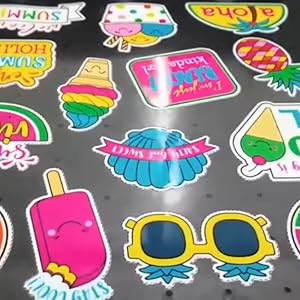
그림 11: 예ample of printing on stickers.

그림 12: 예ample of a 3D embossed print.
6. 유지관리
Proper maintenance ensures the longevity and optimal performance of your UV printer.
6.1 White Ink Mixing Cycle System
The printer is equipped with a white ink mixing system. This system automatically circulates the white ink to prevent pigment settling and ensures even distribution throughout the nozzle. Regular operation of this system is crucial for maintaining print quality and preventing clogs.
6.2 자동 청소 기능
Utilize the automatic cleaning function regularly, especially before and after extended periods of non-use, to prevent ink clogging and maintain print head health. Refer to the USB user manual for instructions on initiating and managing cleaning cycles.

Figure 13: White ink circulation and cleaning mechanisms.
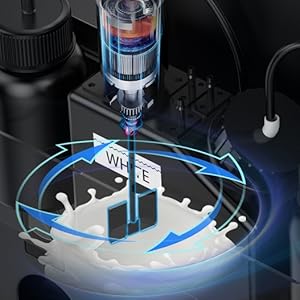
Figure 14: Internal white ink stirring mechanism.
7. 문제 해결
If you encounter any issues during setup or operation, please refer to the detailed instructions and software provided on the USB drive. Many common problems can be resolved by following the troubleshooting guides within the manual.
If you are unable to open the USB manual, install the software, or resolve a persistent issue, please contact the seller for assistance. They are prepared to help you resolve any problems.
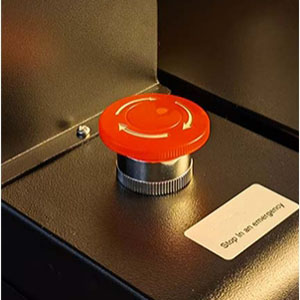
Figure 15: Emergency stop button for immediate printer shutdown.
8. 안전 정보
Always observe the following safety precautions when operating the UV Flatbed Printer:
- 프린터가 접지된 전원 콘센트에 연결되어 있는지 확인하십시오.
- 프린터를 물이나 과도한 습기에 노출시키지 마십시오.
- 작동 중에는 움직이는 부분에 손이나 헐렁한 옷을 가까이 두지 마십시오.
- Handle ink cartridges and bottles with care to avoid spills. Wear appropriate protective gear if necessary.
- In case of an emergency, immediately press the emergency stop button.
- Do not attempt to service the printer beyond the instructions provided in this manual. Refer to qualified personnel for repairs.
9. 보증 및 지원
For any questions regarding your printer, including software installation, operation, or troubleshooting, please refer to the comprehensive user manual and video instructions provided on the included USB drive. If you require further assistance, do not hesitate to contact the seller directly. They are committed to providing support and resolving any issues you may encounter.