
1. 서론
This manual provides essential information for the safe and efficient operation of your Aninerel 3600W Solar Inverter Charger, Model ANJ-3600W-LV. This device is a pure sine wave hybrid inverter designed to convert DC 48V to AC 110V, featuring a built-in 80A MPPT solar charge controller. It supports various battery types, including battery-less operation, and offers flexible charging and output modes for diverse energy requirements. Please read this manual thoroughly before installation and use.

Figure 1: Aninerel 3600W Solar Inverter Charger and Wi-Fi module.
2. 안전 정보
Please observe the following safety precautions to prevent injury and damage to the inverter or connected equipment.
- 설치는 해당 지역의 전기 규정에 따라 자격을 갖춘 인력이 수행해야 합니다.
- Ensure all power sources (PV, battery, AC grid) are disconnected before installation or maintenance.
- 인버터를 분해하지 마십시오. 내부에는 사용자가 수리할 수 있는 부품이 없습니다.
- 인버터를 비, 눈, 액체 또는 과도한 먼지에 노출시키지 마십시오.
- 과열을 방지하려면 인버터 주변을 적절하게 환기시키십시오.
- Connect the inverter to a proper ground.
- 배터리와 태양광 패널을 연결할 때 극성이 올바른지 확인하십시오.
- This inverter is designed for single-phase (120V) output and does not support parallel operation for increased power or split-phase configurations.

Figure 2: Inverter Protection Features.
3. 제품 특징
The Aninerel 3600W Solar Inverter Charger offers a range of features for efficient power management:
- 올인원 디자인: Combines a 3.6KW pure sine wave inverter, a 40A battery charger, and an 80A MPPT solar charge controller.
- 높은 태양광 입력: Supports a maximum PV open circuit voltag300VDC의 e.
- 배터리 호환성: Compatible with 48V AGM/Sealed, Gel, Flooded, and Lithium batteries. Also supports battery-less operation.
- 다양한 충전 모드: Offers Hybrid Charging, Utility Priority Charging, Solar Priority Charging, and Only Solar Charging.
- 다중 출력 모드: Includes Utility Priority, Solar and Utility Hybrid, Solar Priority, and Inverter Priority.
- 시간대 기능: Allows setting specific charging and discharging periods to optimize energy usage based on local tariffs.
- 통신 인터페이스: Supports CAN, USB, and RS485 for communication with compatible batteries and monitoring systems.
- 종합 보호: Features PV input over-voltage/current protection, AC input over-voltag전자 보호, 배터리 오버볼tage protection, and overload protection.

Figure 3: Key Features of the Aninerel Hybrid Solar Inverter Charger.
4. 제품 구성 요소 및 포트
Familiarize yourself with the inverter's components and connection ports before installation.

Figure 4: Inverter Front and Side Panel Overview with Labeled Ports.
- 표시등
- LCD 화면
- Touch Keys (ESC, UP, DOWN, ENTER)
- 과부하 보호기
- Grounding Screw Hold
- AC 출력 포트
- Wi-Fi Port (Optional)
- AC 입력 포트
- RS485-2 Communication Port
- RS485-1 Communication Port
- USB 통신 포트
- 냉각 팬
- ON/OFF 로커 스위치
- 건식 접점 포트
- Current Sharing Port (for parallel module only, not supported by this model)
- Parallel Communication Port (for parallel module only, not supported by this model)
- 배터리 포트
- PV 포트
메모: This specific model (ANJ-3600W-LV) does not support parallel operation. Therefore, ports 15 and 16 are not applicable for this unit.
5. 설정 및 설치
인버터의 성능과 안전을 위해서는 올바른 설치가 매우 중요합니다.
5.1 풀기 및 검사
- Open the package and verify all accessories are present as shown in Figure 5.
- Inspect the inverter for any physical damage. Contact your dealer immediately if any damage is found.

Figure 5: Product Accessories.
5.2 인버터 장착
- Choose a suitable location: indoors, protected from direct sunlight, rain, and dust.
- Ensure adequate clearance around the inverter for proper airflow (at least 20 cm on all sides).
- 인버터를 적절한 고정 장치를 사용하여 견고한 벽에 수직으로 설치하십시오.
5.3 배선 연결
Follow the wiring diagram carefully. All wiring should be done by a qualified electrician.

Figure 6: Typical Wiring Diagram.
- 배터리 연결: Connect the 48V battery bank to the BAT+ and BAT- terminals. Ensure correct polarity. Recommended cable: 2 AWG/25 mm². Recommended fuse: 150A.
- PV 어레이 연결: Connect solar panels to the PV+ and PV- terminals. Max PV input power: 4000W. Max PV open circuit voltage: 300Vdc. MPPT voltage range: 80Vdc-300Vdc. Recommended cable: 10 AWG/6 mm². Connect solar modules in series.
- AC 입력 연결: Connect the AC grid or generator to the AC Input port. Max AC input voltage: 300VAC. Max AC charging current: 80A. Recommended cable: 10 AWG/6 mm². Recommended breaker: 63A.
- AC 출력 연결: Connect your AC loads to the AC Output port. AC output power: 3600W. AC output voltage: 110V / 120V. Recommended cable: 10 AWG/6 mm². Recommended breaker: 63A.
- 접지: Connect the grounding screw to a reliable earth ground.
중요한: Double-check all connections before powering on the inverter. Incorrect wiring can cause severe damage.
6. 사용 설명서
Once installed, you can configure and operate your inverter using the LCD display and touch keys.
6.1 초기 전원 켜기
- Ensure all wiring is secure and correct.
- 배터리 차단기를 켜세요.
- Turn on the PV array breaker (if connected).
- 교류 전원 차단기를 켜십시오(연결되어 있는 경우).
- Flip the ON/OFF rocker switch on the inverter to the "ON" position.
- The LCD screen will light up, and the inverter will perform a self-test.
6.2 LCD 디스플레이 및 설정
Use the ESC, UP, DOWN, and ENTER buttons to navigate the LCD menu and adjust settings. Refer to the detailed manual for specific menu options.
6.3 Charging Priority Modes
These settings determine how your battery bank is charged from available power sources.

Figure 7: Charger Source Priority Options.
- Solar First AC Input Next: Solar panels prioritize charging the battery. AC input charges only if solar power is insufficient.
- Solar and AC Input Simultaneously: Both solar energy and utility power charge the battery bank at the same time.
- 태양광 전용: Solar energy is the exclusive charging source, regardless of AC input availability.
6.4 Output Source Priority Modes
These settings determine which power source the inverter uses to supply connected appliances.

Figure 8: Output Source Priority Options.
- 솔라 퍼스트: Prioritizes powering appliances from solar. If solar is insufficient, AC input will supplement.
- AC 우선: Redirects AC input to power all appliances and uses solar and batteries only when AC input is unavailable.
- DC Priority (Solar and Battery First): Prioritizes solar power. If solar is insufficient, the battery bank supplies power. AC input powers only when battery voltage drops to a programmable value.
6.5 배터리 유형 구성
The inverter is compatible with various 48V battery types. Ensure the correct battery type is selected in the settings for optimal charging and discharge management.

Figure 9: Supported Battery Types.
- 주주총회/밀봉
- 젤라틴
- 침수됨
- 리튬
- User Mode (for custom battery parameters)
The inverter also supports battery-free operation. For lithium batteries, the shore power and photovoltaic can activate dormant lithium batteries.
7. Wi-Fi Monitoring
The inverter comes with an optional Wi-Fi module for remote monitoring.
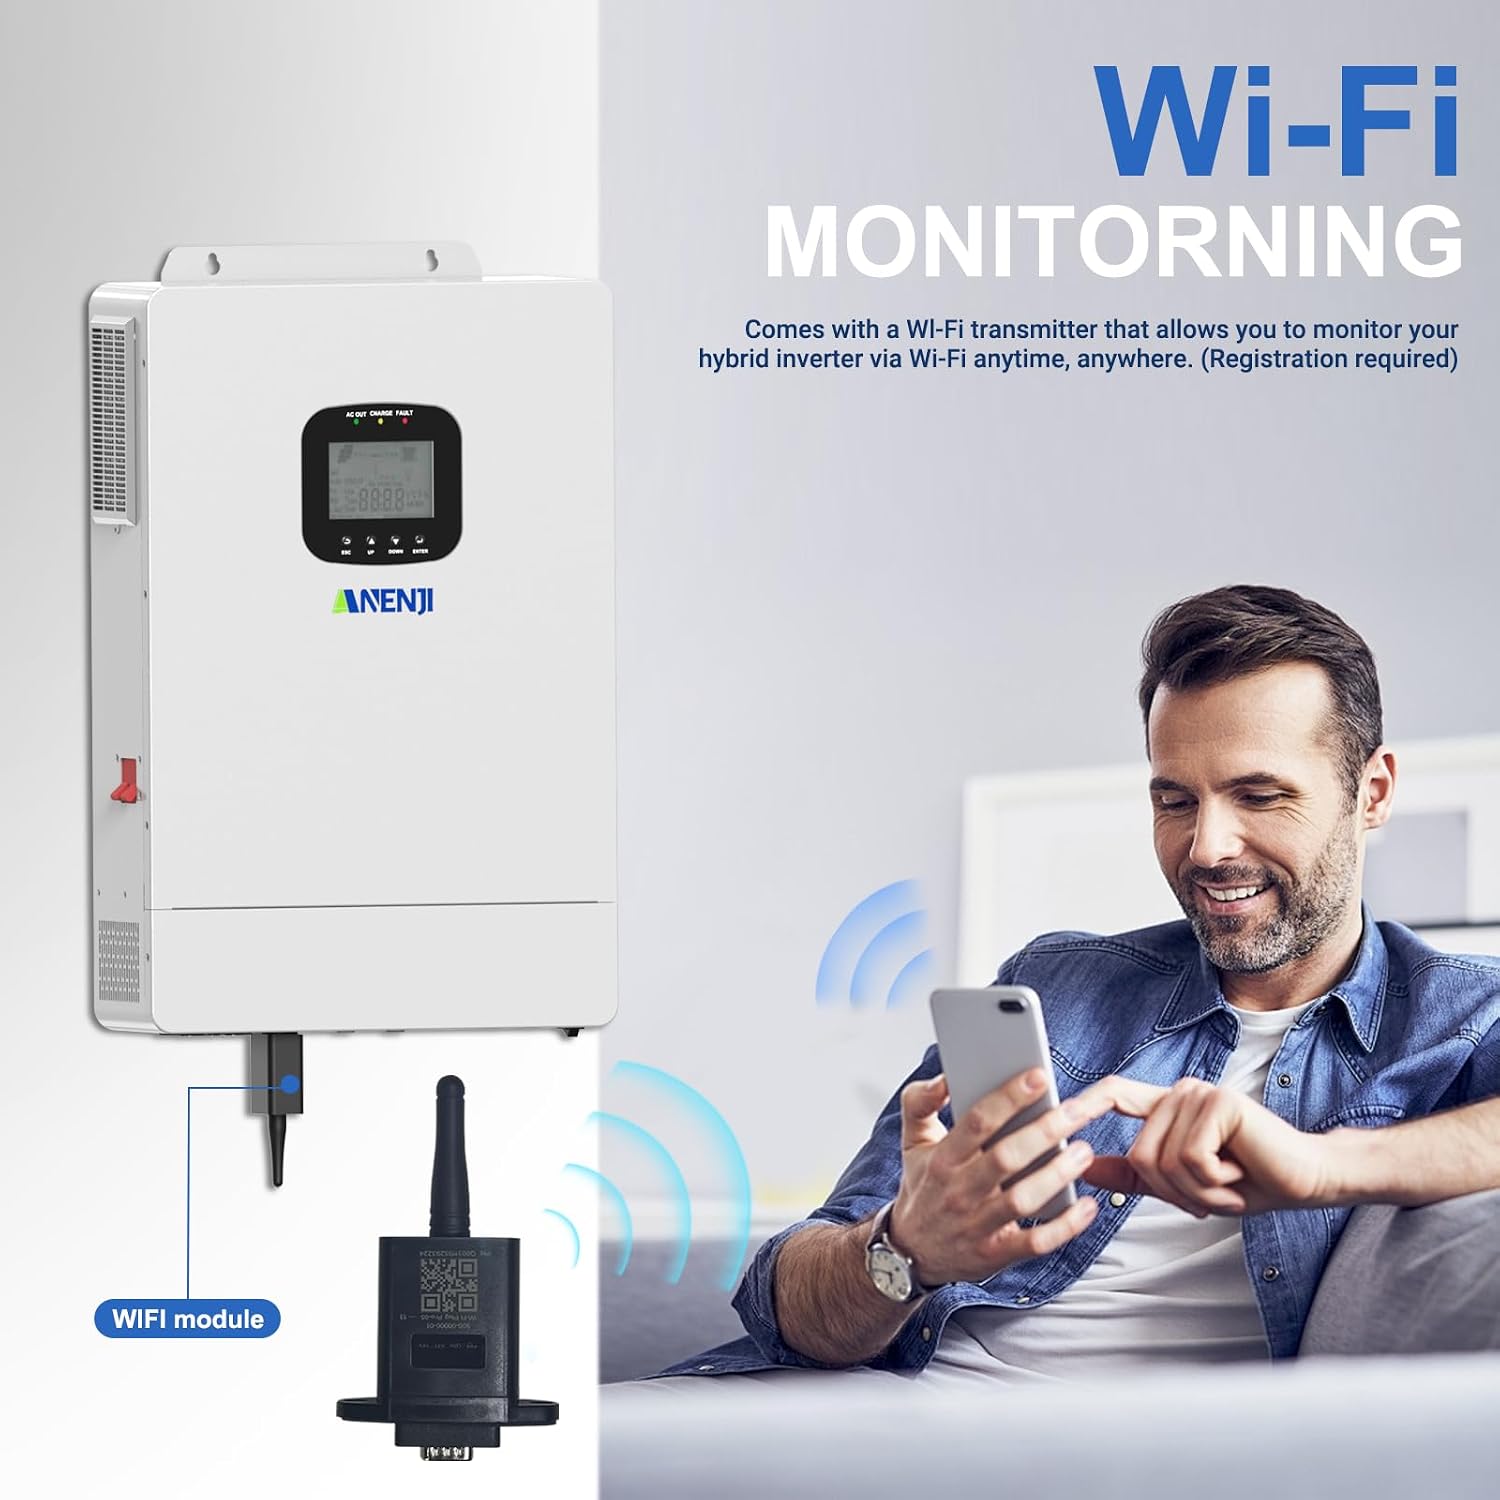
Figure 10: Wi-Fi Monitoring Setup.
- Connect the Wi-Fi module to the designated Wi-Fi port on the inverter.
- Download the compatible monitoring application to your smartphone or tablet.
- Follow the app's instructions to register your device and connect it to your local Wi-Fi network.
- Once connected, you can monitor the inverter's status, energy production, and consumption in real-time from anywhere.
메모: Refer to the Wi-Fi module's separate instruction guide for detailed setup procedures, as app names and connection steps may vary.
8. 유지관리
정기적인 유지관리는 인버터의 수명과 최적의 성능을 보장합니다.
- 청소: 인버터 외부를 주기적으로 마른 부드러운 천으로 닦아주십시오. 통풍구에 먼지와 이물질이 없는지 확인하십시오.
- 사이: 매년 모든 전기 연결부의 조임 상태와 부식 여부를 점검하십시오.
- 환경: 작동 환경이 지정된 온도 및 습도 범위 내에 유지되도록 하세요.
- 배터리 검사: 납축전지를 사용하는 경우, 배터리 제조업체의 지침에 따라 전해액 수위와 단자 상태를 점검하십시오.
유지관리를 수행하기 전에 항상 모든 전원을 분리하세요.
9. 문제 해결
이 섹션에서는 일반적인 문제에 대한 해결 방법을 제공합니다. 여기에 나와 있지 않은 문제는 고객 지원팀에 문의하십시오.
| 문제 | 가능한 원인 | 해결책 |
|---|---|---|
| 인버터 전원이 켜지지 않습니다. | 배터리 연결 안 됨, 배터리 전압 낮음tage, ON/OFF switch off, blown fuse/breaker. | 배터리 연결 및 용량 확인tage. Ensure ON/OFF switch is on. Check and replace fuses/reset breakers. |
| AC 출력이 없습니다. | Overload, short circuit, low battery, inverter fault. | Reduce load. Check for short circuits in wiring. Check battery voltage. Consult LCD error codes. |
| PV not charging batteries. | 햇빛 없음, 태양광 패널 연결 해제됨, 태양광 패널 전압 오류tage, MPPT controller fault. | Check sunlight conditions. Verify PV connections and voltage. Ensure PV input is within operating range. |
| Wi-Fi module not connecting. | Incorrect app, poor Wi-Fi signal, incorrect setup steps. | Ensure correct app is used. Check Wi-Fi signal strength. Re-follow Wi-Fi module setup instructions carefully. |
10. 사양
Key technical specifications for the Aninerel 3600W Solar Inverter Charger (Model ANJ-3600W-LV):
- 모델 이름: ANJ-3600W-LV
- 정격 출력 전력: 3600 와트
- 최대 피크 전력: 7200VA
- 입력 Voltag전자(DC): 48 볼트
- 출력 볼륨tag전자(AC): 110V / 120V (Single Phase)
- 최대 PV 개방 회로 Voltage: 300 Vdc
- PV 운영 볼륨tag전자 범위: 80 - 300 Vdc
- MPPT 권tag전자 범위: 90 - 260 Vdc
- Max. AC Charging Current: 80A
- 배터리 용량tag전자 범위: 40 - 60 Vdc
- 품목 무게: 19.36파운드
- 패키지 크기: 19.57 x 14.17 x 7.09 인치
- 제조업체: Shenzhen Anenji Energy Technology Co.,Ltd
11. 보증 및 지원
For warranty information, technical assistance, or customer support, please contact Aninerel directly.

Figure 11: Aninerel Customer Support Contact Information.
- 이메일: anenji168@outlook.com
- 핸드폰: +86 188 0375 9233
- Support Hours (PDT): 9 AM - 6 PM
Please have your model number (ANJ-3600W-LV) and purchase date ready when contacting support.