1. 서론
This manual provides detailed instructions for the installation, operation, and maintenance of your Haloview Byte Tango BT6 Touch RV Backup Camera System. Please read this manual thoroughly before using the product to ensure proper function and safety.
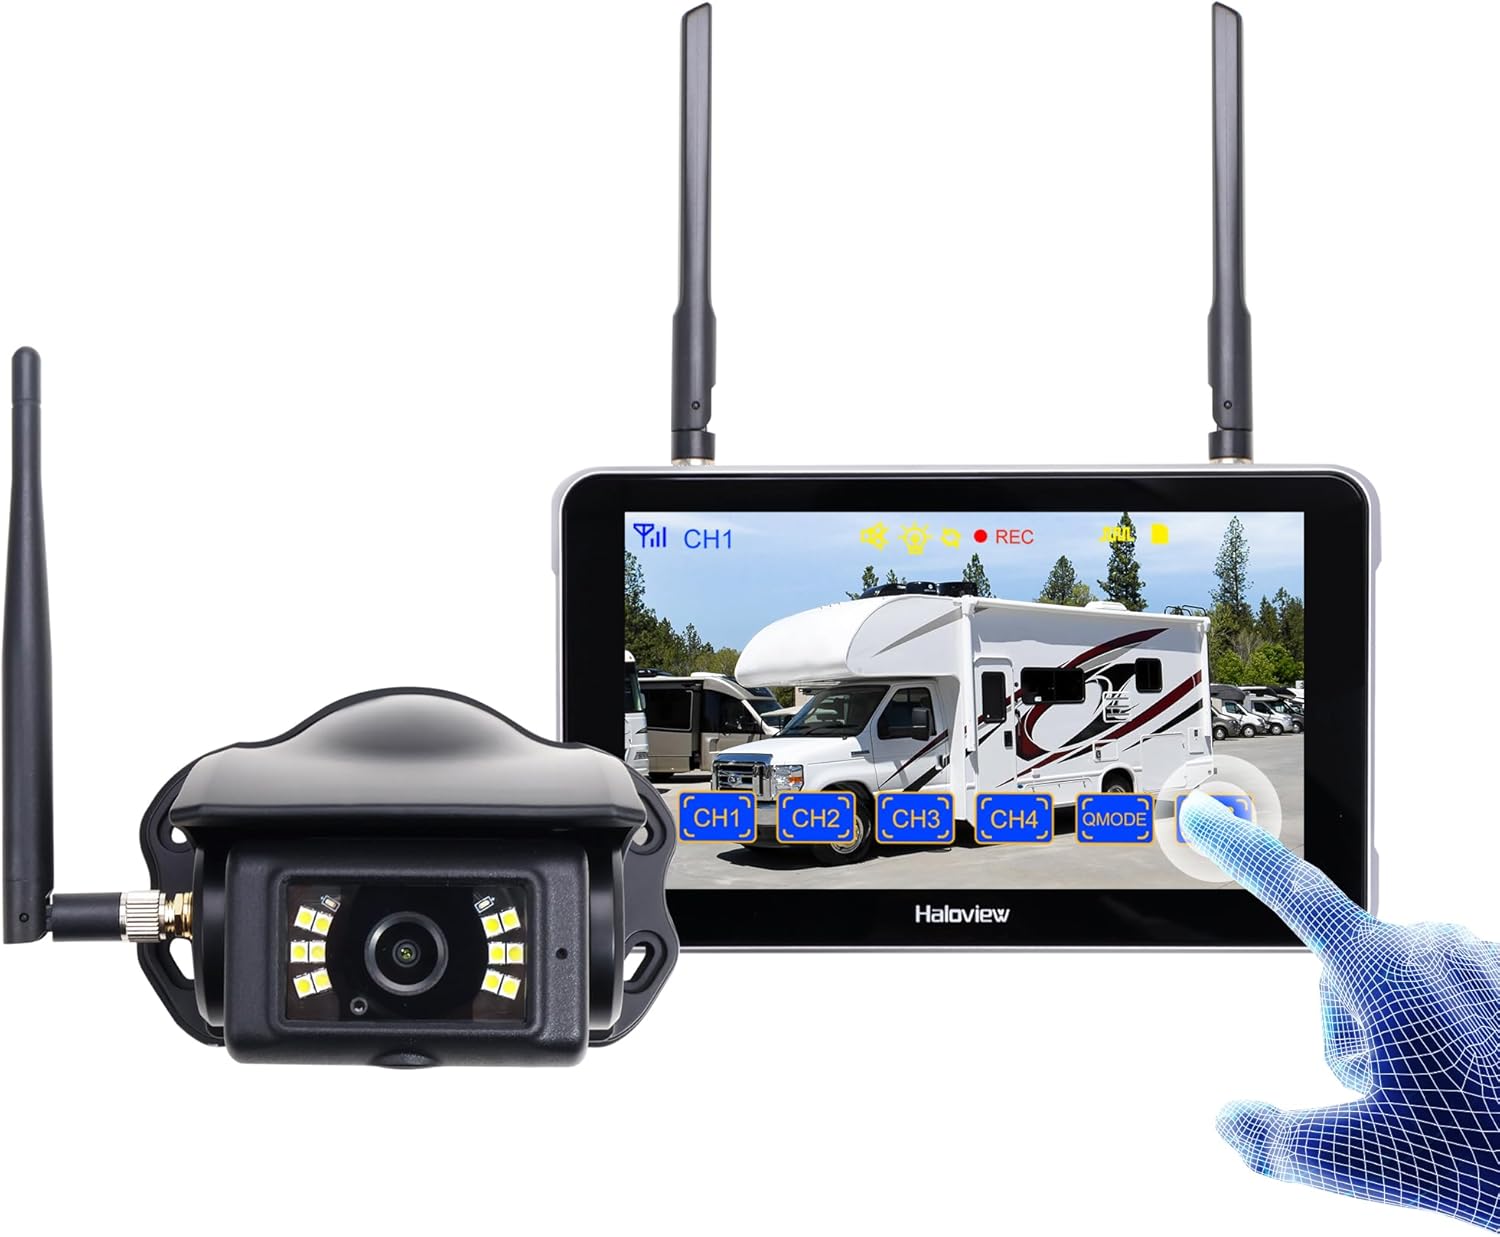
Image 1.1: Haloview Byte Tango BT6 Touch RV Backup Camera System components, including the 5.5-inch touch screen monitor and the wireless camera.
주요 특징:
- 2.5D Curved Glass 5.5'' Touch Screen: Offers a smooth and responsive user interface.
- Low Latency Wireless Technology: Ensures minimal lag and interference-free signal transmission, supporting vehicles up to 65ft in length (e.g., RVs, travel trailers, trucks, campers, vans, pickups, tractors, fifth wheels, motorhomes).
- Full-Color Dim-Light Night Vision: Advanced image sensors provide full-color video even in low-light conditions. Night Vision Fill Lights can be activated or deactivated remotely via the monitor.
- 오디오 캡처: Built-in speaker alerts users to pedestrians, animals, or unusual sounds in the surroundings.
- 내장형 DVR: Supports real-time recording and video playback with 1080P@30fps FHD resolution.
2. 상자 안에 무엇이 들어있나요?
아래 나열된 모든 품목이 패키지에 포함되어 있는지 확인하세요.

Image 2.1: All components included in the Haloview Byte Tango BT6 Touch system package.
- BT6 Touch Screen Monitor
- BTC128 카메라
- 흡착컵 장착 브래킷
- 3M 마운트 브래킷
- C타입 케이블
- 카메라 변환 케이블
- Furrion 사전 배선 RV용 전원 어댑터
- 페어링 케이블
- 담배 라이터 전원 어댑터
3. 설정 및 설치
3.1 카메라 설치
- 장착 위치를 선택하세요: Select a suitable surface mount location at the rear of your vehicle, ensuring a clear view and protection from direct impact.
- 카메라 보안: Mount the BTC128 camera securely using appropriate fasteners. Ensure the antenna is positioned for optimal signal reception.
- 전원 연결: Connect the camera to a 12V DC power source. If your RV is pre-wired for Furrion, use the provided power adapter. Otherwise, connect to your vehicle's reverse light circuit or another suitable 12V power source.
3.2 모니터 설치
- 모니터를 장착하세요: Attach the 5.5-inch monitor to your dashboard or windshield using either the suction cup mount bracket or the 3M adhesive mount bracket. Ensure the monitor is positioned for easy view운전을 방해하지 않고 view.
- Power the Monitor: Connect the monitor to power using the provided cigarette lighter power adapter or the Type-C cable for USB power.
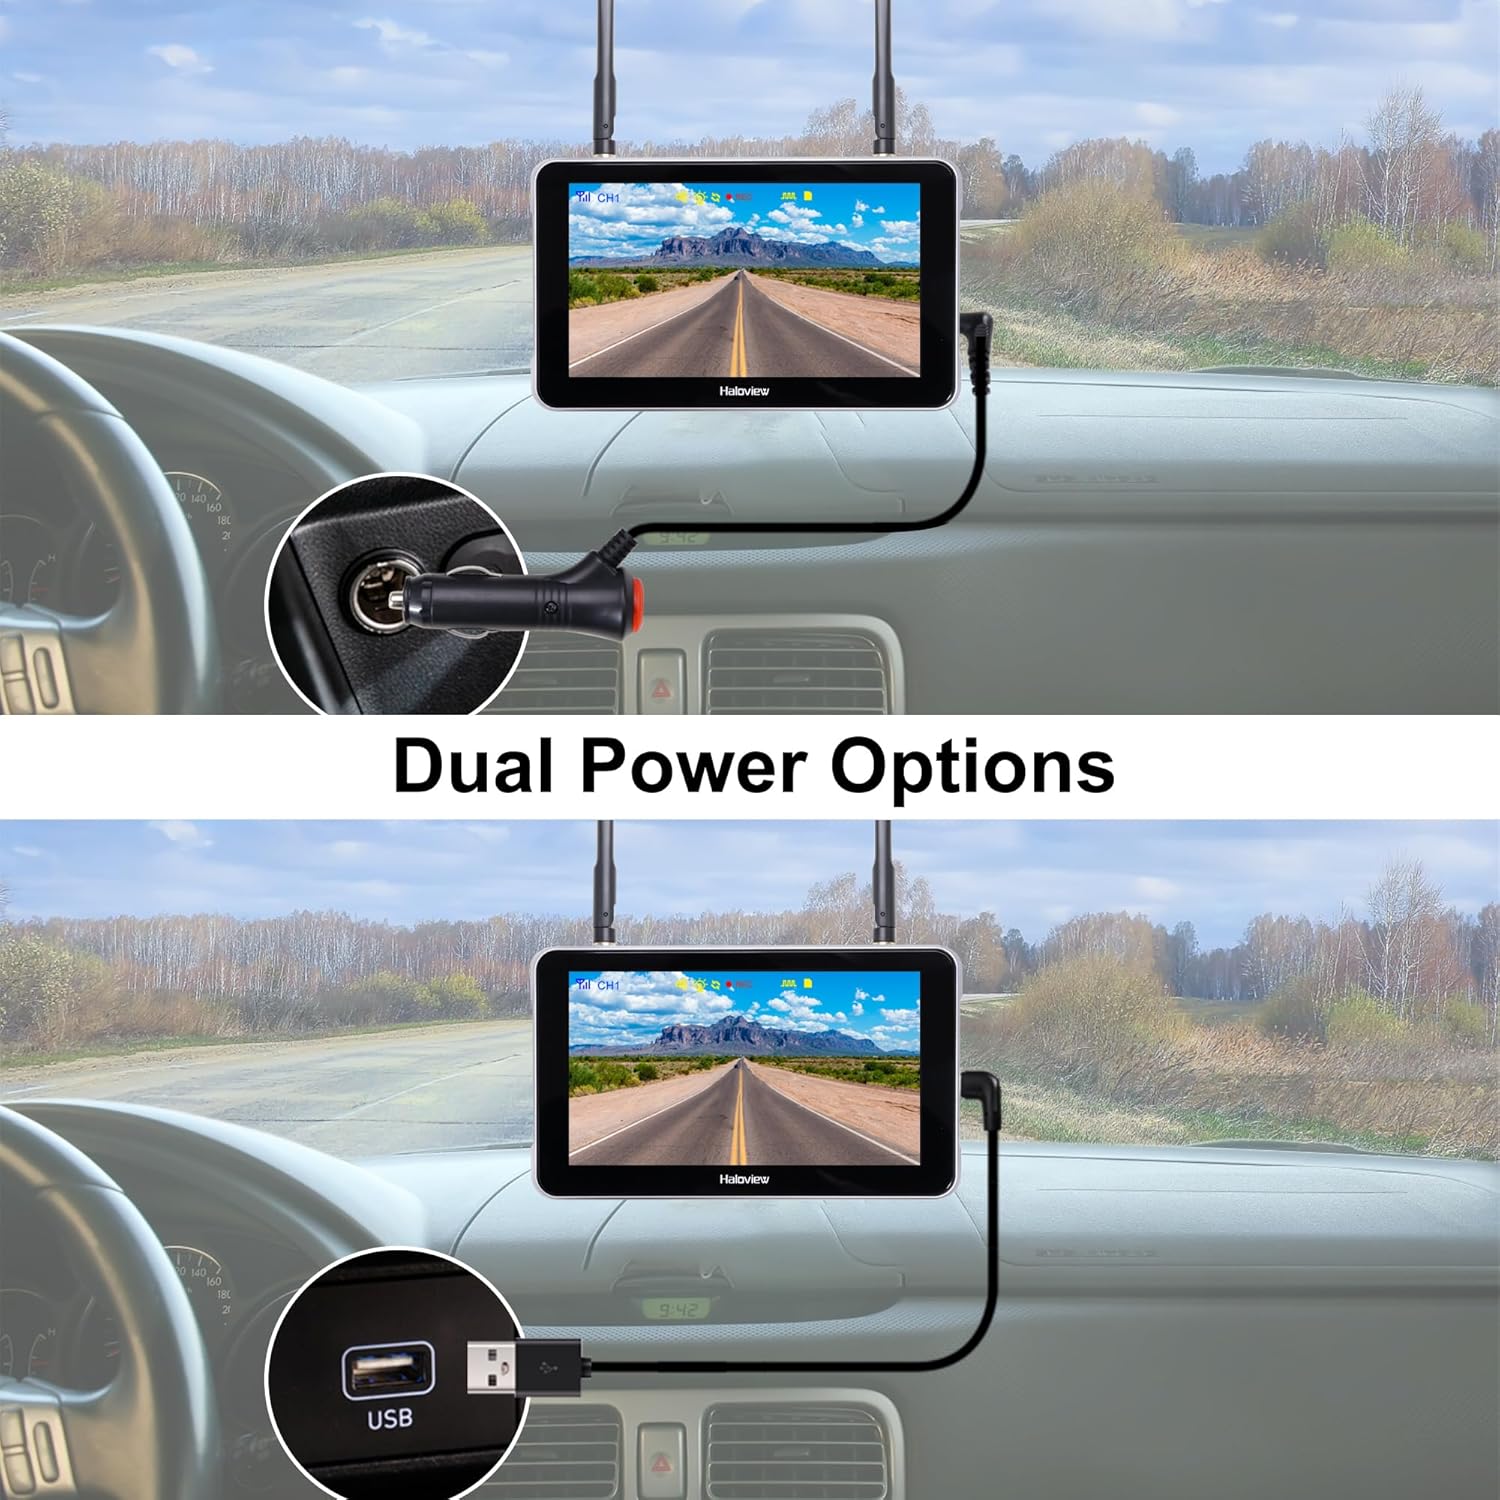
Image 3.1: The monitor can be powered via a cigarette lighter adapter or a USB Type-C cable.
3.3 카메라와 모니터 페어링
The camera and monitor are typically pre-paired from the factory. If no image appears or you are adding additional cameras, follow these steps:
- 카메라와 모니터의 전원을 켭니다.
- On the monitor, navigate to the pairing menu (refer to the operating section for menu access).
- Select an available channel for pairing.
- Press the pairing button on the camera (if applicable, consult camera-specific instructions) or follow the on-screen prompts on the monitor to initiate pairing.
- Once paired, the camera's video feed will appear on the monitor.

Image 3.2: Wireless signal transmission between the camera and monitor.
4. 사용 설명서
4.1 기본 작업
- 전원 켜기/끄기: Press and hold the power button on the monitor to turn it on or off.
- 터치스크린 인터페이스: Navigate through menus and settings by tapping and swiping on the 5.5-inch touch screen.
- 채널 전환: If multiple cameras are connected, tap the channel buttons (CH1, CH2, etc.) on the screen to switch between camera views.

Image 4.1: The touch screen allows for intuitive control of the system.
4.2 고급 기능
- 이미지 뒤집기 : Access the settings menu to adjust the image orientation (horizontal/vertical flip) to match your camera's mounting position.

Image 4.2: The image flip function allows for various display orientations.
- 야간 투시경: The system automatically adjusts for low-light conditions. Night Vision Fill Lights can be manually controlled via the monitor settings if ambient light is extremely low.

Image 4.3: The camera provides full-color images even in dim light conditions.
- DVR 녹화 : Insert a Micro-SD card (not included) into the monitor's slot to enable continuous recording. Access recorded footage through the playback menu. The system records in 1080P at 30 frames per second.

Image 4.4: The monitor supports Micro-SD card recording for continuous video capture.
- Rear Assist Marker Lines: Customizable parking guidelines can be activated and adjusted via the monitor settings to aid in reversing and parking maneuvers.
Image 4.5: Customizable rear assist marker lines for precise maneuvering.
5. 유지관리
- 청소: 부드럽고 마른 천으로 모니터 화면과 카메라 렌즈를 닦으세요. 잘 지워지지 않는 얼룩은 살짝 두드려 닦아주세요.amp물에 적신 천을 사용하세요. 연마성 세제나 용제는 사용하지 마세요.
- 케이블 연결: Periodically check all cable connections for tightness and signs of wear. Ensure power cables are securely plugged in.
- 카메라 렌즈: Keep the camera lens clear of dirt, snow, or ice to maintain optimal image quality.
- 안테나 : Ensure antennas on both the camera and monitor are securely attached and positioned for best signal.
6. 문제 해결
- 모니터에 이미지가 나타나지 않습니다.
- 카메라와 모니터 모두 전원이 켜져 있는지 확인하십시오.
- 모든 전원 연결을 확인하십시오.
- Verify that the camera and monitor are properly paired (refer to Section 3.3).
- Check for obstructions between the camera and monitor that might block the wireless signal.
- 이미지 품질이 좋지 않음:
- 카메라 렌즈를 청소하세요.
- 카메라가 단단히 장착되었고 진동하지 않는지 확인하세요.
- 주변에 강력한 간섭원이 있는지 확인하십시오.
- 녹음 문제:
- Ensure a compatible Micro-SD card is inserted correctly.
- Check if the Micro-SD card is full; format it if necessary (this will erase all data).
- Verify recording settings in the monitor menu.
- Monitor Not Responding to Touch:
- Restart the monitor by powering it off and on again.
- 화면이 깨끗하고 이물질이 없는지 확인하세요.
7. 사양
| 특징 | 사양 |
|---|---|
| 제품 크기 (모니터) | 6.1 x 1 x 8.8인치 (길이 155mm x 너비 25mm x 높이 88mm) |
| 품목 무게 | 2.7파운드 |
| 화면 크기 | 5.5 인치 |
| 디스플레이 기술 | 액정표시장치 |
| 무선 연결 | 2.4G 디지털 무선 |
| 호환 장치 | BTC128, BTC129, BTC126, BTC125, BTC131 |
| 설치 유형 | 표면 실장 |
| 운영 볼륨tage | 12볼트(DC) |
| 광센서 기술 | CMOS |
| 렌즈 유형 | 고정형 광각 렌즈 |
| 실제 각도 View | 120도 |
| 비디오 녹화 해상도 | 1080P@30fps FHD |

Image 7.1: Physical dimensions of the Haloview monitor and a summary of key features.
8. 보증 및 지원
8.1 보증 정보
후광view products are covered by a limited warranty. Please refer to the warranty card included with your product or visit the official Haloview web자세한 보증 약관은 해당 사이트를 참조하세요. 보증 청구를 위해 구매 증빙 자료로 구매 영수증을 보관하세요.
8.2 고객 지원
For technical assistance, troubleshooting, or product inquiries, please contact Haloview 다음 채널을 통한 고객 지원:
- Web대지: Visit the official Haloview webFAQ, 지원 리소스, 문의 양식을 제공하는 사이트입니다.
- 이메일: Refer to your product packaging or the Haloview web고객 지원 이메일 주소 사이트.
- 핸드폰: 연락처는 공식 웹사이트에서 확인할 수 있습니다. web직접 지원을 위한 사이트입니다.
When contacting support, please have your product model (BT6 Touch) and purchase information ready.