
1. 서론
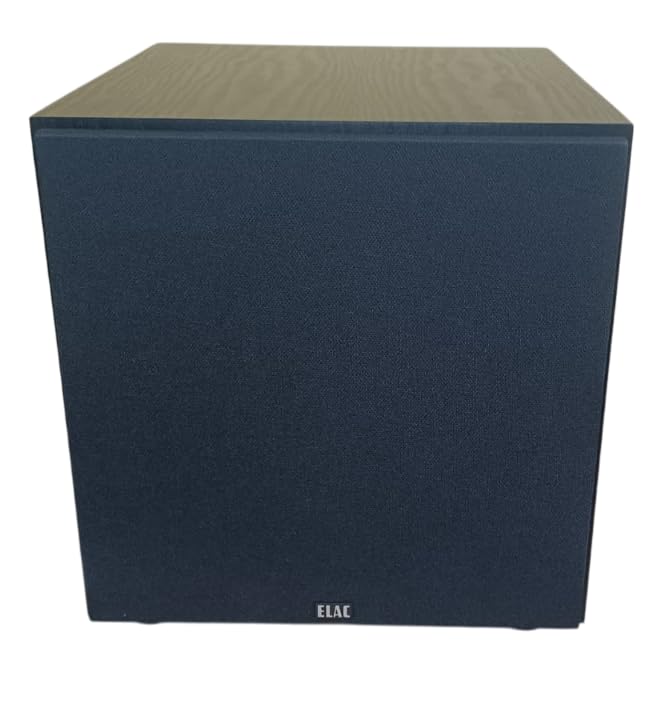
Thank you for choosing the Elac SUB1015 Powered Subwoofer. This high-performance subwoofer is engineered to deliver powerful and deep bass, enhancing your home audio experience. Featuring a 10-inch polypropylene cone, the SUB1015 handles low frequencies with clarity and precision. This manual provides essential information for proper setup, operation, and maintenance to ensure optimal performance and longevity of your subwoofer.
2. 패키지 내용
패키지에 모든 품목이 들어 있는지 확인하세요.
- Elac SUB1015 Powered Subwoofer
- 그릴
- AC 전원 코드
3. 설정 및 연결
Proper setup is crucial for achieving the best sound quality from your subwoofer. Follow these steps for installation:
3.1 배치
The placement of your subwoofer significantly impacts its performance. Experiment with different locations in your room to find the optimal spot. Generally, placing the subwoofer in a corner can enhance bass output, but may also lead to boomy sound. Placing it along a wall or near your main speakers can provide a more balanced sound. Ensure there is adequate ventilation around the unit.
3.2 서브우퍼 연결
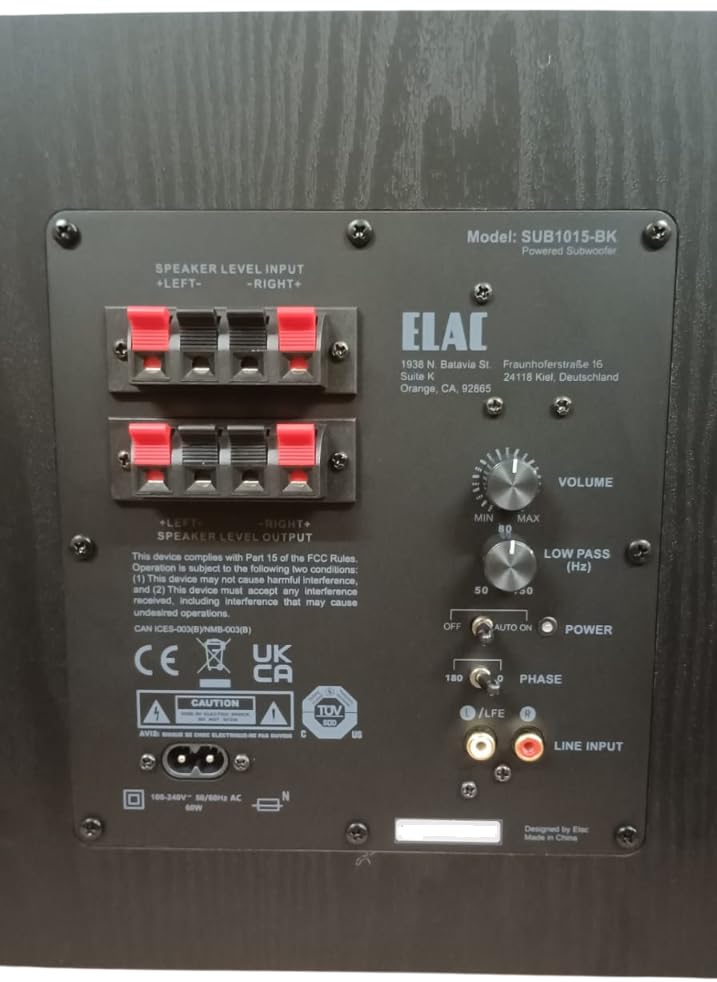
The SUB1015 offers both RCA line-level and speaker-level inputs for compatibility with various audio systems.
RCA Line-Level Input (Recommended)
If your AV receiver or pre-amplifier has a dedicated subwoofer output (often labeled LFE, Sub Out, or Pre-Out Sub), use an RCA cable to connect this output to the LINE INPUT (LFE) on the subwoofer's rear panel. This method typically provides the best performance and control.
스피커 레벨 입력
수신기 또는 amplifier does not have a dedicated subwoofer output, you can connect the subwoofer using the speaker-level inputs. Connect the speaker outputs from your amp에 대한 리퍼 스피커 레벨 입력 terminals on the subwoofer. Ensure correct polarity (positive to positive, negative to negative). You can then connect your main speakers to the 스피커 레벨 출력 terminals on the subwoofer, or directly to your amplifier if your main speakers are full-range.
3.3 전원 연결
Once all audio connections are made, connect the supplied AC power cord to the subwoofer's power inlet and then to a suitable wall outlet. The subwoofer is designed for 230 Volts input.
4. 사용 설명서
After connecting your subwoofer, use the controls on the rear panel to fine-tune its performance.
4.1 컨트롤 오버view
- 음량: 서브우퍼의 전체 출력 레벨을 조절합니다. 낮은 설정에서 시작하여 베이스가 메인 스피커와 자연스럽게 어우러질 때까지 점차 높이십시오.
- LOW PASS (Hz): Controls the upper frequency limit of the subwoofer. This setting determines where the subwoofer takes over from your main speakers. A common starting point is 80 Hz, but adjust based on your main speakers' low-frequency capabilities.
- 힘: 이 스위치에는 세 가지 위치가 있습니다.
- OFF : Turns the subwoofer off.
- 에: Keeps the subwoofer continuously on.
- 자동 : The subwoofer will automatically turn on when an audio signal is detected and enter standby mode after a period of inactivity. This mode consumes less than 0.5W in standby.
- 단계: Adjusts the phase of the subwoofer's output relative to your main speakers. Set to 0° or 180°. Experiment with both settings to find which provides the most coherent and impactful bass in your listening position.
5. 문제 해결
If you encounter issues with your Elac SUB1015 subwoofer, refer to the following common problems and solutions:
- 소리 없음:
- Ensure the power cord is securely connected and the subwoofer is plugged into a live outlet.
- 확인하세요 힘 switch position. If set to AUTO, ensure an audio signal is present.
- Verify all audio cables (RCA or speaker-level) are correctly and securely connected.
- 증가시키다 용량 control on the subwoofer.
- 수신기를 확인하세요/amplifier settings to ensure the subwoofer output is enabled and volume is not muted.
- 약하거나 왜곡된 저음:
- 조정하다 용량 control on the subwoofer.
- 조정하다 LOW PASS (Hz) control. If set too low, you might not hear enough bass.
- 실험해 보세요 단계 switch (0° or 180°) to see if it improves bass integration.
- Check subwoofer placement. Moving it to a different location, especially closer to a wall or corner, might improve bass response.
- Ensure speaker wires are connected with correct polarity (+ to +, - to -).
- 윙윙거리는 소리 또는 윙윙거리는 소음:
- 서브우퍼를 다른 전기 콘센트에 꽂아보세요.
- 모든 오디오 케이블이 적절히 차폐되어 있고 전원 케이블과 평행하게 배치되지 않았는지 확인하세요.
- RCA 연결을 사용하는 경우 다른 RCA 케이블을 사용해 보세요.
- Disconnect all audio inputs from the subwoofer. If the hum disappears, the issue is likely with the source equipment or cabling.
6. 사양
Detailed technical specifications for the Elac SUB1015 Powered Subwoofer:
| 특징 | 사양 |
|---|---|
| 상표 | 엘락 |
| 모델 번호 | SUB1015-BK |
| 스피커 유형 | 파워드 서브 우퍼 |
| Woofer Driver Diameter | 10 Inches (Polypropylene Cone) |
| Amp정수기 유형 | D 클래스 |
| 파워 핸들링(RMS/피크) | 60W RMS / 120W 피크 |
| 주파수 응답 | 36Hz ~ 150Hz |
| 연결 기술 | RCA, 유선 |
| 오디오 출력 모드 | 단핵증 |
| 입력 Voltage | 230 볼트 |
| 낮은 대기 전력 소모 | 0.5W 미만 |
| 캐비닛 마감 | 블랙 애쉬 |
| 품목 치수(D x W x H) | 36.8D x 31W x 32.5H 센티미터 |
| 품목 무게 | 9.8 킬로그램 |
| 원산지 | 미국 |
7. 유지관리
서브우퍼의 외관과 성능을 유지하려면:
- 청소: 부드럽고 마른 천으로 캐비닛을 닦으십시오. 연마성 세제, 왁스 또는 용제 사용은 피하십시오.
- 놓기: 서브우퍼를 직사광선, 열원, 과도한 습기로부터 멀리 두세요.
- 통풍: Ensure the rear panel and any vents are not obstructed to allow for proper heat dissipation.
8. 제품 오버view 동영상
이 영상을 시청하여 시각적으로 살펴보세요.view of the Elac SUB1015 Powered Subwoofer and its key features.
9. 보증 및 지원
The Elac SUB1015 Powered Subwoofer comes with a 1 년 제조업체 보증.
제조업체 정보:
ELAC 아메리카스 주식회사
1938 N. Batavia St. Suite K
오렌지, 캘리포니아 92865
Importer Contact Information (India):
Kripa Electronics (india) Pvt.Ltd
Gala No 4 5 6, Building No. C, Shreeram Complex,
Village Dapoda, Bhiwandi Thane-421032


