1. 서론
구매해주셔서 감사합니다asing the Urageuxy Wireless Indoor/Outdoor Thermometer with 3 Sensors. This device provides accurate, real-time temperature and humidity readings for up to four locations simultaneously (one indoor, three outdoor/remote). It features a clear LCD display with backlight, comfort indicators, and records of daily maximum and minimum values. This manual will guide you through the setup, operation, and maintenance of your new thermometer.
2. 안전 정보
- Do not expose the main unit or sensors to extreme force, shock, dust, temperature, or humidity.
- Do not immerse the main unit in water. The remote sensors are splash-proof but should not be submerged.
- Do not attempt to open the main unit or sensors. This will void the warranty.
- Use only fresh batteries of the specified type. Do not mix old and new batteries.
- 사용된 배터리는 현지 규정에 따라 책임감 있게 폐기하세요.
- 어린이의 손이 닿지 않는 곳에 보관하세요.
3. 패키지 내용
모든 품목이 들어 있는지 확인하려면 패키지 내용물을 확인하세요.
- 1 x Main Display Unit (Indoor Console)
- 3 x 무선 원격 센서
- 1 x 사용 설명서
4. 제품 오버view
메인 디스플레이 유닛
The main display unit shows indoor temperature and humidity, along with readings from up to three remote sensors. It features a large LCD screen with a backlight for easy view주고받음.


Wireless Remote Sensors
Each remote sensor measures temperature and humidity and transmits data wirelessly to the main unit. They are designed for outdoor use but should be placed in a sheltered location to avoid direct rain or prolonged sun exposure.
5. 설정
5.1 배터리 설치
메인 디스플레이 장치의 경우:
- 본체 뒷면의 배터리 덮개를 엽니다.
- Insert 3 AAA batteries (not included) according to the polarity markings (+ and -).
- 배터리 덮개를 닫습니다.
For the Wireless Remote Sensors:
- 각 센서 뒷면에 있는 배터리함 덮개를 여세요.
- Insert 2 AAA batteries (not included) according to the polarity markings (+ and -).
- 배터리 덮개를 닫습니다.

5.2 센서 페어링
The main unit will automatically search for and connect to the remote sensors once batteries are installed. Ensure both the main unit and sensors are within range during initial setup.
- Place the main unit and sensors close to each other during the initial pairing process.
- The main unit will display readings for each connected sensor (CH1, CH2, CH3).
- If a sensor does not connect, press the 'CHANNEL' button on the main unit to cycle through channels or press the 'RESET' button on the sensor to re-initiate pairing.
5.3 센서 배치 지침
최적의 성능과 정확한 측정값을 얻으려면 다음 사항을 고려하십시오.
- 전송 범위: The wireless sensors have a transmission range of up to 328 feet (100 meters) in open areas. Walls, metal structures, and other electronic devices can reduce this range.
- 옥외 배치: While splash-proof, place outdoor sensors under a roof or in a sheltered area to protect them from direct rain and prolonged direct sunlight.
- 열원을 피하세요: Do not place sensors near heat sources (e.g., vents, appliances) or in direct sunlight, as this can lead to inaccurate temperature readings.
- 여러 위치: Utilize the three sensors to monitor different areas such as a greenhouse, baby room, wine cellar, kitchen, or garage.


6. 사용 설명서
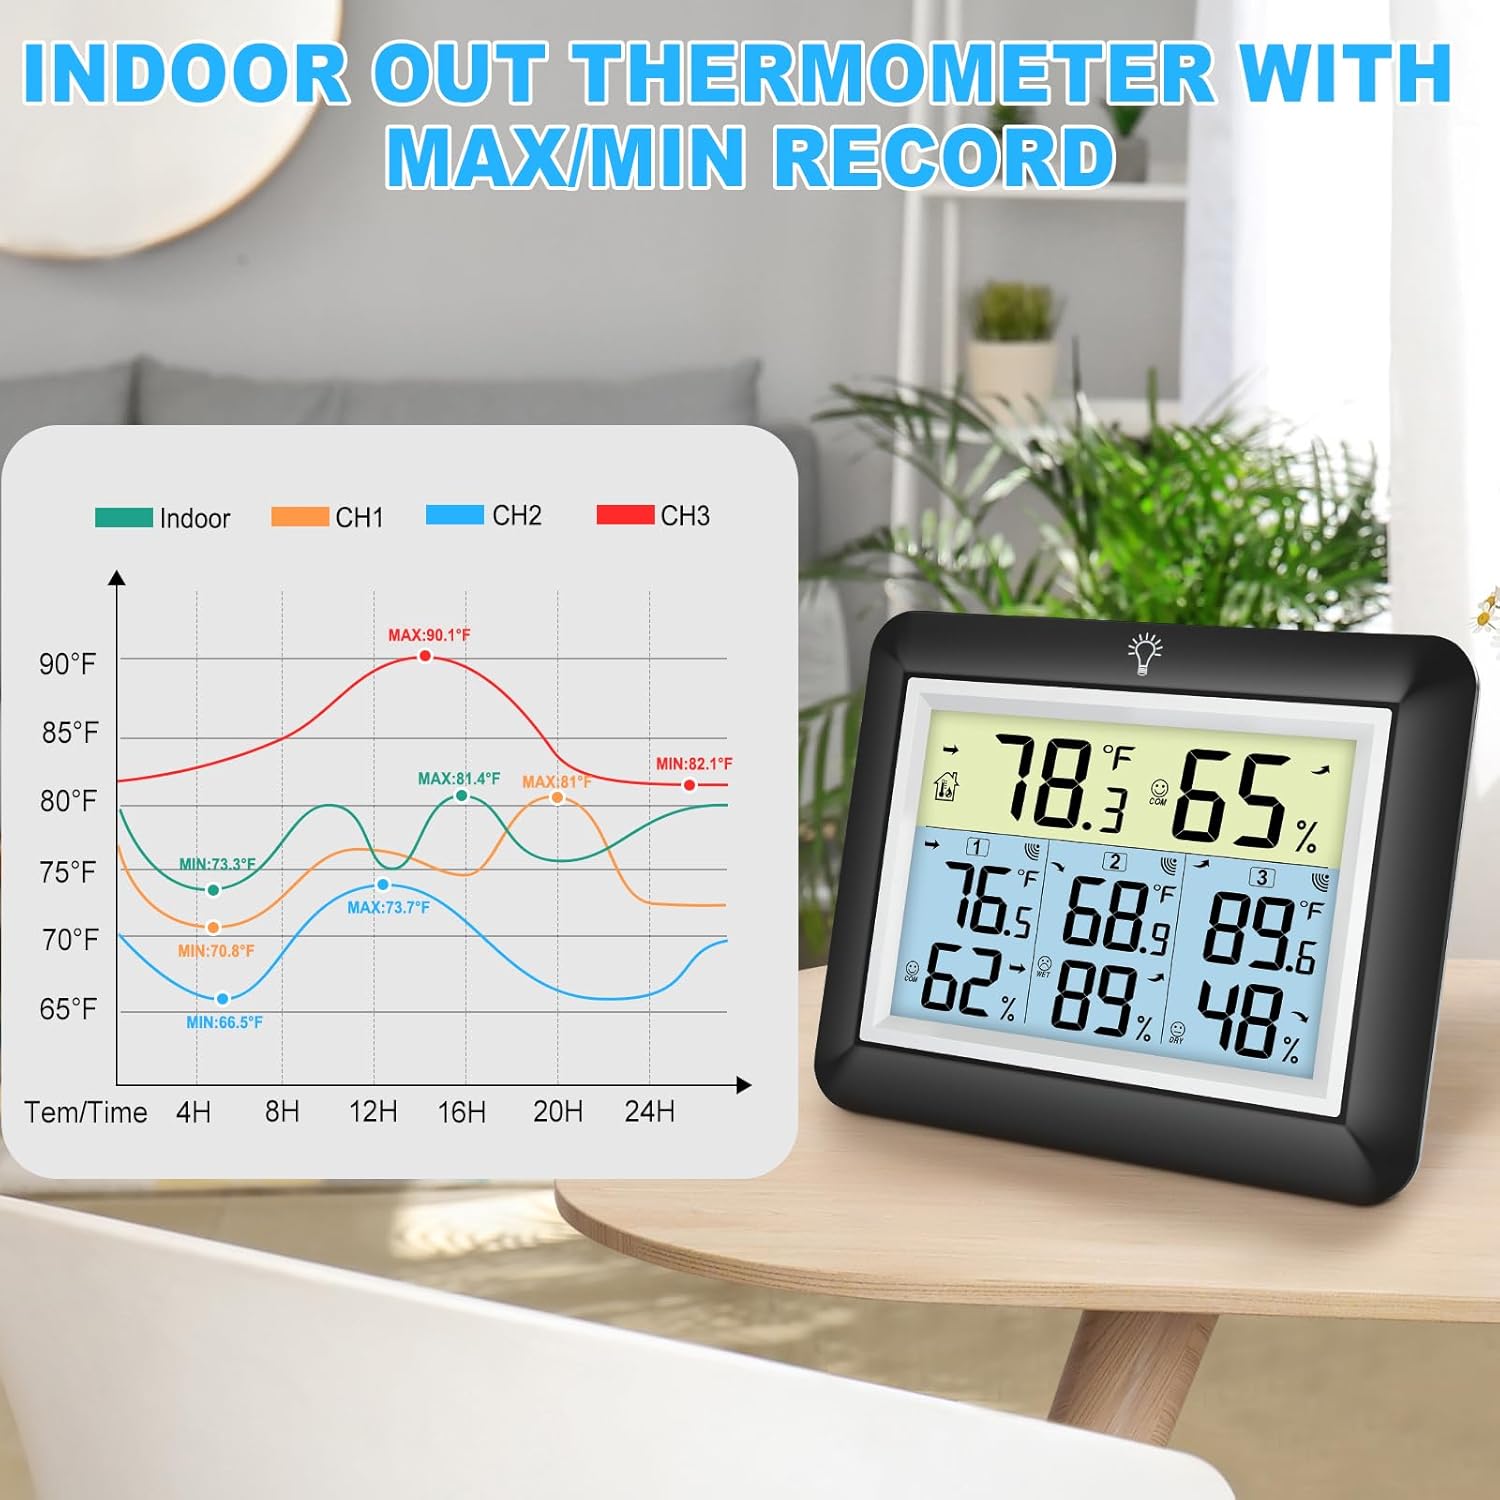
6.1 표시 값
LCD 화면에는 다음 정보가 표시됩니다.
- 실내 온도 및 습도: 디스플레이 상단에 표시됩니다.
- Remote Sensor Readings: Temperature and humidity for each connected sensor (CH1, CH2, CH3) are displayed below the indoor readings.
- Comfort Icons: Indicates the current humidity level (DRY, COMFORT, WET).
- 추세 지표: Arrows next to temperature and humidity values show if they are rising, falling, or stable.
6.2 °C/°F Switcher
To switch between Celsius (°C) and Fahrenheit (°F), press the '°C/°F' button located on the back of the main unit.
6.3 최대/최소 기록
The device automatically records the daily maximum and minimum temperature and humidity values for both indoor and all remote sensors. These records reset every 24 hours.
- Press the 'MIN/MAX' button on the back of the main unit to view 기록된 최대값.
- Press the 'MIN/MAX' button again to view 기록된 최소값.
- 세 번째 누르면 현재 측정값으로 돌아갑니다.

6.4 백라이트 작동
The main unit features an adjustable backlight for improved visibility in low-light conditions.
- Touch the light bulb icon on the top of the main unit to activate the backlight for 5 seconds.
- Press and hold the light bulb icon for more than 5 seconds to keep the backlight on for 30 minutes.


6.5 편안함 표시기
The comfort indicator provides a quick visual reference for the current humidity level, helping you maintain an ideal environment.
- 마른: 습도 < 45%
- 편안: 45% ≤ 습도 ≤ 65%
- 젖은: 습도 > 65%


7. 유지관리
7.1 청소
본체와 센서를 부드러운 천으로 닦아주세요.amp cloth. Do not use abrasive cleaners or solvents, as they may damage the plastic components and electronic circuits.
7.2 배터리 교체
디스플레이에 배터리 부족 표시등이 켜지면 배터리를 교체하십시오. 항상 기기에 있는 모든 배터리를 동일한 종류의 새 배터리로 동시에 교체하십시오.
7.3 보관
If the device will not be used for an extended period, remove the batteries from both the main unit and sensors to prevent leakage and damage.
8. 문제 해결
| 문제 | 가능한 원인 | 해결책 |
|---|---|---|
| 본체에 디스플레이가 없습니다. | 배터리가 소진되었거나 올바르게 설치되지 않았습니다. | 배터리를 새 배터리로 교체하고 극성이 올바른지 확인하세요. |
| Remote sensor not displaying readings or showing '---'. | 1. Sensor out of range. 2. Batteries are dead. 3. 간섭. 4. 센서가 페어링되지 않았습니다. | 1. 센서를 본체에 더 가까이 이동시키십시오. 2. 센서 배터리를 교체하십시오. 3. Move away from other electronic devices. 4. Press the 'RESET' button on the sensor and then cycle channels on the main unit. |
| 부정확한 판독값. | 1. Sensor exposed to direct sunlight or heat source. 2. Poor ventilation around sensor. | 1. Relocate sensor to a shaded, well-ventilated area. 2. Ensure proper airflow around the sensor. |
| 백라이트가 작동하지 않습니다. | 배터리 부족 또는 오작동. | 본체 배터리를 교체하십시오. 문제가 지속되면 고객 지원팀에 문의하십시오. |
9. 사양
- 상표: 우라게욱시
- 모델: WS0170BKY
- 실내 온도 범위: 화씨 32도에서 화씨 140도(섭씨 0도에서 60도)
- 실외 온도 범위: -40°F ~ 140°F(-40°C ~ 60°C)
- 온도 정확도: ± 2 ° F / ± 1 ° C
- 습도 범위 : 상대습도 10% ~ 99%
- 습도 정확도: 상대습도 ±5%
- 무선 전송 범위: 개방된 공간에서는 최대 328피트(100미터)까지
- 전원(주 장치): AAA 배터리 3개 (포함되지 않음)
- 전원 공급 장치(원격 센서): AAA 배터리 2개 (포함되지 않음)
- 특별 기능: Backlit LCD, Comfort Indicator, Min/Max Record, Fast Refresh
- 재료: 아크릴로니트릴 부타디엔 스티렌(ABS)
- 제품 크기 (본체): 0.78"D x 4.33"W x 0.78"H (대략)
- 품목 무게: 9.9온스(0.28킬로그램)
10. 보증 및 지원
10.1 보증 정보
Urageuxy products are manufactured to high-quality standards. This product is covered by a limited warranty against defects in materials and workmanship for a period of one year from the original purchase date. This warranty does not cover damage caused by misuse, accident, unauthorized modification, or improper installation.
10.2 고객 지원
If you encounter any issues or have questions regarding your Urageuxy Wireless Indoor/Outdoor Thermometer, please contact our customer support team. For the quickest assistance, please refer to the contact information provided on the product packaging or the official Urageuxy web대지.
온라인 지원: 방문하세요 Urageuxy Store on Amazon FAQ 및 제품 정보는 여기에서 확인하세요.
이 영상은 시각적으로 다음을 제공합니다.view of the Urageuxy Indoor Outdoor Thermometer with 3 Remote Sensors, demonstrating its features and functionality.