소개
This instruction manual provides detailed guidance for the safe and proper installation, operation, and maintenance of the Generic Wall Mount Kit LSA1U. This kit is designed as a compatible replacement part for Chief Fusion large flat panel displays, accommodating TV sizes from 42 inches to 86 inches with VESA mounting compatibility ranging from 100x100mm to 870x500mm. Please read this manual thoroughly before beginning installation.
안전 정보
- Read all instructions completely before installation. If you have any questions, consult a qualified installer.
- Ensure the mounting surface (wall) can safely support the combined weight of the mount and the display.
- Use only the fasteners provided or specified in these instructions. Using incorrect fasteners may result in damage or injury.
- This product is intended for installation by two persons. Do not attempt to install alone.
- Do not overtighten screws. Overtightening can cause damage to the mount or your display.
- 설치하는 동안 어린이와 애완동물이 접근하지 못하도록 하세요.
패키지 내용
Verify that all components are present and undamaged before proceeding with installation. If any parts are missing or damaged, do not proceed with installation and contact customer support.
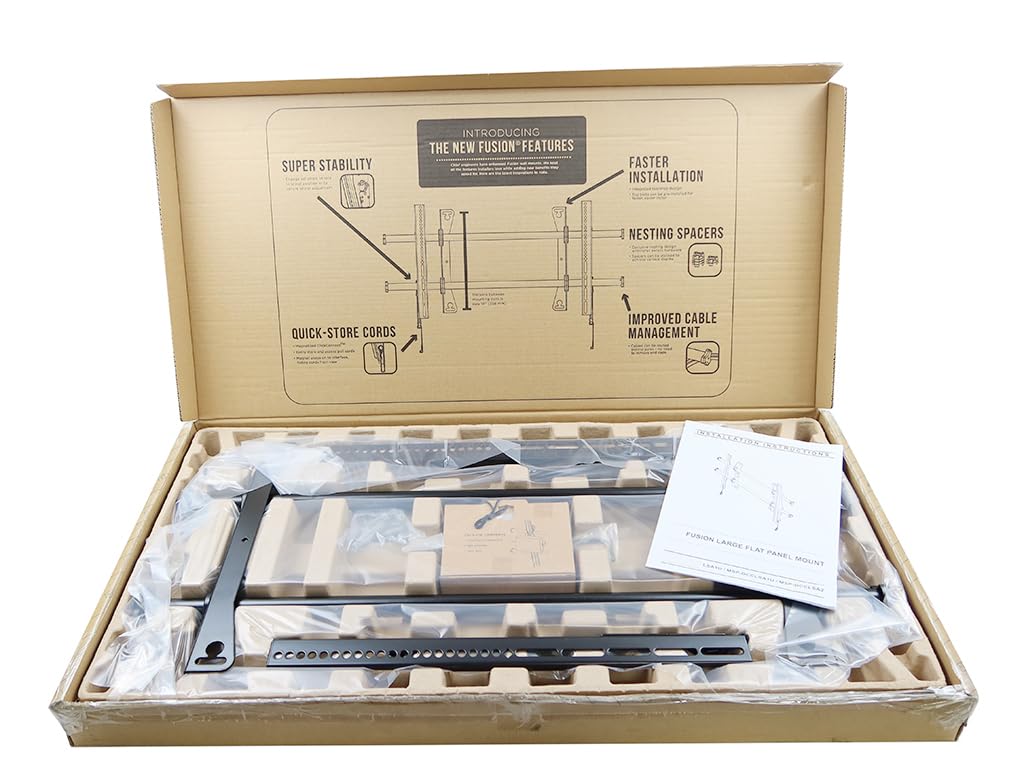
이미지: 이상view of all components included in the Wall Mount Kit LSA1U. This includes the main wall plate, two horizontal support bars, two vertical TV brackets, a hex wrench, and multiple bags containing various screws, washers, and wall anchors for different installation scenarios.
패키지에는 일반적으로 다음이 포함됩니다.
- Main Wall Plate Assembly
- Horizontal Wall Rails (2 pieces)
- Vertical TV Brackets (2 pieces)
- Locking Mechanism / Release Bar
- Hardware Kit (various screws, washers, spacers, wall anchors)
- Hex Key / Allen Wrench
설정 및 설치
필요한 도구 (포함되지 않음): Pencil, Level, Stud Finder (for wood stud walls), Drill, Drill Bits (appropriate for wall type and fasteners), Phillips Head Screwdriver, Socket Wrench (for lag bolts).
- 장착 위치 준비:
- Determine the desired height and center position for your TV.
- Use a stud finder to locate wood studs if mounting to a wood frame wall. Mark the edges of the studs. For concrete or brick walls, ensure the wall is solid and free of obstructions.
- 벽 플레이트 위치 지정:
- Hold the main wall plate assembly against the wall at your desired mounting height.
- Use a level to ensure the wall plate is perfectly horizontal.
- 벽면 플레이트의 구멍을 통해 연필로 드릴 위치를 표시하세요.
- 드릴 파일럿 홀:
- For wood stud installation: Drill pilot holes into the center of the marked studs using a drill bit slightly smaller than the lag bolts.
- For concrete/brick installation: Drill pilot holes using a masonry drill bit of the specified size. Insert the appropriate wall anchors (if provided) flush with the wall surface.
- 벽면 플레이트를 벽에 부착하세요:
- Align the wall plate with the drilled holes.
- 제공된 나사못과 와셔를 사용하여 벽판을 벽에 고정하십시오. 소켓 렌치를 사용하여 단단히 조이되, 너무 세게 조이지 마십시오.
- TV 브래킷을 TV에 부착하세요:
- Carefully lay your TV face down on a clean, soft surface (e.g., a blanket on a table).
- TV 뒷면에 있는 VESA 장착 구멍을 확인하세요.
- Attach the two vertical TV brackets to the back of the TV using the appropriate screws, washers, and spacers from the hardware kit. Ensure the brackets are oriented correctly so the hooks face upwards and can engage with the wall rails. The brackets should be centered vertically on the TV's mounting pattern.
- 벽면 마운트 플레이트에 TV를 고정하세요:
- With the assistance of another person, carefully lift the TV.
- Hook the top of the TV brackets onto the horizontal rails of the wall plate.
- Gently lower the TV until the brackets are fully seated on the rails.
- TV를 보호하세요:
- Locate the locking mechanisms at the bottom of the TV brackets or the release bar.
- Engage these mechanisms to secure the TV to the wall plate, preventing accidental dislodgement. This may involve tightening screws or engaging a pull-cord release.
- Perform a gentle tug test on the bottom of the TV to ensure it is securely locked in place.
작동 지침
The Generic Wall Mount Kit LSA1U is a fixed-position mount. Once installed and secured, your television will remain in a static position on the wall. The mount offers lateral adjustment capabilities, allowing you to slide the TV horizontally along the wall plate for optimal centering after installation. To adjust, ensure the locking mechanisms are slightly loosened (if applicable for lateral movement) and then re-tighten them once the desired position is achieved.
To remove the TV from the mount, you must first disengage the locking mechanisms at the bottom of the TV brackets. With assistance, carefully lift the TV upwards and off the horizontal wall rails.
유지
- 정기 검사: 모든 나사와 연결부를 주기적으로 점검하여 단단히 고정되어 있는지 확인하세요.
- 청소: Wipe the mount with a soft, dry cloth. Avoid using abrasive cleaners or solvents, as these may damage the finish.
- 중량 용량: Do not exceed the maximum weight capacity of the mount or the wall structure.
문제 해결
- TV가 수평이 아닙니다: Ensure the wall plate was installed perfectly level. Some mounts allow for minor post-installation leveling adjustments on the TV brackets; consult the specific design of your brackets. If not, the wall plate may need to be re-adjusted.
- 산이 불안정하다고 느껴집니다: Re-check all wall fasteners and TV bracket screws for tightness. Verify that the wall structure is adequate for the weight of the TV and mount. Ensure the TV is properly seated on the wall rails and the locking mechanisms are engaged.
- TV does not fit the brackets: Confirm that your TV's VESA mounting pattern falls within the specified range (100x100mm - 870x500mm). Ensure you are using the correct screws and spacers from the hardware kit for your TV model.
명세서
| 모델 번호 | MSP-DCCLSA1U |
| 부품 번호 | LSA1U |
| 호환 부품 번호 | CHF-LSA1U, A8421829, 4GH8, E347918 |
| 화면 크기 호환성 | 42인치 - 86인치 |
| VESA 장착 호환성 | 100x100mm - 870x500mm |
| 색상 | 검은색 |
| 키 | 17.9인치(45.47cm) |
| 너비 | 34.8인치(88.39cm) |
| 깊이 | 2인치(5.08cm) |
| 품목 무게 | 19파운드(8.62kg) |
| 재료 | 금속 |
| 장착 유형 | 벽걸이형 |
| 이동 유형 | 결정된 |
| 특징 | Cable Management, Lateral Adjustment |
| 한국어: | 054621068574 |
| 제조업체 | 셰프 |
보증 및 지원
Specific warranty information for this Generic Wall Mount Kit LSA1U is not provided in the product details. For any support inquiries, missing parts, or warranty claims, please refer to the retailer or the original point of purchase. It is recommended to retain your purchase receipt for proof of purchase.


