1. 서론
Thank you for choosing the Generic Solar Outdoor Wall Mounted Light. This manual provides essential information for the proper installation, operation, and maintenance of your solar light. Please read these instructions carefully before use and retain them for future reference.
This solar light is designed for outdoor use, providing illumination for fences, porches, patios, and other areas. It features automatic charging during the day and turns on automatically at night, incorporating a light-sensitive device and motion sensor for efficient operation.
2. 제품 오버view
The solar light integrates a solar panel, LED light source, and motion sensor into a compact, wall-mountable unit. It is constructed from durable plastic, designed to withstand outdoor conditions.

그림 2.1: The solar light automatically charges during daylight hours and illuminates at night.
3. 패키지 내용
- 1 x Solar Outdoor Wall Mounted Light
- 설치용 하드웨어(나사, 벽 플러그) - (Note: Specific hardware may vary, ensure suitability for your mounting surface)
- 사용 설명서(본 문서)
4. 사양
| 특징 | 사양 |
|---|---|
| 모델 번호 | B0DP9SQF81 |
| 치수 | Approximately 5.98 × 5.12 inches (15.2 × 13 cm) |
| 재료 | 플라스틱 |
| 색상 | 검은색 |
| 광원 | 주도의 |
| 전원 | 태양열 전원 |
| 센서 유형 | Light Sensitive Device, Motion Sensor |
| 품목 무게 | 8.6 온스(약 244그램) |

그림 4.1: 설치 계획을 위한 제품 치수 정보입니다.
5. 설정 및 설치
5.1 위치 선택
- Select a location that receives at least 6-8 hours of direct sunlight daily to ensure optimal charging.
- Avoid placing the light under eaves, trees, or other obstructions that may block sunlight.
- Ensure the chosen location is away from other strong light sources (e.g., streetlights, other outdoor lights) at night, as these may interfere with the light sensor and prevent the solar light from turning on.
5.2 장착 지침
- 장착 표면 준비: Ensure the wall or fence surface is clean and stable.
- 드릴 포인트 표시: Hold the solar light in the desired position and mark the locations for the mounting screws.
- 드릴 구멍: Use an appropriate drill bit to drill holes at the marked points. Insert wall plugs if necessary for your mounting surface.
- 빛을 확보하세요: Align the light with the drilled holes and secure it firmly using the provided screws.
6. 사용 설명서
6.1 초기 사용
Before first use, allow the solar light to charge in direct sunlight for at least 8-10 hours. This ensures the internal battery is fully charged for optimal performance.
6.2 자동 작동
- The solar light is equipped with a light-sensitive device. It will automatically turn off and charge during the day when sufficient light is detected.
- At dusk or when ambient light levels drop, the light will automatically turn on.
6.3 모션 센서 기능
The integrated motion sensor detects movement within its range, typically up to 10 meters. When motion is detected, the light will illuminate at full brightness. After a period of no motion, the light will return to a dimmer state or turn off, depending on its specific mode (if multiple modes are available, refer to product packaging for details).
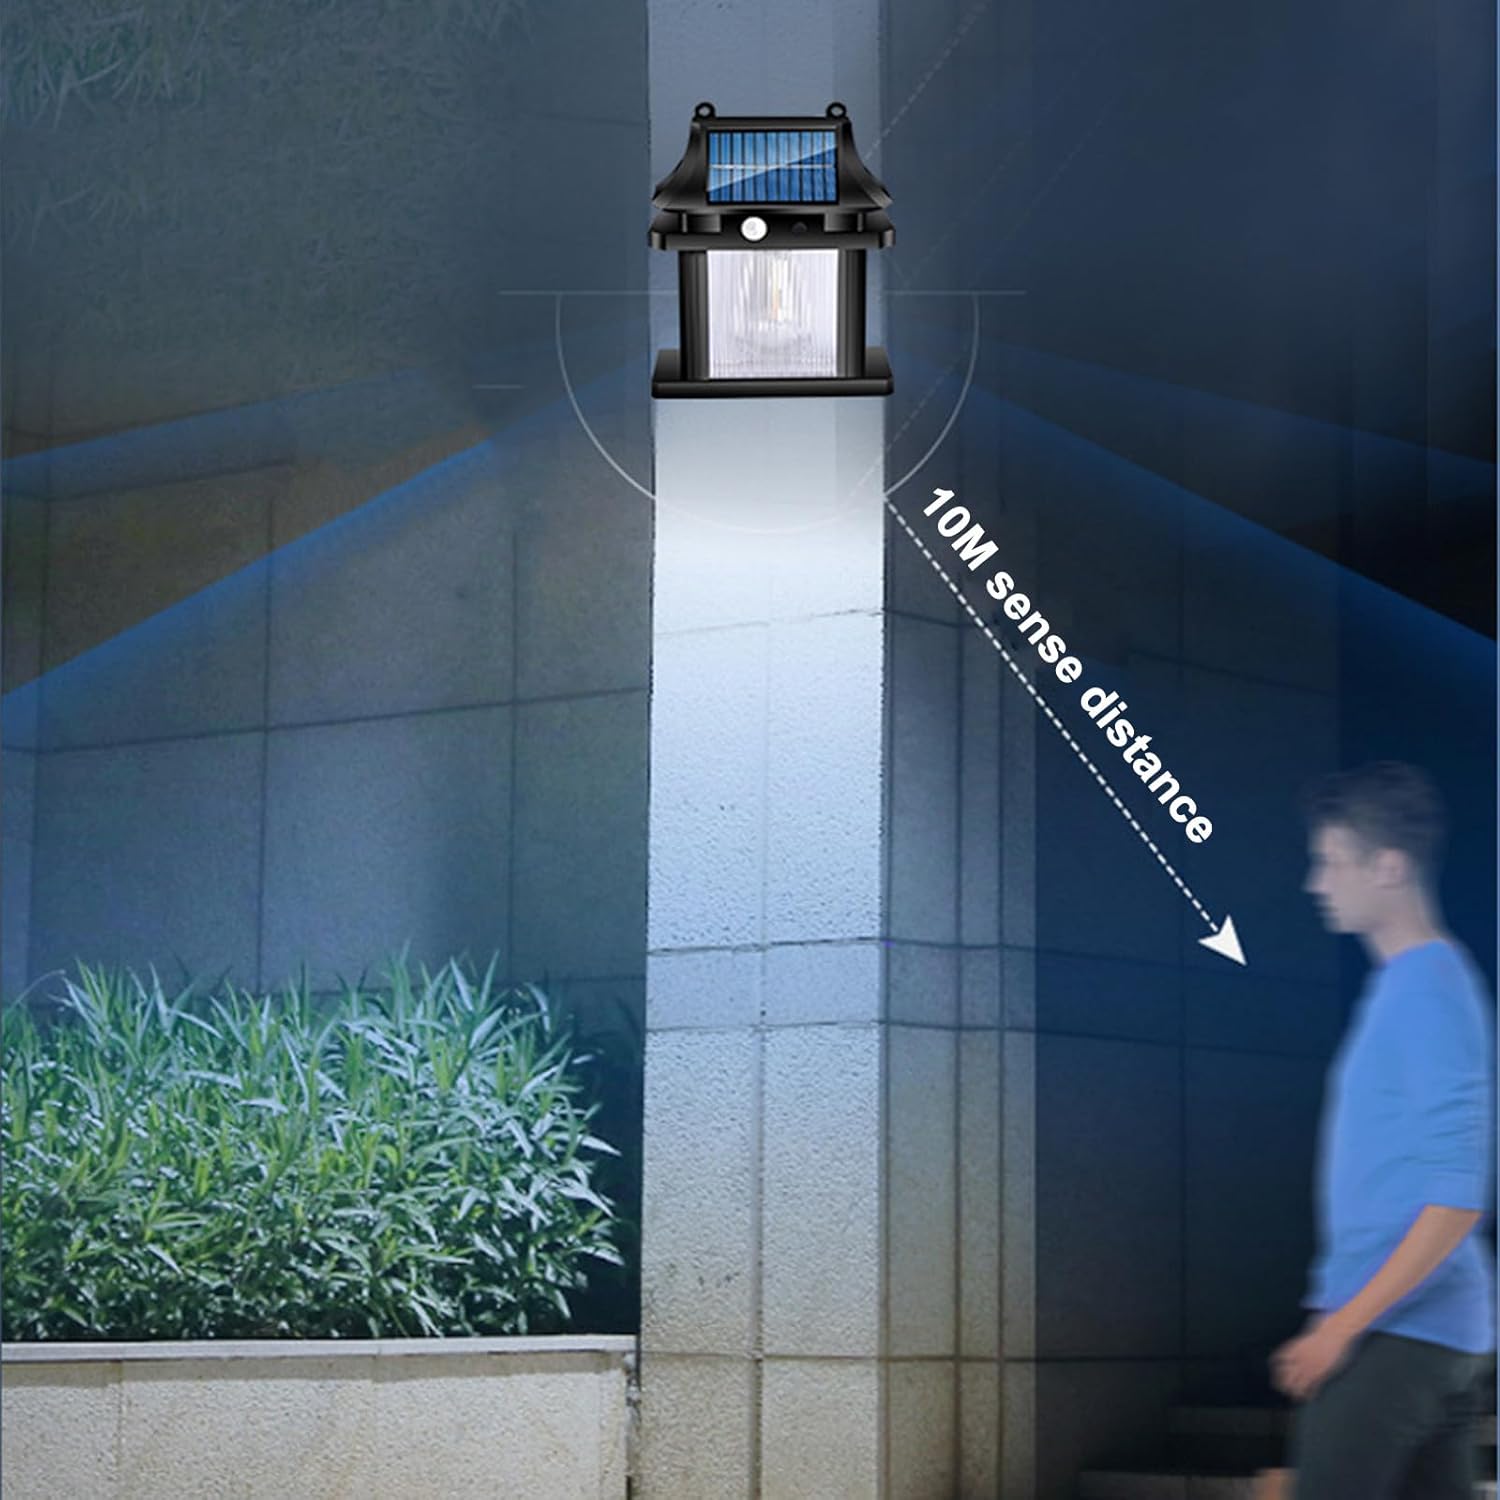
그림 6.1: The motion sensor detects movement up to 10 meters.
7. 유지관리
7.1 청소
- 부드러운 천으로 태양광 패널 표면을 정기적으로 청소하십시오.amp 먼지, 오물 및 이물질을 제거하는 천입니다. 패널이 깨끗해야 효율적인 충전이 가능합니다.
- Do not use abrasive cleaners or harsh chemicals, as these can damage the solar panel or light housing.
7.2 내후성
This solar light is designed to be waterproof and withstand various outdoor weather conditions, including rain. However, prolonged exposure to extreme weather may affect its lifespan.

그림 7.1: The solar light is designed to be waterproof.
8. 문제 해결
| 문제 | 가능한 원인 | 해결책 |
|---|---|---|
| 밤에는 불이 켜지지 않습니다. | 충전하기에는 햇빛이 부족합니다. | 조명을 햇빛이 더 잘 드는 곳으로 옮기세요. 태양광 패널이 깨끗한지 확인하세요. |
| 주변광 간섭. | Ensure the light is not installed near other strong light sources (e.g., streetlights) that might trick the sensor into thinking it's daytime. | |
| 빛이 어둡거나 짧은 시간 동안만 켜져 있습니다. | 배터리가 완전히 충전되지 않았습니다. | Allow the light to charge for 1-2 full sunny days. Clean the solar panel. |
| 모션 센서가 움직임을 감지하지 못합니다. | 센서 경로에 장애물이 있습니다. | Clear any foliage or objects blocking the sensor's view. |
| 센서 범위 문제. | Ensure movement is within the 10-meter detection range. |
9. 보증 및 지원
For warranty information and customer support, please refer to the details provided by your retailer or contact the manufacturer directly. Keep your purchase receipt as proof of purchase.
If you encounter issues not covered in this manual, please reach out to the seller or manufacturer for assistance.