
1. 서론
This manual provides detailed instructions for the safe and effective use of your DEPSTECH DS650 210° Two-Way Articulating Borescope and DEPSTECH DS520 Dual Lens Sewer Inspection Camera. Please read this manual thoroughly before operating the devices to ensure proper functionality and to prevent damage.

Image 1.1: The DEPSTECH DS650 Articulating Borescope and DS520 Sewer Camera kit, showing both main units and their respective probes.
2. 안전 정보
부상이나 기기 손상을 방지하기 위해 다음 안전 수칙을 준수하십시오.
- 가연성 또는 폭발성 가스가 있는 환경에서는 본 기기를 사용하지 마십시오.
- Keep the device away from water and other liquids, except for the waterproof probe.
- 기기를 분해하거나 개조하지 마십시오. 수리는 허가받은 담당자만 수행해야 합니다.
- 사용하지 않을 때는 장치를 건조하고 서늘한 곳에 보관하십시오.
- Ensure the probe is clean before and after each use to maintain optimal performance.
- Avoid bending the probe cable excessively, especially for the DS650 articulating probe, to prevent internal damage.
3. 패키지 내용
패키지에 모든 품목이 들어 있는지 확인하세요.
- DEPSTECH DS650 Articulating Borescope Unit
- DEPSTECH DS520 Sewer Camera Unit
- DS650 Articulating Probe (6.2mm diameter)
- DS520 Dual Lens Probe (50ft cable)
- USB 충전 케이블
- 사용 설명서 (본 문서)
- Carrying Case (for DS650)
- Accessories (e.g., hooks, magnets, side mirror - specific to model, check individual packaging)
4. 제품 오버view
4.1. DEPSTECH DS650 Articulating Borescope
The DS650 features a 4.5-inch IPS display and a 6.2mm diameter probe with 210° two-way articulation for precise inspection in confined spaces.
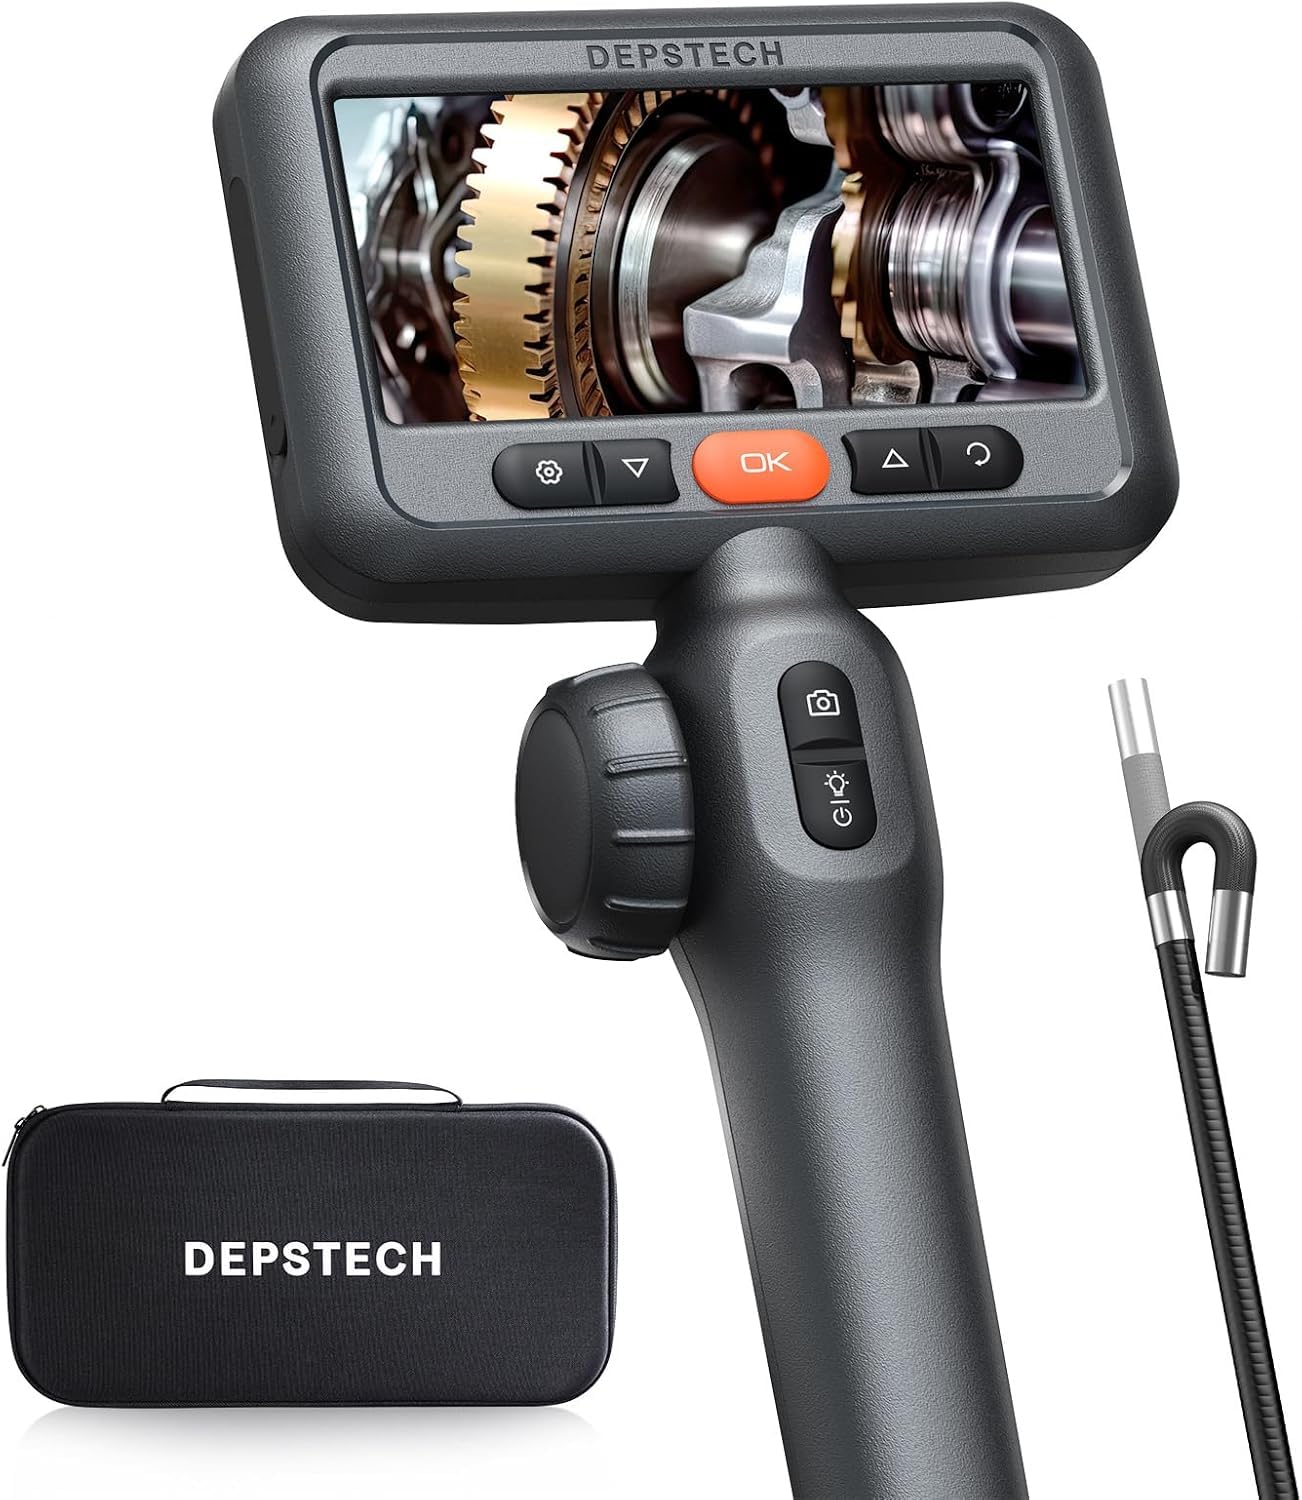
Image 4.1: The DEPSTECH DS650 Articulating Borescope, showing the main display unit, ergonomic handle, and the articulating probe.
- 표시하다: 4.5인치 IPS 화면
- 프로브 직경 : 6.2mm
- 관절: 210° 양방향
- 조명: 조정 가능한 LED 조명
- 통제 수단: Power button, articulation joystick, photo/video button, menu/OK buttons.
4.2. DEPSTECH DS520 Dual Lens Sewer Camera
The DS520 is equipped with a 5-inch IPS screen and a 50ft semi-rigid cable with dual lenses, ideal for inspecting longer pipes and sewer lines.
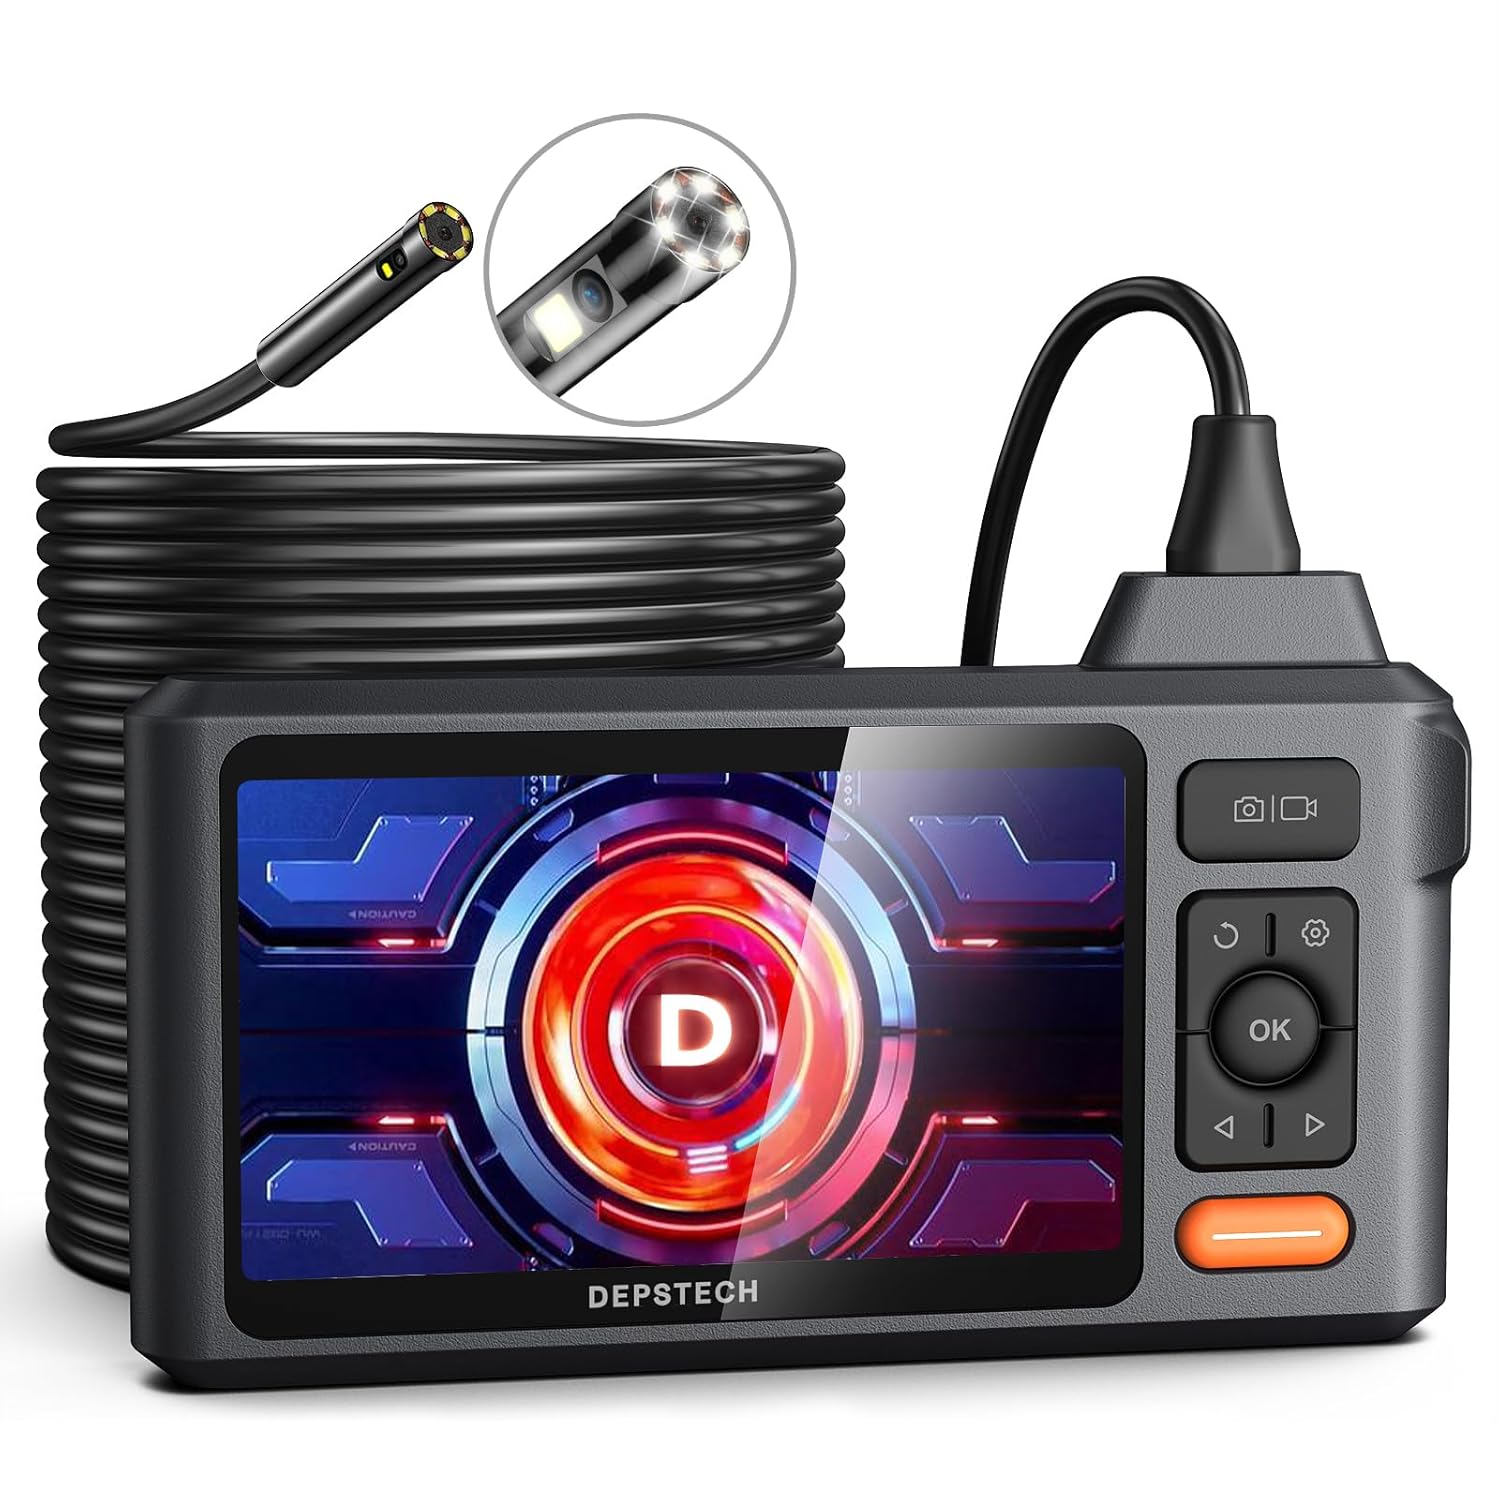
Image 4.2: The DEPSTECH DS520 Dual Lens Sewer Camera, featuring the main display unit and the long, coiled 50ft probe cable.
- 표시하다: 5-inch IPS Screen (179° ultra-wide angle)
- 케이블 길이: 50ft (semi-rigid)
- 렌즈: Dual Lens (front and side view)
- 조명: 6+1 Adjustable LED lights
- 방수복: IP67 rated probe
5. 설정
5.1. 장치 충전
Before first use, fully charge the device. Connect the provided USB charging cable to the charging port on the main unit and to a standard USB power adapter (not included). The charging indicator will show the charging status.
5.2. TF 카드 삽입
Locate the TF card slot on the side of the main unit. Insert a compatible TF card (up to 32GB, typically included) with the gold contacts facing down until it clicks into place. This card is necessary for saving photos and videos.
5.3. 프로브 부착
Carefully align the connector of the probe cable with the port on the main unit. Push firmly until it is securely connected. Ensure a tight connection to prevent signal loss.
6. 사용 설명서
6.1. 전원 켜기 / 끄기
Press and hold the Power button (usually marked with a power symbol) for a few seconds to turn the device on or off.
6.2. LED 조명 조정
The probe is equipped with adjustable LED lights. Use the dedicated light adjustment button or scroll wheel (depending on model) to increase or decrease brightness for optimal visibility in dark environments.

Image 6.1: Close-up of the IP67 waterproof probe tip, illustrating the adjustable LED lights for illumination in dark inspection areas.
6.3. Articulating the DS650 Probe
For the DS650, use the articulation joystick or control wheel on the handle to bend the probe tip up to 210° in two directions. This allows navigation around obstacles and viewing at various angles without repositioning the entire cable.

Image 6.2: A hand demonstrating the articulation control of the DS650 borescope, showing the probe tip bending to inspect an engine component.
6.4. Using the DS520 Dual Lens
The DS520 features dual lenses (front and side). A dedicated button on the unit allows switching between the front view, 측면 view, or a split-screen display of both, providing comprehensive coverage for pipe inspections.
6.5. 이미지 및 비디오 캡처
Press the Photo button (camera icon) to take a still image. Press the Video button (video camera icon) to start recording; press it again to stop. All captured media is saved to the inserted TF card.

Image 6.3: The borescope display interface, highlighting icons for 32GB TF card support, 180° image rotation, time watermark, and tutorial video access, indicating its photo and video capabilities.
6.6. View관리 및 운영 Files
Access the playback mode from the main menu to view saved photos and videos. Use the navigation buttons to browse through files. Files can be deleted directly from the device or by connecting the device to a computer via USB.
6.7. 시스템 설정
Navigate to the 'Settings' menu to adjust various parameters, including:
- 언어: 원하는 언어를 선택하세요.
- 날짜/시간: 정확한 시간을 위해 올바른 날짜와 시간을 설정하세요amp녹음에 관한 것입니다.
- 해결: Adjust photo and video resolution settings.
- TF 카드 형식: Erase all data on the TF card.
- 공장 초기화 : 기본 설정을 복원합니다.
7. 유지관리
7.1. Cleaning the Probe and Screen
After each use, especially in dirty environments, gently wipe the probe tip and cable with a soft, damp 천으로 닦아주세요. 잘 지워지지 않는 얼룩은 순한 세제를 사용한 후 깨끗한 천으로 닦아내면 됩니다.amp cloth. Ensure the probe is dry before storage. Clean the display screen with a soft, lint-free cloth.
7.2. 보관
Store the device and its components in a clean, dry, and cool environment. Avoid extreme temperatures and direct sunlight. Coil the probe cable loosely to prevent kinks or damage.
7.3. 배터리 관리
배터리 수명을 연장하려면 배터리를 자주 완전히 방전하지 마십시오. 장기간 보관할 경우 몇 달에 한 번씩 배터리를 약 50~70%까지 충전하십시오.
8. 문제 해결
| 문제 | 가능한 원인 | 해결책 |
|---|---|---|
| 장치의 전원이 켜지지 않습니다. | 배터리가 부족합니다. 기기가 고장났습니다. | 기기를 완전히 충전하세요. 문제가 지속되면 지원팀에 문의하세요. |
| 화면에 이미지가 나오지 않습니다. | Probe not connected properly; damaged probe. | Ensure probe is securely connected. Try reconnecting. If still no image, the probe may be damaged. |
| 사진/동영상을 저장할 수 없습니다. | No TF card; TF card full; TF card error. | TF 카드를 삽입하세요. 이전 버전을 삭제하세요. files or replace TF card. Format TF card in settings. |
| Image is blurry/dark. | Insufficient lighting; dirty lens. | Adjust LED brightness. Clean the probe lens. |
| DS650 probe articulation not working. | Mechanical obstruction; internal damage. | Ensure no physical obstruction. Avoid forcing articulation. If damaged, contact support. |
9. 사양
9.1. DEPSTECH DS650 Articulating Borescope
- 표시하다: 4.5인치 IPS 디스플레이
- 프로브 직경 : 6.2mm
- Articulation Angle: 210° 양방향
- 해결: 2.0MP (Bluart 3.0 technology)
- 조명: 조절 가능한 LED 조명
- 저장: 최대 32GB TF 카드를 지원합니다.
- 방수 등급: IP67(프로브만 해당)
9.2. DEPSTECH DS520 Dual Lens Sewer Camera
- 표시하다: 5-inch IPS Screen (179° ultra-wide angle)
- 케이블 길이: 50ft (semi-rigid)
- 렌즈: 듀얼 렌즈(전면 및 측면)
- 조명: 6+1 조절 가능한 LED 조명
- 방수 등급: IP67(프로브만 해당)
- 저장: 최대 32GB TF 카드를 지원합니다.
10. 보증 및 지원
DEPSTECH products come with a standard manufacturer's warranty. For specific warranty details, please refer to the warranty card included in your package or visit the official DEPSTECH website. For technical support, troubleshooting assistance, or warranty claims, please contact DEPSTECH customer service through their official channels or visit the DEPSTECH Store on Amazon.