
1. 서론
This manual provides instructions for the safe and effective use of your Amazon Basics Hot Glue Gun Kit. This kit is designed for various applications, including DIY crafts, school projects, arts, and quick home repairs.
주요 특징
- 빠른 가열: Warms up quickly in 1-2 minutes for immediate use.
- 일관된 열: Maintains a stable temperature during operation.
- Drip-Free Nozzle: Designed for precise glue application without excess dripping.
- Strong Bond: Fast-drying glue creates a durable bond.
- 다양한 용도: Suitable for materials such as plastic, paper, artificial flowers, wood, and metal.
- 컴팩트한 디자인: Product dimensions are 6.3" L × 5.7" W × 7.3" H.

Image 1.1: The Amazon Basics Hot Glue Gun highlighting its key features.
The hot glue gun is designed for ease of use, featuring a quick heat-up time and a drip-free nozzle for clean and precise work. It is compatible with a wide range of materials, making it a versatile tool for various crafting and repair needs.
2. 설정
- 키트 포장 풀기: Carefully remove the hot glue gun and glue sticks from the packaging. Ensure all components are present: one hot glue gun and 30 hot glue sticks.
- 작업 영역 준비: Choose a clean, flat, and heat-resistant surface for your project. Place a protective mat or paper underneath to catch any potential drips.
- Insert a Glue Stick: Insert one of the provided mini glue sticks into the circular opening at the back of the glue gun. Push it gently until it stops. Do not force it.
- 전원에 연결: Plug the glue gun's power cord into a standard electrical outlet.
- 전원 켜기: Locate the ON/OFF switch, typically found on the handle or base of the glue gun. Flip the switch to the "ON" position. An indicator light (if present) will illuminate.
- 예열 : Allow the glue gun to preheat for 1-2 minutes. The nozzle will become hot during this time.
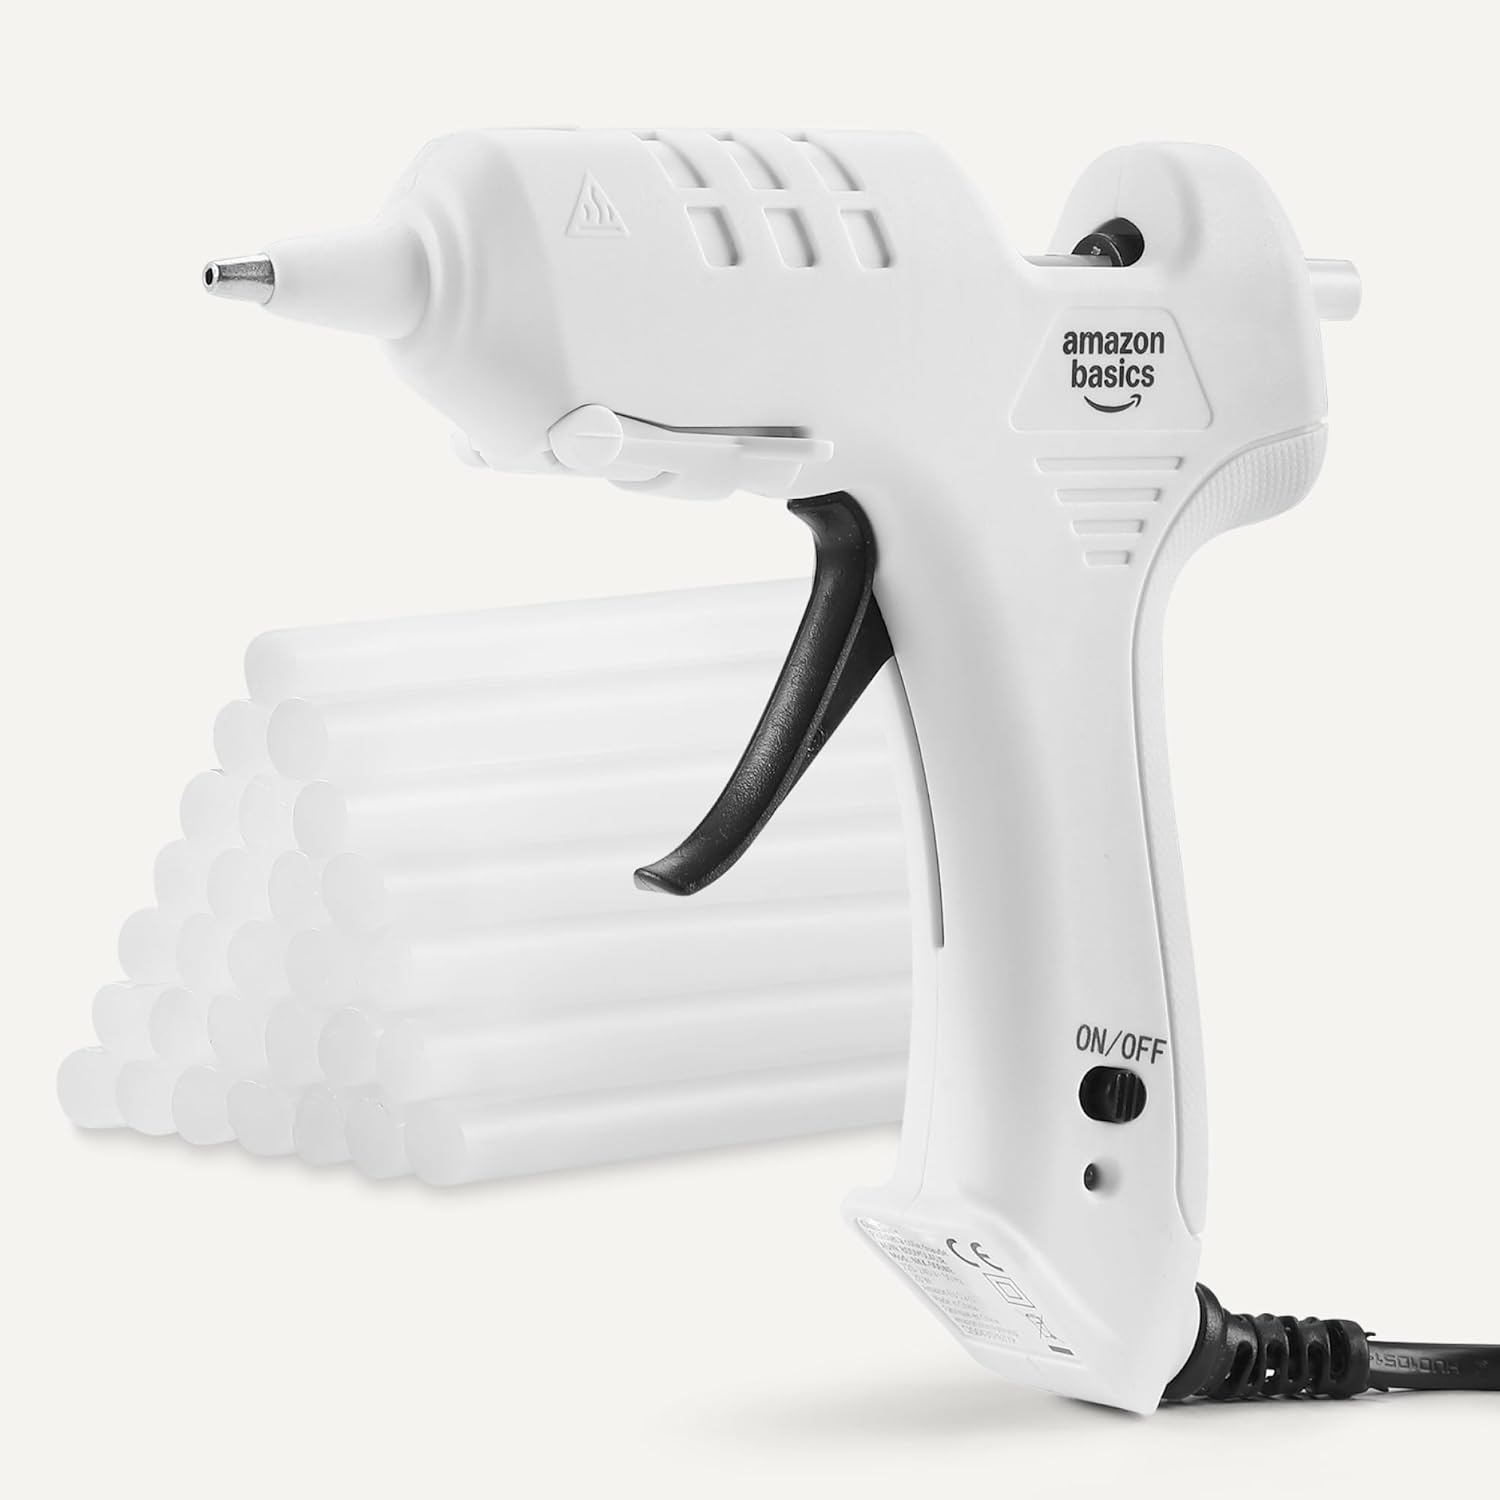
Image 2.1: The hot glue gun kit, including the glue gun and a supply of glue sticks.
Ensure the glue stick is properly seated before plugging in the device. The glue gun is designed to heat up quickly, allowing you to begin your projects without significant delay.
3. 사용 설명서
- 접착제 흐름 테스트: After preheating, gently press the trigger to check if the glue is flowing smoothly from the nozzle. A small amount of melted glue should emerge.
- 접착제를 바르세요: Position the nozzle close to the surface where you want to apply glue. Press the trigger to dispense the desired amount. The drip-free nozzle helps ensure precise application.
- 표면을 결합하세요: Immediately press the two surfaces together after applying glue. Hold them firmly for a few seconds to allow the glue to set and form a strong bond.
- Refill Glue Sticks: As the current glue stick shortens, insert a new one into the back of the gun. The new stick will push the old one forward, ensuring continuous glue flow.
- 전원 끄기 : When finished, turn the ON/OFF switch to the "OFF" position and unplug the glue gun from the power outlet.
- 쿨다운: Allow the glue gun to cool completely before storing it. Do not touch the nozzle until it has cooled.
중요한 사용 참고 사항:
- Always use the correct size glue sticks (mini size, 4" x 0.27") for this glue gun to ensure proper function and prevent damage.
- Avoid touching the hot nozzle or melted glue to prevent burns.
- Do not leave the glue gun unattended while it is plugged in or hot.
Video 3.1: Demonstration of inserting a mini glue stick and using the hot glue gun for crafting.
This video illustrates the process of loading a glue stick into the gun and applying glue to a cardboard craft project. It shows the clear, strong bond formed by the glue.
영상 3.2: 클로즈업 view of different glue stick sizes, emphasizing the importance of using the correct size for your glue gun.
This video provides a visual comparison of glue stick sizes, reinforcing the need to use mini-sized sticks with this particular hot glue gun model.
4. 유지관리
- 노즐 청소: After the glue gun has cooled completely, gently wipe any excess dried glue from the nozzle with a soft cloth. Do not use abrasive materials or sharp objects, as this can damage the nozzle.
- 저장: Store the glue gun in a dry, cool place, away from direct sunlight and out of reach of children. Ensure the power cord is not kinked or damaged during storage.
- 정기 검사: Periodically inspect the power cord and the body of the glue gun for any signs of damage, such as cuts, fraying, or cracks. If damage is found, discontinue use and contact customer support.
5. 문제 해결
| 문제 | 가능한 원인 | 해결책 |
|---|---|---|
| 글루건이 가열되지 않습니다. | 전원 플러그가 꽂혀 있지 않거나, 전원 스위치가 꺼져 있거나, 전원 콘센트에 문제가 있는 경우입니다. | Ensure the glue gun is securely plugged into a working outlet and the ON/OFF switch is in the "ON" position. Check the power outlet with another device. |
| Glue does not flow from the nozzle. | Insufficient preheating time, glue stick not fully inserted, or incorrect glue stick size. | Allow the gun to preheat for the recommended 1-2 minutes. Push the glue stick further into the gun. Verify you are using mini glue sticks (4" x 0.27"). |
| Excessive dripping from the nozzle. | Overheating or incorrect angle. | Ensure the glue gun is not left on for extended periods without use. Try holding the gun at a slightly different angle during application. |
| Glue does not bond properly. | Surfaces not clean, glue cooled too quickly, or incompatible material. | Clean surfaces thoroughly before application. Apply glue and join surfaces immediately. Ensure materials are compatible with hot glue. |
6. 사양
- 상표: 아마존 기본 정보
- 모델 번호: NKK-006WN
- 색상: 하얀색
- 전원: 코드식 전기
- 왓tage: 20 와트
- 품목 무게: 12.2 온스
- 제품 크기(길이 x 너비 x 높이): 6.3인치 x 5.7인치 x 7.3인치
- 호환 가능한 소재: Plastic, paper, artificial flowers, wood, metal, and more.
- 포함된 구성 요소: 1 hot glue gun, 30 hot glue sticks
- 한국어: 840324423372
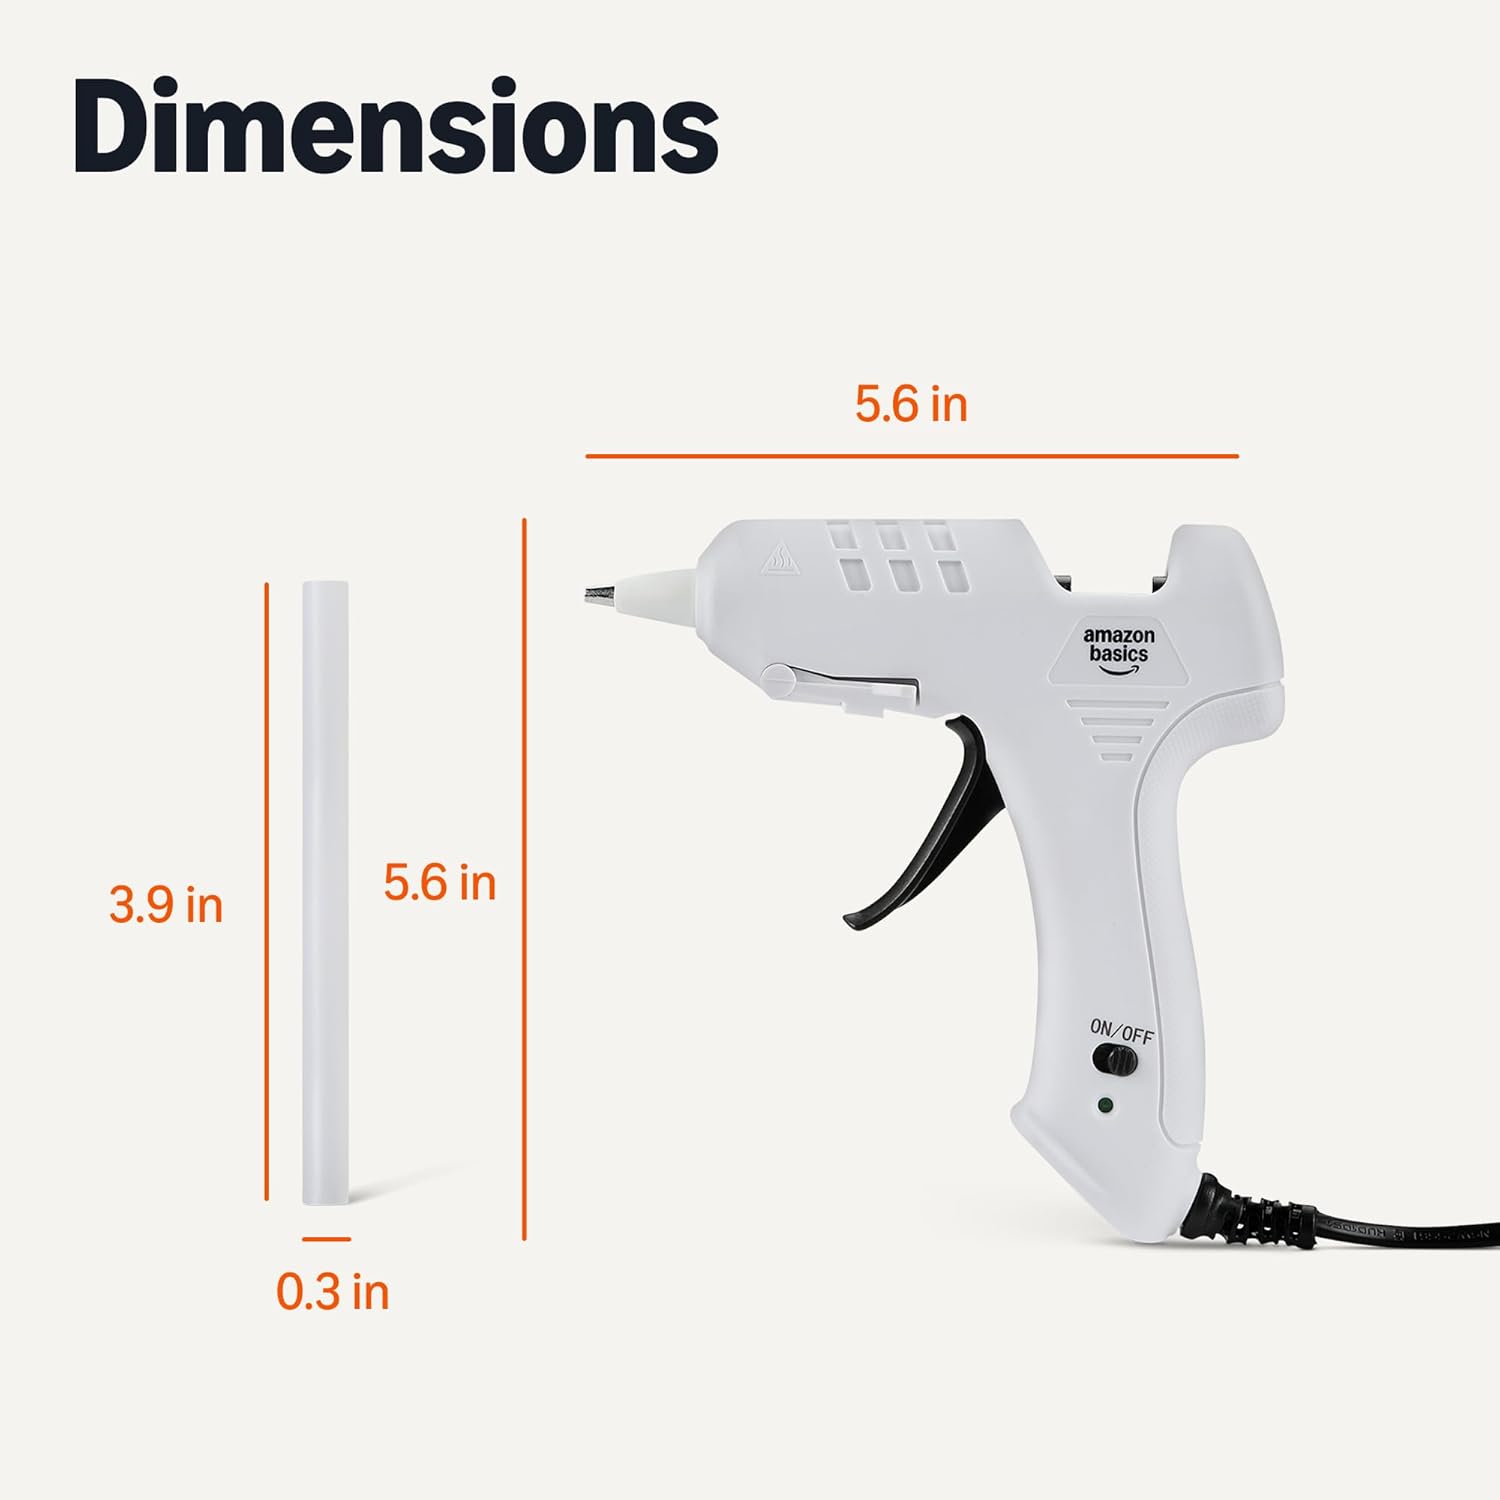
Image 6.1: Visual representation of the hot glue gun and glue stick dimensions.
The diagram provides precise measurements for both the hot glue gun and the compatible mini glue sticks, ensuring users can easily identify the correct accessories.
7. 보증 및 지원
For warranty information and customer support, please refer to the documentation included with your purchase or visit the official Amazon Basics web사이트. 보증 청구를 위해 구매 증빙 자료를 보관하세요.