
1. 서론
This manual provides detailed instructions for the installation, operation, and maintenance of your Sharkoon MK6 RGB Micro ATX PC Case. Please read this manual thoroughly before beginning assembly to ensure proper setup and optimal performance.
The Sharkoon MK6 RGB is a compact Micro ATX PC case designed with a modern glass aesthetic, featuring tempered glass panels on the front and side. It includes three pre-installed addressable RGB PWM fans for efficient cooling and customizable lighting. The case supports BTF motherboards and offers ample space for various components, including large graphics cards and extensive cooling solutions.
2. 설정 및 구성 요소 설치
Before starting, ensure you have all necessary tools, including a screwdriver set and anti-static wrist strap.
2.1 케이스 열기
Carefully remove the tempered glass side panel by unscrewing the retaining thumbscrews, typically located at the rear of the case. Gently slide the panel off and set it aside on a soft, flat surface to prevent scratches.
2.2 마더 보드 설치
- I/O 쉴드를 케이스 후면의 지정된 구멍에 설치하십시오.
- Align your Micro ATX or BTF motherboard with the standoffs inside the case. Ensure all standoffs match the motherboard's mounting holes.
- 제공된 나사를 사용하여 마더보드를 고정하세요. 너무 세게 조이지 마세요.
2.3 전원 공급 장치(PSU) 설치
The MK6 RGB supports bottom-mount power supplies up to 23.5 cm in length.
- PSU를 케이스 뒷면 하단의 지정된 칸에 밀어 넣습니다.
- Secure the PSU to the case using screws from the rear panel.
2.4 저장 드라이브 설치
The case accommodates up to two 3.5" HDDs or three 2.5" SSDs.
- 3.5인치 HDD: Locate the drive cage, typically near the PSU shroud. Mount the HDDs using the provided trays or screws.
- 2.5인치 SSD: SSDs can be mounted on dedicated brackets behind the motherboard tray or within the drive cage.
2.5 그래픽 카드(GPU) 설치
The MK6 RGB supports graphics cards up to 41 cm in length and includes a rubberized graphics card holder for support.
- 케이스 뒷면에서 필요한 PCIe 슬롯 커버를 제거합니다.
- 그래픽 카드를 마더보드의 적절한 PCIe 슬롯에 삽입하세요.
- Secure the graphics card with screws. Adjust the graphics card holder to provide additional support if needed.
2.6 냉각 시스템 설치
The case comes with three pre-installed 120mm addressable RGB PWM fans. Two fans are inverted on the side for intake, and one is at the rear for exhaust. The case supports up to eight fans in total.
- 추가 팬: Install additional 120mm or 140mm fans in available mounting positions (top, bottom, side) as required for optimal airflow.
- Liquid Cooling Radiators: The case supports a 360mm radiator and an additional 240mm radiator. Mount radiators to the designated areas (e.g., top, side) using appropriate screws.
2.7 케이블 관리
마더보드 트레이 뒤쪽의 케이블 라우팅 컷아웃과 고정 지점을 활용하여 케이블을 정리하세요. 이렇게 하면 공기 흐름이 원활해지고 외관도 깔끔해집니다.

그림 1: 내부 view of the Sharkoon MK6 RGB PC case, highlighting the pre-installed fans and drive bay locations.

그림 2: 내부 view showing the motherboard tray and various cutouts for efficient cable management.

그림 3: 내부 view illustrating the available mounting points for liquid cooling radiators.

그림 4: 내부 view displaying the adjustable graphics card holder for enhanced GPU support.
3. 사용 설명서
3.1 전원 켜기
After all components are installed and cables are connected, close the side panel. Connect your monitor, keyboard, mouse, and power cable to the PC. Press the power button on the front panel to start your system.
3.2 RGB 조명 제어
The MK6 RGB includes an RGB controller that provides connections for up to four LED elements and up to four PWM fans. The pre-installed fans are connected to this controller.
- Default Modes: The RGB lighting will typically cycle through default patterns upon startup.
- 소프트웨어 제어: If connected to a compatible motherboard, RGB lighting can be controlled via the motherboard's RGB synchronization software. Refer to your motherboard manual for specific instructions.
- 수동 제어: Some cases may feature a dedicated button on the front panel to cycle through RGB modes. Consult the case's quick start guide for this feature.
3.3 Front Panel Connectivity
The front panel features modern TRRS and USB-C ports for broad compatibility with various devices. Connect your peripherals and storage devices as needed.

그림 5: 전면 view of the Sharkoon MK6 RGB PC case, showcasing the tempered glass panel and visible RGB fans.
4. 유지관리
정기적인 유지관리는 PC 구성 요소의 최적의 성능과 수명을 보장하는 데 도움이 됩니다.
4.1 먼지 필터 청소
The case features dust filters to prevent dust accumulation. Regularly clean these filters to maintain good airflow.
- Locate and remove the dust filters (e.g., top, bottom, front).
- Clean the filters using compressed air or by rinsing them with water. Ensure they are completely dry before reinstallation.
4.2 강화유리 세척
Use a soft, lint-free cloth and a non-abrasive glass cleaner to clean the tempered glass panels. Avoid harsh chemicals that could damage the glass or coatings.
4.3 팬 청소
Over time, dust can accumulate on fan blades, reducing cooling efficiency. Use compressed air to gently clean the fan blades. Ensure the system is powered off before cleaning.
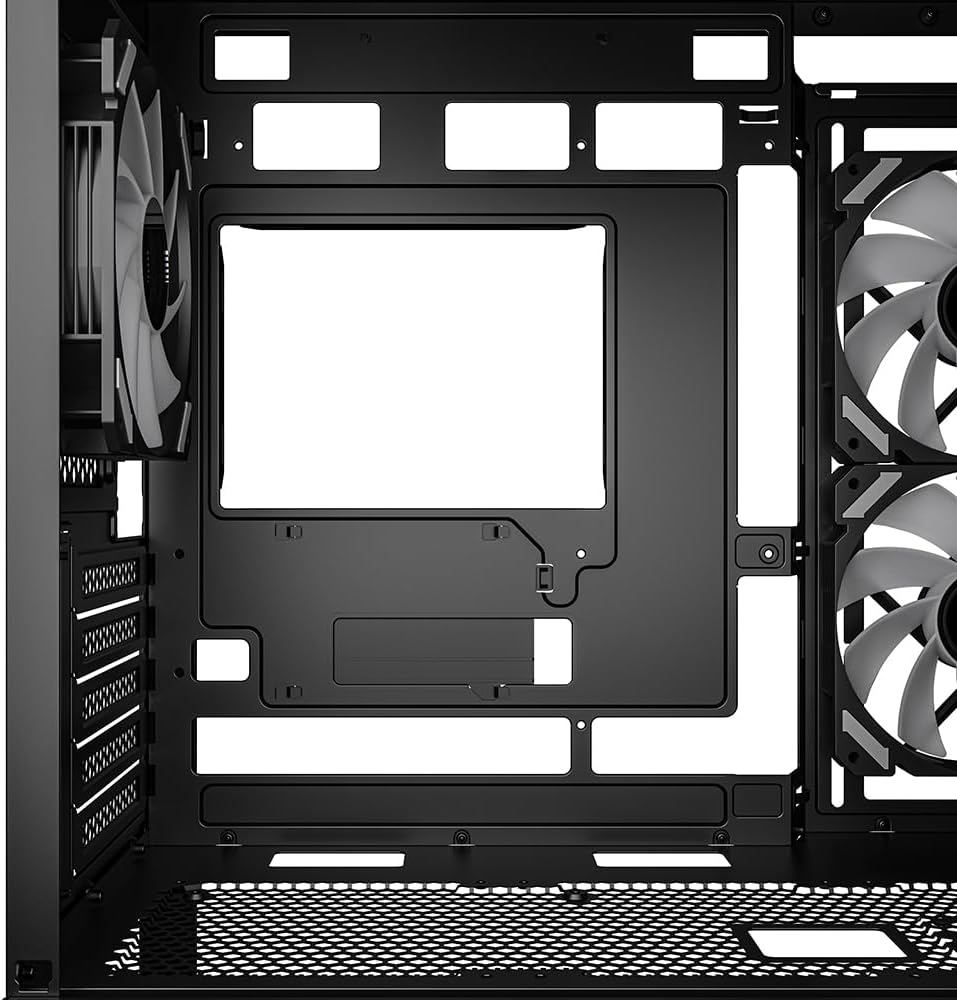
그림 6: 상단 view of the Sharkoon MK6 RGB PC case, illustrating the removable magnetic dust filter for easy cleaning.
5. 문제 해결
이 섹션에서는 일반적으로 발생할 수 있는 문제에 대해 설명합니다.
5.1 시스템 전원이 켜지지 않음
- 전원 연결 : 전원 공급 장치가 벽면 콘센트에 제대로 연결되어 있는지, 그리고 전원 공급 장치의 전원 스위치가 '켜짐' 위치에 있는지 확인하십시오.
- 전면 패널 커넥터: 전면 패널의 전원 버튼 케이블이 마더보드의 전면 패널 헤더에 올바르게 연결되어 있는지 확인하십시오.
- 내부 구성 요소: Check that all major components (motherboard, CPU, GPU, RAM) are securely seated and connected to the PSU.
5.2 팬이 회전하지 않거나 RGB 조명이 켜지지 않음
- 팬 연결: Confirm that all fan power cables are securely connected to the motherboard or the RGB controller.
- RGB Controller Power: Ensure the RGB controller itself is receiving power, typically via a SATA power connector from the PSU.
- Software/Button: If using software control, check the software settings. If there's a physical RGB button, try cycling through modes.
5.3 공기 흐름 불량 또는 과열
- 먼지 필터: 막힌 먼지 필터를 청소하십시오.
- 팬 방향 설정: Ensure fans are oriented correctly for optimal airflow (intake at front/side, exhaust at rear/top).
- 케이블 관리 : 공기 흐름을 방해하는 요소를 줄이기 위해 케이블 관리를 개선하십시오.
6. 사양
| 특징 | 세부 사항 |
|---|---|
| 모델명 | MK6 RGB |
| 상표 | 샤쿤 |
| 케이스 유형 | 미드 타워 |
| 마더보드 호환성 | Micro ATX, BTF |
| 재료 | 강화 유리 |
| 색상 | 검은색 |
| 제품 크기(LxWxH) | 17.13 x 8.86 x 17.52인치(43.5 x 22.5 x 44.5cm) |
| 품목 무게 | 13.42파운드(6.1kg) |
| CPU 쿨러 높이 여유 공간 | 최대 17cm |
| Graphics Card Length Clearance | 최대 41cm |
| PSU 길이 여유 공간 | 최대 23.5cm |
| 드라이브 베이 | 3.5인치 HDD 2개 또는 2.5인치 SSD 3개 |
| 사전 설치된 팬 | 3x 120mm Addressable RGB PWM Fans |
| 최대 팬 지원 | 최대 8명의 팬 |
| 라디에이터 지원 | 1x 360mm, 1x 240mm |
| 전면 I / O 포트 | TRRS, USB-C, USB 3.0 (1 port listed in specs) |
| 냉각 방식 | 공기 |
| 전원 공급 장치 장착 유형 | 바텀 마운트 |
7. 보증 정보
For detailed warranty information regarding your Sharkoon MK6 RGB PC Case, please refer to the official Sharkoon website or contact your local retailer. Warranty terms and conditions may vary by region and purchase location.
8. 기술 지원
If you encounter any issues or require technical assistance beyond the scope of this manual, please visit the official Sharkoon support website for FAQs, driver downloads, and contact information. You may also reach out to your point of purchase for support.