
1. 서론
This manual provides detailed instructions for the installation, operation, and maintenance of your VBESTLIFE Z490 GAMING PLUS ATX Motherboard. Designed for DIY computer enthusiasts, this motherboard supports 10th and 11th generation Intel Core, Pentium Gold, and Celeron processors with an LGA 1200 socket. Please read this manual thoroughly before proceeding with installation to ensure proper setup and optimal performance.

이미지 1.1: 이상view of the VBESTLIFE Z490 GAMING PLUS Motherboard.
2. 주요 특징
- 프로세서 지원: Compatible with 10th and 11th Generation Intel Core, Pentium Gold, and Celeron processors for LGA 1200 sockets.
- 메모리: Features two DDR4 memory slots, supporting up to 64GB of dual-channel DDR4 RAM.
- 저장: Includes a full-speed M.2 interface supporting 32GB/s data transfer for NVMe SSDs, and four Serial ATA 3.0 ports for traditional storage devices.
- 그래픽 출력: Integrated DP, HDMI, and VGA video ports for versatile display connectivity.
- 확장 슬롯: One PCIe Gen 3.0 x16 slot for graphics cards and one PCIe X1 slot for other expansion cards.
- 네트워킹: Integrated 1000Mbps Gigabit LAN for high-speed network connectivity.
- 오디오: Utilizes an independent Realtek HiFi Sound card for enhanced audio experience.
- USB 연결: Multiple USB 3.2 Gen1 and USB 2.0 interfaces, including front panel headers.
- 내구성 있는 디자인: Features pre-installed I/O shielding and stable solid-state components for extended motherboard lifespan and protection against electrostatic discharge.
3. 설정 및 설치
Before beginning installation, ensure your system is powered off and disconnected from the power source. Handle the motherboard by its edges to avoid static discharge. It is recommended to wear an anti-static wrist strap.
3.1. 프로세서(CPU) 설치
- 마더보드에서 LGA 1200 CPU 소켓을 찾으세요.
- 부하 레버를 살짝 아래로 누른 다음 소켓에서 당겨 CPU 소켓 덮개를 엽니다.
- CPU의 삼각형 표시를 소켓의 해당 표시와 일치시키세요. CPU를 소켓에 조심스럽게 넣으세요. 무리하게 힘을 주지 마세요.
- 소켓 덮개를 닫고 부하 레버를 딸깍 소리가 날 때까지 제자리로 밀어 넣으십시오.

이미지 3.1: 클로즈업 view of the LGA 1200 CPU socket, ready for processor installation.
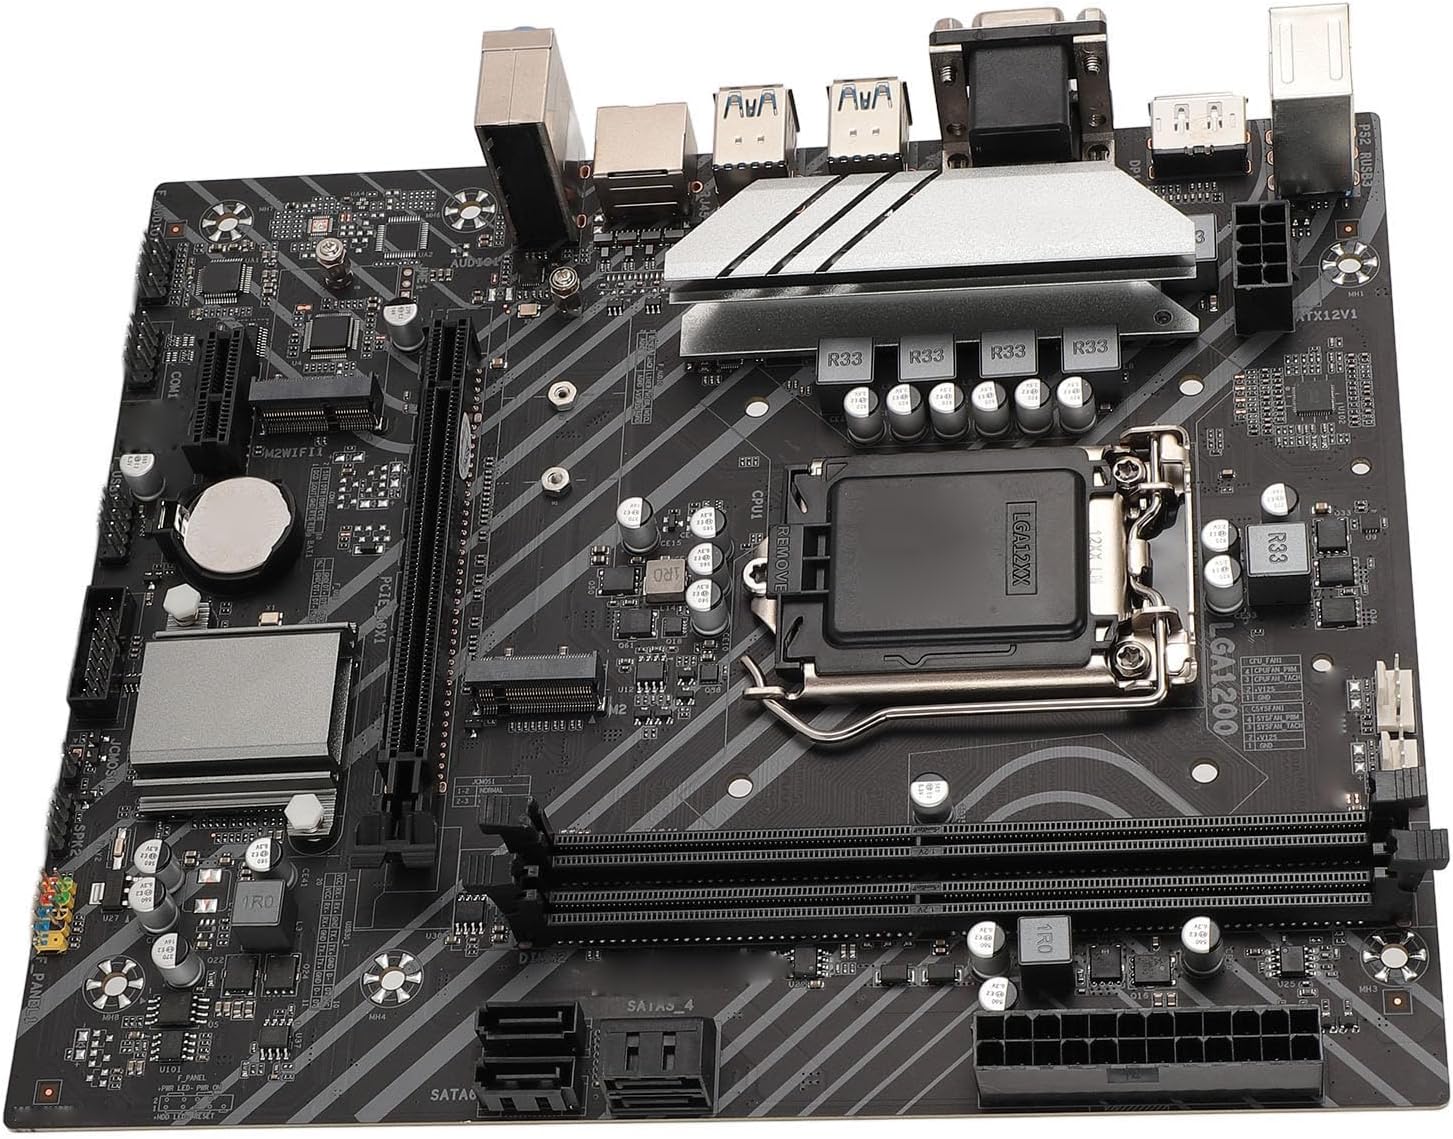
이미지 3.2: 상세 view of the CPU socket area, showing power delivery components.
3.2. 메모리(RAM) 설치
- DDR4 메모리 슬롯 양쪽 끝에 있는 클립을 엽니다.
- DDR4 메모리 모듈의 노치를 메모리 슬롯의 키에 맞춥니다.
- 클립이 제자리에 고정될 때까지 메모리 모듈을 슬롯에 단단히 삽입하세요. 두 클립이 모두 완전히 닫혔는지 확인하세요.
3.3. 저장 장치 설치
3.3.1. M.2 SSD 설치
- 마더보드에서 M.2 슬롯을 찾으세요.
- M.2 스탠드오프 나사를 제거합니다.
- M.2 SSD를 30도 각도로 슬롯에 삽입합니다.
- M.2 SSD를 살살 눌러 넣은 후 스탠드오프 나사로 고정하십시오.

Image 3.3: The M.2 interface, designed for high-speed NVMe SSDs.

Image 3.4: Close-up of the M.2 slot and surrounding expansion slots and headers.
3.3.2. SATA 장치 설치
- SATA 데이터 케이블의 한쪽 끝을 마더보드의 SATA 3.0 포트에 연결하십시오.
- SATA 데이터 케이블의 다른 쪽 끝을 SATA 하드 드라이브나 SSD에 연결합니다.
- 전원 공급 장치(PSU)에서 저장 장치로 SATA 전원 케이블을 연결합니다.

Image 3.5: The Serial ATA 3.0 ports for connecting traditional hard drives and SSDs.
3.4. 확장 카드 설치(PCIe)
- Locate the PCIe x16 slot for your graphics card or PCIe x1 slot for other expansion cards.
- PC 케이스에서 해당 확장 슬롯 덮개를 제거하세요.
- 카드를 슬롯에 맞춰 넣고 제대로 고정될 때까지 꾹 눌러주세요.
- 카드를 나사로 PC 케이스에 고정합니다.
3.5. 전원 연결
- Connect the 24-pin ATX power connector from your PSU to the 24-pin ATXPWR socket on the motherboard.
- Connect the 8-pin ATX 12V power connector from your PSU to the 8-pin ATX12V socket on the motherboard.
3.6. I/O 패널 연결
Connect your peripherals to the appropriate ports on the motherboard's rear I/O panel.
- 표시하다: Connect your monitor to the DP, HDMI, or VGA ports.
- USB 장치: 키보드, 마우스 및 기타 USB 장치를 USB 3.2 Gen1 또는 USB 2.0 포트에 연결하십시오.
- 회로망: Connect an Ethernet cable to the LAN port for internet access.
- 오디오: 오디오 잭에 스피커나 헤드폰을 연결합니다.

Image 3.6: The rear I/O panel featuring DP, HDMI, VGA, USB, LAN, and audio ports.
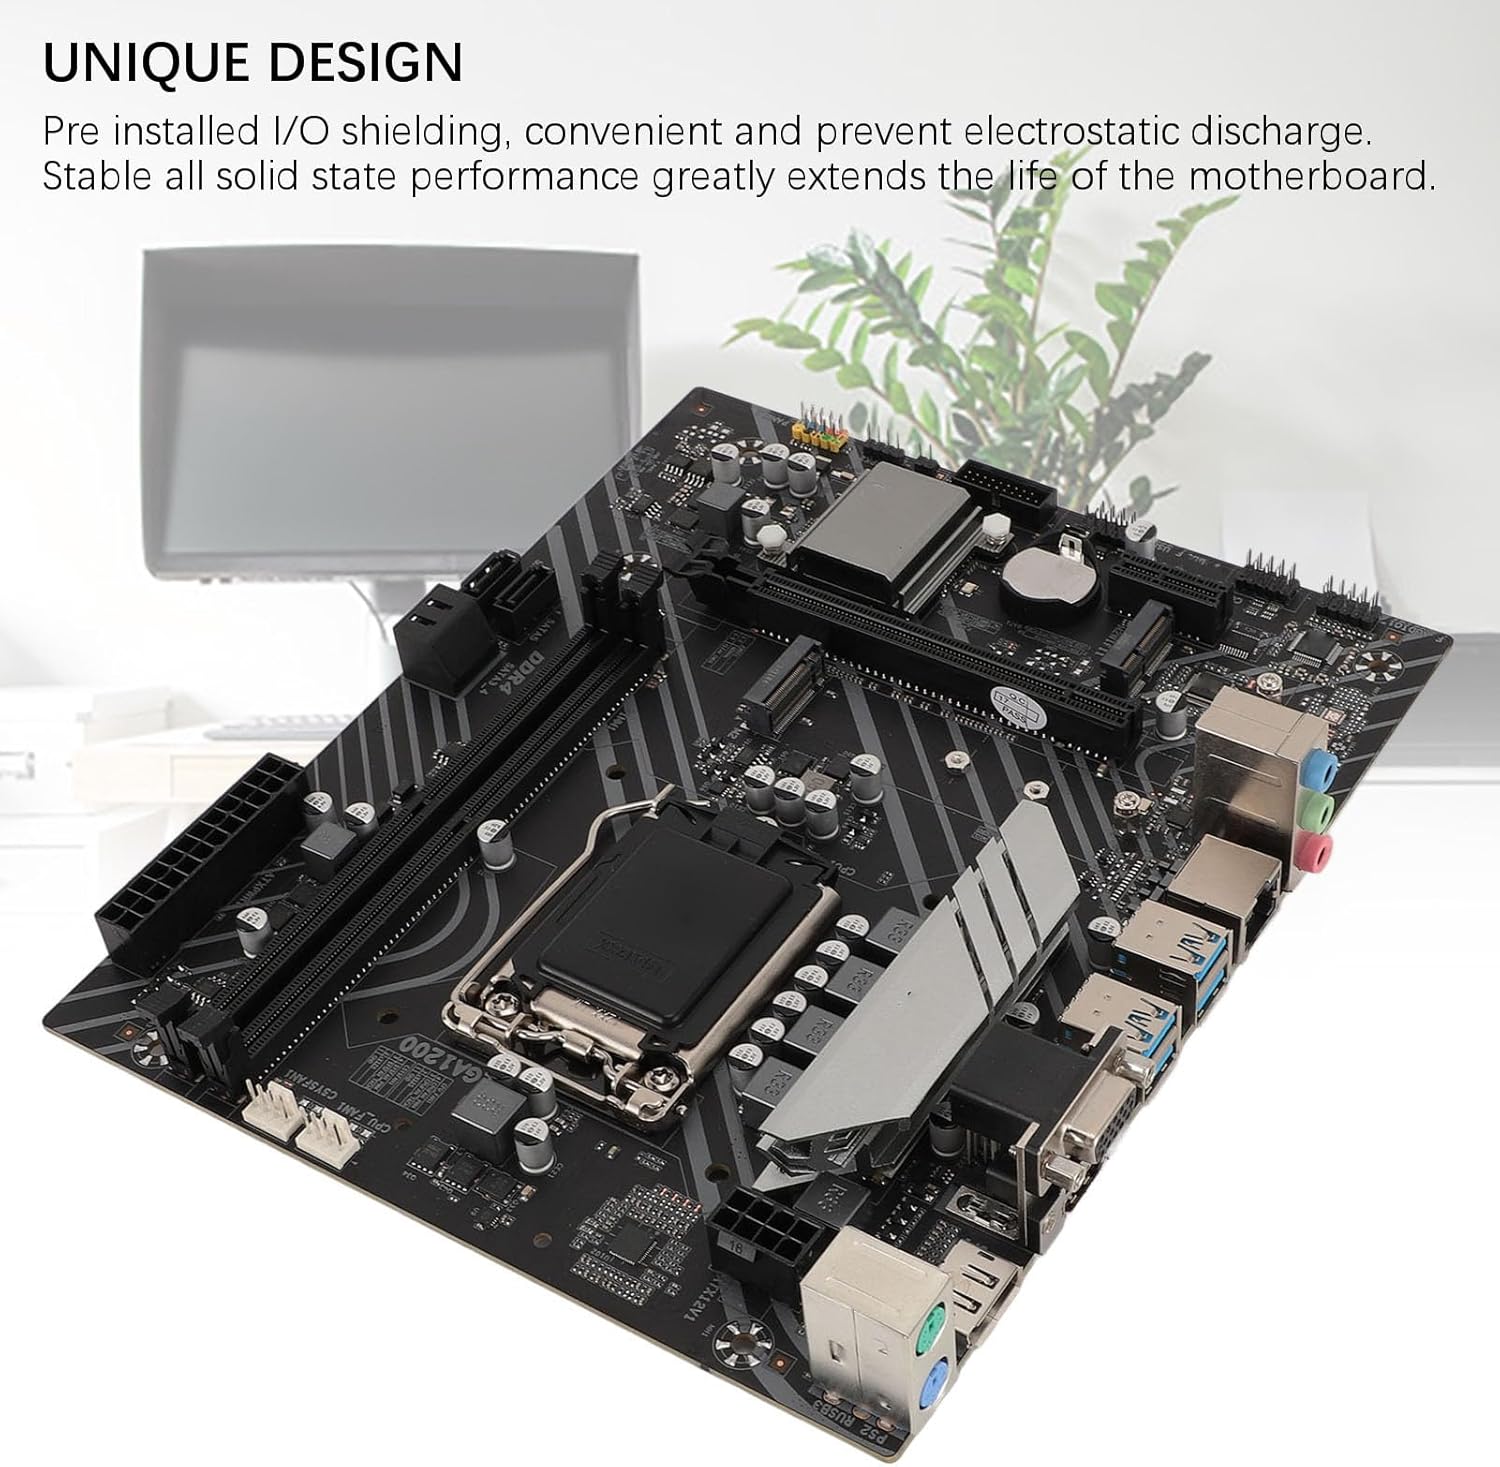
Image 3.7: The motherboard's unique design with pre-installed I/O shielding for convenience and protection.

이미지 3.8: 상세 view of the I/O ports and the CPU socket area.
4. 사용 설명서
4.1. 초기 부팅
After completing all hardware installations, connect your monitor, keyboard, and mouse. Power on your system. The motherboard will perform a Power-On Self-Test (POST). If all components are detected correctly, the system will proceed to boot from your installed operating system or prompt for OS installation.
4.2. BIOS/UEFI 설정
BIOS/UEFI 설정 유틸리티에 접근하려면 지정된 키(일반적으로)를 누르십시오. 델 or F2) repeatedly during the initial boot-up sequence. Within the BIOS/UEFI, you can configure system settings such as boot order, date/time, fan speeds, and other advanced options.
5. 기술 사양
| 특징 | 사양 |
|---|---|
| 모델 | Z490 GAMING PLUS |
| Motherboard Architecture | 에이티엑스 |
| 마더 보드 크기 | Approx. 225x190mm / 8.9x7.5in |
| CPU 소켓 유형 | LGA 1200 (Supports 10th/11th Gen Intel Core, Pentium Gold, Celeron Processors) |
| 칩셋 | 인텔 Z490 |
| 네트워크 카드 | 1000Mbps LAN |
| Integrated Sound Card | Realtek HiFi Sound |
| 그래픽 카드 슬롯 | PCIE X16 Gen 3.0 |
| 지원되는 메모리 유형 | 2개의 DDR4 DIMM 슬롯 |
| 최대 메모리 용량 | 64GB (32GB x 2) |
| 직렬 ATA 인터페이스 | Serial ATA3.0 x 4 |
| USB 인터페이스 | USB3.2 Gen1 x 4, Front USB2.0 pin x 1, Front USB3.0 pin x 1 |
| 확장 인터페이스 | DP x 1, HDMI x 1, VGA x 1, M.2 Interface x 1 (Supports NGFF, NVME protocol), M.2 Wireless Fidelity Interface x 1, PCIE X1 x 1 |
| 전원 인터페이스 | 1 x 24PIN ATXPWR, 1 x 8PIN ATX12V |
| 배터리 유형 | CR2032 button cell battery (240 mAh, integrated) |
| 제조업체 | 브이베스트라이프 |
| 모델 번호 | VBESTLIFE60hydko52q |
| 원산지 | 중국 |
6. 유지관리
- 청소: 압축 공기를 사용하여 마더보드와 부품의 먼지를 정기적으로 청소하십시오. 청소하기 전에 시스템 전원이 꺼져 있고 플러그가 뽑혀 있는지 확인하십시오.
- 손질: Always handle the motherboard by its edges. Avoid touching components directly to prevent electrostatic discharge.
- 환경: Operate the motherboard in a well-ventilated area to prevent overheating. Avoid extreme temperatures and humidity.
- BIOS 업데이트: 정기적으로 제조업체를 확인하십시오 website for BIOS/UEFI updates. Follow update instructions carefully to avoid system instability.
7. 문제 해결
7.1. 전원 없음 / 부팅 안 됨
- Ensure all power cables (24-pin ATX, 8-pin ATX12V) are securely connected to the motherboard and PSU.
- Verify that the power supply unit (PSU) is switched on and functioning correctly.
- Check front panel connections (power button, reset button) to ensure they are correctly plugged into the motherboard headers.
- 문제를 파악하기 위해 최소 구성 요소(CPU, RAM 스틱 1개, 내장 그래픽이 없는 경우 그래픽 카드)로 부팅해 보세요.
7.2. 디스플레이 출력 없음
- Ensure your monitor is connected to the correct display output port (DP, HDMI, or VGA) on the motherboard or dedicated graphics card.
- Verify that the graphics card (if installed) is properly seated in its PCIe slot and has adequate power connected.
- 가능하다면 다른 디스플레이 케이블이나 모니터로 테스트해보세요.
7.3. 시스템 불안정성/충돌
- Check that all memory modules are correctly seated in their slots.
- CPU 쿨러가 제대로 설치되어 CPU와 잘 접촉하는지 확인하십시오. CPU 온도를 모니터링하십시오.
- Verify that your power supply unit (PSU) provides sufficient wattage for all installed components.
- 메모리 진단 도구를 실행하여 RAM에 오류가 있는지 확인하십시오.
8. 보증 및 지원
This VBESTLIFE Z490 GAMING PLUS Motherboard comes with a 2년 제조사 보증. This warranty covers defects in materials and workmanship under normal use. For warranty claims or technical support, please contact your retailer or the VBESTLIFE customer service directly. Please retain your proof of purchase for warranty validation.
For further assistance, please refer to the official VBESTLIFE web사이트를 방문하거나 지원 채널에 문의하세요.