
CREALITY FALCON Falcon 10W
Creality Falcon 10W Laser Engraver and Cutter User Manual
Model: Falcon 10W
1. 서론
Welcome to the user manual for your new Creality Falcon 10W Laser Engraver and Cutter. This powerful and versatile machine is designed for precision engraving and cutting across a wide range of materials, making it suitable for hobbyists, artists, and small businesses. Please read this manual thoroughly before operation to ensure safe and efficient use of your device.

The Creality Falcon 10W Laser Engraver actively working on a detailed mandala pattern, showcasing its precision and capability on a wooden surface.
2. 안전수칙
Your safety is paramount. This device is a Laser Class 2 product. Always adhere to the following safety guidelines:
- Always wear the provided safety goggles when the laser is in operation.
- 레이저 빔이나 그 반사면을 절대로 직접 쳐다보지 마십시오.
- Ensure proper ventilation in your workspace to dissipate fumes and smoke generated during engraving/cutting.
- 작동 중에 기계를 무인 상태로 두지 마십시오.
- 작업 구역 근처에 가연성 물질을 두지 마세요.
- The laser head protective cover is designed to protect eyes from laser glare.
- The machine features an active stop function that activates if the machine tilts, enhancing safety.

This image illustrates the advanced safety features of the Creality Falcon 10W, highlighting the internal leveler for stability and the active stop function for immediate shutdown in case of tilting, ensuring user safety during operation.
3. 패키지 내용
상자를 풀 때 다음 구성품이 모두 포함되어 있는지 확인하세요.
- 10W 레이저 모듈
- X / Y Axis Assembly
- Control Box Assembly and Profiles
- 전원 어댑터
- 전원 코드
- Linden Plywood (samp르 자료)
- 설치 도구
- TF 카드 및 카드 리더기
- 먼지 없는 천
- 고글
- Multi-level Fixed Focus Bar
4. 설정 가이드
The Creality Falcon 10W is designed for easy assembly. Approximately 60% of the components are modularized, simplifying the setup process.
4.1 조립 단계
- 모든 구성품을 풀어 깨끗하고 평평한 표면에 펼쳐 놓으세요.
- Follow the detailed assembly instructions provided in the quick start guide (usually on the TF card or a separate printed sheet).
- Connect the X and Y axis assemblies to the main frame.
- Install the laser module onto the carriage.
- Connect all necessary cables, including the power cord and USB cable (if operating online).
- Ensure all screws are tightened securely before powering on the device.

This image demonstrates the modular design of the Creality Falcon 10W, showing how its main components are separated for straightforward and quick assembly.
5. 제품 특징
5.1 Powerful and Accurate Performance
The Creality Falcon 10W laser engraver and cutter delivers a robust 72W effective output, enabling it to effortlessly cut through 12mm wood in a single pass. Its ultra-fine 6-lens array, combined with a 32-bit chip and proprietary algorithm, achieves a compressed spot size of 0.06×0.06mm, guaranteeing exceptional precision and detail in all your projects.

This image highlights the powerful 10W laser output of the Creality Falcon, showing its ability to cut deeply into wood, indicating strong penetration and cutting efficiency.

This diagram visually explains the 0.06mm ultra-fine laser spot, demonstrating how the advanced 6-lens array contributes to the machine's high precision for intricate engraving details.
5.2 Efficient Operation and Large Working Area
With a generous 400×415 mm working area, the Creality Falcon 10W allows you to engrave and cut larger materials in a single operation, minimizing the need for repositioning. Its high working speed of 10000mm/min significantly boosts efficiency and productivity, making it an excellent choice for small businesses engaged in batch production.
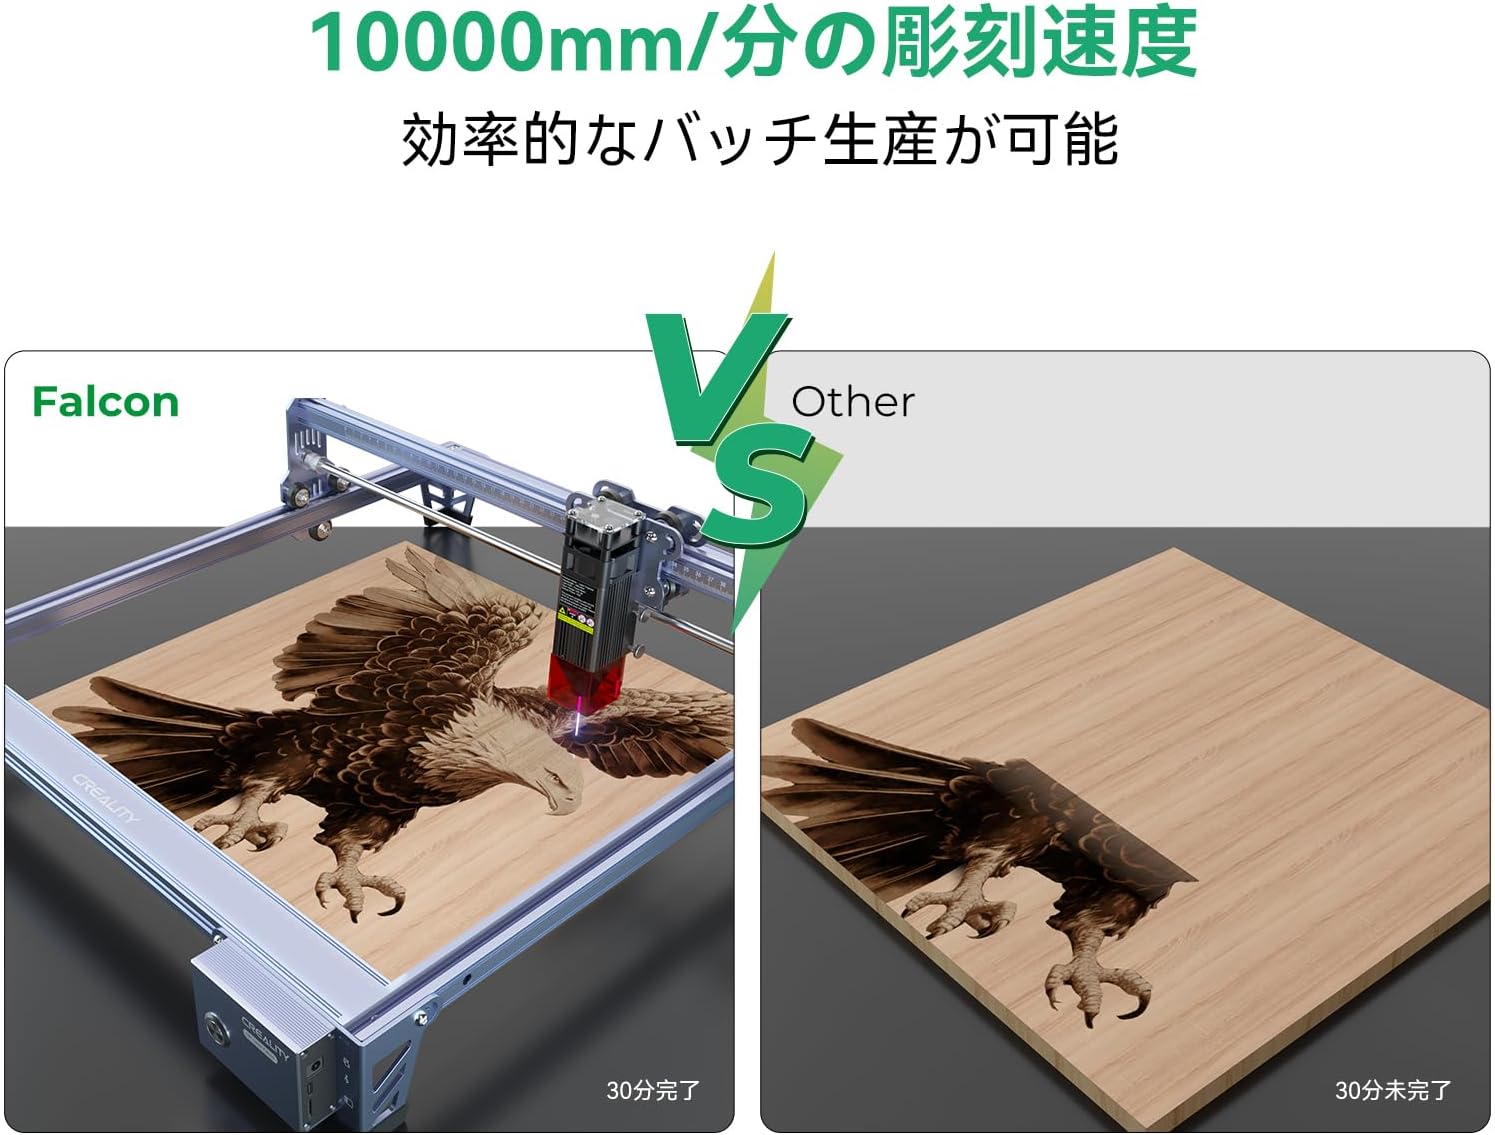
This image compares the engraving speed of the Falcon with another machine, illustrating how its 10000mm/min speed allows for faster completion of projects, enhancing overall efficiency.

이 도표는 명확한 정보를 제공합니다. view of the machine's dimensions and its substantial 400x415mm working area, demonstrating how a compact machine can offer a large creative space.
5.3 Wide Compatibility and Offline Engraving
The Creality Falcon 10W is compatible with popular professional engraving software such as LightBurn and LASERGRBL, supporting both MacOS and Windows operating systems. For added convenience, it supports offline operation: simply insert a TF card with your design files and press the power button to begin your creative work without needing a computer connection.

This image demonstrates the wide compatibility of the Creality Falcon 10W, showing it connected to both Windows and MacOS systems, indicating support for various professional engraving software.
This image focuses on the machine's control panel, highlighting the TF card slot and power button, which enable convenient offline engraving without a computer connection.
5.4 Stability and Precision Assurance
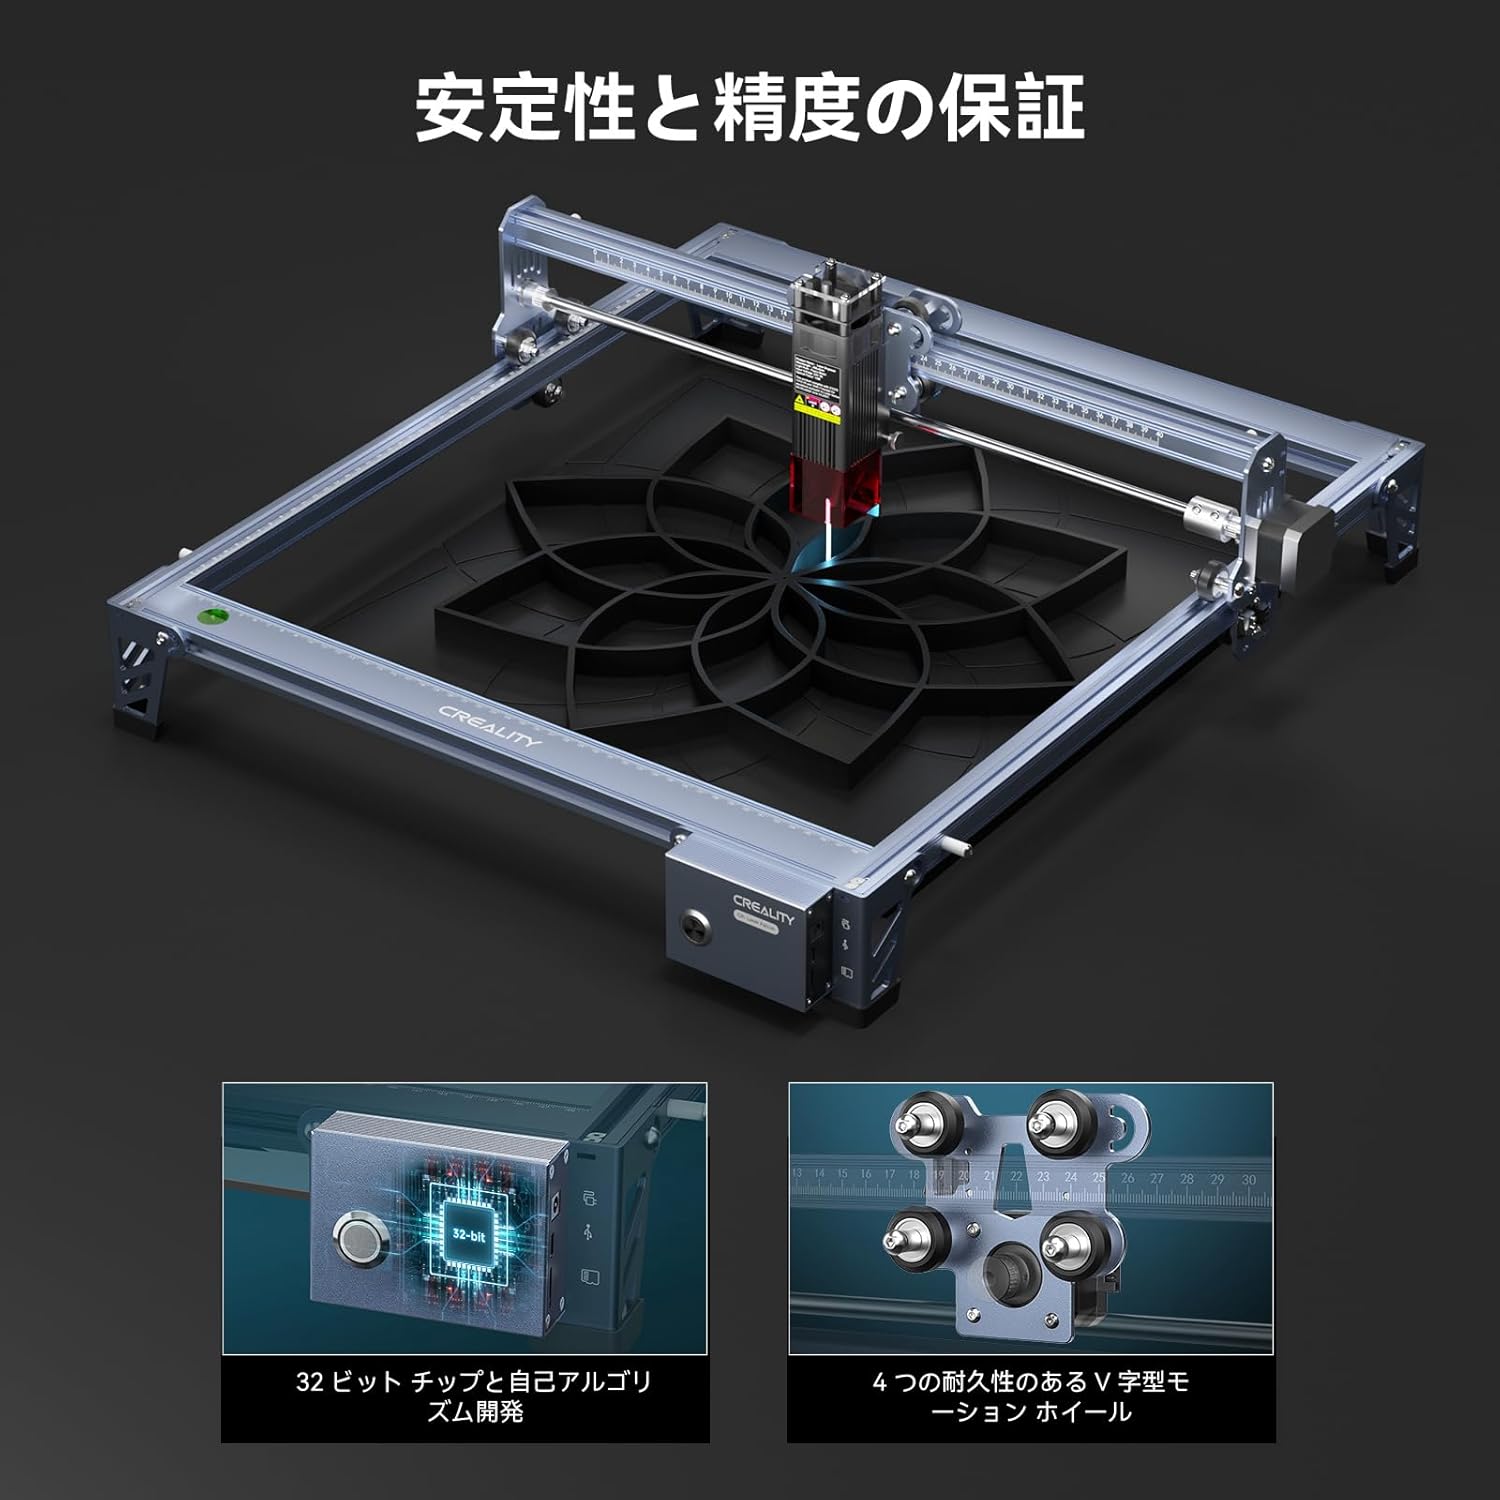
Built with a high-quality all-aluminum alloy, the Creality Falcon 10W ensures robust stability. It incorporates a 32-bit chip and durable V-motion wheels, which contribute to its precise movement and consistent performance, minimizing errors and maximizing engraving quality.

This image showcases the internal engineering that ensures stability and precision, featuring the 32-bit chip for advanced processing and durable V-motion wheels for smooth, accurate movement.
5.5 적용 재료
The Creality Falcon 10W is highly versatile and can engrave or cut a wide variety of materials, including:
- 목재
- 가죽
- 구조
- 종이
- 아크릴
- 유리
- Metal (engraving only, certain types)
- 도예

This collage displays a wide array of materials, from paper and fabric to wood and metal, illustrating the extensive versatility of the Creality Falcon 10W for different engraving and cutting applications.
6. 사용 설명서
6.1 소프트웨어 설치
To operate the Creality Falcon 10W, you will need compatible engraving software. We recommend LightBurn or LASERGRBL. Please download and install the latest version from their official websites. Drivers for the machine may also be required and are typically found on the included TF card or the manufacturer's support page.
6.2 장치 연결
Connect the laser engraver to your computer using the provided USB cable. Ensure the power adapter is connected to the machine and a power outlet. Turn on the machine using the power button.
6.3 자재 적재
Place your chosen material flat within the working area of the machine. Ensure it is securely positioned and will not shift during operation. Use clamp필요한 경우 s.
6.4 레이저 초점 맞추기
Accurate focusing is crucial for optimal engraving and cutting results. Use the multi-level fixed focus bar to set the correct distance between the laser module and the material surface. Follow the specific focusing instructions provided in the quick start guide or software manual.
6.5 조각/절단 작업 시작
온라인 운영:
- Open your engraving software (e.g., LightBurn, LASERGRBL).
- Import or create your design.
- Configure the laser settings (power, speed, passes) according to your material and desired effect.
- 사전view the job to ensure correct placement and scale.
- Initiate the job from the software.
오프라인 운영:
- Save your design file (e.g., G-code) to the provided TF card.
- Insert the TF card into the machine's card slot.
- 기계의 전원을 켭니다.
- Use the control panel buttons to select and start the desired file.
7. 유지관리
Regular maintenance ensures the longevity and optimal performance of your Creality Falcon 10W.
- 레이저 렌즈 청소: 레이저 성능에 영향을 줄 수 있는 먼지와 이물질을 제거하려면 부드럽고 보풀 없는 천과 렌즈 세척액을 사용하여 주기적으로 레이저 렌즈를 청소하십시오.
- Cleaning the Rails and Wheels: Keep the X and Y axis rails and V-motion wheels free from dust and debris to ensure smooth movement. Use a dry cloth or brush.
- 펌웨어 업데이트: 크리얼리티 공식 웹사이트를 확인하세요. web성능 향상이나 새로운 기능 추가를 위한 펌웨어 업데이트가 있는지 확인하려면 해당 사이트를 방문하십시오.
- 저장: 사용하지 않을 때는 직사광선과 극한 온도 변화를 피해 깨끗하고 건조한 곳에 보관하십시오.
8. 문제 해결
다음은 몇 가지 일반적인 문제와 이에 대한 잠재적 해결책입니다.
- 기계 전원이 켜지지 않음:
Ensure the power adapter is securely connected to both the machine and a working power outlet. Check the power button. - 레이저가 작동하지 않거나 조각이 안 됨:
Verify that the laser module is correctly installed and connected. Check software settings for laser power and speed. Ensure the material is within the focus range. - Machine Not Moving/Responding:
For online operation, ensure the USB cable is securely connected and the correct COM port is selected in your software. For offline operation, ensure the TF card is inserted correctly and the file is valid. Restart the machine and software. - 조각/절단 품질이 좋지 않습니다:
Check laser focus. Adjust laser power and speed settings. Ensure the material is flat and stable. Clean the laser lens. - X and Y Alignment Issues:
Ensure the machine frame is square and stable. Check for any obstructions on the rails or issues with the belts/wheels. - No Japanese Manual:
While this manual is in English, some users have noted the lack of a Japanese manual. Please refer to online resources, community forums, or translation tools for assistance if needed.
9. 기술 사양
| 사양 | 값 |
|---|---|
| 상표 | 크리리얼리티 팔콘 |
| 패키지 크기 | 61 x 28.8 x 20.7cm |
| 품목 무게 | 4.47 킬로그램 |
| 전원 | 교류/직류 |
| 포함된 구성 요소 | CR Falcon 10W * 1 |
| ASIN | B0DDBRBL1L |
| 첫 번째 이용 가능 날짜 | 17년 2024월 XNUMX일 |
10. 보증 및 지원
Creality Falcon provides professional after-sales support for your product. For any technical issues, warranty claims, or further assistance, please contact the seller or refer to the official Creality Falcon support channels. Details regarding warranty period and terms are typically included with your purchase documentation.
Ask a question about this manual
Ask about setup, troubleshooting, compatibility, parts, safety, or missing instructions. Manuals+ will review the question and use this page’s manual context to help answer it.