
1. 서론
This manual provides detailed instructions for the safe and proper installation, operation, and maintenance of your USX STAR SAS202 Ceiling TV Mount. Please read this manual thoroughly before installation and retain it for future reference. This mount is designed to securely hold televisions ranging from 26 to 65 inches, with a maximum weight capacity of 110 lbs, and VESA patterns from 50x50mm to 400x400mm.
2. 안전 정보
- 경고: Do not mount this product on drywall alone. It must be mounted to a solid structural support such as wood studs, concrete, or brick.
- 설치 표면이 마운트와 텔레비전의 총 무게를 안전하게 지탱할 수 있는지 확인하십시오.
- Always use the provided hardware. If you are unsure about any part of the installation, consult a qualified professional.
- 설치하는 동안 어린이와 애완동물이 접근하지 못하도록 하세요.
- 최대 중량 용량은 110파운드(50kg)를 초과하지 마십시오.
- Verify your TV's VESA pattern and screen size are compatible with the mount before proceeding.
3. 패키지 내용
Please check to ensure all components are present and undamaged. If any parts are missing or defective, contact customer support immediately.
- 천장판 조립
- 조정 가능한 극
- TV Bracket Plate
- Vertical TV Brackets (2x)
- Mounting Hardware Kit (screws, washers, spacers, anchors for various ceiling types)
- 앨런 키
4. 사양
| 특징 | 사양 |
|---|---|
| 모델 번호 | SAS202 |
| 화면 크기 호환성 | 26인치에서 65인치까지 |
| 중량 용량 | 최대 110kg(50파운드) |
| VESA 호환성 | 최소 50x50mm, 최대 400x400mm |
| 높이 조정 | 21.14인치~29.02인치 (높이 5단계 조절) |
| 기울기 각도 | Up to 15 degrees down |
| 회전 각도 | 360 degrees (full rotation) |
| 천장 회전 | Up to 90 degrees for sloped ceilings |
| 재료 | 금속 |
| 색상 | 검은색 |
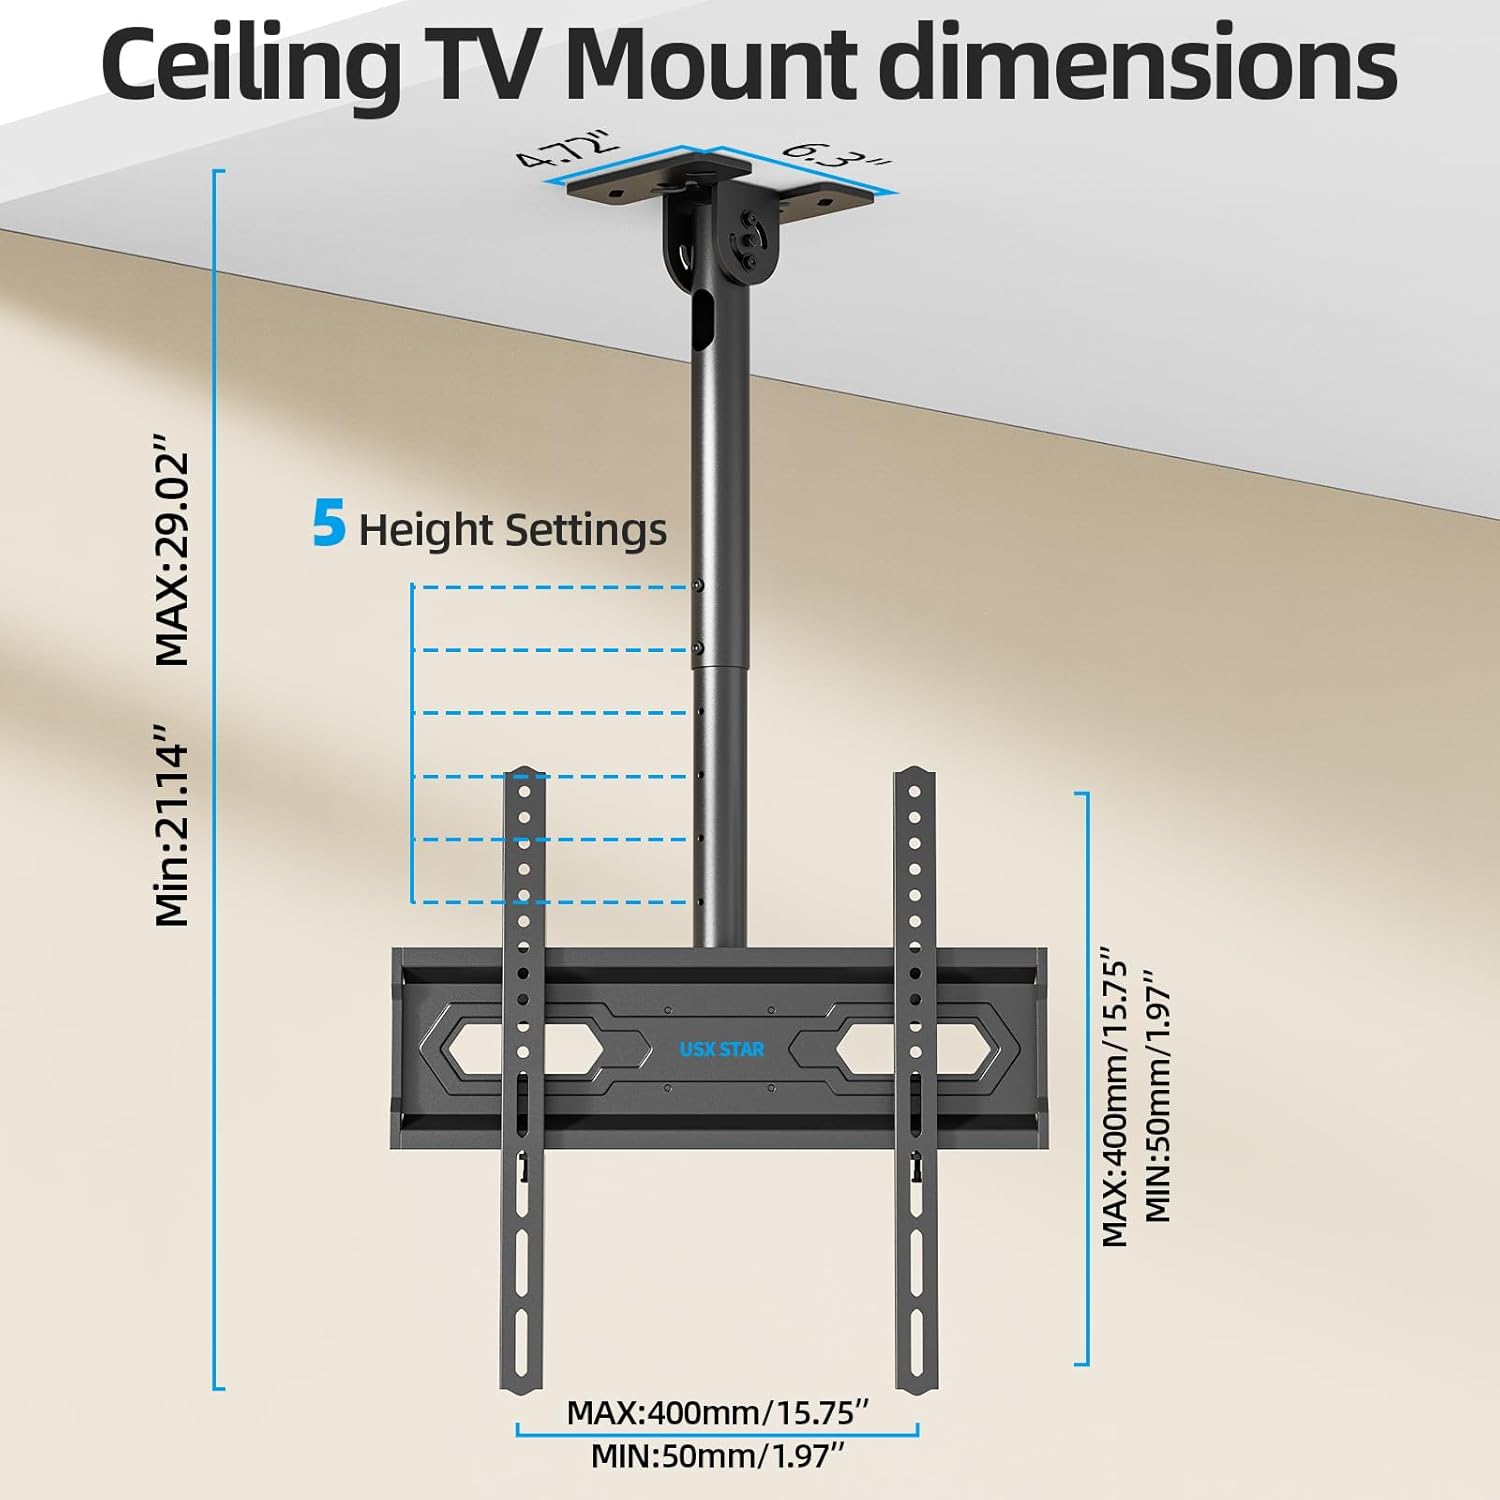
Image: Wide Compatibility Overview
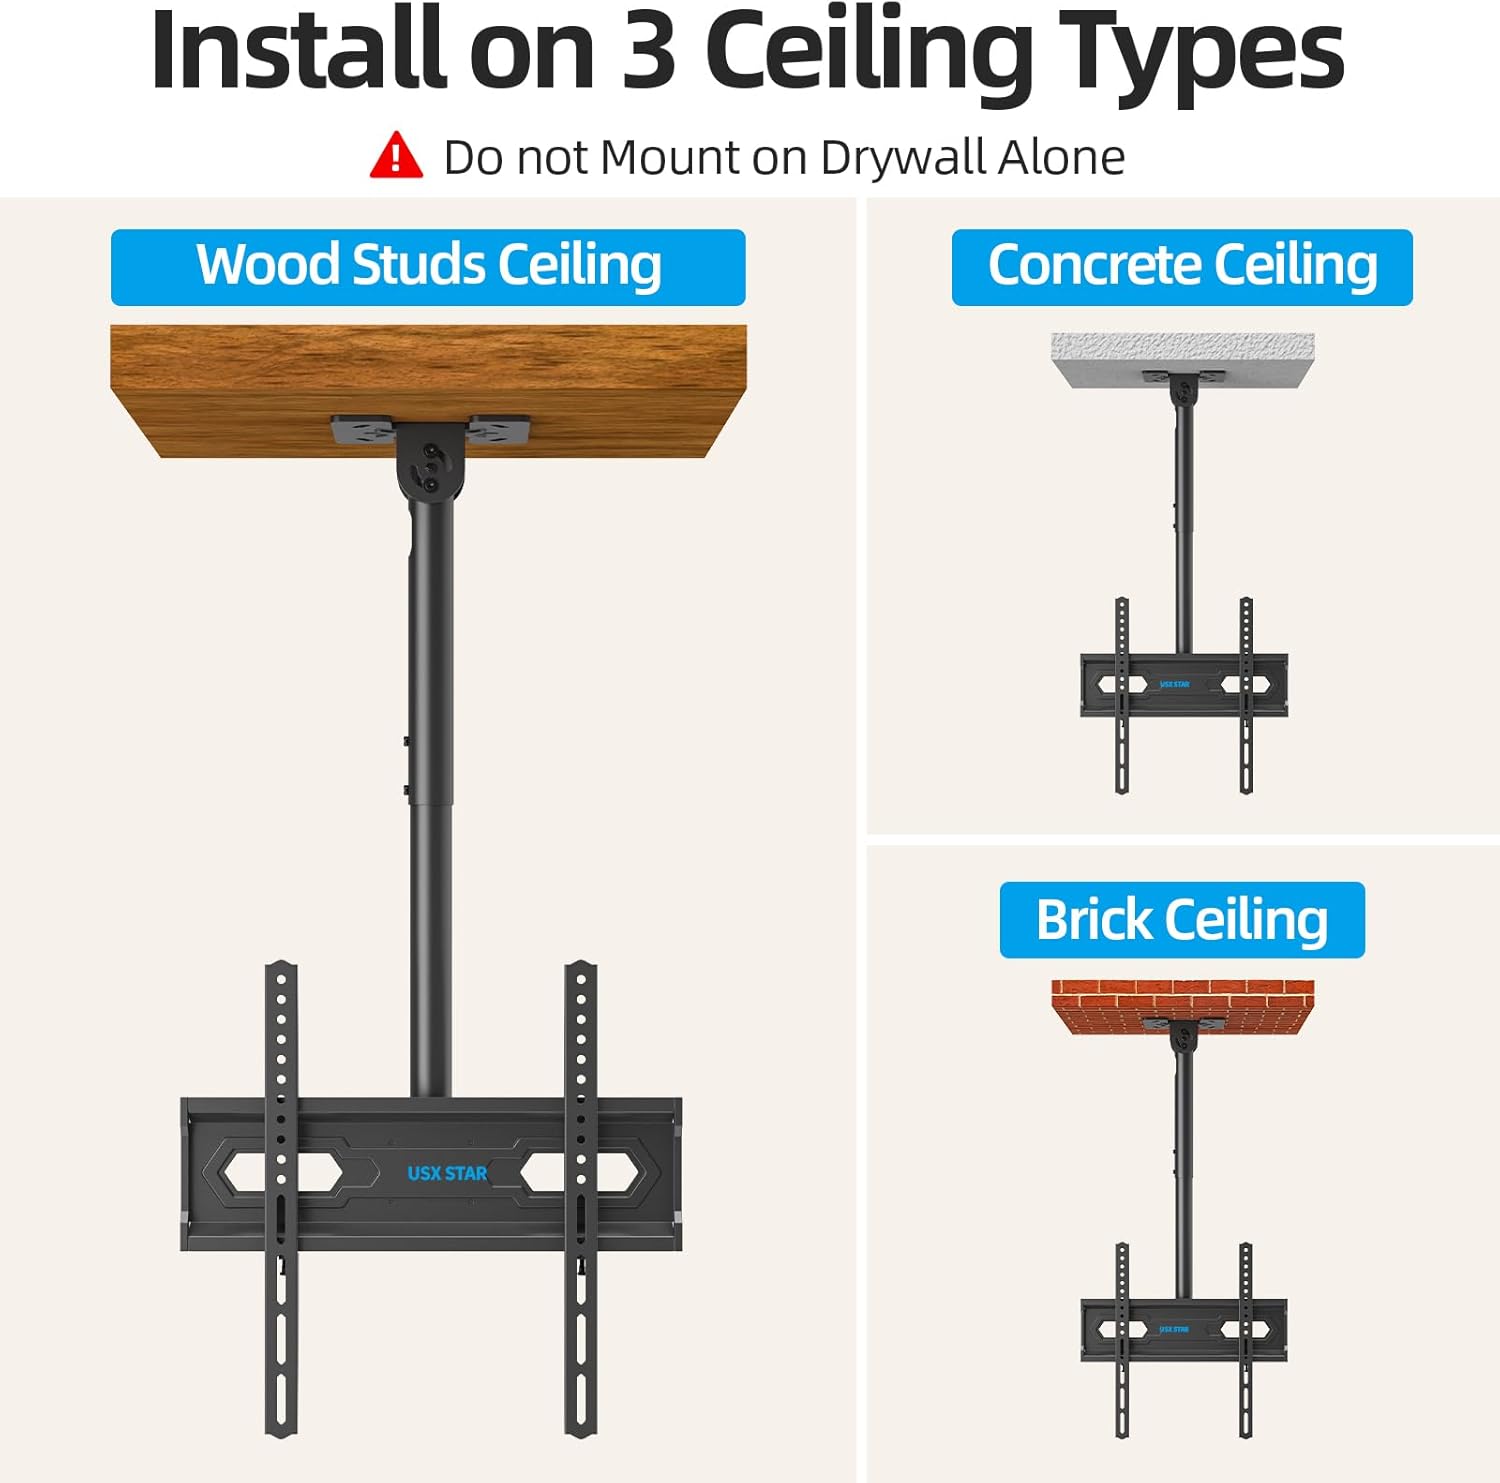
Image: Ceiling TV Mount Dimensions
5. 설정 및 설치
5.1 설치 전 체크리스트
- Verify your TV's screen size (26-65 inches), weight (under 110 lbs), and VESA mounting pattern (50x50mm to 400x400mm).
- Identify your ceiling type: wood studs, concrete, or brick. Do not install on drywall alone.
- Gather necessary tools: drill, stud finder (for wood studs), level, screwdriver, pencil, measuring tape.
5.2 천장판 설치
- Determine the desired location for your TV mount. Use a stud finder to locate wood studs if applicable.
- Position the ceiling plate against the ceiling and mark the drill holes. Ensure it is level.
- Drill pilot holes according to the marked positions and your ceiling type (wood, concrete, or brick).
- Secure the ceiling plate using the appropriate screws and anchors from the hardware kit. Ensure it is firmly attached.
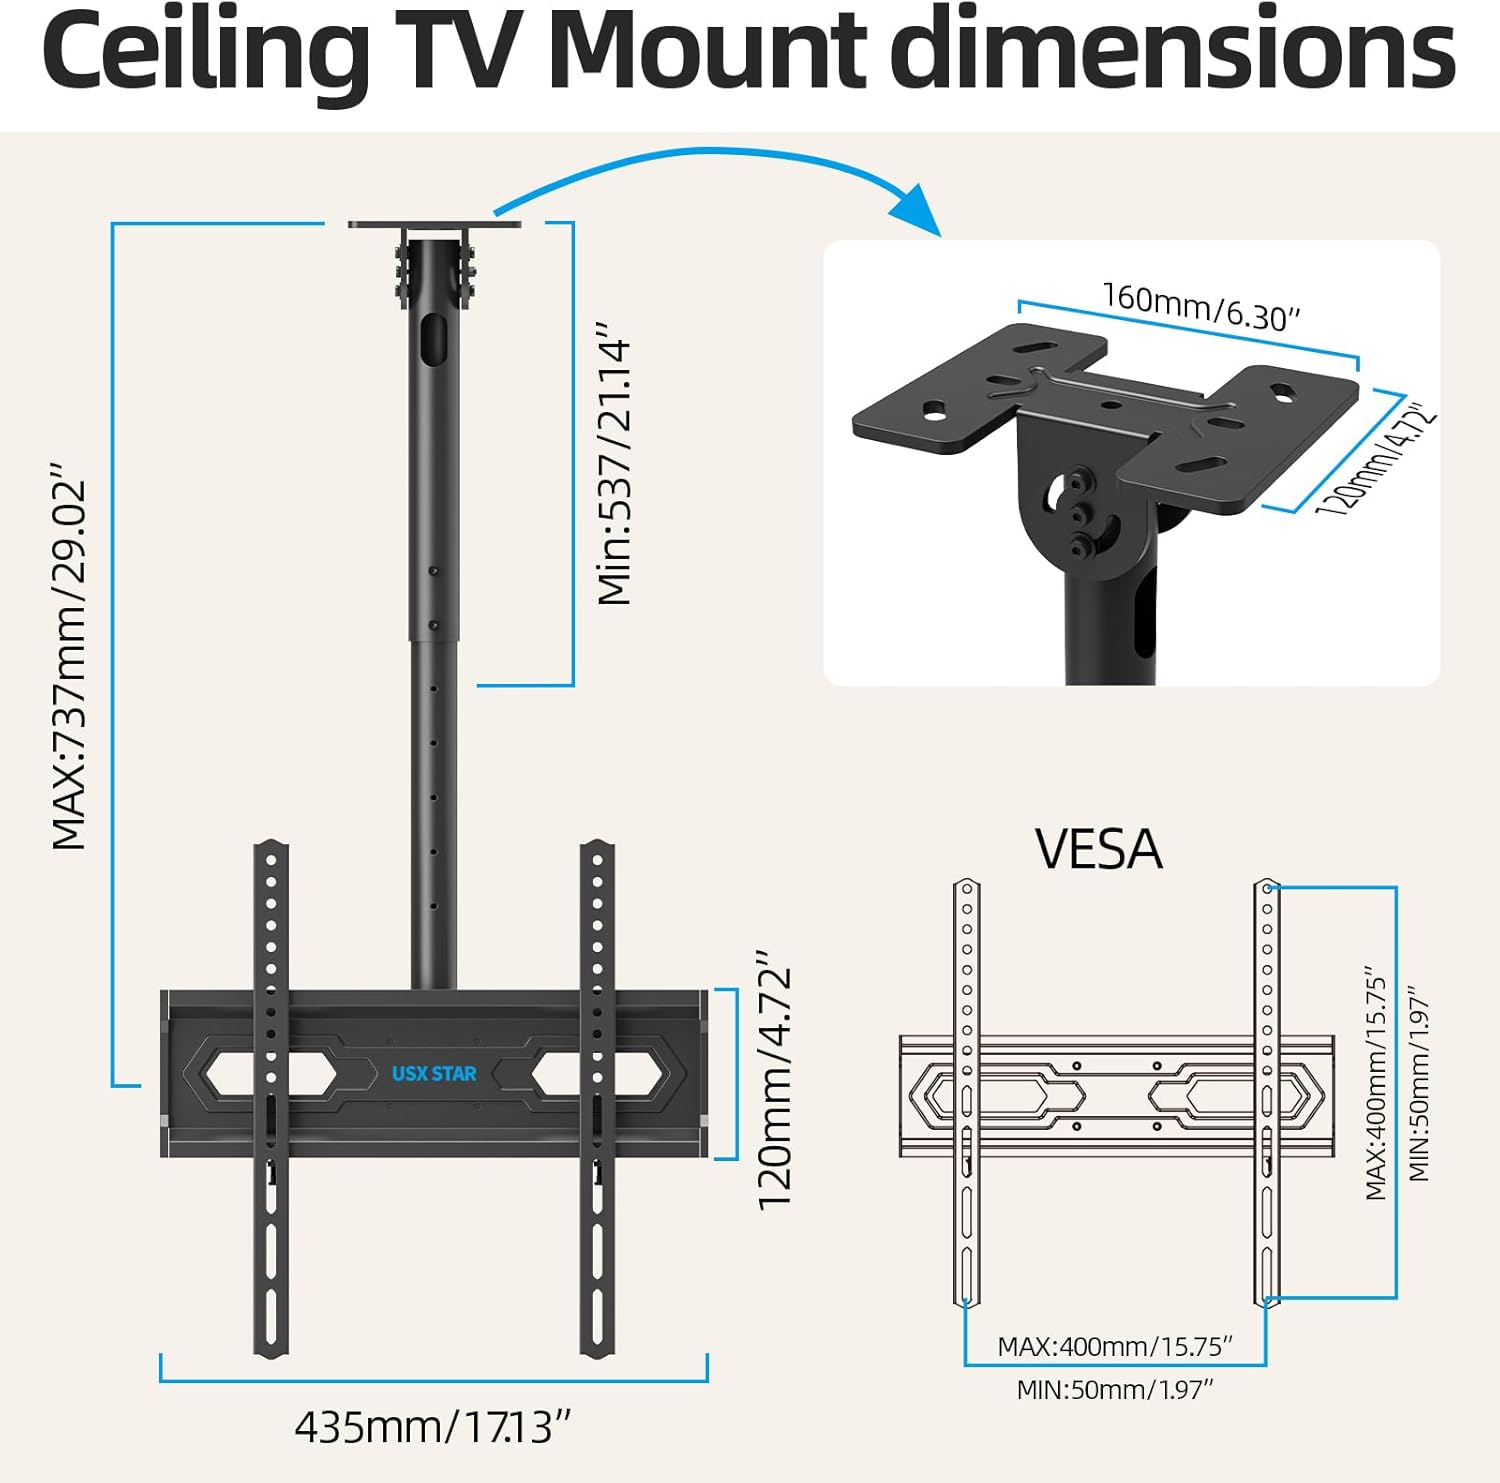
Image: Installation on Various Ceiling Types
5.3 TV 브래킷 부착하기
- TV에 흠집이 생기는 것을 방지하기 위해 부드럽고 깨끗한 표면에 TV 화면이 아래로 향하게 놓으세요.
- Attach the two vertical TV brackets to the back of your television using the appropriate screws, washers, and spacers from the hardware kit. Ensure the brackets are centered and securely fastened to the TV's VESA holes.
5.4 TV 걸기
- With assistance, carefully lift the television and hook the vertical TV brackets onto the TV bracket plate of the ceiling mount.
- Secure the TV to the mount by tightening the safety screws or locking mechanisms on the vertical brackets.
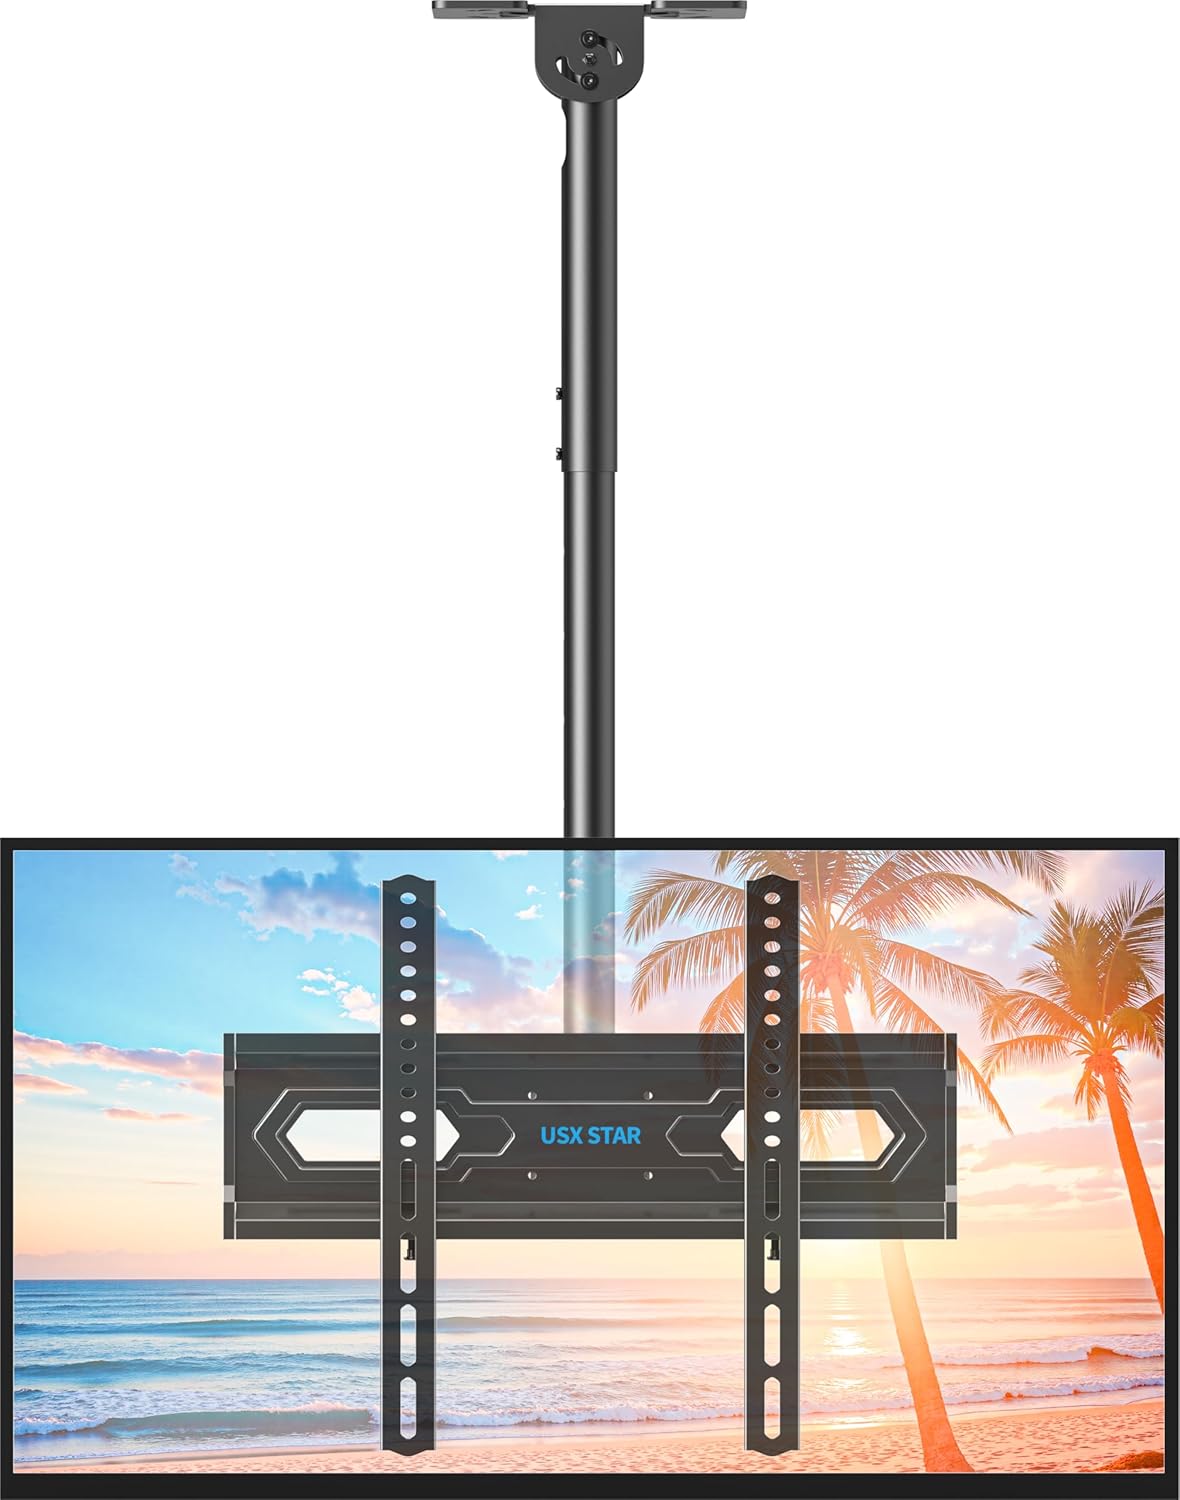
Image: Assembled Ceiling TV Mount with Television
6. 작동 및 조정
The USX STAR SAS202 mount offers multiple adjustment options for optimal view주고받음.
6.1 높이 조정
- The mount features 5 height settings, allowing adjustment from 21.14 inches to 29.02 inches.
- To adjust the height, loosen the locking mechanism on the pole, slide the TV to the desired height, and re-tighten securely.
6.2 기울기 조정
- The TV can be tilted down by up to 15 degrees to reduce glare and achieve a comfortable view잉 각도.
- Use the provided Allen key to loosen the tilt adjustment screws, set the desired tilt, and then re-tighten the screws firmly.
6.3 회전 및 스위블
- The mount allows for a full 360-degree rotation of the TV, enabling view방 안의 여러 위치에서.
- Additionally, the base of the mount can swivel up to 90 degrees, making it suitable for installation on angled or sloped ceilings.
- To adjust swivel, loosen the handle on the mount, rotate the TV to the desired angle, and re-tighten the handle.
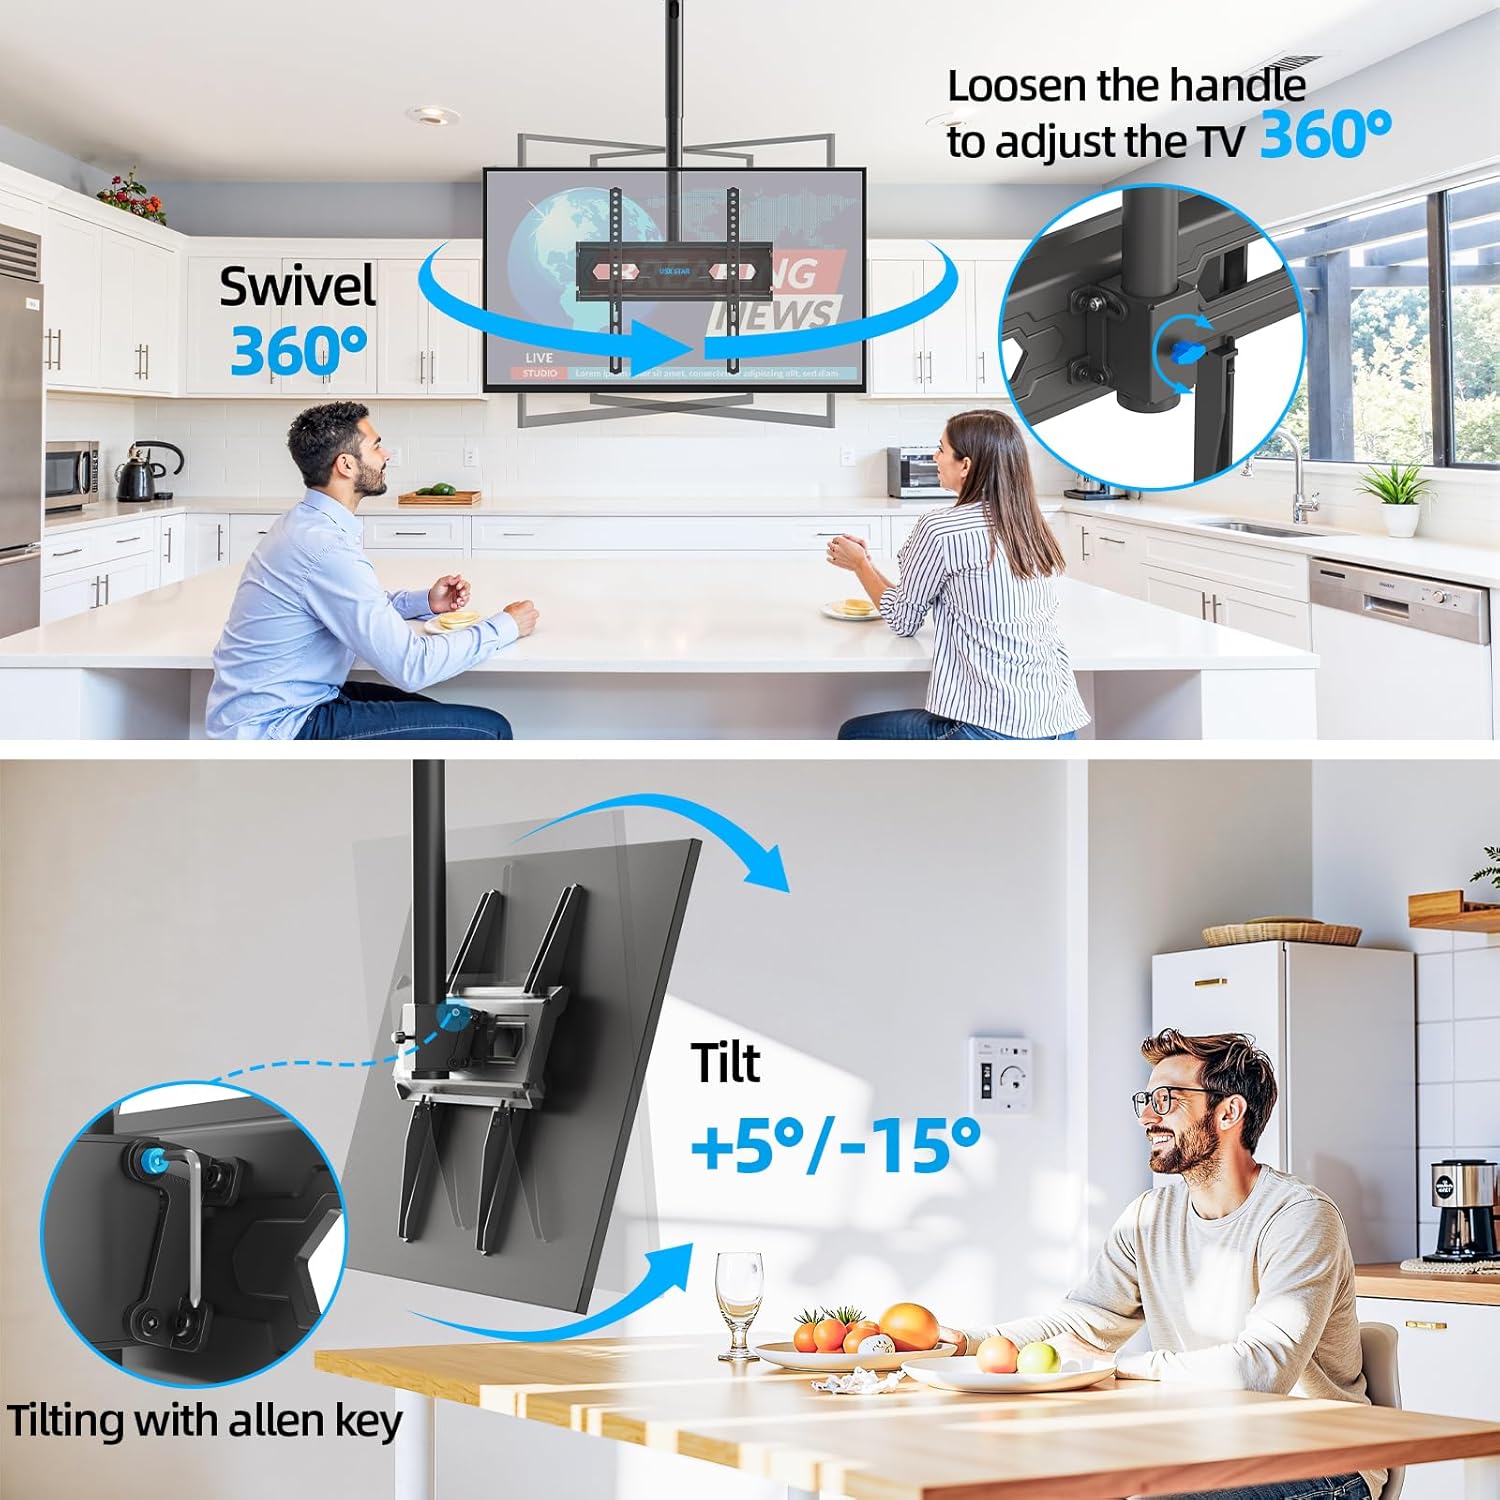
Image: Swivel and Tilt Adjustments

Image: Leveling and Sloped Ceiling Adaptability
7. 유지관리
- 모든 나사와 연결부를 주기적으로 점검하여 단단히 고정되어 있는지 확인하세요.
- 부드럽고 마른 천으로 마운트를 닦으십시오. 연마성 세척제나 용제를 사용하지 마십시오.
- Ensure cables are properly managed through the cable management holes to prevent strain or damage.
8. 문제 해결
- TV가 수평이 아닙니다: Check the leveling screws on the TV bracket plate and adjust as needed. Ensure the ceiling plate was installed level.
- 마운트가 느슨해진 느낌: Re-check all mounting screws on the ceiling plate and TV brackets. Ensure they are tightened securely. Do not overtighten.
- 기울기/회전 조절에 어려움이 있습니다. Loosen the adjustment screws/handles slightly before attempting to move the TV, then re-tighten once the desired position is achieved.
9. 보증 및 지원
USX STAR products are backed by a warranty. For specific warranty details, product support, or assistance with installation, please refer to the warranty card included with your product or visit the official USX STAR website. Our US-based customer service team is available to provide quick responses and support tailored to your needs.
Thank you for choosing USX STAR.