
1. 제품 오버view
The waveshare 8-inch HDMI Display Monitor is a versatile IPS panel touchscreen designed for various applications, including Raspberry Pi, Windows, and Jetson Nano systems. It features a 768x1024 resolution, 10-point capacitive touch, and a wide 178-degree viewing angle. This manual provides instructions for its setup, operation, and maintenance.
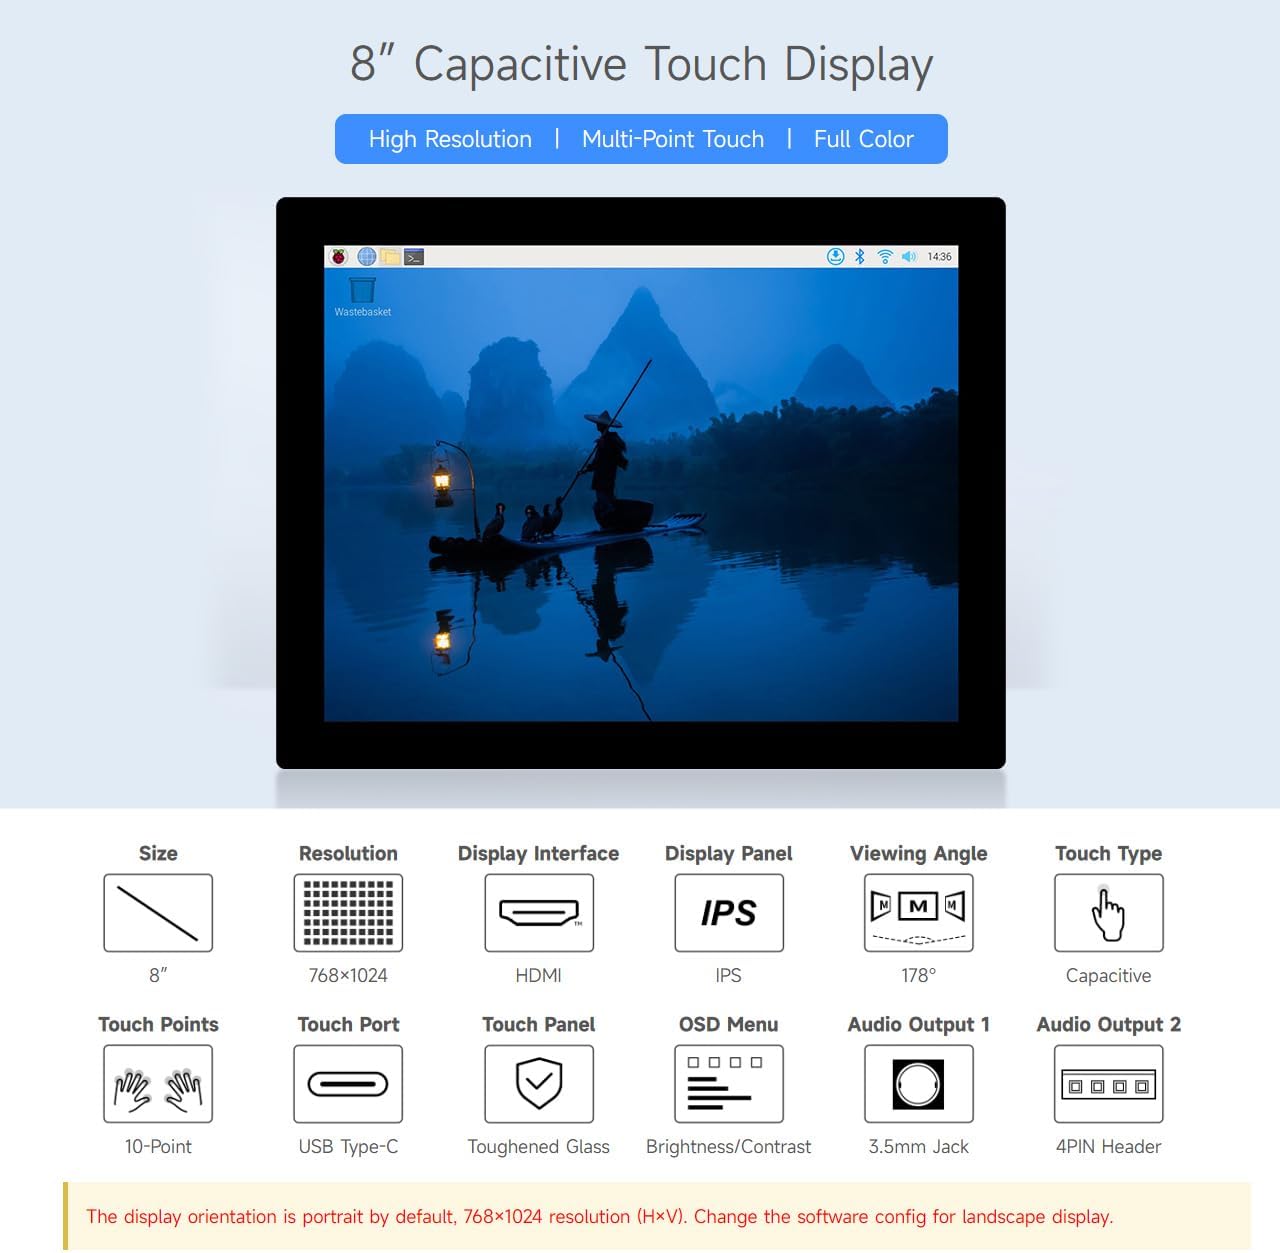
그림 1.1: 위에view of the 8-inch Capacitive Touch Display highlighting its high resolution, multi-point touch, and full-color IPS panel.
2. 패키지 내용물
아래 나열된 모든 품목이 패키지에 포함되어 있는지 확인하세요. 품목이 누락되었거나 손상된 경우 고객 지원팀에 문의하세요.

그림 2.1: 제품 패키지에 포함된 모든 구성품.
- 8-inch 768x1024 LCD (x1)
- HDMI flat cable ~1m (x1)
- USB-A to Type-C cable ~1m (x1)
- HDMI adapter (x1)
- USB to Type-C adapter (B) (x1)
- HDMI to Micro HDMI adapter (x1)
- USB to Type-C adapter (C) (x1)
- Screws pack (x1)
3. 설정 지침
3.1. 인터페이스 소개
Familiarize yourself with the display's interfaces before connecting.

그림 3.1: Labeled interfaces including Power ON/OFF & Brightness Adjustment, Touch Rotation Button, Audio Jack, HDMI Port, Power Supply, Touch Port, and Speaker Header.
- Power ON/OFF & Brightness Adjustment: Controls power and display brightness.
- Touch Rotation Button: For adjusting touch orientation.
- 오디오 잭 : 3.5mm 오디오 출력.
- HDMI 포트 : 비디오 입력.
- 전원 공급 장치: 전원 입력용 USB Type-C 포트.
- Touch Port: USB Type-C port for touch data.
- Speaker Header: 4PIN header for external speakers.
3.2. 시스템 호환성
The display supports a wide range of devices and operating systems:

그림 3.2: Device and system support for Raspberry Pi, Jetson series boards, and Windows PCs.
- 라즈베리 파이: Supports all versions of Raspberry Pi. Compatible with Raspberry Pi OS (10-point touch, driver-free), Ubuntu / Kali / WIN10 IoT (single-point touch, driver-free), and Retropie (driver-free).
- Jetson Series Board: 우분투 운영체제를 지원합니다(싱글포인트 터치, 드라이버 설치 필요 없음).
- PC: Windows 11/10/8.1/8/7을 지원합니다(10점 터치, 드라이버 설치 필요 없음).
3.3. 연결 예amp레
이 예를 따르십시오amples for connecting the display to various host devices.

그림 3.3: Illustrative connection setups for Raspberry Pi 5, Raspberry Pi 4B, Raspberry Pi 3B+, Raspberry Pi Zero 2 W, Jetson Series Board, and a standard PC. Note that additional mini HDMI adapters and USB cables may be required for some setups, and controller boards/hosts are not included.
- 연결 비디오: Use the provided HDMI cable to connect the display's HDMI port to your host device's HDMI output. Use appropriate adapters (e.g., HDMI to Micro HDMI) if necessary.
- Connect Touch(USB): Connect the display's Touch Port (USB Type-C) to a USB port on your host device using the provided USB-A to Type-C cable. This enables touch functionality.
- 전원 연결: Connect the display's Power Supply port (USB Type-C) to a 5V power source (e.g., a USB power adapter or a powered USB port on your host device) using a USB cable. Ensure the power supply meets the display's requirements (e.g., 5V/5A for Raspberry Pi 5, 5V/3A for Raspberry Pi 4B/3B+, 5V/2.5A for Raspberry Pi Zero 2 W).
Note on Display Orientation: The display orientation is portrait by default (768x1024 resolution, HxV). To achieve a landscape display, you will need to change the software configuration on your host device. Refer to your operating system's documentation for display rotation settings.
4. 사용 설명서
4.1. 터치 기능
The display features a 10-point capacitive touch panel with a toughened glass surface for durability.

그림 4.1: The display supports up to 10-point capacitive touch, depending on the operating system, and features a 6H hardness toughened glass panel.
Ensure the USB touch cable is connected to your host device for touch input to function. The touch functionality is driver-free for supported operating systems.
4.2. 백라이트 조정
The display's backlight can be adjusted via software on your connected host device.

그림 4.2: Example of adjusting backlight brightness through a software interface on the display.
Access your operating system's display settings or use specific utilities provided by your system to control the backlight intensity.
4.3. 오디오 출력
The display supports audio output via HDMI. Additionally, it features an onboard 3.5mm headphone jack and a 4PIN speaker header for connecting external audio devices.
- 3.5mm 헤드폰 잭 : Connect standard headphones or external speakers.
- 4PIN Speaker Header: For direct connection of small speakers.
5. 유지관리
디스플레이의 수명과 최적의 성능을 보장하려면 다음 유지 관리 지침을 따르세요.
- 청소: 부드럽고 보풀이 없는 천을 사용하여 화면을 부드럽게 닦으세요. 잘 지워지지 않는 얼룩은 가볍게 닦아주세요.amp물이나 화면에 안전한 세척액을 천에 적셔 사용하세요. 강한 화학 물질, 연마제 또는 화면에 직접 분사하는 것은 피하세요.
- 손질: Handle the display by its edges. Avoid applying excessive pressure to the screen surface.
- 환경: Operate and store the display in a clean, dry environment, away from extreme temperatures, direct sunlight, and high humidity.
- 힘: Always use the recommended 5V power supply. Disconnect power when the display is not in use for extended periods.
6. 문제 해결
디스플레이에 문제가 발생하면 다음의 일반적인 문제 해결 단계를 참조하세요.
- 디스플레이 없음/검은 화면:
- Ensure the HDMI cable is securely connected to both the display and the host device.
- Verify that the display is receiving adequate power (5V). Check the power cable and adapter.
- Confirm the host device's video output is enabled and configured correctly. Try connecting the host device to another monitor to rule out host issues.
- 디스플레이와 호스트 장치를 모두 재시작하십시오.
- 터치가 응답하지 않음:
- Ensure the USB Type-C touch cable is securely connected from the display to the host device.
- For Raspberry Pi, ensure the operating system is configured for touch input.
- For Windows, check Device Manager to see if the touch screen device is recognized and drivers are installed (though it's typically driver-free).
- Try connecting the USB touch cable to a different USB port on your host device.
- 화면 방향이 잘못되었습니다:
- As the display is portrait by default, adjust the display rotation settings within your operating system.
- Use the Touch Rotation Button on the display's circuit board if applicable for touch orientation.
- 오디오 없음:
- Verify that the audio output is selected correctly on your host device (e.g., HDMI audio).
- Ensure speakers or headphones are properly connected to the 3.5mm jack or 4PIN header.
- Check volume levels on both the host device and any connected audio accessories.
이러한 단계를 거쳐도 문제가 해결되지 않으면 지원 섹션을 참조하여 추가 지원을 받으세요.
7. 사양
| 특징 | 사양 |
|---|---|
| 상표 | 웨이브쉐어 |
| 모델 번호 | 8inch 768x1024 LCD |
| 화면 크기 | 8 인치 |
| 해결 | 768x1024 Pixels (Portrait by default) |
| 디스플레이 유형 | IPS LCD |
| View잉 각도 | 178도 |
| 터치타입 | 10포인트 정전식 터치 |
| 화면 표면 | Glossy, Toughened Glass (6H hardness) |
| 연결성 | HDMI (Video), USB Type-C (Touch & Power) |
| 오디오 출력 | HDMI Audio, 3.5mm Headphone Jack, 4PIN Speaker Header |
| 새로 고침 빈도 | 60Hz |
| 권tage | 5 볼트 |
| 품목 무게 | 0.43 킬로그램 |
| 품목 치수(D x W x H) | 0.43인치(깊이) x 7.4인치(너비) x 5.79인치(높이) (약 11mm(깊이) x 188mm(너비) x 147.3mm(높이)) |
| 호환 장치 | Raspberry Pi (all versions), Windows 11/10/8.1/8/7, Jetson Nano, Desktop, Laptop |
그림 7.1: Detailed dimensions of the display unit in millimeters.
8. 보증 정보
This waveshare 8-inch HDMI Display Monitor comes with a 1년 제조사 보증. Please retain your proof of purchase for warranty claims. The warranty covers defects in materials and workmanship under normal use. It does not cover damage caused by misuse, accidents, unauthorized modifications, or improper installation.
9. 지원
For technical support, product inquiries, or warranty claims, please contact waveshare customer service through their official website or the platform where the product was purchased. Have your product model number (8inch 768x1024 LCD) and purchase details ready when contacting support.
You can often find additional resources, drivers, and detailed guides on the waveshare official web대지: www.waveshare.com