1. 서론
The OSD Audio DAC-X200 is a powerful 2-channel Class D stereo amplifier designed to deliver high-fidelity audio. It features a built-in Hi-Res 24bit/192khz DAC, offering superior digital audio conversion. With versatile input options including USB, Optical, and RCA, and A/B speaker switching, this amplifier is suitable for various home audio setups, from driving bookshelf speakers to powering floorstanding units.
2. 안전 지침
- 전원: 본 기기는 지정된 전원 공급 장치에만 연결하십시오.tage.
- 통풍: 충분한 환기를 유지하세요. 환기구를 막지 마세요.
- 물과 습기: 본 제품을 비, 습기 또는 과도한 습도에 노출시키지 마십시오.
- 열원: 장치를 라디에이터, 난방 조절기, 스토브 또는 기타 열을 발생시키는 기기와 같은 열원으로부터 멀리 두십시오.
- 청소: 마른 천으로만 닦으십시오.
- 서비스: 이 제품을 직접 수리하려고 하지 마십시오. 모든 서비스는 자격을 갖춘 서비스 담당자에게 문의하십시오.
- 놓기: Place the unit on a stable, flat surface. Avoid placing heavy objects on top of the amp리퍼.
3. 패키지 내용
패키지에 모든 품목이 들어 있는지 확인하세요.
- OSD Audio DAC-X200 Amp리퍼
- 빠른 시작 가이드
- 전원 케이블
- 리모컨 (모델에 포함된 경우)
4. 제품 오버view
4.1 전면 패널
전면 패널을 통해 일상 작업에 필요한 필수 제어 기능에 접근할 수 있습니다.

그림 4.1: 앞쪽 view of the DAC-X200 amplifier, showing the power button, speaker selectors, balance, and volume controls.

그림 4.2: Detail of the front panel, highlighting the Power button and Speaker A/B selection buttons.

그림 4.3: Detail of the front panel, showing the Balance and Volume control knobs.
4.2 후면 패널
The rear panel houses all input and output connections for audio sources and speakers.
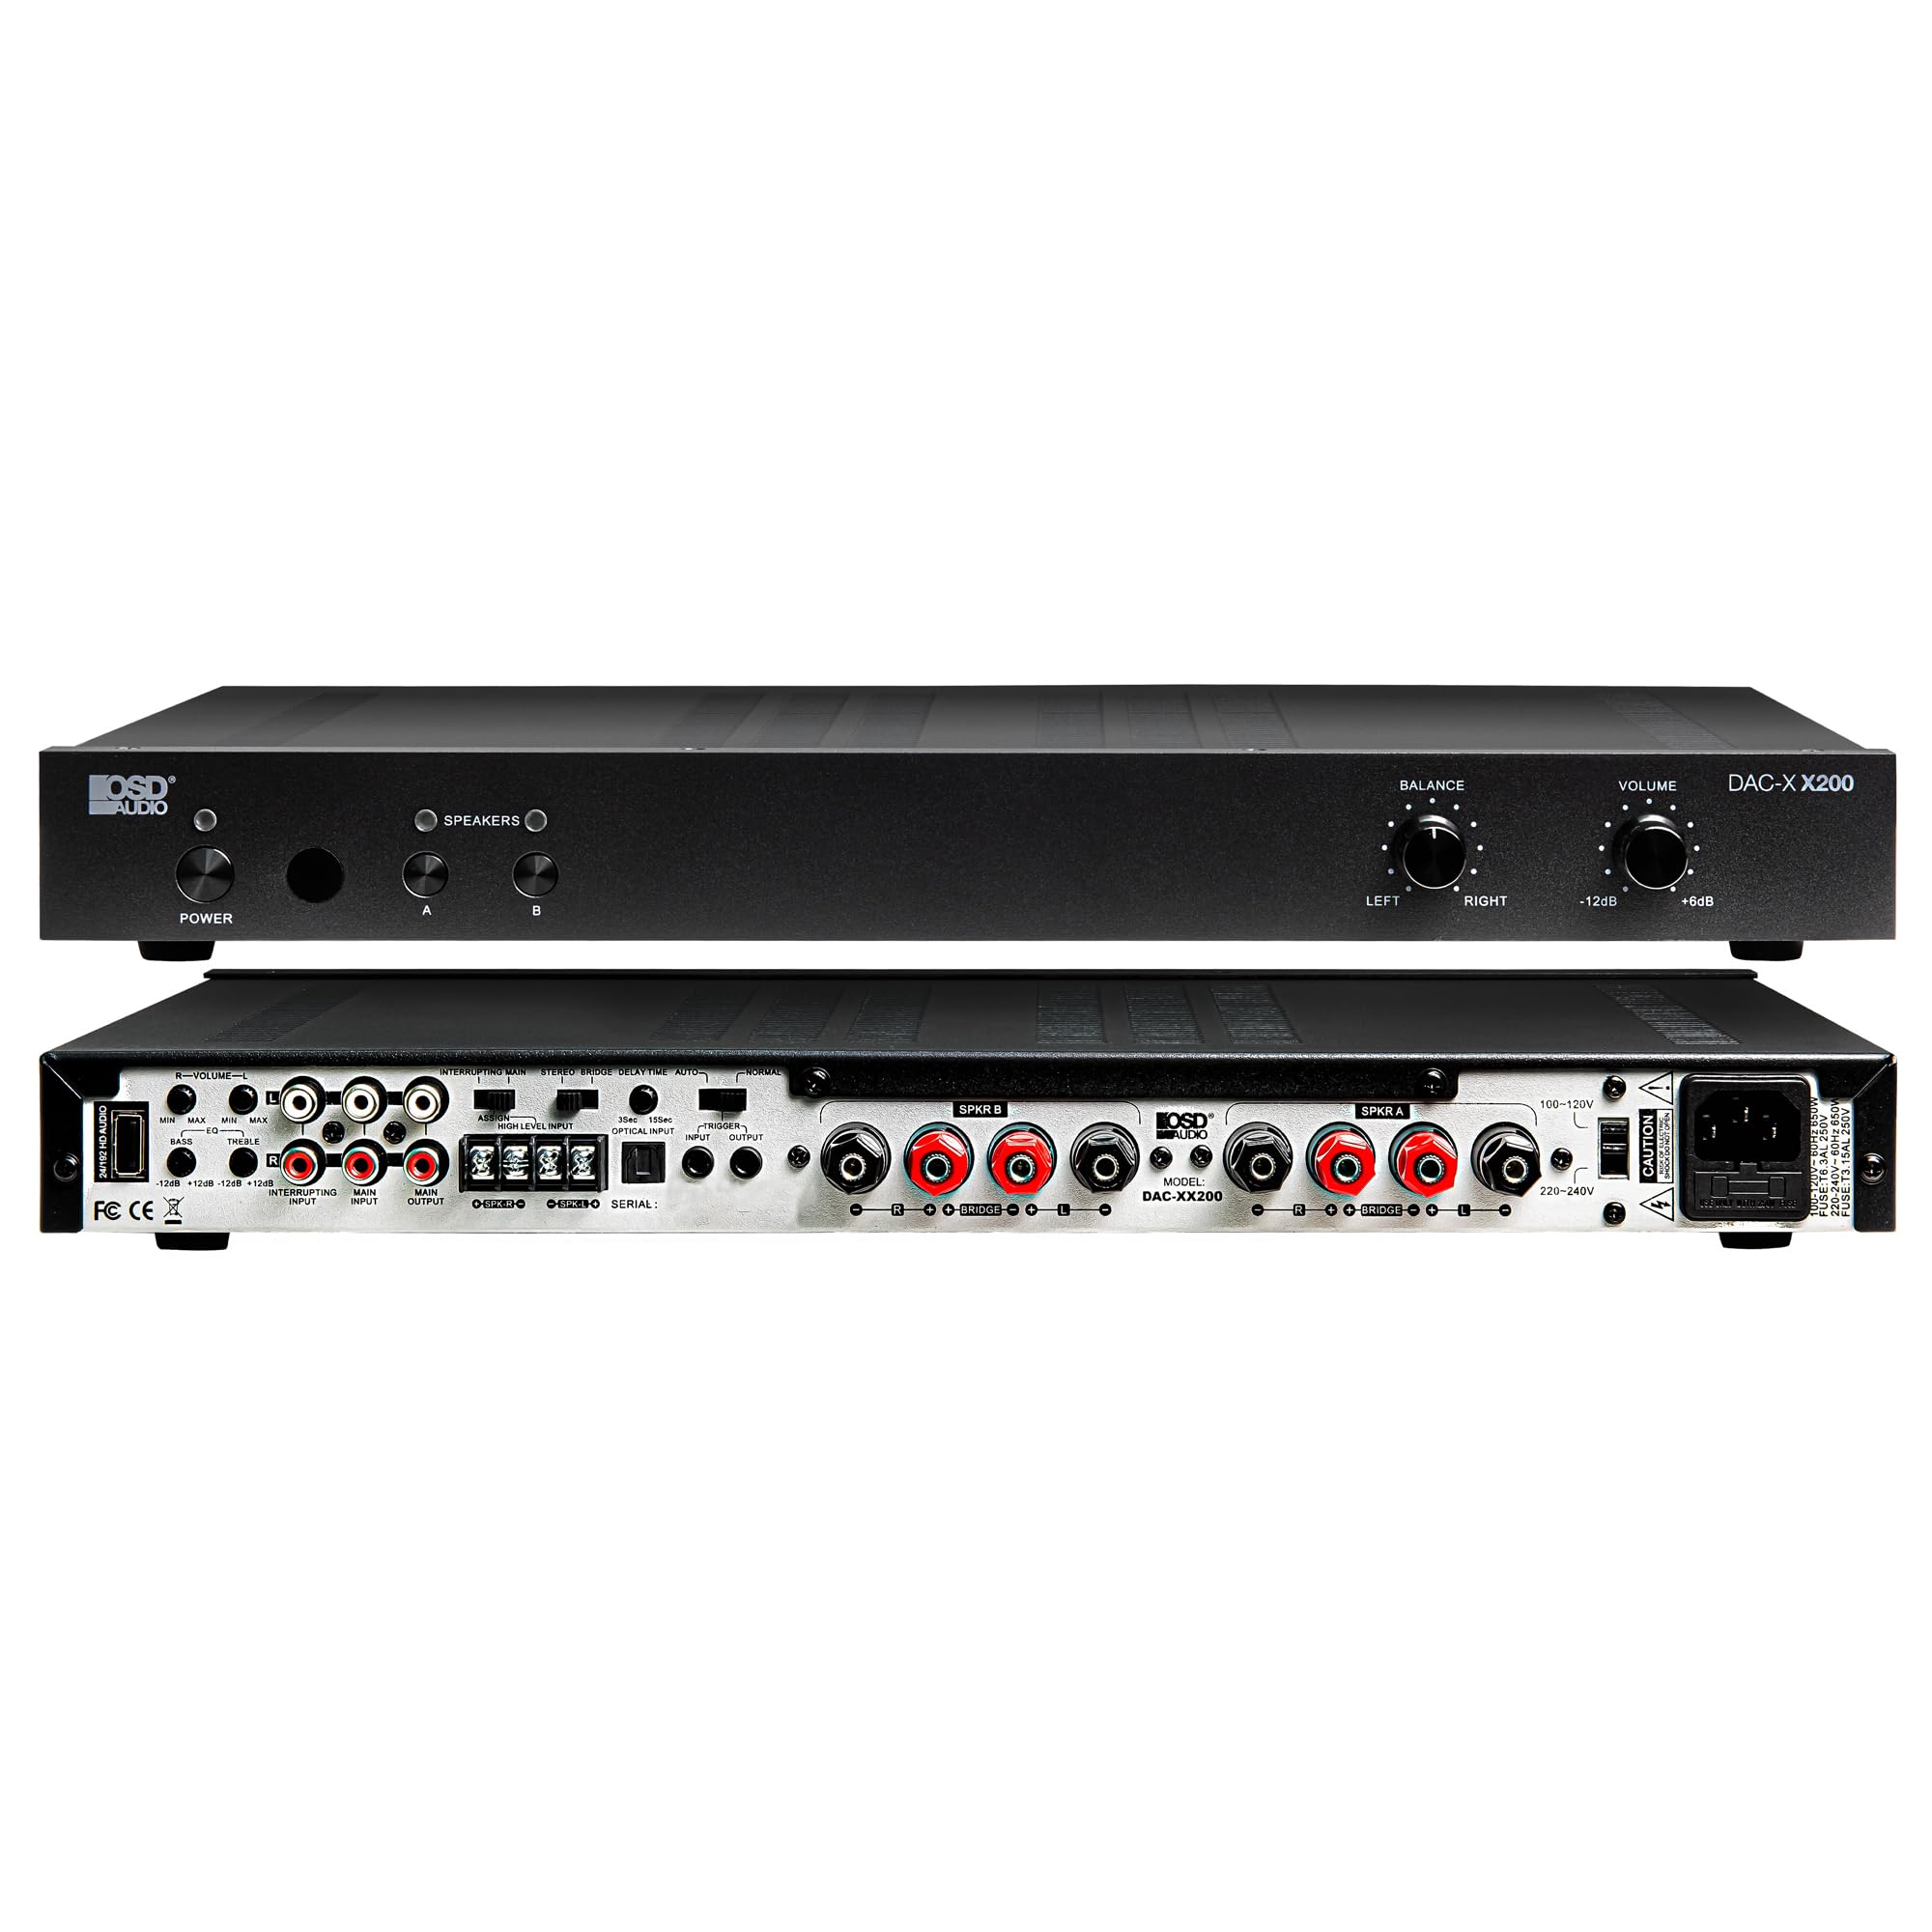
그림 4.4: 뒤쪽 view of the DAC-X200 amplifier, displaying various audio inputs (USB, Optical, RCA), speaker outputs, and power input.

그림 4.5: Detail of the rear panel inputs, including USB, Optical, and RCA connections.

그림 4.6: Detail of the rear panel speaker output terminals for Speaker A and Speaker B.
5. 설정
5.1 배치
Place the DAC-X200 on a flat, stable surface with adequate space around it for ventilation. Avoid enclosed cabinets or areas with poor airflow to prevent overheating.
5.2 스피커 연결하기
- 확인하십시오 amplifier의 전원이 꺼져 있고 플러그가 뽑혀 있습니다.
- 패시브 스피커를 스피커 A 그리고/또는 스피커 B terminals on the rear panel. Observe correct polarity (+ to + and - to -).
- For optimal performance, use high-quality speaker wire.
5.3 오디오 소스 연결
The DAC-X200 supports multiple input types:
- USB 입력 : Connect a computer or other USB audio source using a Type A to Type A USB 2.0 cable.
- 광학 입력: Connect digital audio sources like TVs or CD players using an optical cable.
- RCA 입력: Connect analog audio sources such as music streamers, turntables (with a pre-amp), or other devices using RCA cables.
5.4 전원 연결
After all audio and speaker connections are made, connect the supplied power cable to the amp앰프의 전원 입력 단자에 연결한 다음 적절한 AC 전원 콘센트에 연결하십시오.
6. 사용 설명서
6.1 전원 켜기/끄기
를 누르세요 힘 전면 패널의 버튼을 눌러 켜세요 amp앰프가 켜져 있는지 꺼져 있는지 여부. 전원 표시등은 제품이 켜져 있을 때 켜집니다.
6.2 입력 선택
The DAC-X200 features smart source switching, automatically detecting and switching to an active input. If multiple inputs are active, you may need to manually select the desired input using the remote control (if applicable) or by cycling through inputs.
6.3 볼륨 조절
전체 출력 볼륨을 조절하려면 다음을 사용하십시오. 용량 knob on the front panel. Rotate clockwise to increase volume and counter-clockwise to decrease it.
6.4 톤 컨트롤
사용하세요 균형 knob to adjust the left/right channel balance. The DAC-X200 also includes bass and treble adjustment knobs (located on the rear panel or accessible via remote, depending on model variation) to fine-tune the sound to your preference or room acoustics.
6.5 A/B Speaker Switching
를 누르세요 A or B buttons on the front panel to select which set of speakers (Speaker A, Speaker B, or both) are active. This allows for multi-room audio configurations.
7. 유지관리
- 청소: 부드럽고 마른 천을 사용하여 외부를 청소하십시오. amp세정제. 액체 세제나 에어로졸은 사용하지 마세요.
- 통풍: 주기적으로 환기구에 먼지나 이물질이 없는지 확인하세요.
- 저장: 장기간 보관할 경우, 전원 콘센트에서 플러그를 뽑고 서늘하고 건조한 곳에 보관하세요.
8. 문제 해결
| 문제 | 가능한 원인 | 해결책 |
|---|---|---|
| 전원이 없습니다 | 전원 케이블이 연결되지 않았습니다. 전원 콘센트가 작동하지 않습니다. Amp리퍼 꺼. | Check power cable connection; Test power outlet; Press the Power button. |
| 소리가 나지 않습니다 | Incorrect input selected; Speaker cables loose; Volume too low; Speakers A/B not selected. | Select correct input; Check speaker connections; Increase volume; Ensure Speaker A or B is active. |
| 왜곡된 소리 | Input signal too high; Speaker impedance mismatch; Faulty cable. | Reduce source volume; Verify speaker impedance (8̣ or 4̣); Replace audio cables. |
| Input not switching automatically | Multiple active sources; Specific source not detected. | Manually select input; Ensure only one source is playing if auto-switching is desired. |
9. 사양
- 모델: DAC-X200
- 출력 전력: 100W RMS per channel at 8̣; 225W RMS per channel at 4̣; 450W bridged mono
- 채널 수: 2
- DAC : Hi-Res 24bit/192khz, DSD formats supported
- 입력: USB, Optical, RCA
- 스피커 존: A/B Switching
- 치수(길이 x 너비 x 높이): 16.7 x 10 x 2 인치
- 재료 유형: 플라스틱
- 한국어: 810074881173
10. 보증 정보
OSD Audio products are designed for reliability and performance. This product is covered by a limited warranty against defects in materials and workmanship. Please refer to the official OSD Audio web보증 기간 및 보장 범위 등 구체적인 보증 조건은 웹사이트 또는 구매 증빙 서류를 참조하십시오. 보증 청구를 위해 구매 증빙 서류를 보관하십시오.
11. 지원
For technical assistance, troubleshooting not covered in this manual, or service inquiries, please contact OSD Audio customer support. You can find contact information, FAQs, and additional resources on the official OSD Audio web대지.
Web대지: www.osdaudio.com