
소개
This manual provides comprehensive instructions for the Dapper Supply DP-FM1303 13-inch Floor Buffer Polisher Machine. This multi-functional machine is designed for cleaning, buffing, scrubbing, and polishing various floor surfaces, including carpets. It features a high-torque random orbit motor, a 13-inch cleaning path, and a 350-Watt pure copper motor for consistent performance. An optional 1-gallon solution tank is included for wet cleaning applications.
안전 정보
Read all safety warnings and instructions before operating this machine. Failure to follow these instructions may result in electric shock, fire, or serious injury. Keep this manual for future reference.
- Always ensure the machine is unplugged before assembly, disassembly, or maintenance.
- 습한 환경이나 가연성 액체 또는 가스 근처에서 기계를 작동하지 마십시오.
- 손, 발, 헐렁한 의복을 움직이는 부품에 가까이 하지 마십시오.
- 제조업체에서 승인한 부착물과 액세서리만 사용하세요.
- Ensure the power cord is not damaged and avoid tripping hazards.
- The machine features an anti-collision buffer rubber ring on the nose edge to reduce impact during operation.
- 기기를 어린이의 손이 닿지 않는 건조하고 안전한 장소에 보관하십시오.
무엇이 포함됩니까?
The Dapper Supply DP-FM1303 includes the following components:
- Floor Buffer Polisher Machine Unit
- Optional 1-Gallon Solution Tank
- Hard Brush for Hard Floors (Red)
- Soft Brush for Carpets (Yellow)
- Set of 3 Scouring Pads for Polishing (Light Abrasive, Medium Abrasive, Heavy Duty Abrasive)
- 조립 도구 (예: 육각 렌치)

그림 1: 포함된 구성 요소
명세서
| 특징 | 사양 |
|---|---|
| 모델 번호 | DP-FM1303 |
| 청소 경로 | 13인치 |
| 모터 파워 | 350 Watts (Pure Copper High-Power Motor) |
| 최대 전력 | 500 와트 |
| 속도 | 1440 RPM |
| 코드 길이 | 43 피트 |
| 권tage | 110볼트(AC) |
| 품목 무게 | 21.68kg(약 47.8파운드) |
| 제품 치수 | 33.02 x 33.02 x 121.92cm(13 x 13 x 48인치) |
| 재료 | Aluminum (Main Bracket) |
| 포함된 구성 요소 | Hard Brush, Soft Brush, 3 Scouring Pads |
설정
Follow these steps to assemble your Dapper Supply DP-FM1303 Floor Buffer Polisher Machine:
- 손잡이 부착: Secure the handle to the main shaft using the provided screws and Allen wrench. Ensure it is firmly tightened.
- 전원 케이블 연결: Plug the power cable into the machine's motor unit. Secure the cable along the handle using the provided clips.
- Install Solution Tank (Optional): If using the solution tank, attach it to the handle bracket and secure it. Connect the solution hose from the tank to the machine's dispensing port.
- Attach Brush or Pad: Tilt the machine back to access the base. Align the desired brush (hard or soft) or scouring pad onto the velcro base. Ensure it is centered and securely attached.
Video 1: Multi-Surface Floor Buffer/Scrubber Installation Guide. This video demonstrates the assembly process, including attaching the handle, connecting the power cable, installing the solution tank, and attaching different brushes.
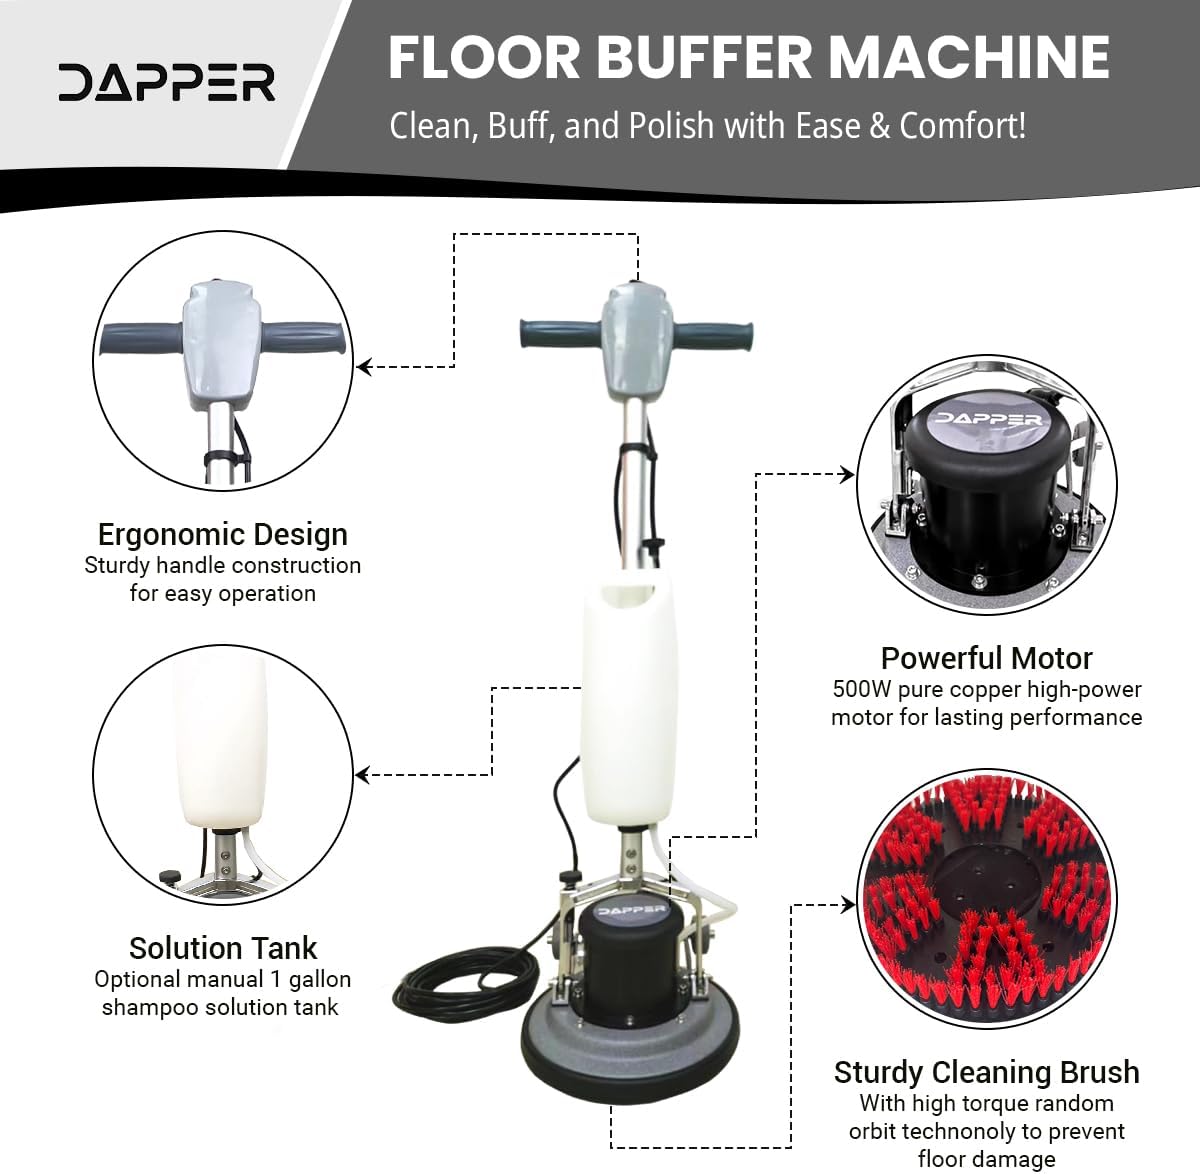
Figure 2: Key Components and Assembly Points
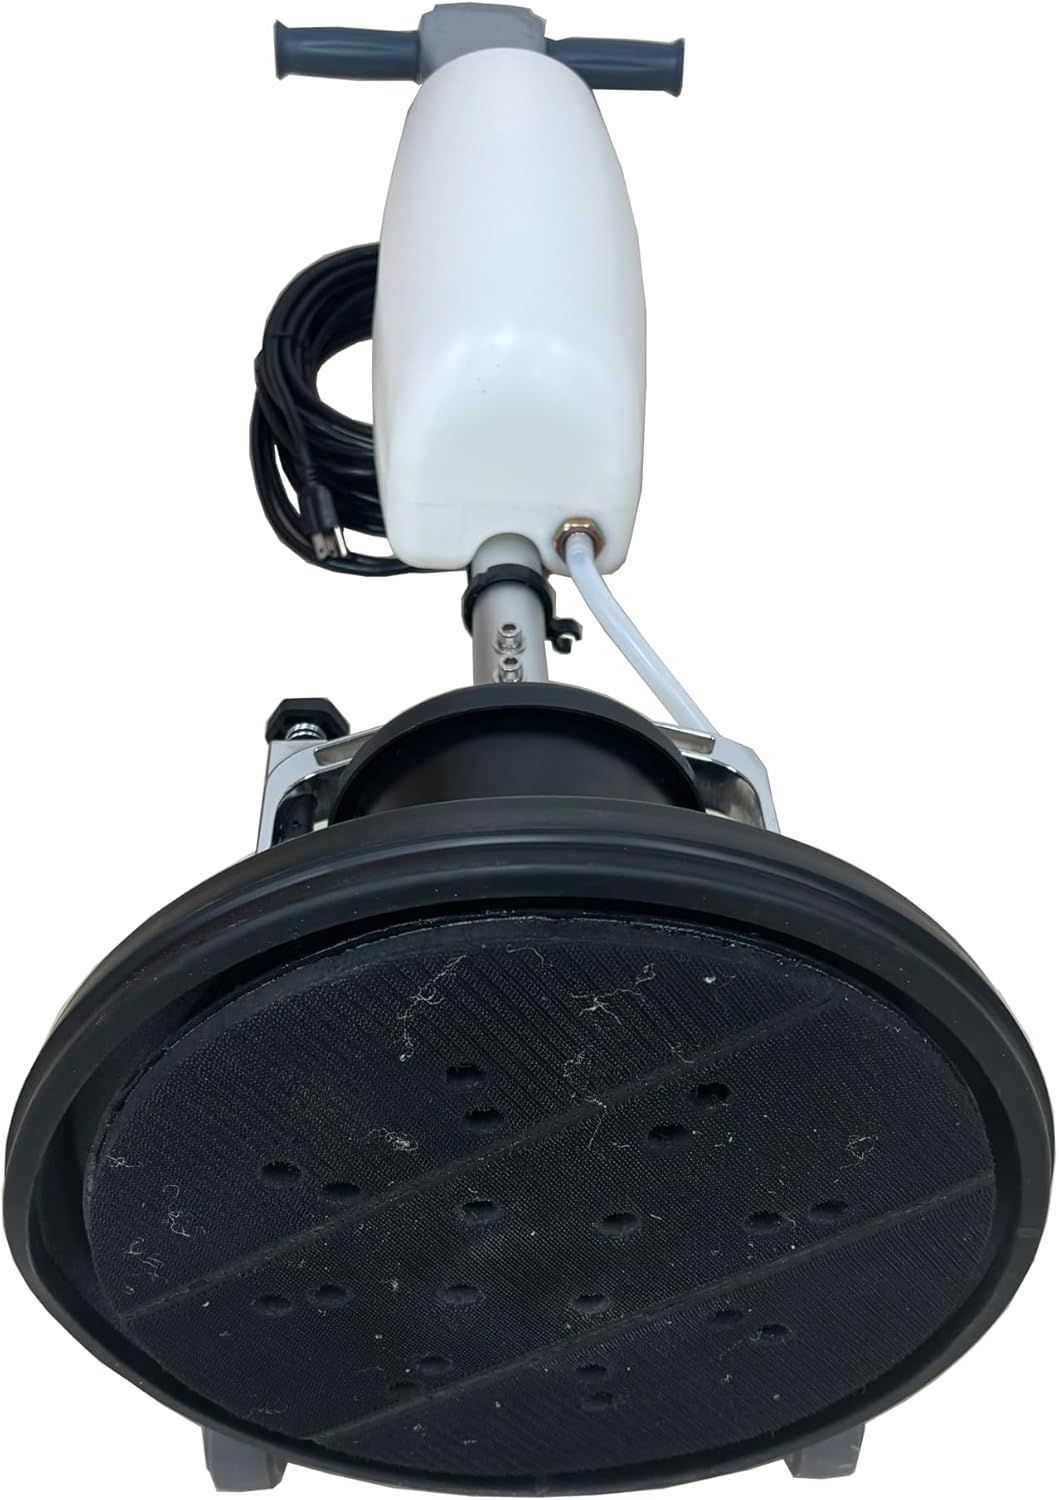
Figure 3: Brush/Pad Attachment Mechanism
작동 지침
The DP-FM1303 is designed for versatile floor care. Always ensure the correct brush or pad is installed for your specific floor type and task.
일반 작업:
- 지역 준비: Clear the floor of any loose debris or obstacles.
- 첨부파일 선택: Choose the appropriate brush or pad for your task (e.g., hard brush for concrete, soft brush for carpet, scouring pads for polishing).
- Fill Solution Tank (if applicable): For wet cleaning or scrubbing, fill the optional 1-gallon solution tank with the appropriate cleaning solution.
- 플러그인: Connect the 43-foot power cord to a suitable electrical outlet (110V AC).
- 머신 시작: Press the power switch located on the handle to turn on the machine. The machine's counterweighted head provides pressure for effective cleaning.
- Guide the Machine: Gently guide the machine across the floor. The random orbit motor and bidirectional cleaning action help prevent gouges and swirls.
- Dispense Solution: If using the solution tank, adjust the flow valve to dispense the cleaning solution as needed.
- 마치다: Once the task is complete, turn off the machine, unplug it, and clean the attachments.
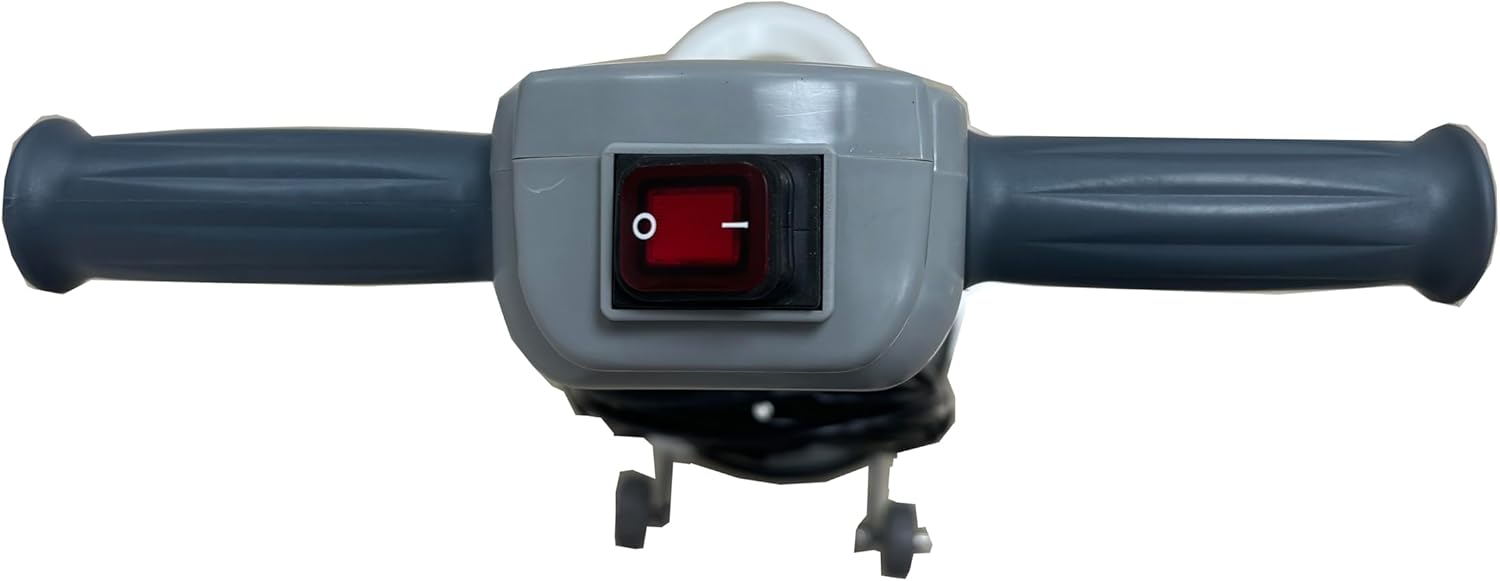
Figure 4: Power Switch on Handle
응용 프로그램:
- 스크러빙: Use the hard brush for concrete, tile, and other hard surfaces. The soft brush is suitable for carpets.
- Buffing & Polishing: Use the appropriate scouring pads for buffing and polishing hardwood, vinyl, marble, and travertine floors.
- 카펫 청소: The soft brush and solution tank can be used for shampooing and deep cleaning carpets.

Figure 5: Machine in use on various floor types
유지
Regular maintenance ensures the longevity and optimal performance of your DP-FM1303 machine.
- 사용 후마다 세척: After each use, remove the brush or pad and rinse it thoroughly. Clean the machine's base and exterior with a damp 옷감.
- Empty Solution Tank: If the solution tank was used, empty any remaining solution and rinse the tank and hose with clean water to prevent clogging.
- 전원 코드 검사: Regularly check the 43-foot power cord for any signs of damage, fraying, or cuts. Replace if damaged.
- 올바르게 보관하세요: Store the machine in a dry, clean environment. The sturdy tires allow for effortless moving and storage.
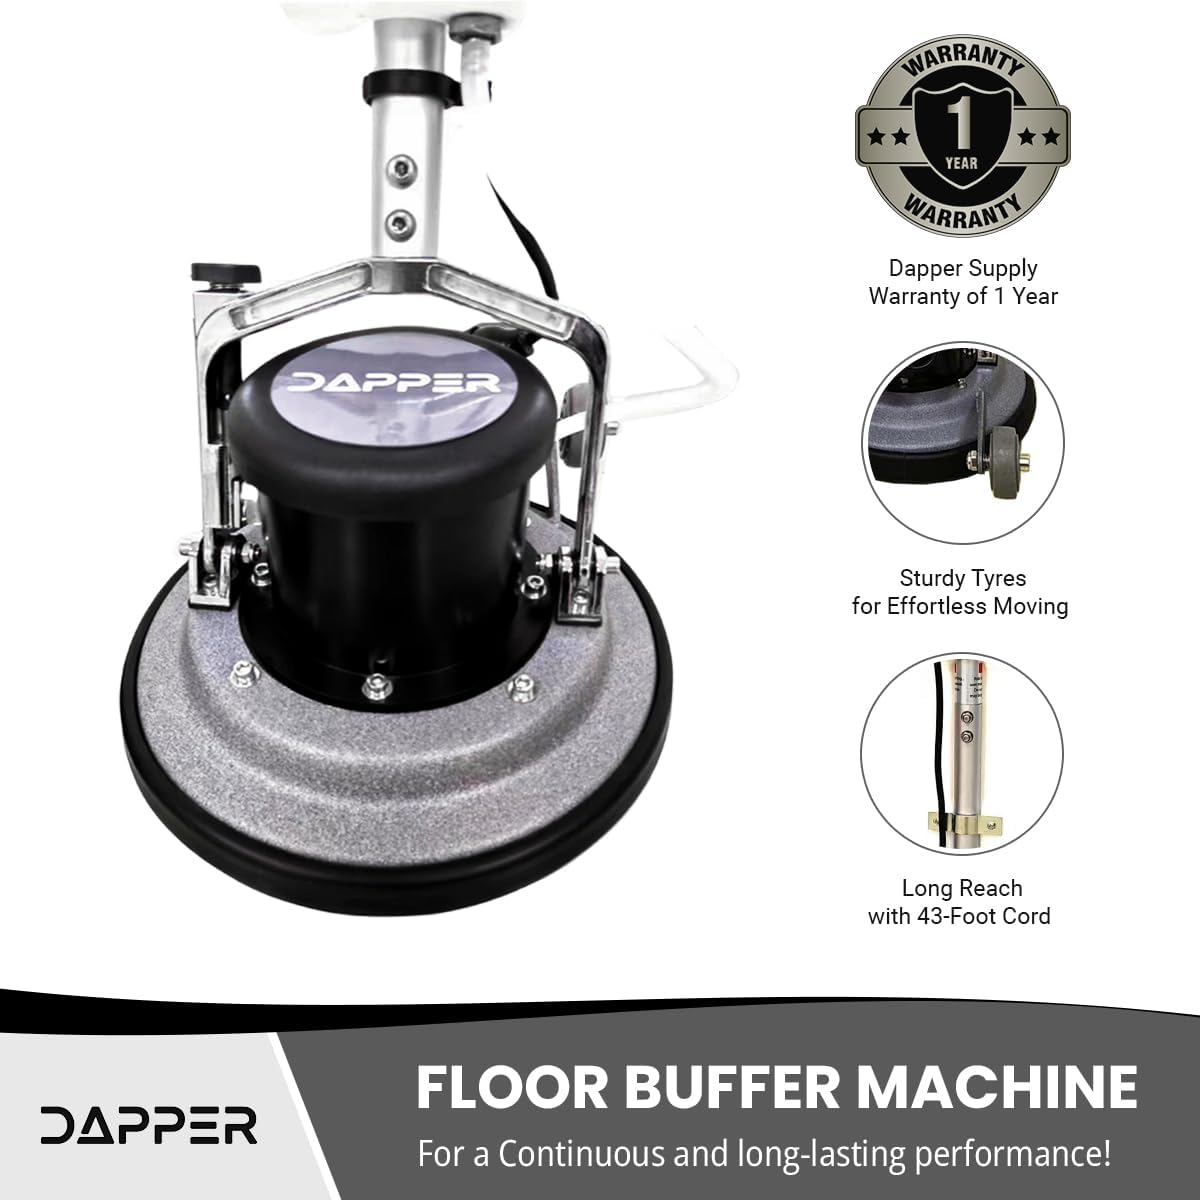
Figure 6: Machine with Sturdy Tires and Long Cord
문제 해결
If you encounter issues with your DP-FM1303 machine, refer to the following common troubleshooting steps:
- 기계가 시작되지 않습니다:
- 전원 코드가 제대로 작동하는 콘센트에 제대로 꽂혀 있는지 확인하세요.
- Check the power switch on the handle to ensure it is in the 'ON' position.
- 전원 코드에 눈에 띄는 손상이 있는지 검사하십시오.
- 세척 성능이 좋지 않음:
- Verify that the correct brush or pad is installed for the floor type and task.
- Check if the brush or pad is worn out and needs replacement.
- Ensure the solution tank (if used) contains sufficient cleaning solution and the flow valve is open.
- Machine Vibrates Excessively:
- Ensure the brush or pad is properly centered and securely attached to the base.
- Check for any foreign objects caught in the brush or motor area.
If problems persist after attempting these steps, contact Dapper Supply customer support.
보증 및 지원
The Dapper Supply DP-FM1303 Floor Buffer Polisher Machine comes with a 1년 제조사 보증. This warranty covers manufacturing defects and malfunctions under normal use.
For warranty claims, technical assistance, or any questions regarding your product, please contact Dapper Supply customer support through their official channels. Keep your purchase receipt as proof of purchase for warranty validation.
Figure 7: 1-Year Manufacturer Warranty