
1. 서론
This manual provides detailed instructions for the installation, operation, and maintenance of your EVTSCAN Digital Thermoregulator. This device is designed to precisely control heating equipment, such as wall-mounted boilers and gas boilers, ensuring a stable and energy-efficient temperature environment. Please read this manual thoroughly before installation and use to ensure proper function and safety.
2. 안전 정보
기기 손상이나 부상을 방지하기 위해 항상 다음 안전 수칙을 준수하십시오.
- 설치 또는 유지 관리 전에 전원 공급 장치가 분리되어 있는지 확인하십시오.
- 전기 배선에 대해 잘 모르시는 경우, 설치는 자격을 갖춘 전문가에게 맡기셔야 합니다.
- 기기를 물이나 과도한 습기에 노출시키지 마세요.
- Use only the specified battery type (2 AA batteries) and ensure correct polarity.
- 장치를 가연성 물질 가까이에 두지 마십시오.
3. 제품 오버view
The EVTSCAN Digital Thermoregulator features a clear LCD display for easy monitoring and a simple interface for temperature control. Its compact design allows for discreet integration into your living space.

그림 3.1: 전면 view of the Digital Thermoregulator. The LCD screen displays current settings and room temperature, with a rotary knob below for adjustments.
주요 구성 요소:
- LCD 디스플레이: Shows set temperature, room temperature, time, and operational icons.
- 조절 노브/버튼: 메뉴 탐색 및 설정 조정에 사용됩니다.
- 배터리 칸: Located on the rear or side for 2 AA batteries.
- 배선 터미널: For connection to the heating system.
4. 사양
| 특징 | 사양 |
|---|---|
| 모델 | EVTSCANok0g9ct2zq |
| 전원 모드 | AA 배터리 2개 (포함되지 않음) |
| Screen Accuracy | 0.5℃ |
| 프로브 센서 | NTC(10k) 1% |
| 접점 용량 | Greater than 30-230 V DC working voltage, lower current. Reference: 5 A 30 V (HF relay) or 2 A 30 V (NEC relay) |
| 온도 표시 범위 | 1~40℃ |
| 기본 온도 조절 범위 | 5~35℃ |
| 작동 온도 범위 | 0~50℃ |
| 실행 프로그램 | Set once a week |
| 산출 | 스위칭 릴레이 |
| 재료 | 난연성 폴리카보네이트 |
| 무게 | 170g |
5. 설정 및 설치
The EVTSCAN Digital Thermoregulator is designed for simple installation. Follow these steps carefully:
5.1. 개봉 및 검사
모든 구성품을 포장에서 조심스럽게 꺼내세요. 포장 내용물에 나열된 모든 품목이 들어 있고 손상되지 않았는지 확인하세요.
- 1 Digital Temperature Controller
- 나사 2개
5.2. 배터리 설치
The device requires 2 AA batteries for operation. These are not included in the package.
- Locate the battery compartment on the back of the thermoregulator.
- 배터리 덮개를 엽니다.
- AA 배터리 2개를 올바른 극성(+/-)에 맞춰 넣으세요.
- 배터리 덮개를 단단히 닫으세요.

그림 5.1: 각도 view of the thermoregulator, illustrating its compact size and potential location for battery access or mounting points.
5.3. 장착 및 배선
The thermoregulator is designed for wall mounting. Ensure the power to your heating system is turned off before proceeding with wiring.
- 직사광선, 외풍 또는 온도 측정에 영향을 줄 수 있는 열원으로부터 떨어진 실내 벽면의 적절한 위치를 선택하십시오.
- Mount the backplate (if detachable) to the wall using the provided screws.
- Connect the thermoregulator to your boiler or heating system according to the wiring diagram provided with your boiler and the thermoregulator's terminal markings. This typically involves connecting the switching relay output to the boiler's control input.
- Secure the thermoregulator onto the mounted backplate.
메모: For wiring, consult a qualified electrician if you are unfamiliar with electrical installations.
6. 사용 설명서
The EVTSCAN Digital Thermoregulator uses a microcomputer control technology to maintain your desired temperature efficiently.
6.1. Powering On and Initial Display
Once batteries are installed, the LCD display will illuminate, showing the current room temperature, set temperature, and time.
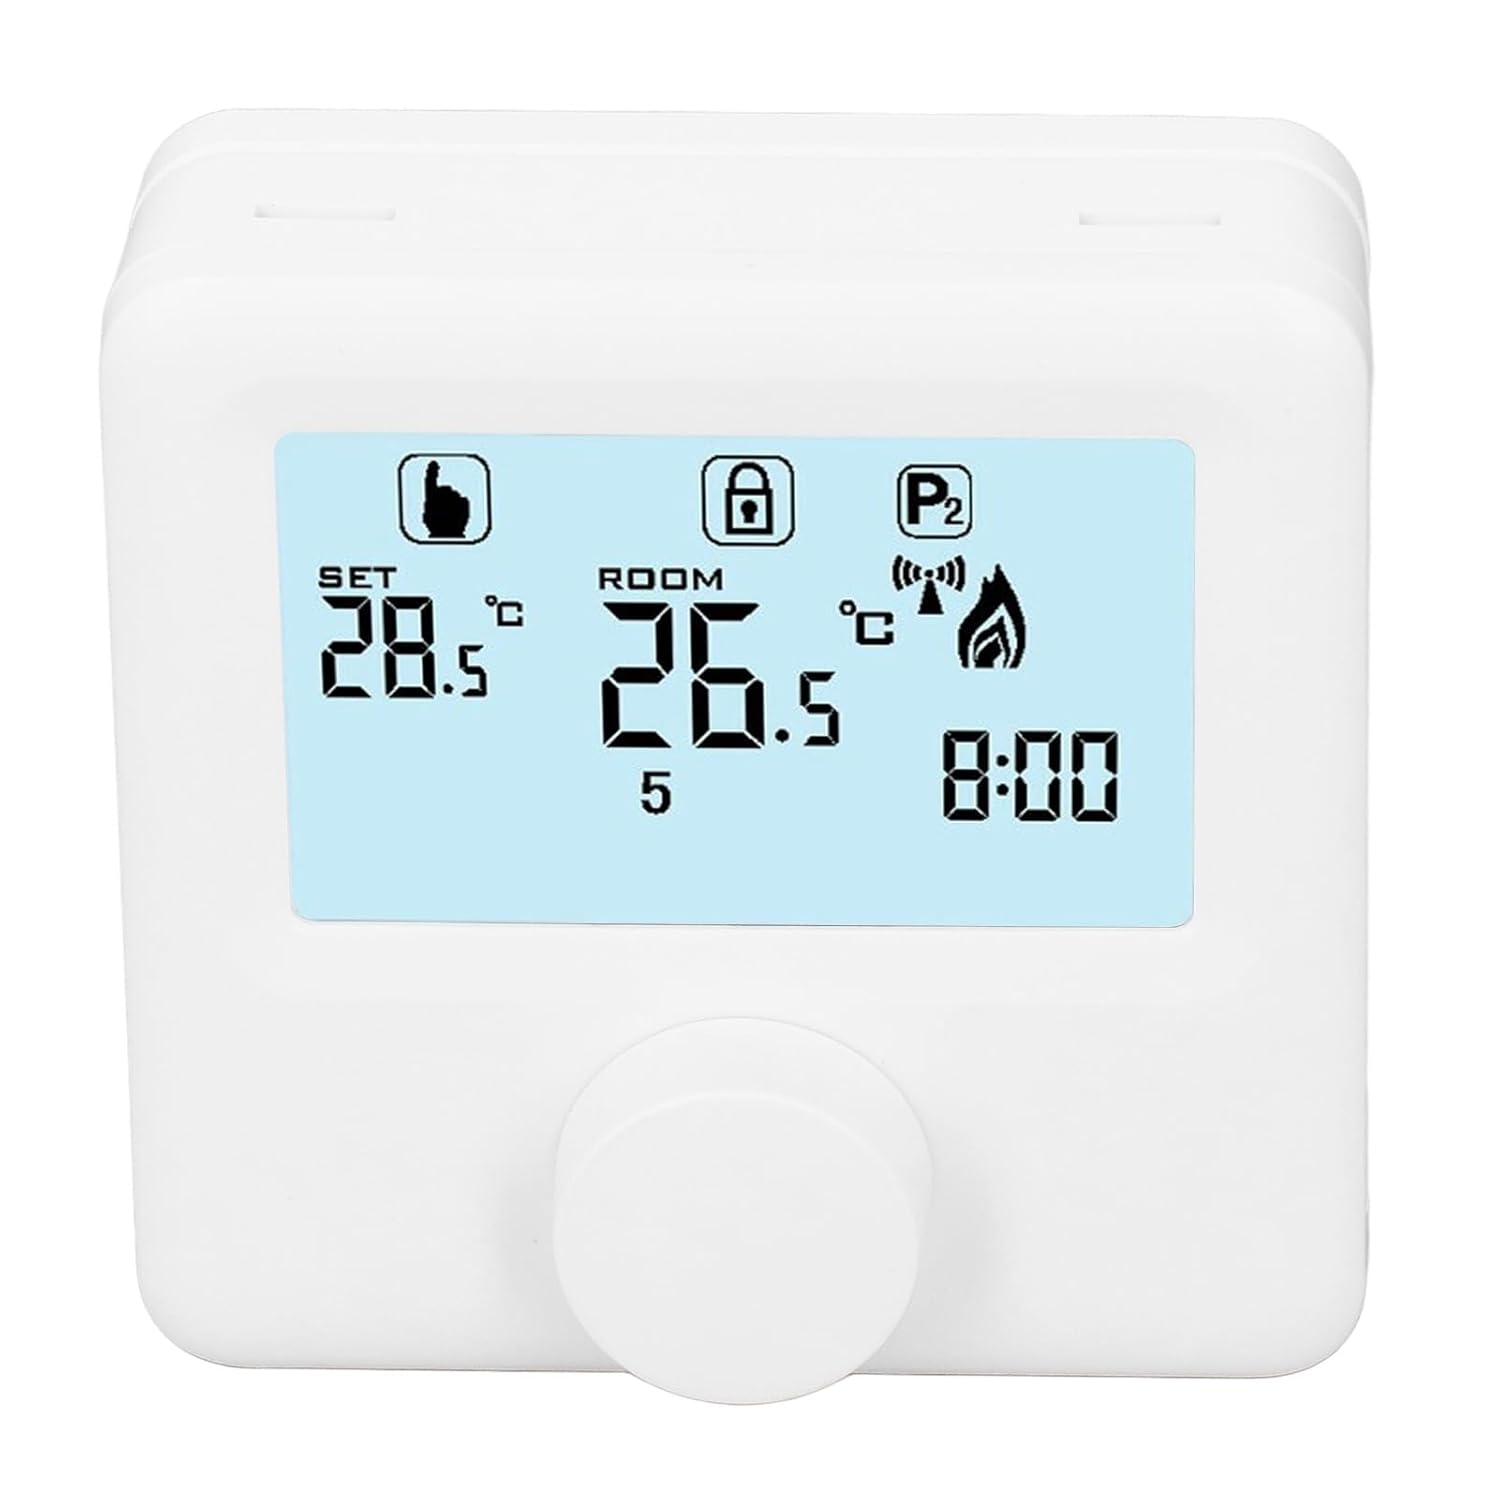
그림 6.1: 상세 view of the LCD display. It shows the set temperature (SET), room temperature (ROOM), a lock icon, a program icon (P2), a signal icon, a flame icon indicating heating, and the current time.
6.2. 온도 설정
원하는 온도를 조정하려면:
- Rotate the control knob to increase or decrease the set temperature. The "SET" value on the display will change accordingly.
- The device will automatically activate or deactivate the heating system to maintain the set temperature within the range of 1 to 40 ℃. The default adjustment range is 5 to 35 ℃.
6.3. 주간 프로그램 일정
The thermoregulator supports a weekly programming schedule. This allows you to set different temperatures for various times of the day across the week.
- Press and hold the control knob (or a designated button, if available) to enter programming mode.
- Use the control knob to navigate through days of the week and time slots.
- Adjust the desired temperature for each programmed period.
- Confirm your settings to save the weekly program. The device will then operate according to this schedule.
6.4. Understanding Display Icons
- 세트: Indicates the target temperature you have set.
- 방: 현재 실내 주변 온도를 표시합니다.
- 불꽃 아이콘: 난방 시스템이 작동 중일 때 불이 켜집니다.
- 잠금 아이콘: May indicate a keypad lock feature to prevent accidental changes.
- P1/P2 Icon: Indicates the current program mode (e.g., P1 for comfort, P2 for economy, or specific weekly program segments).
- 신호 아이콘: May indicate wireless communication status if applicable.
7. 유지관리
Regular maintenance ensures the longevity and optimal performance of your thermoregulator.
- 청소: 부드럽고 마른 천으로 기기를 닦으세요. 연마성 세제나 용제를 사용하지 마세요.
- 배터리 교체: Replace batteries when the low battery indicator appears on the display. Always replace both batteries simultaneously with new AA batteries.
- 센서 영역: Ensure the temperature sensor area (usually a small vent on the device) is free from dust and obstructions for accurate readings.
8. 문제 해결
If you encounter issues with your EVTSCAN Digital Thermoregulator, refer to the following common problems and solutions:
- 디스플레이가 비어 있습니다:
- 배터리가 올바르게 설치되었는지 확인하십시오.
- 오래된 배터리를 새 배터리로 교체하십시오.
- 난방 시스템이 응답하지 않습니다.
- Ensure the thermoregulator is powered on and the flame icon is displayed when heating is expected.
- Verify wiring connections to the boiler are secure and correct.
- Check the boiler's power supply and status.
- 설정 온도가 현재 실내 온도보다 높은지 확인하십시오.
- 부정확한 온도 측정:
- Ensure the device is not exposed to direct sunlight, drafts, or heat sources.
- Clean any dust or debris from the sensor area.
- 설정을 변경할 수 없습니다.
- Check if the lock icon is displayed. If so, refer to the operating instructions to unlock the keypad.
문제가 지속되면 고객 지원에 문의하십시오.
9. 보증 및 지원
Specific warranty information for this product is not provided in the available data. Please refer to the product packaging or the retailer's web보증 세부 정보는 사이트를 참조하십시오.
For technical support or further assistance, please contact EVTSCAN customer service through their official channels or the retailer from whom you purchased the product.
You can visit the EVTSCAN store on Amazon for more information: EVTSCAN Store