
1. 서론
The CREALITY FALCON Rotary Roller Pro is a versatile 4-in-1 multi-functional laser rotary attachment designed for engraving cylindrical objects, tumblers, wine glasses, rings, and spheres. This kit enhances the capabilities of your laser engraver, allowing for precise and stable engraving on various curved surfaces. It is specifically designed for use with Falcon/Falcon2 series laser engravers.
2. 안전 정보
Always prioritize safety when operating laser engraving equipment and accessories. Read and understand all instructions before use. Ensure proper ventilation in your workspace. Wear appropriate personal protective equipment, including laser safety glasses, to protect your eyes from laser radiation. Keep the work area clear of flammable materials. Do not leave the machine unattended during operation. This accessory is designed for use with compatible laser engravers; using it with incompatible systems may lead to errors or malfunctions.
3. 패키지 내용
The Rotary Kit Pro package includes the following components:
- Rotary Kit Pro (Main Unit)
- 빠른 설명
- M4 알렌 렌치
- M4*8 Screws (4 pieces)
- Hex Studs (3 pieces)
- 자
Video: A frame from the official product video showing the Rotary Kit Pro packaging list, including the main unit, quick guide, M4 Allen wrench, M4*8 screws, hex studs, and ruler.
4. 설정
4.1 Installing Riser Stands (Optional)
If your laser engraver requires additional height for the rotary kit, install the riser stands. There are 3 positions for installation at each of the four corners of the machine. Please pay attention to symmetry when installing the stands.
Video: Demonstrates the installation of riser stands on the laser engraver frame to elevate it for the rotary kit.
4.2 Connecting the Rotary Kit Pro
The Rotary Kit Pro is designed for plug-and-play operation. Simply connect it to your compatible laser engraver.
- Place the Rotary Kit Pro on the engraving bed of your laser engraver.
- Locate the dedicated port on your laser engraver for rotary axis connection.
- Connect the cable from the Rotary Kit Pro to the laser engraver's rotary axis port.
Video: Shows how to connect the Rotary Kit Pro to the laser engraver's Y-axis port.
5. 사용 설명서
The Rotary Kit Pro offers four main clamping methods to accommodate various object shapes and sizes. Ensure your laser engraving software (e.g., Lightburn) is configured for rotary engraving.
5.1 Software Configuration (Lightburn Examp르)
- Open Lightburn software.
- Click the "Settings" button in the menu.
- In the settings window, enable "Show rotary enable on main window".
- Click "OK" to apply changes.
- Open the "Rotary Setup" window (usually under "Laser Tools").
- Set "Rotary Type" to "Chuck".
- Enable "Enable Rotary".
- Set "Rotary Axis" to "Y Axis".
- Set "40 mm per rotation" (this value may vary based on your specific setup, refer to your engraver's manual).
- Input the object's diameter or circumference (can be measured with the included ruler).
- "확인"을 클릭하세요.
Video: Demonstrates Lightburn software configuration for rotary engraving, including enabling rotary and setting parameters.
5.2년 CLamping 방법
5.2.1년 CLamp from the Outside (1-110mm diameter)
This method is suitable for cylindrical objects with a diameter of 1-110mm, such as tumblers or bottles.
- 척에 있는 삼각형 표시를 손으로 돌린 나사에 맞추십시오.
- Tighten the hand-twisted screw clockwise to fix the chuck.
- Measure the circumference of your object using the provided ruler.
- Loosen the hand-twisted screw counterclockwise.
- Rotate the tensioner to adjust the chuck jaws.
- Place the cylindrical object between the jaws and the support module.
- Tighten the hand-twisted screw clockwise to secure the object.
- Adjust the focal length of the laser module using the focus bar.
- Rotate the chuck to ensure the object rotates smoothly.
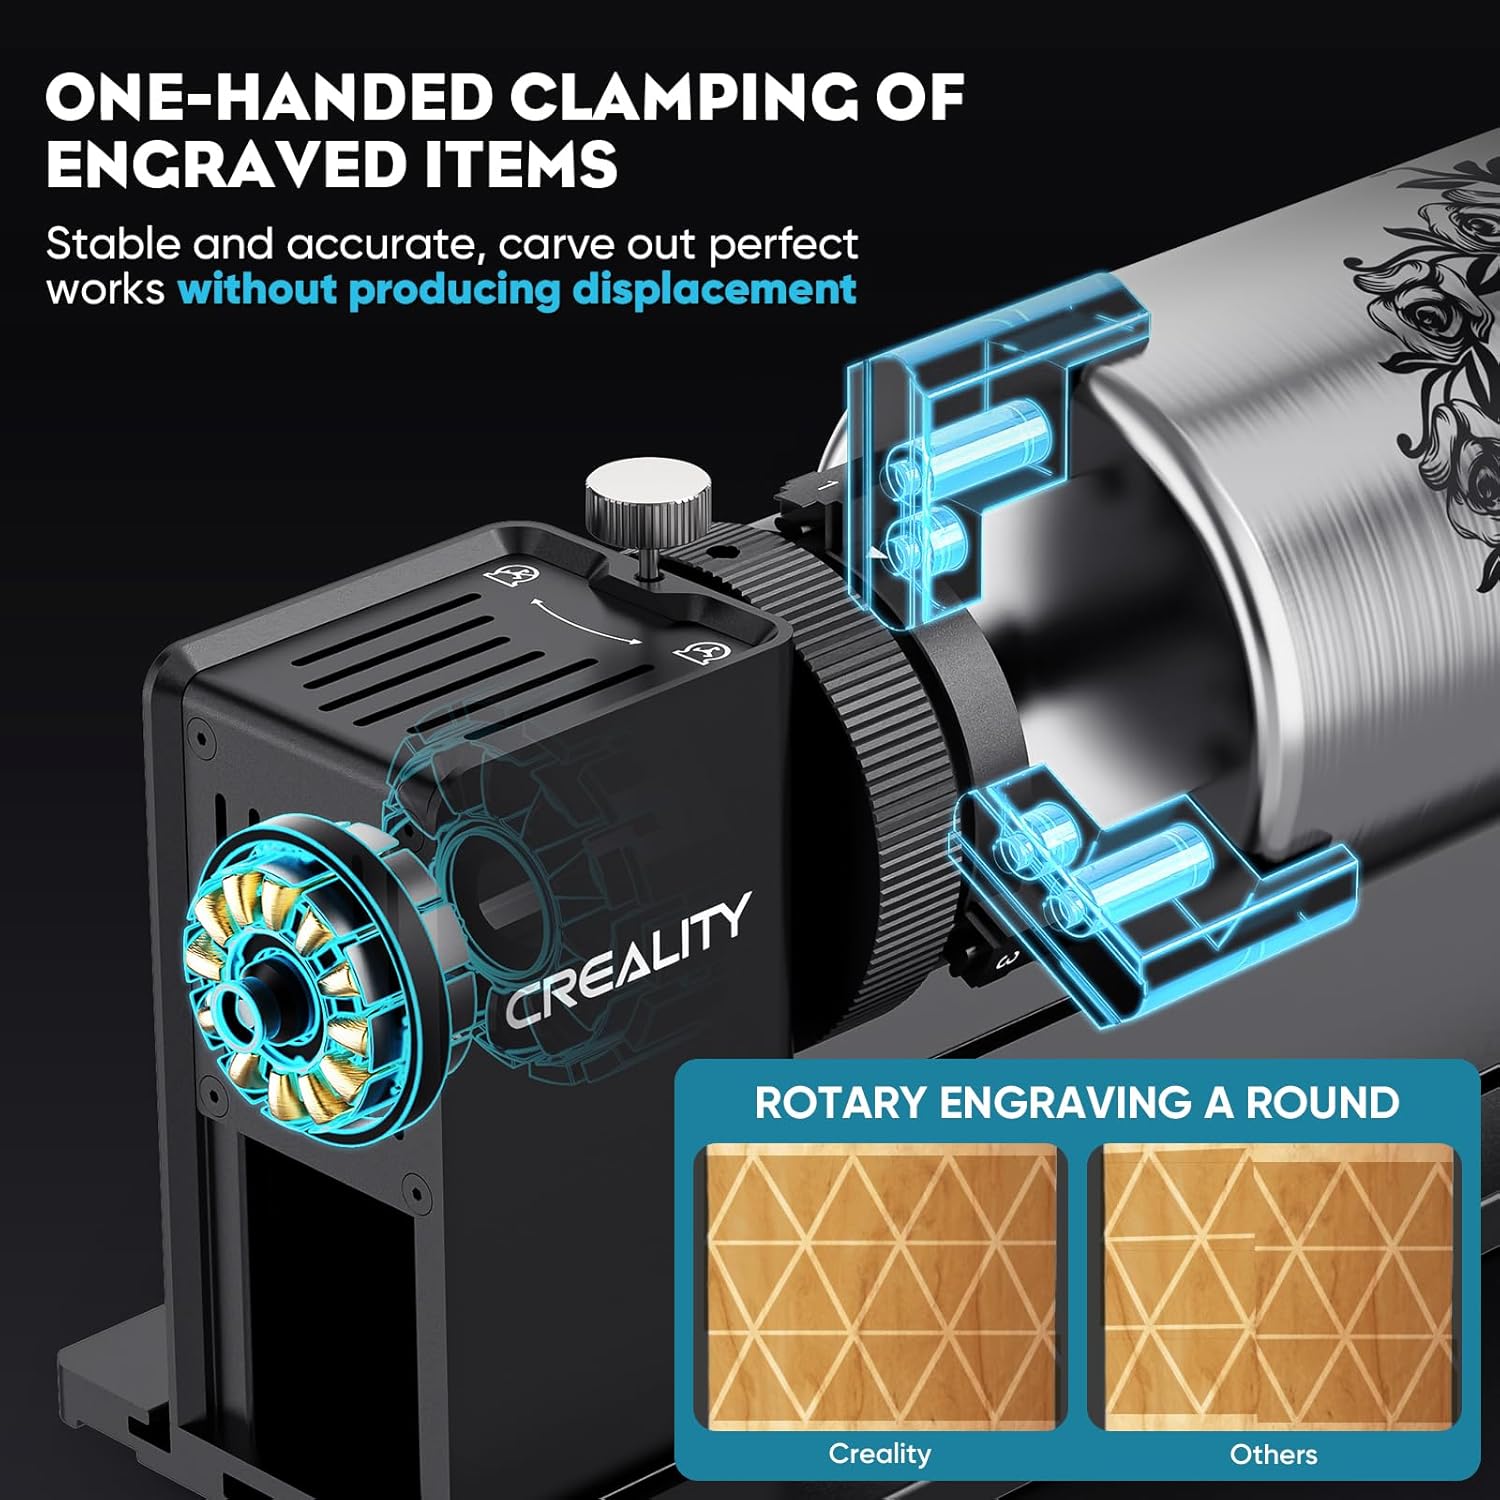
Image: The Rotary Roller Pro clamping a cylindrical object from the outside for engraving.
Video: Detailed steps for clamping a cylindrical object from the outside, including measurement and focal length adjustment.
5.2.2 Prop Up From the Inner Side (25-75mm diameter)
This method is ideal for cylindrical objects with a diameter of 25-75mm, such as wine glasses or cups with a wider opening.
- Change the chuck jaws to the inner prop-up configuration.
- Insert the object, ensuring it is securely propped from the inside.
- Adjust the focal length of the laser module.
- Rotate the chuck to ensure the object rotates smoothly.
- For tapered objects, raise one side of the rotary kit to ensure the laser maintains consistent focus.

Image: The Rotary Roller Pro configured to prop up a wine glass from the inner side for engraving.
Video: Shows how to configure the chuck for inner side propping and engrave a tapered object like a cup.
5.2.3 Using the Hex Stud (10-130mm spheres, 15-100mm rings)
The hex stud attachment is used for engraving spherical objects (10-130mm diameter) and ring-shaped items (15-100mm diameter).
- Remove the standard chuck jaws and install the hex studs.
- For rings, place the ring onto the hex studs and secure it.
- For spheres, place the sphere onto the hex studs and adjust for stability.
- Adjust the focal length of the laser module.
- Rotate the chuck to ensure the object rotates smoothly.
- 메모: For clear glass surfaces, an additional dark coating is required for successful engraving.
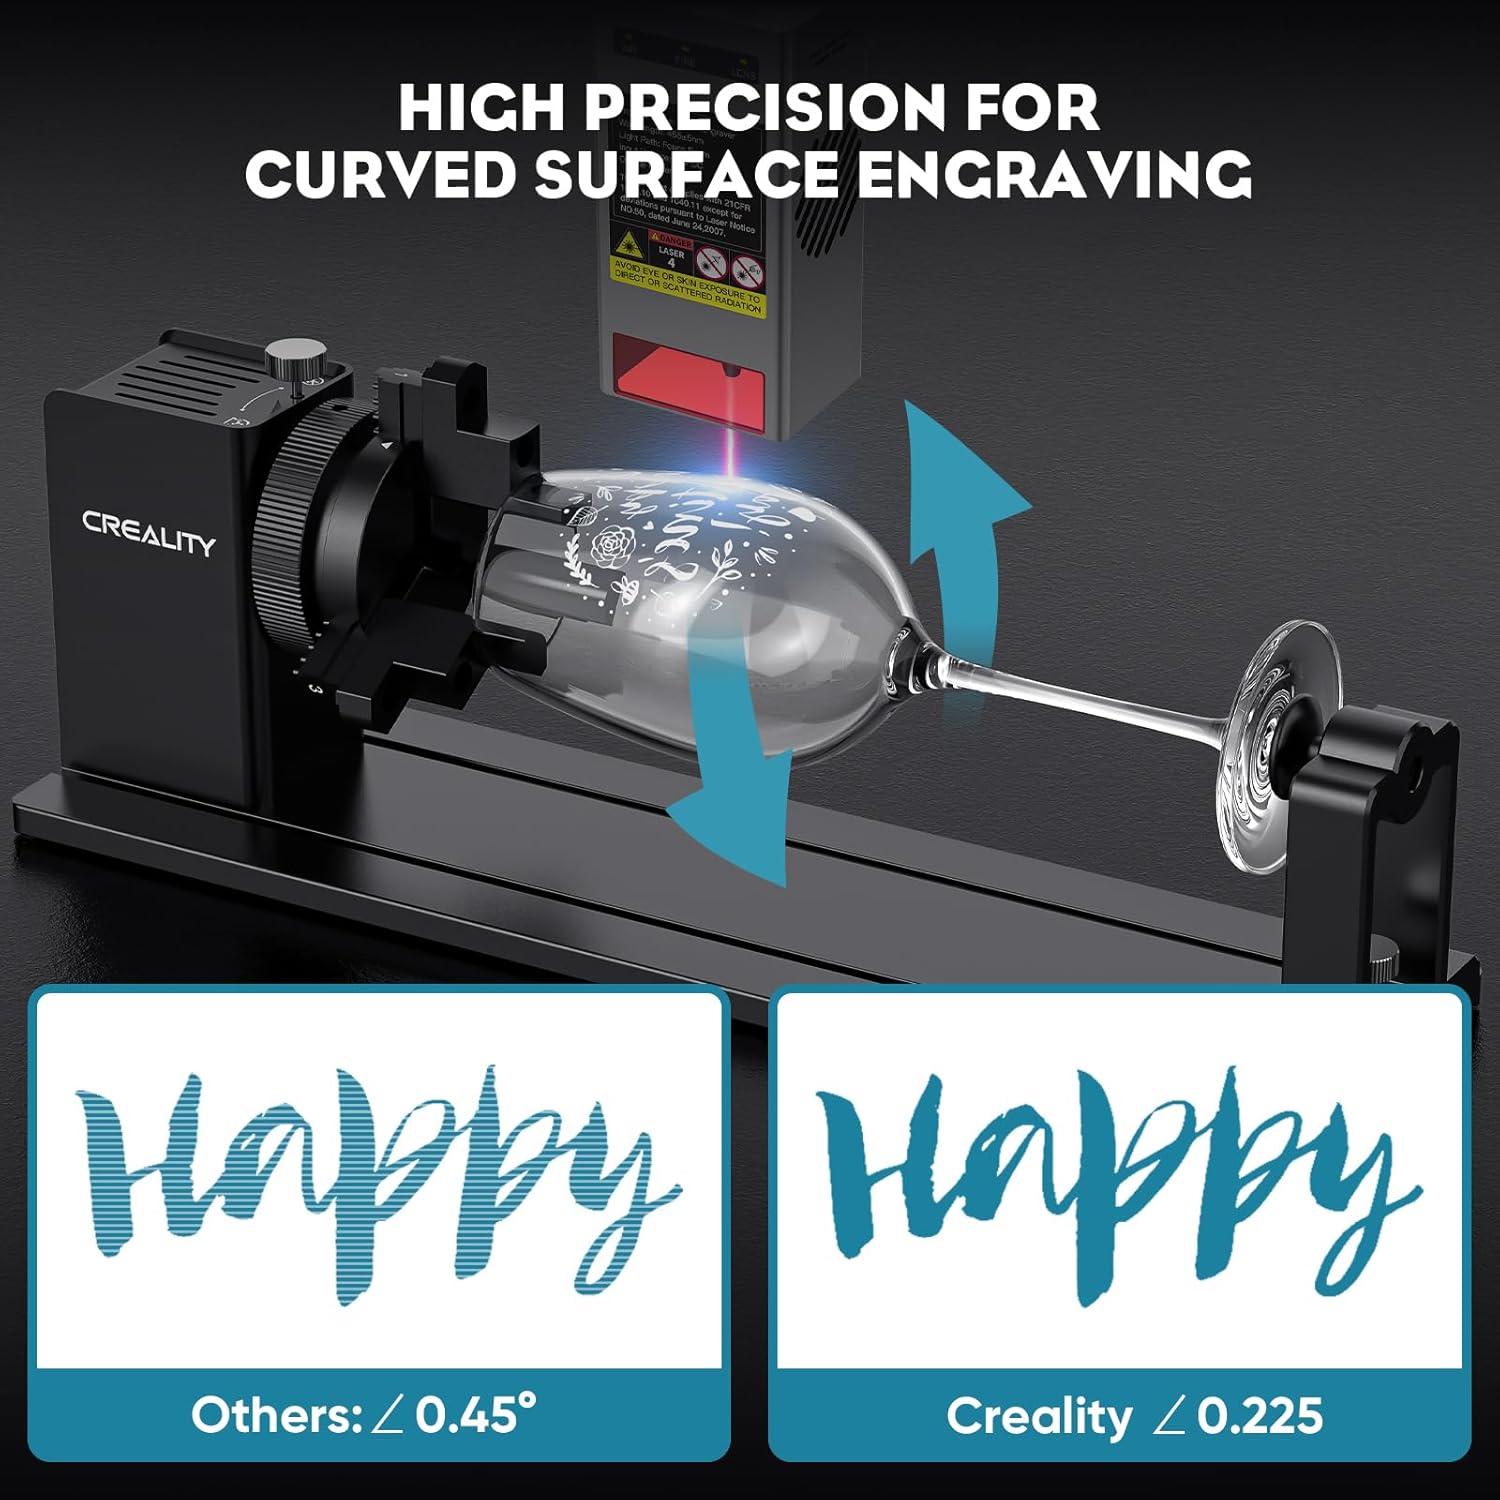
Image: The Rotary Roller Pro configured with hex studs for engraving spherical objects.
Video: Demonstrates installing hex studs and engraving rings and spheres, including the requirement for dark coating on clear glass.
6. 유지관리
- Regularly inspect the chuck jaws and moving parts for any wear or damage.
- Keep the rotary kit clean and free from dust and debris. Use a soft, dry cloth for cleaning.
- Ensure all screws and connections are secure before each use.
- Store the rotary kit in a dry, safe place when not in use.
7. 문제 해결
- Object not rotating smoothly: Ensure the object is properly centered and securely clamped. Check for any obstructions in the rotation path.
- Engraving is distorted or misaligned: Verify that the software settings for rotary engraving (diameter/circumference, steps per rotation) are correct. Ensure the object is firmly fixed and not slipping.
- Laser not focusing correctly: Re-adjust the focal length of the laser module using the provided focus bar. Ensure the object is level.
- 비호환성 문제: The Creality Rotary Kit Pro is designed for Falcon/Falcon2 series. Compatibility with other brands is not guaranteed and may cause errors.
8. 사양
| 특징 | 세부 사항 |
|---|---|
| 제품 치수 | 14 x 4.81 x 3.9 인치 |
| 품목 모델 번호 | 로터리 롤러 프로 |
| 품목 무게 | 5.04파운드 |
| 제조업체 | 크리리얼리티 팔콘 |
| Clamping Range (Outside) | 직경 1-110mm |
| Clamping Range (Inner Side) | 직경 25-75mm |
| Hex Stud (Spheres) | 직경 10-130mm |
| Hex Stud (Rings) | 직경 15-100mm |
| Angular Control Precision | 0.225° |
9. 보증 및 지원
For warranty information, technical support, or service inquiries, please refer to the official CREALITY FALCON web사이트를 방문하거나 고객 서비스에 직접 문의하세요. 보증 청구를 위해 구매 증빙 자료로 구매 영수증을 보관하세요.
