
1. 서론
The Flysky FS-R4M is a compact 4-channel mini receiver designed for use with RC models, specifically mini and micro cars. It operates on the 2.4GHz ISM band using the advanced ANT protocol, offering reliable bidirectional communication. This receiver features a single external antenna and provides PWM output for control signals.
It is compatible with Flysky transmitters that support the ANT protocol, such as the FS-G7P. Its ultra-small size and lightweight design make it an ideal choice for applications where space and weight are critical considerations.
2. 특징
- 4채널 출력: Provides four independent PWM channels for controlling various functions.
- ANT Protocol: Utilizes the advanced ANT 2.4GHz protocol for stable and efficient communication.
- Bidirectional Transmission: Supports two-way communication between the receiver and compatible transmitter.
- Single External Antenna: Ensures reliable signal reception.
- 컴팩트한 디자인: Ultra-small dimensions (20.0 x 13.0 x 7.2mm) and lightweight (3g) for easy integration into mini/micro RC models.
- 폭넓은 호환성: Designed for use with Flysky ANT protocol transmitters, such as the FS-G7P.
- Easy Binding: Facilitates quick and straightforward pairing with compatible transmitters.
- Online Update Support: Allows for firmware updates to enhance performance and features.
3. 제품 오버view
Familiarize yourself with the components and layout of the FS-R4M receiver.

Figure 1: FS-R4M Receiver Component Diagram
- [1] CH1: Channel 1 PWM Output
- [2] CH2: Channel 2 PWM Output
- [3] CH3: Channel 3 PWM Output
- [4] CH4: Channel 4 PWM Output
- [5] Antenna: Single external antenna for signal reception.
- [6] LED: 상태 표시등.
- [7] Signal pin: Output for control signal.
- [8] Power anode: Positive power input.
- [9] Power cathode: 음극 전원 입력(접지).
메모: The interface specifications for the connectors are ZH1.5mm-3P, commonly known as JST-PH2.0. Standard RC servo connectors (Futaba style) are not directly compatible and will require adapter cables or modification.
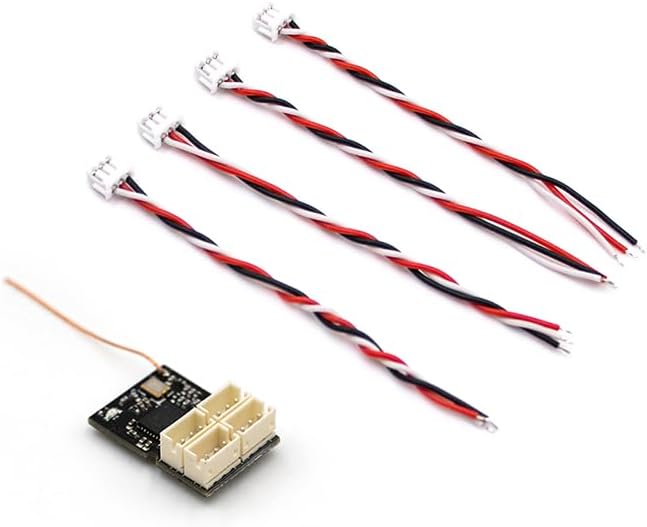
Figure 2: FS-R4M Receiver with Adapter Cables
This image illustrates the FS-R4M receiver alongside the necessary adapter cables for connecting to standard RC components. The receiver's ports are designed for ZH1.5mm-3P (JST-PH2.0) connectors.
4. 설정 및 바인딩
4.1 배선 연결
Connect your servos, Electronic Speed Controller (ESC), and other components to the corresponding channels on the FS-R4M receiver. Ensure correct polarity for power connections (Power anode [8] for positive, Power cathode [9] for negative/ground, Signal pin [7] for signal).
As noted in the product overview, the receiver uses ZH1.5mm-3P (JST-PH2.0) connectors. If your servos or ESC use standard Futaba-style connectors, you will need to use appropriate adapter cables or modify the connectors. Ensure all connections are secure before proceeding.
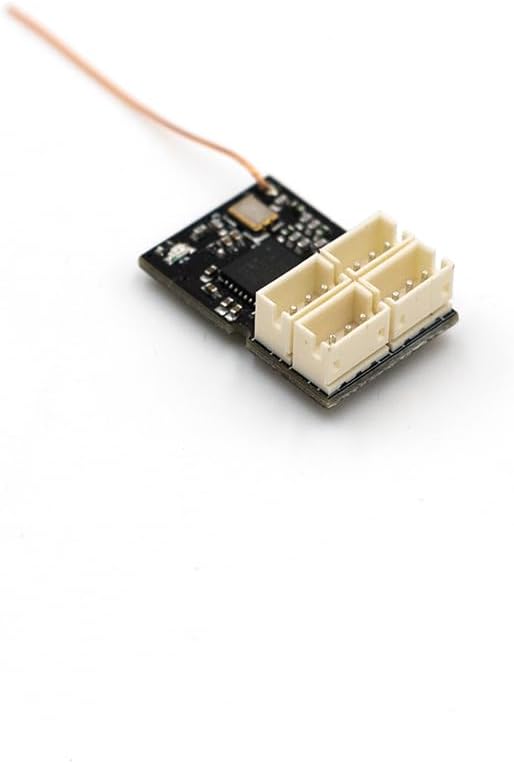
Figure 3: Receiver Channel Ports
자세한 view of the four channel ports on the FS-R4M receiver, highlighting their compact design.
4.2 바인딩 절차
The binding process links your FS-R4M receiver to your Flysky ANT protocol transmitter. Refer to your specific transmitter's manual for detailed binding instructions, as procedures may vary slightly. A general binding sequence is as follows:
- 송신기의 전원이 꺼져 있는지 확인하세요.
- Connect power to the FS-R4M receiver. The LED [6] on the receiver will typically flash, indicating it is in binding mode or awaiting a signal.
- Place your transmitter into binding mode. This usually involves holding a specific button (e.g., "BIND" button) while powering on the transmitter. Consult your transmitter's manual for the exact steps.
- Once the receiver and transmitter successfully bind, the LED on the receiver will change to a solid state, indicating a successful connection.
- Release the bind button on the transmitter and power cycle both the transmitter and receiver to confirm the binding.
If binding fails, ensure the receiver is within range of the transmitter and that both devices are using the ANT protocol. Repeat the steps if necessary.
5. 사용 설명서
After successful binding, the FS-R4M receiver will output PWM signals corresponding to the commands from your transmitter. Ensure all control surfaces and functions respond correctly before operating your RC model.
- 전원 켜기 순서: Always power on your transmitter first, then the receiver. When powering off, disconnect power from the receiver first, then power off the transmitter.
- 범위 확인: Perform a range check before each use, especially in new environments, to ensure reliable signal strength.
- 간섭: Avoid operating near sources of 2.4GHz interference (e.g., Wi-Fi routers, other 2.4GHz RC systems) to prevent signal loss.
6. 유지관리
Proper care and maintenance will extend the lifespan of your FS-R4M receiver.
- 환경 조건: Operate and store the receiver within the specified temperature range of -10°C to +60°C and humidity limit of 20% to 95%. Avoid extreme temperatures and high humidity.
- 권tage and Safety: Always pay attention to the input voltage range (3.5-9V/DC) and ensure it is not exceeded. Incorrect voltage can damage the receiver.
- 청소: 수신기를 깨끗하게 유지하고 먼지, 오물 및 습기가 없도록 하십시오. 부드럽고 마른 천으로 닦으십시오. 용제나 강한 화학 물질은 사용하지 마십시오.
- 안테나 관리: Ensure the antenna is not cut, bent sharply, or damaged. A damaged antenna can significantly reduce range and signal reliability.
- 펌웨어 업데이트: The receiver supports online updates. Periodically check the official Flysky web최적의 성능과 새로운 기능에 대한 액세스를 보장하기 위해 사용 가능한 펌웨어 업데이트 사이트를 방문하세요.
7. 문제 해결
If you encounter issues with your FS-R4M receiver, consider the following troubleshooting steps:
- 수신자가 구속력이 없음:
- Ensure both the transmitter and receiver are powered on and within close proximity during the binding process.
- Verify that your transmitter supports the ANT protocol.
- Check the LED status on the receiver; it should indicate binding mode (e.g., flashing).
- Refer to your transmitter's manual for specific binding instructions.
- 제어 응답 없음:
- Confirm the receiver is successfully bound to the transmitter (solid LED).
- Check all wiring connections between the receiver, ESC, and servos for correct polarity and secure fit.
- Ensure the power supply to the receiver is within the specified voltage range (3.5-9V/DC).
- Verify that the transmitter is powered on and functioning correctly.
- 단거리 또는 간헐적 신호:
- Inspect the receiver antenna for any damage, kinks, or improper routing. Ensure it is positioned away from metal objects.
- 2.4GHz 대역 간섭이 심한 지역에서는 작동을 피하십시오.
- Ensure the transmitter's battery is adequately charged.
- LED 표시기 문제:
- If the LED does not light up, check the power connection to the receiver.
- Refer to the transmitter manual for specific LED indications during binding and operation.
8. 사양
| 특징 | 사양 |
|---|---|
| 제품 모델 | FS-R4M |
| 적응형 송신기 | Transmitters with ANT protocol (e.g., Flysky FS-G7P) |
| 적응형 모델 | Mini/Micro RC Cars |
| 채널 수 | 4 |
| RF 주파수 | 2.4GHz 주의 |
| 최대 전력 | <10dBm(eirp)(EU) |
| 안테나 유형 | 단일 외부 안테나 |
| Distance (Ground) | >50분 |
| 2.4G 프로토콜 | 개미 |
| 해결 | 1024 |
| 데이터 출력 | PWM |
| 입력 Voltag및 범위 | 3.5-9V/DC |
| 온라인 업데이트 | 예 |
| 온도 범위 | -10°C ~ +60°C |
| 습도 한계 | 20%에서 95%까지 |
| 치수(길이*너비*높이) | 20.0 x 13.0 x 7.2mm |
| 무게 | 3g |
| 인증 | CE, FCC ID: 2A2UNR4M00 |
| 인터페이스 유형 | ZH1.5mm-3P (JST-PH2.0) |
9. 보증 및 지원
보증 관련 정보는 구매 시 판매점 또는 제조업체에서 제공한 약관을 참조하십시오. 보증 청구를 위해서는 구매 증빙 자료를 보관하십시오.
For technical support, firmware updates, and additional product information, please visit the official Flysky web대지:
You may also contact your point of purchase for assistance.