
1. 서론
Thank you for choosing the Homra Removable Recessed Bin. This product is designed to provide an organized and discreet waste management solution for your kitchen, fitting conveniently under your sink. It features two removable 20-liter compartments, ideal for separating waste and recyclables. This manual provides essential information for safe installation, operation, and maintenance of your new recessed bin.
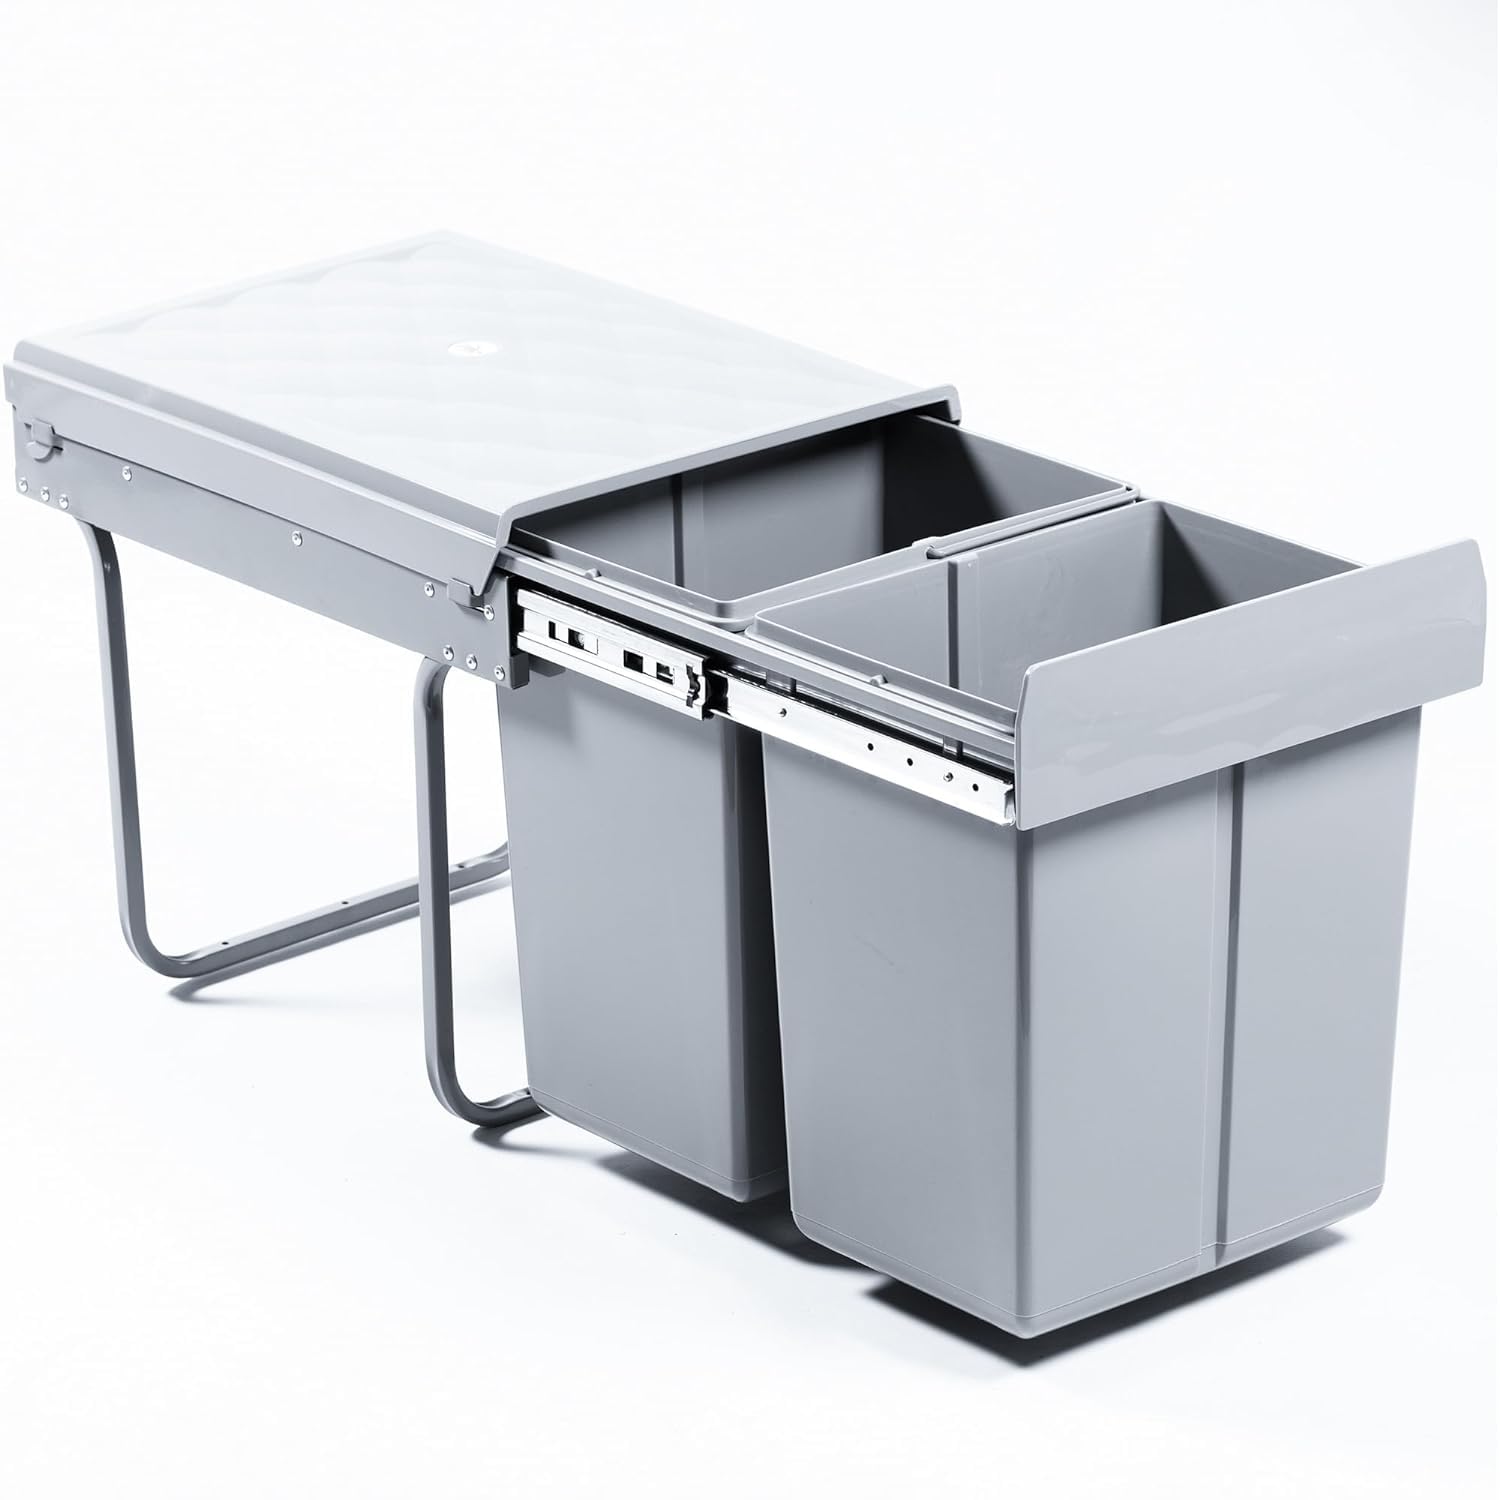
그림 1: The Homra Removable Recessed Bin, showcasing its two compartments and under-sink installation.
2. 안전 지침
설치 및 사용 전에 모든 안전 지침을 주의 깊게 읽어 주십시오. 지침을 따르지 않을 경우 부상이나 제품 손상이 발생할 수 있습니다.
- Ensure the installation area is clear of electrical wires, water pipes, and gas lines before drilling.
- 설치 시에는 항상 장갑과 보안경과 같은 적절한 안전 장비를 착용하십시오.
- Do not overload the bins. The maximum capacity for each compartment is 20 liters.
- 작동 중에는 움직이는 부품에 손과 손가락이 닿지 않도록 하여 끼는 것을 방지하세요.
- 본 제품은 가정용으로만 사용하도록 제작되었습니다.
- 사고 예방을 위해 어린이의 손이 닿지 않는 곳에 보관하세요.
3. 패키지 내용
설치를 진행하기 전에 모든 구성 요소가 있고 손상되지 않았는지 확인하세요.
- 1x Main frame/housing with pull-out mechanism
- 2x Removable 20-liter bins (grey)
- 1x Set of mounting hardware (screws, washers)
- 1x 사용 설명서
4. 설정 및 설치
The Homra Recessed Bin is designed for base fixing within a kitchen cabinet, typically under the sink. Ensure your cabinet meets the minimum dimension requirements for proper fit and function.
4.1. 설치 전 점검
- 캐비닛 치수: The bin requires a minimum cabinet width of 40 cm. Measure the internal width, depth, and height of your cabinet to ensure adequate space, especially considering any plumbing under the sink.
- 정리: Verify that no pipes, hoses, or other obstructions will interfere with the bin's movement or installation.
- 필요한 도구: You will need a measuring tape, pencil, drill, screwdriver, and possibly a level.
4.2. Mounting the Frame
- Position the main frame of the bin inside your cabinet at the desired location. Ensure it is flush against the cabinet base and aligned correctly.
- Using a pencil, mark the positions for the mounting screws through the pre-drilled holes in the frame's base.
- Remove the frame and, if necessary, pre-drill pilot holes at the marked positions. Be careful not to drill through the cabinet base.
- Reposition the frame and secure it to the cabinet base using the provided screws and washers. Tighten securely, but do not overtighten.
Note: An image illustrating the frame being secured to the cabinet base would typically be included here, showing screw placement.
4.3. Inserting the Bins
- Once the frame is securely mounted, slide the two removable 20-liter bins into their designated slots within the frame.
- Ensure the bins sit firmly and are properly aligned.
Your Homra Recessed Bin is now installed and ready for use.
5. 사용 설명서
5.1. 개회 및 폐회
- To access the bins, gently pull the front of the bin assembly outwards from the cabinet. The pull-out mechanism will extend the bins.
- To close, push the bin assembly back into the cabinet until it is fully recessed.
5.2. Waste Separation
Utilize the two separate 20-liter compartments for efficient waste separation. For example, one bin can be used for general waste and the other for recyclables (plastic, paper, etc.).
5.3. Emptying the Bins
- Pull the bin assembly out of the cabinet.
- Lift each individual 20-liter bin upwards to remove it from the frame.
- Empty the contents into your main waste or recycling collection.
- Return the empty bins to their respective slots in the frame.
6. 유지관리
Regular cleaning and maintenance will ensure the longevity and hygienic operation of your Homra Recessed Bin.
6.1. Cleaning the Bins
- The removable plastic bins can be easily cleaned with warm water and mild detergent.
- Rinse thoroughly and allow to air dry completely before placing them back into the frame.
- Avoid using abrasive cleaners or harsh chemicals, as these may damage the plastic.
6.2. Cleaning the Frame and Mechanism
- Wipe down the metal frame and pull-out mechanism with a damp 옷감.
- For stubborn dirt, use a mild, non-abrasive cleaner.
- Ensure the mechanism is dry after cleaning to prevent rust.
- Periodically check the mounting screws for tightness and re-tighten if necessary.
7. 문제 해결
If you encounter any issues with your Homra Recessed Bin, refer to the following common problems and solutions:
| 문제 | 가능한 원인 | 해결책 |
|---|---|---|
| Bin is difficult to pull out or push in. | New mechanism stiffness; obstruction; loose mounting screws. | Operate several times to break in; check for obstructions; tighten mounting screws. |
| Bins do not sit properly in the frame. | Incorrect placement; debris in slots. | Ensure bins are inserted correctly; clear any debris from the slots. |
| Bin assembly feels wobbly. | 장착 나사가 느슨합니다. | Re-tighten all mounting screws securing the frame to the cabinet base. |
8. 사양
- 상표: Homra
- 모델: 2x20L Recessed Bin (B0CLDKR783)
- 용량: 40 Liters (2 x 20L compartments)
- 색상: 회색
- 재료: Plastic (bins), Metal (frame)
- 개방 메커니즘: Manual Pull-out
- 설치 유형: Base Fixing (Under Sink)
- 최소 캐비닛 너비: 40cm
- 품목 무게: 약 5.3킬로그램
- 특징: 이동식 쓰레기통
9. 보증 및 지원
Homra products are manufactured to high-quality standards. For specific warranty information, please refer to the documentation provided at the time of purchase or contact your retailer. If you have any questions, require technical assistance, or need to report a defect, please contact Homra customer support through the retailer's platform or the official Homra web대지.

