
DV8 Offroad FBJL-11
DV8 Offroad FS-1 Series Stubby Front Bumper
Installation and User Manual for 2007-2025 Jeep Wrangler JK/JL & Gladiator JT (Model FBJL-11)
1. 서론
This manual provides detailed instructions for the installation, operation, and maintenance of your DV8 Offroad FS-1 Series Stubby Front Bumper. This bumper is specifically engineered for the 2007-2025 Jeep Wrangler JK & JL, as well as the Gladiator JT. It features a high-clearance stubby design, a recessed winch tray, a tubular bull bar, and retains OEM sensor functionality.
Please read this manual thoroughly before beginning installation or operation to ensure proper use and safety.
2. 안전 정보
Always prioritize safety during installation and operation. Failure to follow these safety guidelines may result in injury or damage to your vehicle.
- 전문 설치 권장: If you are not experienced with automotive modifications, professional installation is highly recommended.
- 눈 보호: Always wear appropriate eye protection when working with tools or under the vehicle.
- 차량 지원: Ensure the vehicle is securely supported on a level surface using jack stands before working underneath it. Never rely solely on a jack.
- Heavy Object Handling: The bumper is heavy. Use proper lifting techniques or seek assistance to prevent injury.
- 배터리 분리: Disconnect the vehicle's battery before beginning any electrical work or installation to prevent accidental shorts.
- 토크 사양: Adhere to all specified torque values for fasteners to ensure secure installation.
- 제안 65 경고: 이 제품은 캘리포니아 주에서 암, 선천적 기형 또는 기타 생식 장애를 일으키는 것으로 알려진 화학 물질을 포함할 수 있습니다.
3. 패키지 내용
Verify that all components are present and undamaged before beginning installation. If any parts are missing or damaged, contact DV8 Offroad customer support.
- FS-1 Series Stubby Front Bumper Assembly
- Tubular Bull Bar
- D-Ring Mounts (2)
- 장착 브래킷
- 하드웨어 키트(볼트, 와셔, 너트)

Image: All components of the DV8 Offroad FS-1 Series Stubby Front Bumper, including the main bumper, bull bar, mounting brackets, and various bolts, washers, and nuts from the hardware kit.
4. 필요한 도구
일반적으로 설치에는 다음과 같은 도구가 필요합니다.
- 소켓 렌치 세트
- 오픈 엔드 렌치 세트
- 토크렌치
- Pry Bar (optional, for factory bumper removal)
- Cutting Tool (if minor trimming is required for specific models, consult vehicle manual)
- 안전 안경
- 장갑
- 플로어 잭 및 잭 스탠드
5. 설정(설치)
This bumper is designed for a fully bolt-on installation with no modifications required for most applications. Refer to your vehicle's service manual for specific factory bumper removal procedures.
5.1. 사전 설치
- 차량을 평평한 곳에 주차하고 주차 브레이크를 걸어주세요.
- 차량 배터리의 음극 단자를 분리합니다.
- Remove the factory front bumper according to your vehicle's service manual. This typically involves removing fasteners, disconnecting fog lights, and any other electrical connections.
- Carefully remove any OEM sensors from the factory bumper if they are to be retained and transferred to the new bumper.
5.2. Bumper Assembly
- Attach the tubular bull bar to the main bumper assembly using the provided hardware. Do not fully tighten at this stage.
- If applicable, install the OEM sensors into the designated locations on the new DV8 Offroad bumper. Ensure they are securely seated and connected.
5.3. Bumper Mounting
- 다른 사람의 도움을 받아 조립된 범퍼를 조심스럽게 들어 올려 차량 프레임 장착 지점에 맞춰 정렬하십시오.
- Install the provided mounting brackets and hardware to secure the bumper to the frame. Hand-tighten all bolts initially.
- Once the bumper is properly aligned, progressively tighten all mounting bolts to the manufacturer's specified torque values.
5.4. Accessory Installation (Optional)
- Install the D-ring mounts into their designated locations on the bumper.
- If installing a winch, mount it into the recessed winch tray according to the winch manufacturer's instructions. Ensure proper wiring and fairlead installation. Note: This bumper is NOT compatible with traditional roller style fairleads.
- If installing a light bar, mount it into the inset light mount. This bumper is engineered to accommodate DV8 Elite 20”, Baja Designs 20”, or Rigid 20” dual row light bars.
5.5. 설치 후
- 차량 배터리의 음극 단자를 다시 연결합니다.
- Test all vehicle lights, horn, and any transferred OEM sensors to ensure proper functionality.
- Perform a final inspection to ensure all fasteners are tight and the bumper is securely mounted.

Image: A Jeep Gladiator JT showcasing the installed DV8 Offroad FS-1 Series Stubby Front Bumper, complete with a winch and an integrated light bar, view앞에서부터.

이미지: 사이드 프로file view of a Jeep Gladiator JT equipped with the DV8 Offroad FS-1 Series Stubby Front Bumper, demonstrating the bumper's compact, high-clearance design.
6. 작동 특징
The DV8 Offroad FS-1 Series Stubby Front Bumper is designed with several functional features to enhance your off-road experience.
6.1. Winch Tray
The bumper features a recessed winch tray that accepts multiple-size winches. The winch sits protected behind the tubular bull bar. Ensure your winch is properly installed and wired according to its manufacturer's instructions. Remember, this bumper is not compatible with traditional roller style fairleads.
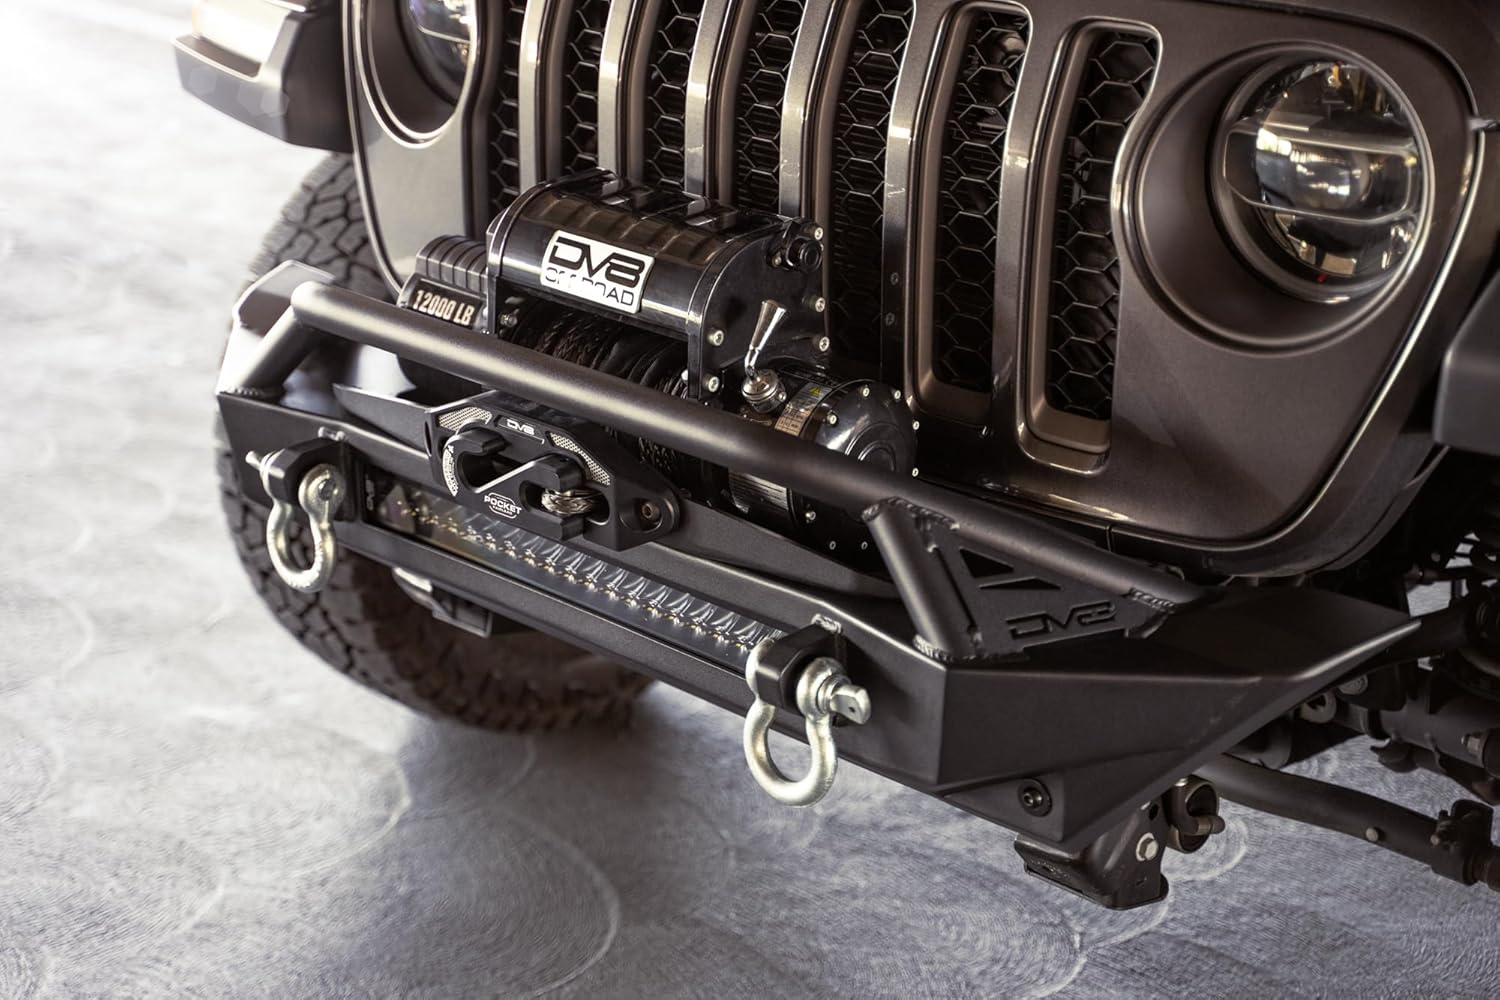
이미지: 자세한 view of the DV8 Offroad FS-1 Series Stubby Front Bumper, highlighting the recessed winch tray with a winch installed and an integrated LED light bar.
6.2. D링 마운트
Additional recovery options are provided by the integrated 1-inch D-ring mounts, which are designed to accommodate 3/4-inch shackle pins. Always use high-quality, rated shackles for recovery operations.

Image: A close-up shot of the D-ring mount on the DV8 Offroad FS-1 Series Stubby Front Bumper, illustrating its solid construction and weld points.
6.3. Lighting Options
The bumper includes an inset light mount engineered to accommodate DV8 Elite 20”, Baja Designs 20”, or Rigid 20” dual row light bars, offering versatile lighting options for off-road trails.
7. 유지관리
Regular maintenance will help preserve the appearance and functionality of your DV8 Offroad bumper.
- 청소: Wash the bumper regularly with mild soap and water to remove dirt, mud, and road grime. Avoid abrasive cleaners or harsh chemicals that could damage the powder coat finish.
- 점검: Periodically inspect the bumper for any signs of damage, rust, or loose fasteners, especially after off-road use.
- 패스너 점검: Re-torque all mounting bolts after the first 500 miles of driving and periodically thereafter to ensure they remain secure.
- 터치업: If the powder coat finish is chipped or scratched, touch it up promptly to prevent rust.
8. 문제 해결
이 섹션에서는 설치 중이나 설치 후에 발생할 수 있는 일반적인 문제에 대해 설명합니다.
- Issue: Light Bar Alignment
If the light bar does not align correctly with the cutout, inspect for any warping in the bumper or interference from winch bolts. Ensure all components are seated properly before final tightening. Minor adjustments during installation may be required. - Issue: Loose Fitment or Rattling
Ensure all mounting bolts are torqued to the specified values. Check for any loose accessories (winch, D-rings, light bar) and tighten their fasteners. - Issue: OEM Sensor Malfunction
Verify that the OEM sensors were correctly transferred and securely connected to their wiring harnesses. Ensure no debris or paint is obstructing the sensor's field of view. - Issue: Difficulty with Installation
Double-check that you have the correct bumper model for your vehicle year and model. Review the installation steps carefully. If issues persist, professional assistance is recommended.
9. 사양
| 상표 | DV8 오프로드 |
| 모델 번호 | FBJL-11 |
| 자동차 부품 위치 | 앞쪽 |
| 재료 | 합금강 |
| 색상 | 검은색 |
| 차량 서비스 유형 | Jeep (Wrangler JK/JL, Gladiator JT) |
| 외부 마감 | 파우더코트 |
| 제품 치수 | 17인치 깊이 x 54인치 너비 x 15인치 높이 |
| 품목 무게 | 67파운드 |
| 한국어: | 810087812652 |
10. 보증 정보
DV8 Offroad products are designed for durability and performance. For specific warranty details regarding your FS-1 Series Stubby Front Bumper, please contact DV8 Offroad directly or visit their official web해당 사이트입니다. 보증 청구를 위해 구매 증빙 자료를 보관하시는 것이 좋습니다.
11. 고객 지원
For technical assistance, installation questions, or any other inquiries regarding your DV8 Offroad FS-1 Series Stubby Front Bumper, please contact DV8 Offroad customer support through their official website or an authorized dealer. You can find contact information on the DV8 Offroad Store.
Ask a question about this manual
Ask about setup, troubleshooting, compatibility, parts, safety, or missing instructions. Manuals+ will review the question and use this page’s manual context to help answer it.