
1. 서론
This manual provides detailed instructions for the installation and operation of the Sarmert 3-Lead Hard-Wire Kit. This kit is designed to provide continuous power to your Micro-USB compatible dash camera, enabling features such as 24-hour parking monitoring and low voltage protection. It converts 12V-24V vehicle power to a stable 5V/2.5A output for your device.
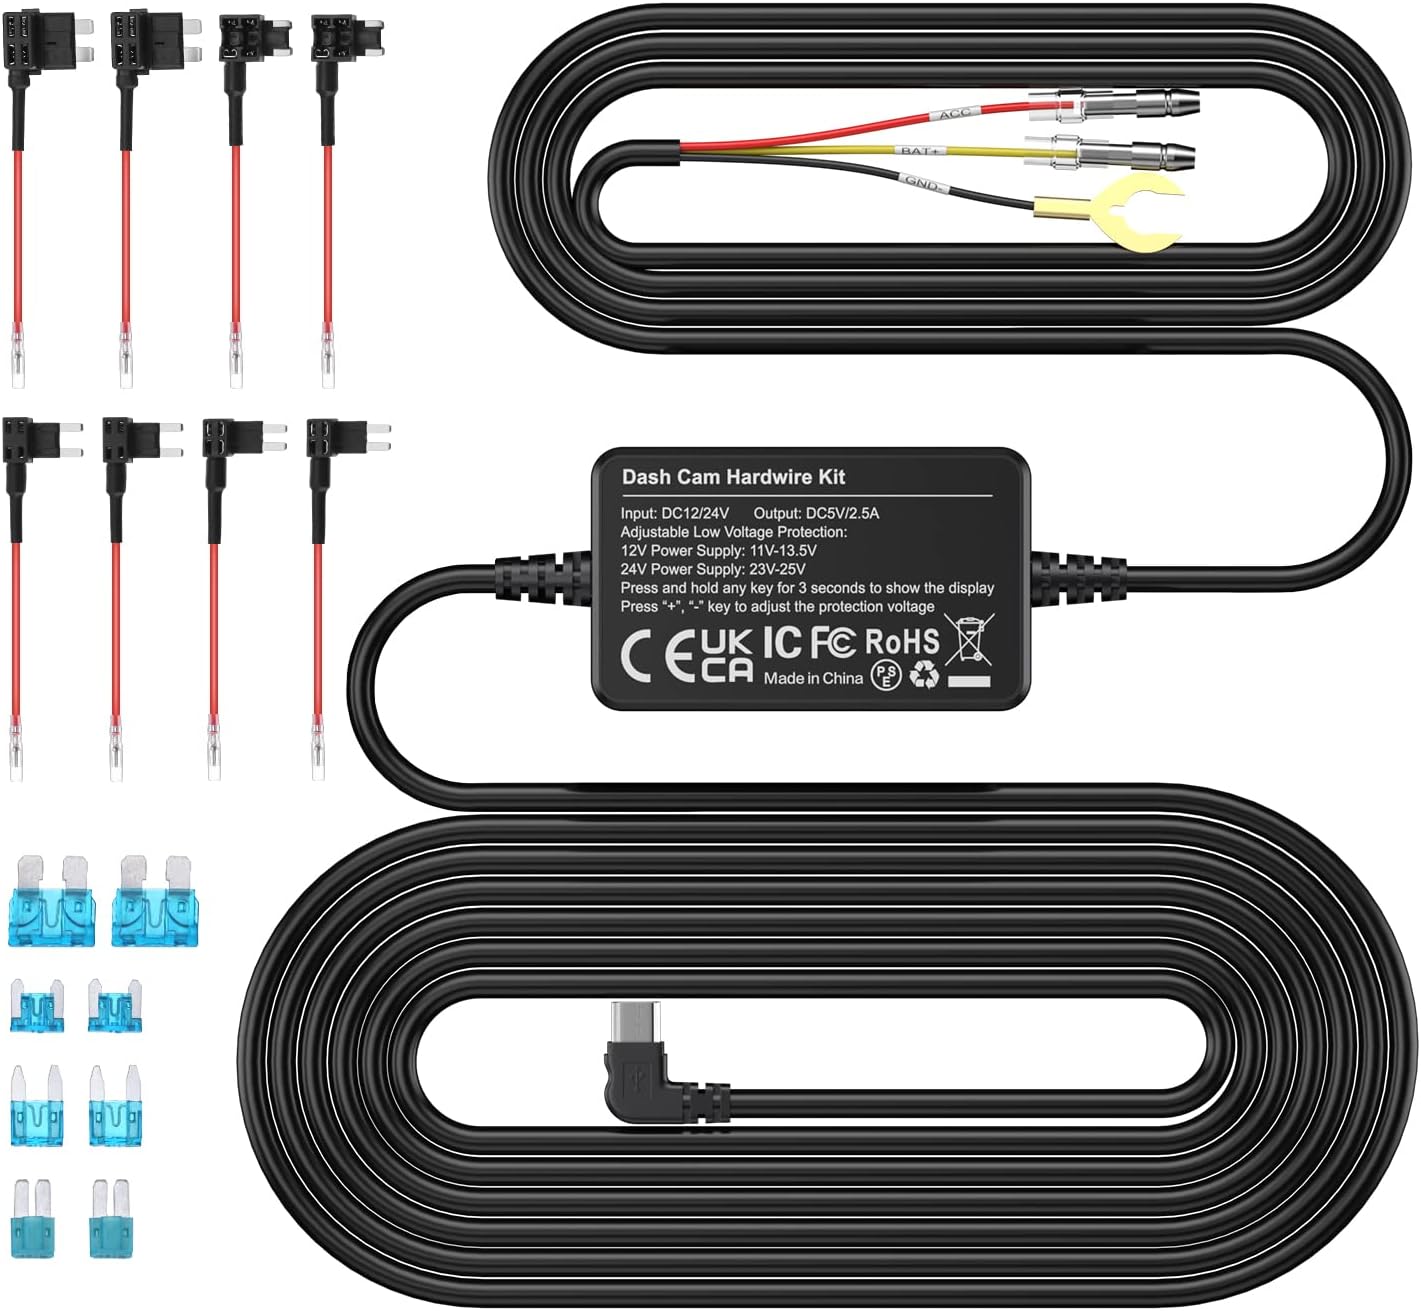
그림 1: 이상view of the Sarmert 3-Lead Hard-Wire Kit and included fuse taps.
2. 제품 오버view 및 기능
The Sarmert Hard-Wire Kit ensures your dash camera operates reliably with advanced power management features.
주요 특징:
- Automatic Parking Mode: Powers on and records automatically when the vehicle is accessed, supporting time-lapse or continuous recording.
- 와이드볼tage 호환성: Compatible with 12V-24V vehicles (cars, trucks, buses). Adjustable protection voltag설정.
- 24시간 주차 감시: Provides constant power to the dash cam for continuous surveillance, protecting against theft.
- 낮은 볼륨tage 보호: Intelligent system automatically cuts power to prevent vehicle battery drain when voltage drops below 11.6V (for 12V systems) or 23.2V (for 24V systems).
- Micro-USB Compatibility: Designed for Micro-USB dash cams, GPS navigators, and radar detectors, freeing up the cigarette lighter port.
패키지 내용:
- Sarmert 3-Lead Hard-Wire Kit with Micro-USB connector
- Assorted Fuse Taps
- Assorted Fuses
- 사용 설명서(이 문서)

Figure 2: Contents of the Sarmert Hard-Wire Kit package.

Figure 3: The 3-lead hard-wire kit provides multiple protections including battery drain, over-current, short-circuit, reverse connection, and overheat protection.
3. 설정 및 설치
Proper installation is crucial for the hard-wire kit's functionality. If you are unfamiliar with vehicle electrical systems, it is recommended to seek professional assistance.
배선도:
The hard-wire kit consists of three main wires:
- 검은색 선(접지): Connect to a metal bolt or screw on the vehicle chassis for ground.
- 적색선(ACC): Connect to a fuse in the fuse box that is only powered when the ignition is on (Accessory power).
- 노란색 전선(BAT+): Connect to a fuse in the fuse box that has constant power, even when the ignition is off (Battery power).

Figure 4: Hard-wire kit control box showing input and output cables, and connections for GND, ACC, and BAT+.
설치 단계:
- 퓨즈 박스 찾기: Refer to your vehicle's owner's manual to find the location of the fuse box. Common locations include under the dashboard, in the glove compartment, or under the hood.
- Identify Fuse Slots: Using a circuit tester, identify a fuse slot that provides ACC power (on with ignition) for the Red wire and a fuse slot that provides constant BAT+ power (always on) for the Yellow wire.
- Select Correct Fuse Type: Choose the appropriate fuse tap from the kit that matches the fuse type in your vehicle's fuse box.
- Connect Wires to Fuse Taps: Insert the Red and Yellow wires into their respective fuse taps. Insert the original fuse into the lower slot of the fuse tap and a new fuse (matching the original's amperage) into the upper slot for the hard-wire kit.
- Insert Fuse Taps: Plug the fuse taps into the identified ACC and BAT+ fuse slots.
- Locate a Ground Point: Connect the Black (GND) wire to a secure metal bolt or screw on the vehicle's chassis that is free of paint or rust.
- 케이블 경로: Carefully route the Micro-USB output cable to your dash camera, ensuring it does not interfere with driving controls or airbags. Conceal the cable behind trim panels for a clean installation.
- 대시캠에 연결: Plug the Micro-USB connector into your dash camera.
- 테스트 시스템 : Start your vehicle to ensure the dash cam powers on. Turn off the vehicle and remove the key to verify the parking monitor mode activates (if enabled on your dash cam).

Figure 5: Visual guide for the hard-wire kit installation process within a vehicle.
4. 사용 설명서
주차 모니터 모드:
Once correctly installed, the hard-wire kit enables your dash camera's parking monitor function. When your vehicle is turned off, the kit continues to supply power from the vehicle battery, allowing the dash cam to record in parking mode (e.g., time-lapse or motion detection, depending on your dash cam's features).
낮은 볼륨tage 보호:
The hard-wire kit features an integrated low voltage protection system to prevent excessive drain on your vehicle's battery. If the vehicle battery voltage drops below a preset threshold, the kit will automatically cut power to the dash camera.
- For 12V batteries, power is cut at 11.6V, 12.0V, 12.2V, or 12.4V (user adjustable).
- For 24V batteries, power is cut at 23.6V, 24.0V, 24.4V, or 24.8V (user adjustable).
To adjust the protection voltage, press and hold the '+' or '-' buttons on the hard-wire kit box for 3 seconds to display the current setting, then use the buttons to select the desired voltage. The digital display on the hard-wire kit box will show the current voltag전자 설정.

Figure 6: Low voltage protection thresholds for 12V and 24V batteries.
5. 유지관리
- 정기 점검: 배선에 마모, 손상 또는 느슨한 연결 흔적이 있는지 주기적으로 점검하십시오.
- 퓨즈 무결성: Ensure the fuses in the fuse taps are correctly seated and not blown. Replace blown fuses with ones of the same amp분노.
- 청결: Keep the hard-wire kit box and connections free from dust and moisture.
- 환경 조건: Avoid exposing the kit to extreme temperatures or direct sunlight for prolonged periods, which could affect its lifespan.
6. 문제 해결
| 문제 | 가능한 원인 | 해결책 |
|---|---|---|
| 대시캠 전원이 켜지지 않습니다. | Loose connection, blown fuse, incorrect wiring, vehicle battery too low. | Check all connections. Inspect fuses in fuse taps and replace if blown. Verify wiring (GND, ACC, BAT+). Check vehicle battery voltage. |
| Parking monitor mode not activating. | Dash cam setting not enabled, incorrect BAT+ connection, low voltag전자 보호가 활성화되었습니다. | Ensure parking mode is enabled in your dash cam's settings. Verify the Yellow (BAT+) wire is connected to a constant power source. Check if low voltage protection has cut power. |
| 차량 배터리가 빨리 방전됩니다. | 낮은 볼륨tage protection set too low, dash cam consuming too much power in parking mode. | Adjust the low voltage protection setting to a higher value. Consider using a dash cam with more efficient parking mode options (e.g., motion detection only). |
| 권tage display on kit box is off. | 전원 문제, 내부 오류. | Ensure the kit is receiving power. If the issue persists, contact customer support. |
| Micro-USB connector does not fit. | Incompatible dash cam port (e.g., USB-C, Mini-USB). | This kit is designed for Micro-USB ports only. Verify your dash cam's port type. |

Figure 7: The hard-wire kit is compatible with Micro-USB devices, not USB-C or Mini-USB.
7. 사양
| 특징 | 세부 사항 |
|---|---|
| 입력 Voltage | 직류 12V - 24V |
| 출력 볼륨tage | 직류 5V |
| 출력 전류 | 최대 2.5A |
| 커넥터 유형 | 마이크로 USB |
| 낮은 볼륨tage Protection (12V) | 11.6V / 12.0V / 12.2V / 12.4V (Adjustable) |
| 낮은 볼륨tage Protection (24V) | 23.6V / 24.0V / 24.4V / 24.8V (Adjustable) |
| 입력 케이블 길이 | Approximately 1000mm ± 50mm |
| 출력 케이블 길이 | Approximately 2500mm ± 50mm |
| 제품 치수 | 14.5 x 9 x 5 cm; 210 g (Overall package dimensions) |
8. 보증 및 지원
For warranty information or technical support, please refer to the documentation provided with your purchase or contact Sarmert customer service directly. Keep your proof of purchase for any warranty claims.
You can visit the Sarmert store for more information: Sarmert Store