
1. 서론
This manual provides detailed instructions for the setup, operation, and maintenance of your osee Lilmon 5 field monitor. Designed for professional and enthusiast videographers, the Lilmon 5 offers a 5.5-inch 1000 Nits high-bright touch screen with advanced monitoring features including 3D LUT, HDR, 4K HDMI input/output, exposure assist, focus assist, and waveform monitoring. Please read this manual thoroughly to ensure optimal performance and longevity of your device.
2. 상자 안에 무엇이 들어있나요?
- Lilmon 5 Monitor (1x)
- Tilt Arm (1x)
- Clean Cloth (1x)
- Quick Start Guide (QSG) and Service Card (1x)

Image: Contents of the osee Lilmon 5 package, including the monitor, tilt arm, cleaning cloth, and documentation.
3. 제품 오버view
3.1. 물리적 구성 요소
The Lilmon 5 features a compact and robust design. Key physical components include:
- 전원 버튼: Located on the side for turning the unit on/off.
- 1/4'' Screw Holes: Reinforced with metal and anti-rotation pin holes for secure mounting.
- SD 카드 슬롯: For loading user LUTs and firmware updates.
- 헤드폰 잭: 오디오 모니터링용.
- Battery Out: 외부 장치에 전원을 공급하기 위한 용도입니다.
- HDMI 입력/출력: Supports up to 4K signal input and loop out.
- NPF Battery Slot: For power, compatible with Sony NPF batteries.
- DC 입력: For external power supply (6-18V DC).

이미지: 후면 view of the osee Lilmon 5 monitor, highlighting the HDMI input/output ports, NPF battery slot, and DC power input.

이미지: 측면 view of the osee Lilmon 5 monitor, displaying the SD card slot, headphone jack, and battery output port.
3.2. 모니터 기능
- 1000 Nits Daylight Viewable Panel: Low reflection, anti-fingerprint coating, 10-bit color, 1000:1 contrast ratio, D65 color temperature.
- Pristine and Crisp Image Quality: 22-bit internal processing color engine, HDR/LOG mapping technology.
- Super Convenient Touch Swift OS: Customizable Mysets for framing, exposure, and focus checking.
- 안정적인 빌드: Sturdy polycarbonate housing with built-in aviation aluminum plate.
- 다양한 장착: Torque-adjustable tilt arm or cold shoe mountings.
- Pro Color Calibration: Supports on-location calibration with X-Rite probes and osee specialized calibration software.
4. 설정
4.1. 모니터 전원 공급
The Lilmon 5 can be powered in two ways:
- NPF Battery: Attach a compatible Sony NPF battery to the battery slot on the rear of the monitor.
- DC 전원 : Connect an optional DC to D-tap cable to the DC In port for external power (6-18V DC).
4.2. 모니터 장착
Utilize the included torque-adjustable tilt arm or any standard cold shoe mounting accessory with the 1/4'' screw holes. The tilt arm allows for 360-degree rotation for flexible view각도를 나타냅니다.

Image: The osee Lilmon 5 monitor securely mounted on a camera rig, demonstrating its versatile positioning.
4.3. 카메라에 연결하기
Connect your camera's HDMI output to the HDMI In port on the Lilmon 5. If needed, use the HDMI Out port to loop the signal to another monitor or device. The monitor supports up to 4K signal input.
4.4. SD Card for LUTs and Firmware
Insert an SD card (less than 32GB, formatted as FAT32) into the SD card slot to upload custom 3D LUTs or perform firmware updates.

Image: The osee Lilmon 5 displaying the custom 3D LUT feature, with an arrow pointing to the SD card slot for uploading LUTs.
5. 모니터 작동하기
5.1. Swift OS Touch Interface
The Lilmon 5 features an intuitive touch-screen interface:
- 백라이트 조정: Swipe from the left side of the screen to adjust the backlight intensity.
- 볼륨 조절: Swipe from the right side of the screen to adjust headphone volume.
- Workspace Switching: Swipe left or right across the screen to switch between up to 8 customizable workspaces (Mysets).
- 기능 활성화: Single tap on a function icon to enable/disable it. Use the arrow next to the icon to adjust its parameters.

Image: The osee Lilmon 5 screen showing the Swift OS interface with touch gestures for adjusting backlight and volume.
5.2. Key Monitoring Features
The Lilmon 5 offers a comprehensive suite of monitoring tools:
- 포커스 피킹: Highlights in-focus areas with customizable colors and sensitivity.
- 그리드: Various grid overlays (e.g., 3x3, 9x9) for composition and alignment.
- 아나모픽 디스퀴즈: Supports popular squeeze ratios (1.33x, 1.5x, 1.8x, 2x) for accurate viewing of anamorphic footage.
- 거짓 색상 : Visualizes exposure levels with different color ranges, highly customizable.
- Zebras: 과다 노출된 영역을 나타냅니다.
- Waveform, Vectorscope, Histogram: Advanced scopes for precise exposure and color analysis.
- Image Rotate/Mirror: Allows for horizontal and vertical image flipping, useful for self-shooting or specific rig setups.
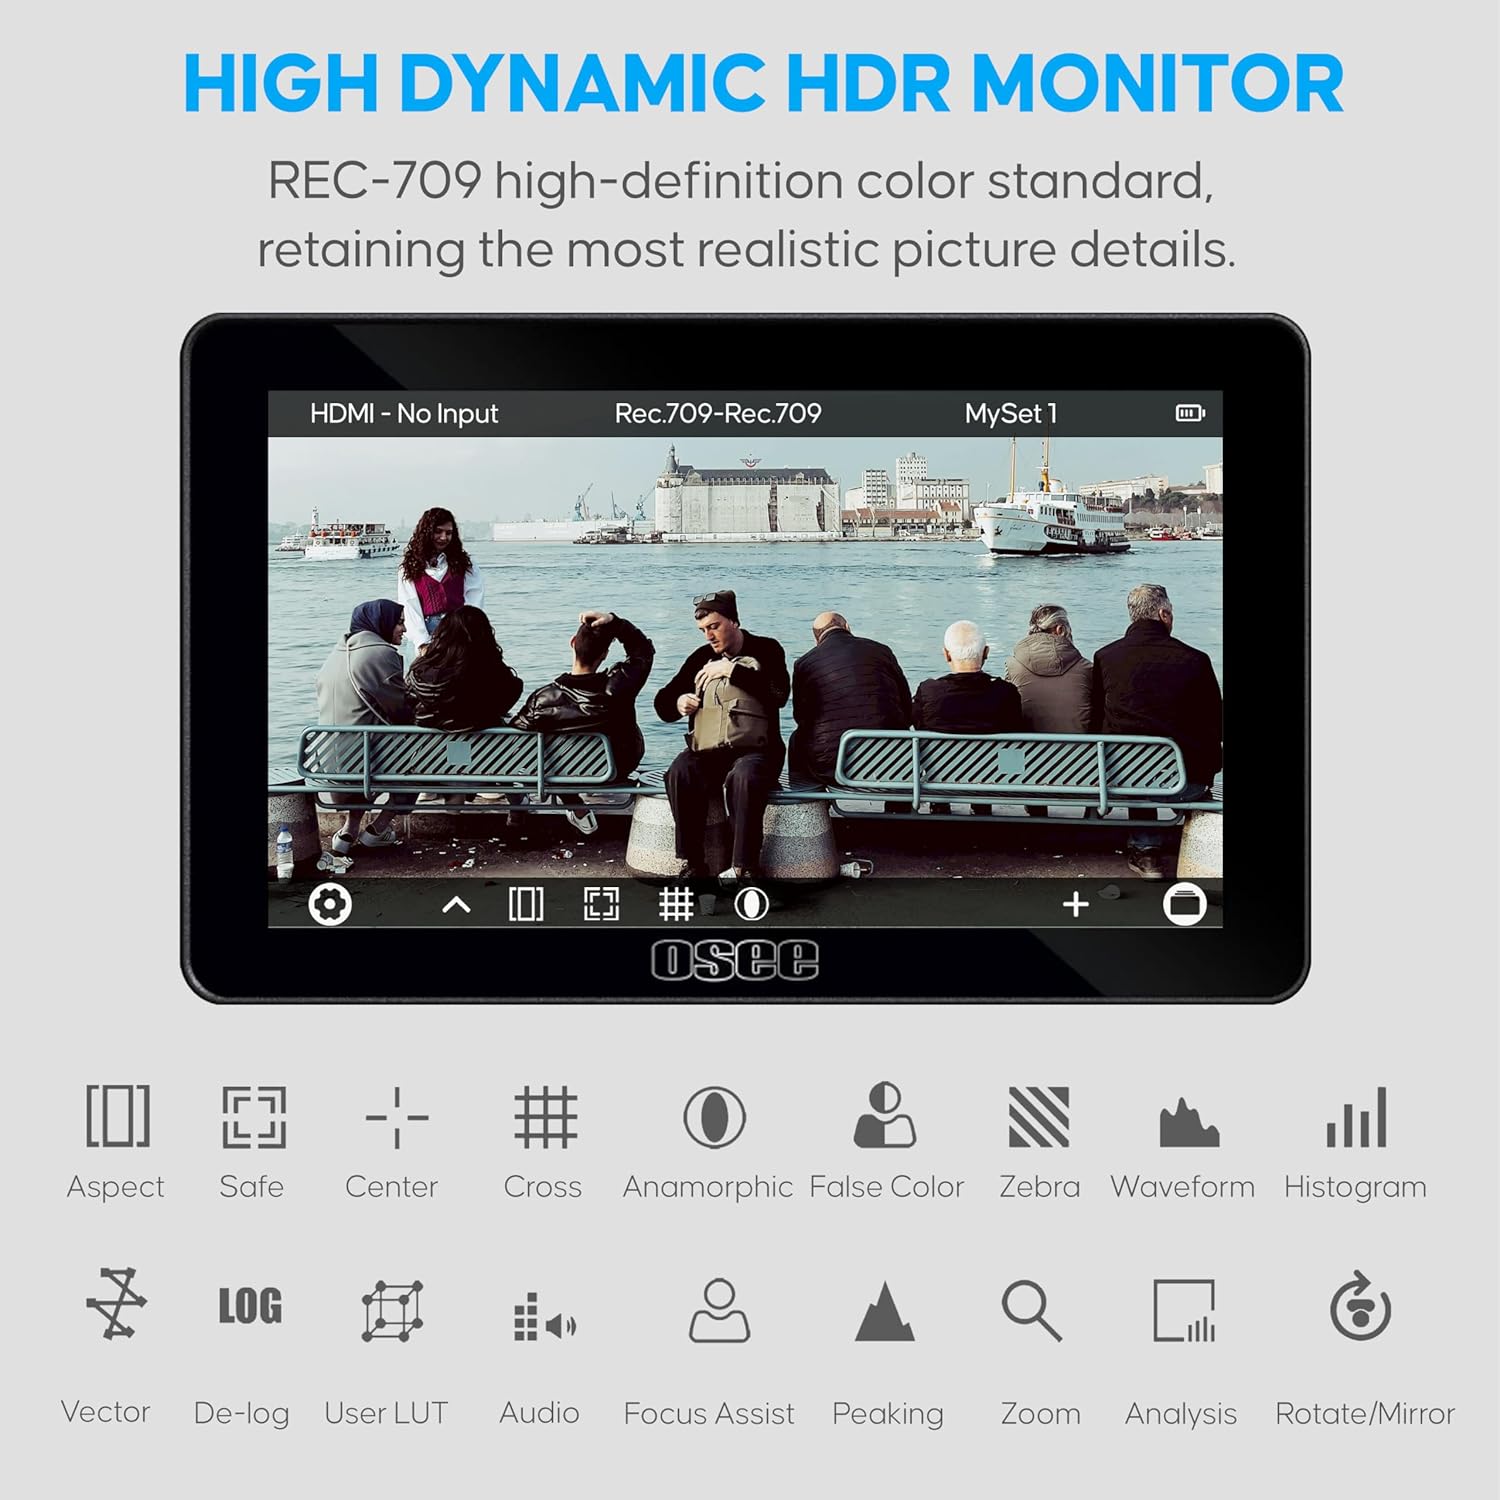
Image: The osee Lilmon 5 monitor showcasing its high dynamic HDR capabilities and a range of monitoring tools including aspect ratio, safe area, center mark, cross, anamorphic, false color, zebra, waveform, and histogram.
5.3. 공식 제품 영상
비디오: 오버view of the osee Lilmon 5 monitor, demonstrating its features, physical design, and user interface. This video provides a comprehensive look at the monitor's capabilities and how to interact with its touch-based operating system.
Video: A detailed look at the Lilmon 5, highlighting its 1000 Nits brightness and 5.5-inch touch screen. The video showcases the monitor's performance in various lighting conditions and its responsive touch interface for quick adjustments.
Video: This video demonstrates the osee Lilmon 5's high-bright display and its utility as a camera field monitor. It illustrates how the monitor's features contribute to effective outdoor filming and precise image monitoring.
6. 유지관리
6.1. 청소
Use the provided clean cloth to gently wipe the screen and body of the monitor. Avoid using harsh chemicals or abrasive materials that could damage the screen or finish.
6.2. 펌웨어 업데이트
Periodically check the osee official website for new firmware updates. Download the update file to a FAT32 formatted SD card and insert it into the monitor's SD card slot. Follow the on-screen instructions for updating.
6.3. Color Calibration
The Lilmon 5 supports on-location color calibration using X-Rite probes and osee specialized calibration software. This ensures color accuracy over time and consistent image reproduction.

Image: The osee Lilmon 5 monitor being calibrated with an X-Rite color checker device, demonstrating its professional color calibration capabilities.
7. 문제 해결
7.1. Power On Issues (Screen Flash)
If the monitor's logo flashes but the unit does not fully power on, this may be due to holding the power button for too long. To properly power on the device, press and hold the power button for approximately 2 seconds, then release it. The monitor should then proceed to power on normally.
7.2. 배터리 소모
If the monitor drains the battery even when turned off, ensure the power button is fully disengaged or remove the battery when not in use for extended periods. This can prevent unexpected battery depletion.
7.3. No Signal Display
Verify that the HDMI cable is securely connected to both the camera's output and the monitor's HDMI In port. Ensure the camera's video output settings match the monitor's supported input formats (e.g., 1080p, 4K).
8. 사양
| 모델 | Lilmon 5 |
| 패널 크기 | 5.5 인치 |
| 해결 | 1920 x 1080(FHD 1080p) |
| 이미지 밝기 | 1000 Nits |
| 대비율 | 1000시 1분 |
| 색상 깊이 | 10 비트 |
| 종횡비 | 16시 9분 |
| View잉 각도 | 178° x 178° |
| 입출력 | HDMI In & Out (up to 4K signal) |
| 품목 무게 | 1.08파운드 |
| 패키지 크기 | 7.56 x 6.34 x 1.85 인치 |
9. 보증 및 지원
Your osee Lilmon 5 monitor comes with the following:
- 1년 보증: 구매일로부터 1년 동안 제조상의 결함에 대한 보증을 제공합니다.
- 평생 기술 지원: 제품 수명 기간 동안 기술 지원을 받을 수 있습니다.
- 24시간 연중무휴 라이브 채팅: Immediate support available through online chat.
- Professional Aid Group: Dedicated team for advanced support and queries.
추가 지원이 필요하면 다음을 방문하세요. osee Store on Amazon or refer to your service card for direct contact information.